Last updated: October 20, 2026
Key Takeaways
- Good school-age stick crafts have a simple frame, a clear result, and only a few extra supplies.
- Choose projects with 3 to 10 steps, one main shape, and room to decorate right away.
- Simple builds work best when the structure is easy to see and the child can stop after the first layer.
- Use a thin line of wood glue, press the sticks together for 10 to 30 seconds, and let the piece dry flat before moving it.
Quick Answer
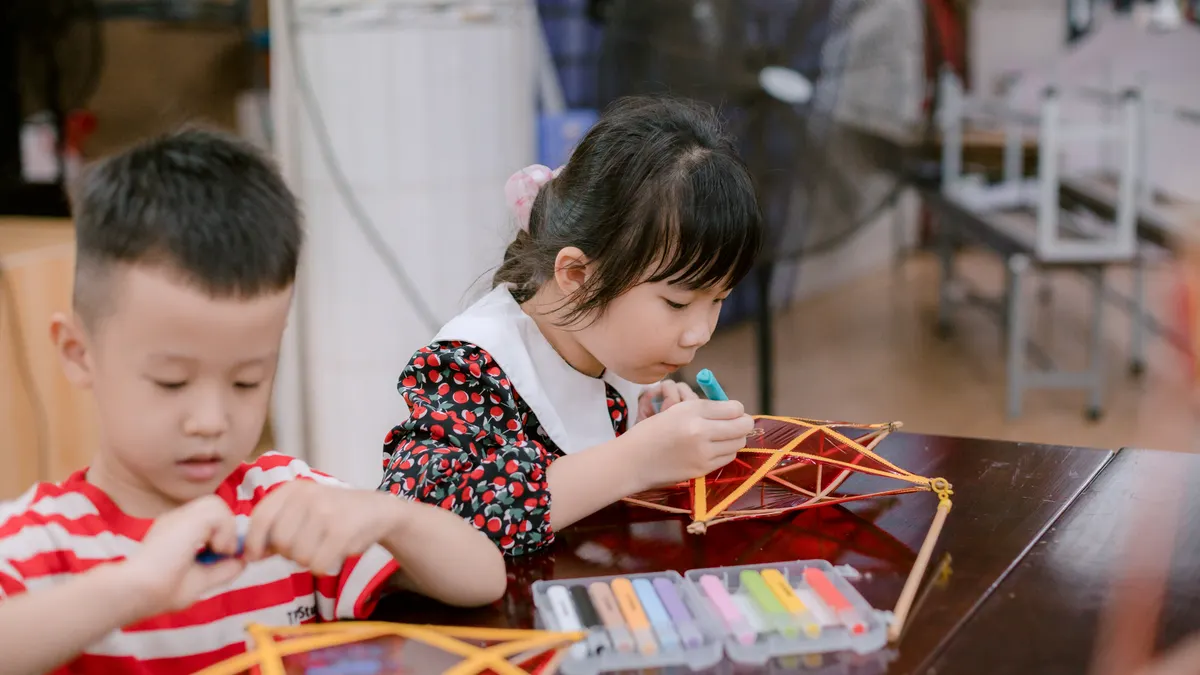
The best craft stick projects for school-age kids are simple, flat builds that use 5 to 20 sticks, finish in one sitting, and leave room for quick decorating. For most children, the sweet spot is 6 to 12 sticks, 15 to 45 minutes of build time, and wood glue for the strongest joints. School-age kids also do well with projects that start decorating immediately after assembly, such as animal faces, boats, stars, signs, and puppets.
Craft stick projects are a fast way to turn a small pile of popsicle sticks, wood glue, markers, and acrylic paint into something a school-age kid can finish in one sitting. The best choices are usually simple builds with 5 to 20 sticks, a short drying time, and a clear shape kids can decorate without advanced cutting.
A good craft stick project should do three things: hold together with basic glue, look finished after a few markers or paint strokes, and keep the build time under about 30 minutes before drying. That makes it useful for classrooms, rainy afternoons, after-school clubs, and sibling projects where attention runs out fast. The CDC’s child development guidance also supports choosing age-appropriate activities that match attention span and fine-motor skill.
Best craft stick projects for school-age kids
These Best Craft Stick Projects for School-Age Kids are ones with a simple frame, a visible payoff, and only a few extra supplies. If the project needs precise measurements, a saw, or a long drying clamp setup, it belongs in an older-kid or adult category, not here. For comparison, the Smithsonian and NAEYC both stress choosing hands-on activities that fit a child’s developmental stage.
A strong list for this age group usually includes flat shapes, not complex structures. Think bookmarks, mini signs, simple figures, picture holders, boats, or game pieces. These are the projects kids can finish in 15 to 45 minutes, then personalize with googly eyes, markers, and acrylic paint. The build is the main event, but the decoration is what makes the project feel like theirs.
Here is the basic decision rule I would use. If a child can place the sticks, spread glue, and decorate without help beyond a nudge, the project fits. If the job depends on tight joins, exact symmetry, or very small parts, it stops being a kid craft and starts acting like a miniature construction assignment.
A few examples work especially well because they are forgiving:
- Flat animals made from 6 to 10 sticks
- Mini rafts or boats from 8 to 12 sticks
- Simple star or heart shapes from 5 to 8 sticks
- Small desk signs from 6 to 9 sticks
- Picture frames are popular, but they belong on a different page, so I would skip them here
This is also the point where materials matter. Standard wood craft sticks are easier to handle than jumbo sticks for little hands, but jumbo sticks give more room for paint and marker details. Wood glue holds better than school glue, but it needs patience. If the child wants to move on in 5 minutes, glue sticks or school glue may feel easier, though the project may be weaker.
The projects below are the ones I would choose first because they balance speed, decoration, and success rate. For more family-friendly ideas, the easy paper craft ideas for kids hub pairs well with these stick projects, and you can also compare supplies with easy kids’ art projects or DIY kids’ games for indoor use.
How do I choose a craft stick project that kids will actually finish?

Pick a project with 3 to 10 assembly steps, one main shape, and a decoration stage that can start right away. That combination keeps the child busy without demanding advanced technique.
Start with the child’s age and attention span, then match the shape to it. For many school-age kids, a project that uses 6 to 12 sticks is the sweet spot. Fewer than that can feel too bare unless the design is very deliberate. More than that often means the glue stage drags on and the kid loses interest before the fun part.
A useful filter looks like this:
- Choose a finished object the child can name in one sentence, such as “a butterfly” or “a boat.”
- Keep the supply list to 4 items or fewer when possible.
- Use pieces that lie flat on the table, since flat builds are easier to glue.
- Plan at least one easy decorating method, such as markers, paint, or googly eyes.
- Avoid anything that needs tiny angled cuts or long drying pressure.
The project also needs a clear finish line. Kids do better when they can see, “I am done when the paint is on” or “I am done when the face is glued.” A vague craft, like “make something with sticks,” usually turns into hovering and second-guessing.
One trade-off is that the easiest projects are not always the prettiest. A simple stick animal may look more charming than a complicated model because the child can finish it confidently. That matters more than making the craft look like it came from a display shelf.
If the goal is a group activity in a classroom or library, choose a project that tolerates different skill levels. A single template or example helps, but do not make the whole table follow exact measurements. That is how a quick craft turns into a correction session.
Simple craft stick builds that work well in one sitting
Simple craft stick builds work best when the structure is obvious at a glance and the child can stop after the first layer. These are the most reliable choices for school-age kids because they leave room for personality without demanding engineering skill.
1. Mini animal faces
Use 2 to 6 sticks for the base, then add googly eyes, markers, and a mouth. A bear, fox, cat, or monster face is easy because the “wrong” version still looks intentional. This is ideal for 15-minute sessions and younger school-age kids.
2. Flat boats and rafts
Line up 6 to 10 sticks side by side, then glue one or two crosspieces across the back. A paper sail or marker-drawn flag finishes the look. This project is simple, but it does need patience while the glue sets.
3. Star or heart shapes
These use 5 to 8 sticks arranged into a recognizable outline. The shape is satisfying because the result appears quickly. It is a good choice when a child wants a decoration-first craft rather than a model.
4. Stick puppets
A single stick handle plus a cutout face or creature body gives an instant toy. This is one of the easiest projects for role-play because the craft becomes usable as soon as the glue dries.
5. Tiny signs or name tags
A few sticks make a border or backboard, then the child writes a name, a room label, or a short message with markers. This works well for school settings because it teaches neat lettering without requiring a long setup.
6. Mini boxes or trays
These need a little more glue discipline but still stay in the beginner range if the walls are short. They are useful when a child wants something that can hold erasers, beads, or paper clips.
The drawback with these simple builds is obvious: they can look plain if the decoration is rushed. That is not a failure of the project. It is a sign that the paint or marker stage needs more attention than the structure stage.
For a group activity, I would pick one build and let kids personalize it in different ways. That keeps the room calmer than offering six unrelated options at once.
How do you glue craft sticks together?
Use a thin line of wood glue, press the sticks together for 10 to 30 seconds, and let the piece dry flat before moving it. That is the most reliable method for craft stick projects that need stronger joints.
Here is the cleanest assembly process for school-age kids:
- Lay the sticks on a flat table before adding glue. This keeps the shape visible and prevents rushing.
- Put a thin bead of wood glue where the sticks overlap. Too much glue makes the project slippery and slows drying.
- Press the pieces together for 10 to 30 seconds. The goal is contact, not force.
- Set the piece on wax paper, cardboard, or another surface that can handle a little squeeze-out.
- Let the project rest flat until the joint feels stable. Many small crafts need at least part of a class period before handling.
- Add paint, markers, or googly eyes only after the main structure is steady enough to hold its shape.
Wood glue is usually the strongest choice for craft sticks because it bonds wood to wood well. The trade-off is drying time. If the child wants to decorate immediately, school glue can be more forgiving in the moment, but it tends to be weaker and messier on a slippery table.
A few mistakes cause most of the frustration:
- Using too much glue: this adds dry time and makes the sticks slide. Use less.
- Moving the craft too soon: this breaks joints that looked fine a minute earlier. Leave it flat.
- Building on a soft surface: couch cushions and laps tilt the pieces and weaken the shape. Use a hard table.
- Skipping alignment: if the sticks are crooked before the glue sets, the finished craft stays crooked.
If the project is for a classroom, keep a stack of paper towels nearby and limit the glue to small, controlled amounts. A squeeze bottle is easier to manage than a wide-tipped container. That single detail often matters more than the craft itself. For glue safety and drying guidance, check a manufacturer label and a classroom supply guide before starting.
Easy paint and decorate ideas for popsicle sticks
Easy paint and decorate ideas for popsicle sticks are what make the finished project feel personal instead of plain. A simple build can turn into a keeper with 10 minutes of color.
Acrylic paint gives bright coverage on wood sticks, but it works best in a thin coat. Thick paint fills the grooves and can make pieces sticky for longer than expected. Markers are faster and cleaner for outlines, faces, patterns, and lettering. For many school-age kids, the best approach is to combine both: paint the base and use markers for details.
Good decoration ideas include:
- Rainbow stripes across the sticks
- Polka dots with marker tips or paint daubs
- Animal faces with googly eyes and a marker nose
- Initials or short names
- Simple patterns like zigzags, hearts, and stars
- Background color on the whole piece, then drawn details on top
Googly eyes are especially useful because they make even a very plain build feel finished. A pair of eyes on a stick monster, fish, frog, or robot can do more than a long list of painted details. That said, they are not ideal for very young children who still put small items in their mouths.
One smart strategy is to separate the craft into two stages: build first, decorate later. That gives the glue time to settle and keeps paint from rubbing onto wet joints. It also helps if the child has a shorter attention span. A child can finish the structure in one session and come back for color after lunch or the next day.
If the project is intended for display, choose one dominant color and one accent color rather than many competing shades. That keeps the piece from looking muddy. A red body with black marker details usually reads better than six random colors on the same surface.
The biggest drawback of paint-heavy projects is mess. Use a covered table, aprons, or old shirts, and keep wet wipes nearby. That is not extra fuss; it is what keeps a quick craft from becoming a cleanup assignment.
What craft stick projects are best for classrooms and after-school groups?
The best classroom and after-school craft stick projects are flat, fast, and easy to repeat with the same supplies for 8 to 20 kids. Group settings reward projects with short directions and low drying drama.
A classroom craft needs different traits than a solo project at home. It should be simple enough to explain once, but open enough that kids do not all end up with identical results. The best group projects usually use the same basic materials—sticks, glue, markers, acrylic paint, and googly eyes—but allow different final designs. If you need age guidance for a mixed group, the American Academy of Pediatrics and NAEYC both recommend matching activities to children’s developmental range.
Good group projects include:
- Animal faces on a stick base
- Name signs
- Boats or rafts
- Puppets
- Shapes like stars, hearts, or flowers
- Mini masks made from a stick frame and paper details
I would avoid anything that needs a 3-D structure with multiple angles. In a group, that kind of project creates a line of children waiting for help. A flat craft keeps the room moving and reduces the number of broken pieces.
There is also a practical reason to keep supplies simple. When every child needs the same 6 tools, the setup and cleanup stay manageable. A project that demands specialty cutters, fast clamps, or a long list of embellishments stops being a craft and turns into logistics.
For a school-age group, one solid template is enough. A sample finished piece can show the basic idea, but the best results come when kids are free to choose colors, expressions, and small extras. The project feels less like a worksheet and more like a finished object they want to carry home.
If I had to choose one rule for group success, it would be this: pick the craft that can survive being slightly imperfect. That is the one children finish with pride.
For more quick, low-mess ideas, the hub on easy paper craft ideas for kids pairs well with these stick projects, and DIY kids’ games can extend the same materials into play.
Craft stick projects that are not worth the trouble
Craft stick projects are not worth the trouble when they need precision, advanced cutting, or so many pieces that the child spends more time correcting than creating. That is especially true for school-age kids who want something finished today, not next week.
A few warning signs tell me a project should be skipped:
- It needs exact angles or tiny measured gaps
- It depends on long clamping or heavy pressure
- It uses more than one drying stage with no fun in between
- It requires specialty supplies that the average classroom does not keep on hand
- The final result is fragile enough that a child cannot play with it
This is where a lot of generic craft lists go wrong. They keep recommending the same pretty projects without saying which ones create frustration. A child who likes decorating may still hate a build that takes 45 minutes of correction before a single marker appears. The most popular project is not always the best project.
I would also skip any stick project that asks the child to copy a perfect sample. That can work for very patient kids, but it often drains the fun from the craft. The stronger choice is a shape that remains recognizable even when the sticks are a little uneven. Imperfection is part of the look.
One more trade-off matters: the more structural the project, the less room there is for creative play. A kid may enjoy making a simple monster face more than a detailed basket because the monster is finished in 20 minutes and can be used right away as a puppet or desk mascot.
If the goal is a quick, satisfying school-age activity, the best craft stick projects are the ones that finish well, decorate easily, and do not punish small mistakes. That is the standard worth keeping.
What can kids make with craft sticks?
Kids can make simple animals, signs, puppets, stars, hearts, boats, and other flat classroom crafts with craft sticks.
Drafted with AI; not yet reviewed by a person.
Leave a Reply