Last updated: October 23, 2026
Ten to fifteen minutes. One square sheet. Enough for a simple origami flower with four petals and a compact folded center. This guide walks through the fold sequence with clean creases and a beginner-friendly pace.
Key takeaways
- Use square paper, not rectangular scrap, or the folds will not meet cleanly.
- Crisp creases matter more than fancy paper; a bone folder helps on thicker sheets.
- The simplest flower design is built from a kite-shaped base, then repeated petal folds.
- When the flower keeps opening back up, the crease lines are too shallow or the paper is too stiff.
- This is a beginner project, but the final shape improves a lot when the folds are precise.
What you need before you start
A square sheet of origami paper is usually the easiest starting point; 15 cm by 15 cm feels right for most beginners. Smaller paper, such as 10 cm squares, works too, but the folds tighten up fast. Plain copy paper can be cut into a square if that is all you have, though it will feel stiffer and show more wrinkling.
You also need a flat table, clean hands, and something to sharpen creases. A bone folder is useful here because it presses the fold line without tearing the paper. No bone folder? The back edge of a spoon or even a fingernail works in a pinch.
Choose paper that is colored on one side if you want the petals to show contrast when the flower opens. Thin origami paper is easier for beginners than cardstock because it bends sharply and releases more easily into a flower shape. Thick paper makes the center bulky, and the petals spring apart unevenly. That part gets fussy in a hurry.
Before folding, make sure every corner is aligned exactly. Off-center corners are the main reason a simple origami flower ends up lopsided. A 1 mm mistake at the start can become a petal that points away from the rest of the flower.
How do you fold the base for a simple origami flower?
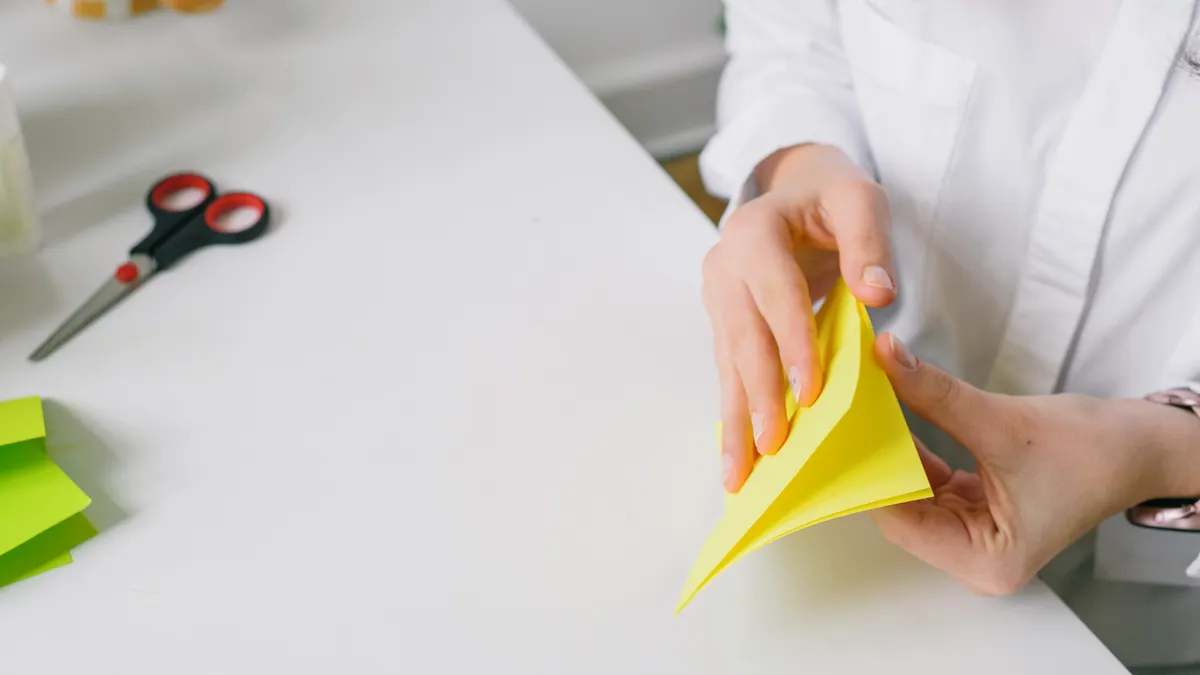
You begin with a kite-shaped base, because that shape gives the flower its four main petals. Start with the colored side down if your paper has a colored side.
- Fold the square in half corner to corner to make a triangle, then open it. You should see one diagonal crease running across the paper.
- Fold the opposite corner to corner, then open it again. The paper should now have an X of creases crossing at the center.
- Bring the left and right corners toward the center so the paper collapses into a smaller square or diamond shape. When it works, the top flap lies flat and the edges line up neatly.
- Turn the model over and repeat the collapse if the paper resists. The paper should now look like a compact diamond with four layers.
- Fold the lower side edges toward the center line on both sides to create a kite shape. The new edges should meet cleanly in the middle without overlapping.
- Repeat that same fold on the back. When it works, the model looks like a narrow kite on each side, with four crisp points.
- Fold the top layer’s side edges inward again so the shape gets slimmer.
- Flatten the model and sharpen every crease with a bone folder. The base should hold its shape without springing open.
At this stage, the paper is no longer a square flower. It is a folded base with four slim sections that can become petals. If one side looks wider than the other, stop and realign it now. Fixing it here is far easier than wrestling with crooked petals later.
How do you turn the base into petals?
Turn the base into petals by opening the top layers and folding them outward one at a time. That is the moment the model stops looking like a geometric exercise and starts reading as a flower.
Lift the top flap gently at its tip. Press the side folds apart so the flap opens into a petal shape. The inside of the paper should flatten into a wider diamond, and the top point should spread into a rounded petal edge. Should the flap fight back, the earlier folds were not sharp enough.
Repeat the same opening fold on the remaining three flaps. Work slowly and keep the center point aligned while you open each petal. Each finished petal should sit evenly around the center, with the same amount of paper showing on every side.
If your flower looks pinched, flatten each petal from the center outward, not from the edges inward. That keeps the paper from wrinkling near the tip. A light touch matters here; pressing too hard can crease the petal into a hard ridge instead of a soft curve.
For a neater flower, pinch the base of each petal once the shape is open. That small pinch helps the petals stay separated. You can also curl the tips slightly with a pencil if you want the flower to look softer, though that is optional and less crisp than a straight-fold look.
When the center opens too wide, press the inner layers back together and re-crease the side lines. A simple origami flower should look balanced, not flattened like a starfish. The goal is a clean ring of four petals around a compact center.
Why does my origami flower keep unfolding?
Your origami flower keeps unfolding when the creases are shallow, the paper is too thick, or the center was not locked tightly enough. Usually, the fix is in the fold pressure, not the design.
Open each petal slightly and sharpen the base crease with a bone folder. Press along the exact fold line, not beside it. A weak crease lets the paper relax back toward its original square shape, especially if the paper is springy or coated.
Paper choice matters here. Lightweight origami paper holds a petal fold better than copier paper or gift wrap. If you only have thicker paper, make the model larger, around 20 cm square, so the folds have more room to settle. Tiny folds in thick paper are hard to lock.
One petal pulled tighter than the others makes the flower twist and begin to open at the loose side first. Match the fold angle on each petal and check the center after every fold. The top should look symmetrical from above.
If the base keeps separating, flatten the center more firmly before opening the petals. That center point should feel compact, almost like a small knot in the paper. You do not need glue for this beginner design, and glue can leave the petals stiff and flat, which defeats the point of origami.
Paper size selection: what works best for a beginner?
A 15 cm square is the easiest size for a first flower because it gives enough room for the layers without making the folds awkward. Anything between 12 cm and 20 cm square is workable, but the feel changes fast as you move smaller.
Smaller paper makes the finished flower tighter and more delicate, which is nice for a card or table setting. The trade-off is that the center becomes harder to hold while you fold. Larger paper is easier to control, but the flower can look loose if the folds are not sharpened well. It is a bit of a balancing act.
If you are cutting paper yourself, measure the square carefully before you start. A rectangle trimmed into a square by eye often ends up slightly off, and that small mismatch shows up later as uneven petals. Use a ruler if you want the sides to match.
Paper weight matters as much as size. Thin origami paper folds sharply and opens neatly. Printer paper is acceptable for practice, but it produces softer petals and a thicker center. Avoid very glossy paper for your first try, because it slides while you crease and can split at the corners.
For a bouquet-style display, make several flowers in the same size so they look related. If you want variety, change the color rather than the dimensions. A mix of 15 cm squares in three colors looks more coherent than a mix of random sizes.
Beginner folding tips that make the flower cleaner
Sharp folds and slow alignment make a simple origami flower look deliberate instead of messy. The biggest improvement comes from pausing at each corner before you crease.
Hold the paper at the corners, not the middle, when you line it up. Corners show you whether the edges truly match. If the corners drift by even a little, the final petals will fan unevenly.
Fold from the center outward with your fingers first, then press with the bone folder. That sequence gives you control before you commit to a hard crease. On the first few folds, you can even unfold and correct them if the angles look wrong.
Keep the model flat on the table while you work. Holding it in the air makes the layers shift. A flat surface is especially useful during the collapse step, where several layers need to meet at once.
Do not rush the petal opening. Beginners often pull too hard and tear the inner layers near the base. A gentle lift with both thumbs is enough. If the flower resists, back up one fold and sharpen that crease instead of forcing the paper.
If you want the flower for a card, small gift, or quick craft session, stop after the basic four-petal shape. If you want a fuller look, make two or three flowers and cluster them together. That is where the design starts to work well as a bouquet accent without becoming an advanced paper flower project.
Simple variations for bouquets and cards
You can make the same simple origami flower look different by changing paper color, petal shape, or size. That keeps the fold sequence familiar while giving you more use cases for gifts and decorations.
For a bouquet-style group, fold three to five flowers in matching paper weights but different colors. A consistent 15 cm square size keeps the set from looking chaotic. Add a folded green stem or a separate paper leaf if you want the arrangement to read as a bouquet rather than loose flowers.
For a card, use smaller squares, around 10 cm, and flatten the back of the flower before attaching it. That keeps the card from bulking up too much. A small dot of glue or double-sided tape can hold the flower in place without changing the fold pattern.
If you want a fuller look, curl the petal tips slightly with a pencil after the flower is complete. That gives a softer profile and makes the petals catch the light. If you want a sharper, more graphic look, leave the tips straight and crisp.
This design is a good fit for the easy paper craft ideas for kids hub because it is simple, visual, and fast to repeat. It is not the right choice if you want a highly realistic bloom or a complex layered flower. For that, a more advanced paper flower tutorial would be the better next step.
What paper works best for origami flowers?
Thin square origami paper works best for origami flowers. It folds sharply, keeps the center compact, and opens into petals without much resistance. A 15 cm square is a reliable starting point. Printer paper can work for practice, but it is thicker and usually gives softer, less precise petals.
Why does my origami flower keep unfolding?
Your origami flower keeps unfolding because the creases are not tight enough or the paper is too stiff for the fold pattern. Repress each crease with a bone folder and check that the center is folded flat. If the paper is thick, make a larger flower so the layers do not spring apart as easily.
Can beginners make origami flowers?
Yes, beginners can make origami flowers. This simple design uses repeated folds and a small number of steps, so it is manageable with square paper and a flat surface. The hardest part is the collapse step, but careful alignment and firm creases make it much easier on a first try.
Drafted with AI; not yet reviewed by a person.
Leave a Reply