Category: Beginner Craft Projects

  • How to Make a Simple Origami Flower

    How to Make a Simple Origami Flower

    Last updated: October 23, 2026

    Ten to fifteen minutes. One square sheet. Enough for a simple origami flower with four petals and a compact folded center. This guide walks through the fold sequence with clean creases and a beginner-friendly pace.

    Key takeaways

    • Use square paper, not rectangular scrap, or the folds will not meet cleanly.
    • Crisp creases matter more than fancy paper; a bone folder helps on thicker sheets.
    • The simplest flower design is built from a kite-shaped base, then repeated petal folds.
    • When the flower keeps opening back up, the crease lines are too shallow or the paper is too stiff.
    • This is a beginner project, but the final shape improves a lot when the folds are precise.

    What you need before you start

    A square sheet of origami paper is usually the easiest starting point; 15 cm by 15 cm feels right for most beginners. Smaller paper, such as 10 cm squares, works too, but the folds tighten up fast. Plain copy paper can be cut into a square if that is all you have, though it will feel stiffer and show more wrinkling.

    You also need a flat table, clean hands, and something to sharpen creases. A bone folder is useful here because it presses the fold line without tearing the paper. No bone folder? The back edge of a spoon or even a fingernail works in a pinch.

    Choose paper that is colored on one side if you want the petals to show contrast when the flower opens. Thin origami paper is easier for beginners than cardstock because it bends sharply and releases more easily into a flower shape. Thick paper makes the center bulky, and the petals spring apart unevenly. That part gets fussy in a hurry.

    Before folding, make sure every corner is aligned exactly. Off-center corners are the main reason a simple origami flower ends up lopsided. A 1 mm mistake at the start can become a petal that points away from the rest of the flower.

    How do you fold the base for a simple origami flower?
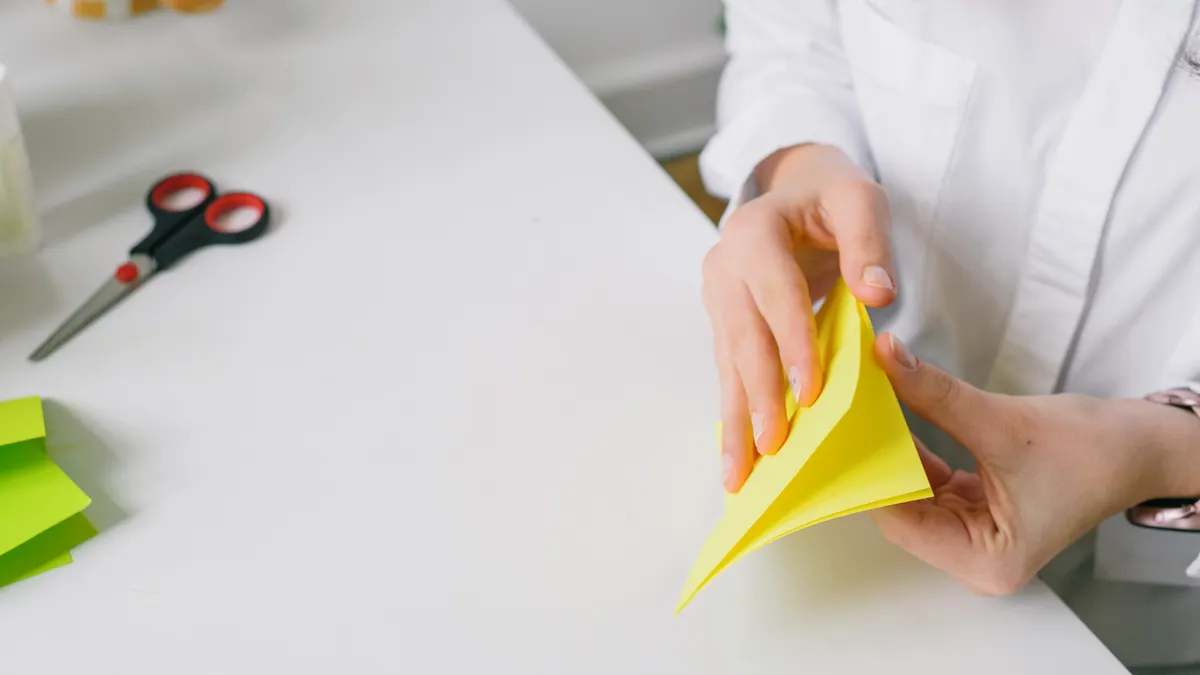
    Person folding yellow paper at a table

    You begin with a kite-shaped base, because that shape gives the flower its four main petals. Start with the colored side down if your paper has a colored side.

    1. Fold the square in half corner to corner to make a triangle, then open it. You should see one diagonal crease running across the paper.
    2. Fold the opposite corner to corner, then open it again. The paper should now have an X of creases crossing at the center.
    3. Bring the left and right corners toward the center so the paper collapses into a smaller square or diamond shape. When it works, the top flap lies flat and the edges line up neatly.
    4. Turn the model over and repeat the collapse if the paper resists. The paper should now look like a compact diamond with four layers.
    5. Fold the lower side edges toward the center line on both sides to create a kite shape. The new edges should meet cleanly in the middle without overlapping.
    6. Repeat that same fold on the back. When it works, the model looks like a narrow kite on each side, with four crisp points.
    7. Fold the top layer’s side edges inward again so the shape gets slimmer.
    8. Flatten the model and sharpen every crease with a bone folder. The base should hold its shape without springing open.

    At this stage, the paper is no longer a square flower. It is a folded base with four slim sections that can become petals. If one side looks wider than the other, stop and realign it now. Fixing it here is far easier than wrestling with crooked petals later.

    How do you turn the base into petals?

    Turn the base into petals by opening the top layers and folding them outward one at a time. That is the moment the model stops looking like a geometric exercise and starts reading as a flower.

    Lift the top flap gently at its tip. Press the side folds apart so the flap opens into a petal shape. The inside of the paper should flatten into a wider diamond, and the top point should spread into a rounded petal edge. Should the flap fight back, the earlier folds were not sharp enough.

    Repeat the same opening fold on the remaining three flaps. Work slowly and keep the center point aligned while you open each petal. Each finished petal should sit evenly around the center, with the same amount of paper showing on every side.

    If your flower looks pinched, flatten each petal from the center outward, not from the edges inward. That keeps the paper from wrinkling near the tip. A light touch matters here; pressing too hard can crease the petal into a hard ridge instead of a soft curve.

    For a neater flower, pinch the base of each petal once the shape is open. That small pinch helps the petals stay separated. You can also curl the tips slightly with a pencil if you want the flower to look softer, though that is optional and less crisp than a straight-fold look.

    When the center opens too wide, press the inner layers back together and re-crease the side lines. A simple origami flower should look balanced, not flattened like a starfish. The goal is a clean ring of four petals around a compact center.

    Why does my origami flower keep unfolding?
    Two patterned origami cranes on dark background

    Your origami flower keeps unfolding when the creases are shallow, the paper is too thick, or the center was not locked tightly enough. Usually, the fix is in the fold pressure, not the design.

    Open each petal slightly and sharpen the base crease with a bone folder. Press along the exact fold line, not beside it. A weak crease lets the paper relax back toward its original square shape, especially if the paper is springy or coated.

    Paper choice matters here. Lightweight origami paper holds a petal fold better than copier paper or gift wrap. If you only have thicker paper, make the model larger, around 20 cm square, so the folds have more room to settle. Tiny folds in thick paper are hard to lock.

    One petal pulled tighter than the others makes the flower twist and begin to open at the loose side first. Match the fold angle on each petal and check the center after every fold. The top should look symmetrical from above.

    If the base keeps separating, flatten the center more firmly before opening the petals. That center point should feel compact, almost like a small knot in the paper. You do not need glue for this beginner design, and glue can leave the petals stiff and flat, which defeats the point of origami.

    Paper size selection: what works best for a beginner?

    A 15 cm square is the easiest size for a first flower because it gives enough room for the layers without making the folds awkward. Anything between 12 cm and 20 cm square is workable, but the feel changes fast as you move smaller.

    Smaller paper makes the finished flower tighter and more delicate, which is nice for a card or table setting. The trade-off is that the center becomes harder to hold while you fold. Larger paper is easier to control, but the flower can look loose if the folds are not sharpened well. It is a bit of a balancing act.

    If you are cutting paper yourself, measure the square carefully before you start. A rectangle trimmed into a square by eye often ends up slightly off, and that small mismatch shows up later as uneven petals. Use a ruler if you want the sides to match.

    Paper weight matters as much as size. Thin origami paper folds sharply and opens neatly. Printer paper is acceptable for practice, but it produces softer petals and a thicker center. Avoid very glossy paper for your first try, because it slides while you crease and can split at the corners.

    For a bouquet-style display, make several flowers in the same size so they look related. If you want variety, change the color rather than the dimensions. A mix of 15 cm squares in three colors looks more coherent than a mix of random sizes.

    Beginner folding tips that make the flower cleaner

    Sharp folds and slow alignment make a simple origami flower look deliberate instead of messy. The biggest improvement comes from pausing at each corner before you crease.

    Hold the paper at the corners, not the middle, when you line it up. Corners show you whether the edges truly match. If the corners drift by even a little, the final petals will fan unevenly.

    Fold from the center outward with your fingers first, then press with the bone folder. That sequence gives you control before you commit to a hard crease. On the first few folds, you can even unfold and correct them if the angles look wrong.

    Keep the model flat on the table while you work. Holding it in the air makes the layers shift. A flat surface is especially useful during the collapse step, where several layers need to meet at once.

    Do not rush the petal opening. Beginners often pull too hard and tear the inner layers near the base. A gentle lift with both thumbs is enough. If the flower resists, back up one fold and sharpen that crease instead of forcing the paper.

    If you want the flower for a card, small gift, or quick craft session, stop after the basic four-petal shape. If you want a fuller look, make two or three flowers and cluster them together. That is where the design starts to work well as a bouquet accent without becoming an advanced paper flower project.

    Simple variations for bouquets and cards

    You can make the same simple origami flower look different by changing paper color, petal shape, or size. That keeps the fold sequence familiar while giving you more use cases for gifts and decorations.

    For a bouquet-style group, fold three to five flowers in matching paper weights but different colors. A consistent 15 cm square size keeps the set from looking chaotic. Add a folded green stem or a separate paper leaf if you want the arrangement to read as a bouquet rather than loose flowers.

    For a card, use smaller squares, around 10 cm, and flatten the back of the flower before attaching it. That keeps the card from bulking up too much. A small dot of glue or double-sided tape can hold the flower in place without changing the fold pattern.

    If you want a fuller look, curl the petal tips slightly with a pencil after the flower is complete. That gives a softer profile and makes the petals catch the light. If you want a sharper, more graphic look, leave the tips straight and crisp.

    This design is a good fit for the easy paper craft ideas for kids hub because it is simple, visual, and fast to repeat. It is not the right choice if you want a highly realistic bloom or a complex layered flower. For that, a more advanced paper flower tutorial would be the better next step.

    What paper works best for origami flowers?

    Thin square origami paper works best for origami flowers. It folds sharply, keeps the center compact, and opens into petals without much resistance. A 15 cm square is a reliable starting point. Printer paper can work for practice, but it is thicker and usually gives softer, less precise petals.

    Why does my origami flower keep unfolding?

    Your origami flower keeps unfolding because the creases are not tight enough or the paper is too stiff for the fold pattern. Repress each crease with a bone folder and check that the center is folded flat. If the paper is thick, make a larger flower so the layers do not spring apart as easily.

    Can beginners make origami flowers?

    Yes, beginners can make origami flowers. This simple design uses repeated folds and a small number of steps, so it is manageable with square paper and a flat surface. The hardest part is the collapse step, but careful alignment and firm creases make it much easier on a first try.

    Drafted with AI; not yet reviewed by a person.
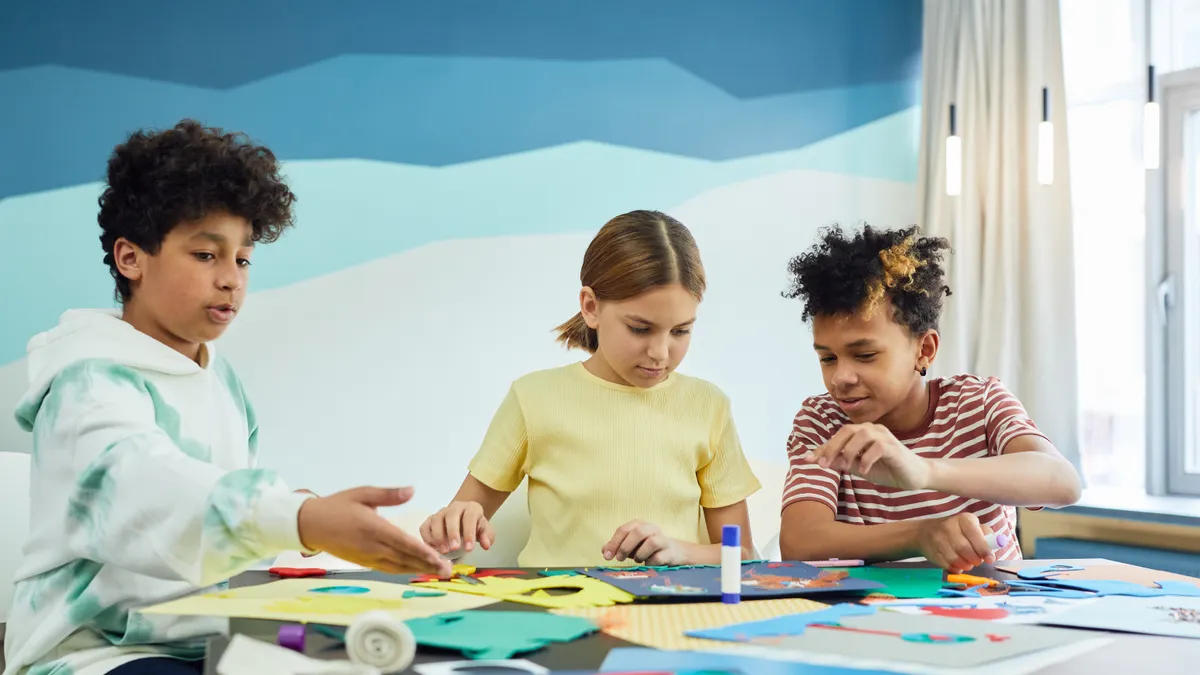
  • Easy Paper Craft Ideas for Kids at Home

    Easy Paper Craft Ideas for Kids at Home

    Last updated: October 22, 2026

    Quick answer: 7 easy paper craft ideas for kids at home are included below, and each one uses common supplies, a short setup, and a finishable step list. Easy paper craft ideas for kids at home work best with paper, scissors, a glue stick, and markers already on hand.

    Easy paper craft ideas for kids at home start with one simple rule: use paper crafts for kids that need little setup, little cleanup, and materials already in the drawer. A sheet of construction paper, a stack of printer paper, scissors, a glue stick, and markers are enough for most of the projects below. For paper safety guidance, the U.S. Consumer Product Safety Commission recommends age-appropriate materials and supervision for young children. https://www.cpsc.gov/Safety-Education/Safety-Education-Centers/Child-Product-Safety

    What makes a paper craft easy enough for home?

    An easy paper craft is one a child can finish in 10 to 20 minutes with one main fold, one main cut, or one simple glue step. That matters because the craft should feel doable on a kitchen table, not like a school project that needs a ruler, specialty paper, or a drying rack.

    A practical home paper craft usually has three traits. It uses common supplies such as construction paper, printer paper, crayons or markers, scissors, and a glue stick. It forgives uneven cutting and crooked folds. It still looks finished even if the child is young or distracted halfway through.

    That makes some crafts a poor fit. Tiny paper weaving, layered collage scenes, and intricate cutouts are frustrating for children who are still learning to control scissors. They also create more scraps, more glue smears, and more adult fixing. For this page, the goal is not perfection. The goal is a finished object a child can hold up with pride.

    Age matters too. Four- and five-year-olds usually do better with tearing, folding, and sticking large shapes. Children around 6 to 8 can handle simple cutting lines and basic templates. Older kids can add details like faces, patterns, and labels without changing the core project. That range is why the ideas below stay low-prep and low-mess rather than highly decorative.

    If a craft needs a hot glue gun, glitter, paint, or a long drying time, it no longer belongs in the “easy at home” bucket. It may still be a good craft, but it is not the kind a parent can pull out on a weekday afternoon.

    Easy paper craft ideas for kids at home

    Kids and adult doing paper cutting and gluing

    These paper craft ideas for kids at home are a safe place to start because each one uses a short supply list and one clear action. Pick one project, set out the materials before the child sits down, and keep the instructions to three steps or fewer.

    1) Paper animals from circles and rectangles

    Cut a few circles and rectangles from construction paper, then turn them into animals with a glue stick and markers. A paper bear needs one large circle for the head, one bigger circle for the body, two small circles for ears, and a rectangle for the legs. A paper fish can be a single oval with a triangle tail.

    This works well because children do not need exact measurements. If the circles are lopsided, the animal still reads as an animal. Markers add eyes, whiskers, spots, stripes, and claws without extra supplies. For younger children, pre-cut the shapes. For older children, let them cut the shapes themselves and decide what animal to make.

    The trade-off is that the craft can look plain if the child stops after gluing the shapes together. Add one detail that changes the whole page: a nose, a tail, or a small background like grass or water.

    2) Folded paper fans

    Fold a strip of printer paper back and forth like an accordion, then tape or glue one end to hold it together. A strip about 2 to 3 inches wide makes a small fan that opens neatly in little hands. Construction paper works too, but printer paper folds more easily.

    This is a strong first folding craft because the result appears fast. A child can decorate the strip before folding with crayons, dots, stripes, or hand-drawn patterns. When opened, the folds make the design look more complex than it is.

    The downside is that thin paper can tear if a child folds too hard. Show gentle creases first, then press each fold flat with a palm. If the fan keeps springing open, add a piece of tape at the handle instead of more glue.

    3) Handprint trees and flowers

    Trace a hand on construction paper, cut it out, and use the fingers as branches, petals, or feathers. A brown handprint becomes a tree trunk and canopy when turned upside down. A green handprint can become a flower top with a paper stem.

    This craft is useful because it mixes drawing, cutting, and gluing without complex shapes. It also gives younger children something personal to make. The hand outline creates a shape that feels special even when the child uses only one color.

    The common mistake is making the handprint too small to decorate. Use a full sheet of paper if possible, especially for children under 7. That leaves room for markers, blossoms, birds, or grass.

    4) Paper chains from scrap strips

    Cut 1-inch-wide strips of construction paper, loop one strip, glue or tape the ends, then thread the next strip through the first loop. Repeat until the chain is as long as the child wants. Printer paper works in a pinch, but construction paper makes sturdier links.

    Paper chains are ideal for low-energy afternoons because the child repeats one move. The pattern becomes satisfying fast, and the chain can be made in 10 minutes or stretched into a longer project. It also uses leftovers from other crafts.

    The main drawback is cleanup from many small strips. Put a tray or baking sheet under the work area so scraps stay contained. If the child loses interest quickly, start with just 6 to 8 links instead of a long chain.

    5) Puppets with paper bags or folded paper

    Make a face on a folded paper rectangle or the flat side of a lunch-sized paper bag, then add paper ears, hair, and arms. A glue stick and markers are enough. The child can turn the puppet into an animal, a character, or a made-up creature.

    This craft gives kids something to play with after the making part ends. That matters because useful home crafts are not only pretty; they also support a second round of pretend play. Simple speech bubbles cut from printer paper can add another layer without making the project harder.

    Avoid too many glued layers on the mouth area. Thick glue can make the paper bend awkwardly and can hide the moving part of the puppet. Keep the face flat and leave the center fold or opening clear.

    6) Paper crowns and headbands

    Cut a long strip of construction paper to fit around the child’s head, then staple or tape the ends after decorating it with stars, spots, lines, or paper jewels. A strip about 2 inches tall is enough for most headbands.

    This is a strong choice when a child wants something wearable. The result feels special with almost no materials. It also gives room for personal choices, which keeps older kids engaged. Add one paper shape at a time rather than piling on decoration.

    The drawback is fit. If the strip is too tight, the crown becomes uncomfortable. If it is too loose, it slips. Wrap the strip around the child’s head before decorating, then overlap the ends and mark the size first.

    7) Simple paper masks

    Draw a mask shape on construction paper, cut out eye holes, and decorate it with markers and paper scraps. A tongue depressor, paper straw, or folded strip of paper can act as a handle if you want a handheld mask instead of a head-worn one.

    Masks are useful for older preschoolers and early elementary kids because the project gives them a clear identity to build around. A fox mask needs orange paper, pointy ears, and a black nose. A superhero mask may need only a bold color and sharp eye shapes.

    The biggest mistake is cutting the eye holes too close together or too small. Start with larger holes and adjust only if needed. A child can always add decoration around the eyes, but a cramped mask cannot be fixed easily.

    Which supplies should I set out first?

    Set out five basics first: construction paper, printer paper, scissors, a glue stick, and markers. Those items cover most low-prep paper crafts without sending you to buy specialty supplies. Tape is useful too, but it is optional.

    Keep the setup simple. A flat table, a trash bowl, and one pencil for tracing are enough for most projects. If you want to make the session easier, pre-cut a few shapes or strips before the child starts. That saves time and cuts down on frustration, especially for younger children or children still learning scissor control.

    Use paper that matches the job. Construction paper is better for sturdy shapes, crowns, chains, and puppets. Printer paper is better for folding, tracing, and drawing templates. Mixing the two can help: printer paper for practice, construction paper for the final version.

    Choose scissors by hand size. Child-safe scissors with blunt tips are easier for small hands and are the safer choice for preschool and early elementary children. Adult scissors are fine for the grown-up who is doing the pre-cutting. For official child-safety advice on tools and supervision, see the CPSC guidance above and the American Academy of Pediatrics’ HealthyChildren resources: https://www.healthychildren.org

    One honest limitation: paper alone cannot do everything. If a child wants a project that stands upright, glows, or has texture, paper will feel too flat. That is not a failure of the craft. It just means this category is best for simple, table-friendly activities rather than sculptural ones.

    If the aim is minimum mess, skip glitter, liquid glue, paint, and foam stickers. A glue stick usually keeps the page cleaner and dries faster than school glue. Markers are better than watery paints for most home paper projects because they do not need drying time.

    How do I make paper crafts less messy?

    Children cutting and arranging colored paper

    Paper crafts stay cleaner when the setup is controlled before the first cut. Put out only the materials needed for one project, keep a small scrap container on the table, and use a glue stick instead of liquid glue when possible. That alone cuts most of the mess.

    Start with a placemat, tray, or newspaper square under the work area. It gives scraps a boundary and makes cleanup easier in under 2 minutes. For children who scatter pieces, cut paper into larger shapes first so there are fewer tiny leftovers.

    Keep the glue rules simple. One swipe is usually enough for paper-to-paper bonding. More glue does not make the craft stronger; it just causes wrinkling and slippery fingers. If a child tends to overdo it, hand them the glue stick and keep liquid glue out of reach.

    Markers are the cleanest decoration tool for most projects. Crayons are fine too. Avoid wet paint unless the project truly needs it, because wet paint changes the whole cleanup problem. If you do use anything wet, plan for drying time and a separate surface.

    The most common mess mistake is giving a child too many options at once. Ten colors, extra paper scraps, stickers, and googly eyes sound fun, but they make the work area chaotic fast. Two or three colors are usually enough for a finished look.

    This is not the right activity if the child wants a highly detailed scene with glue, paint, and lots of layering in one sitting. For that kind of project, a different craft format makes more sense. Paper crafts work best when the child can finish without needing help every minute.

    What should I do when a paper craft starts to go wrong?

    When a paper craft goes wrong, simplify it instead of restarting. A crooked fold, a torn edge, or a badly cut circle usually does not ruin the project. It just means the design needs a smaller goal.

    If a fold keeps opening, press it flat again and secure it with a small piece of tape at the back. If the problem keeps happening, stop and check whether the paper is too thick for the fold or whether the child needs help holding the crease. If needed, consult a teacher, parent, or other trusted adult about a safer way to finish the step. If a cut shape is uneven, turn it into something else: a bird wing, a cloud, a monster ear, or a leaf. Paper is forgiving because many shapes can be repurposed.

    If the child gets frustrated, stop adding rules. Say what still works, then give one next step. “This circle is fine for a face” is more useful than “Try again.” A 5-minute reset can save the whole craft session.

    A practical way to keep momentum is to cap each project at one main outcome. For example, a paper animal only needs a body and face; details can wait. A crown only needs a band and a few decorations. That rule keeps the project from ballooning into something that feels like homework.

    The biggest mistake is expecting the finished craft to match a model exactly. Kids’ paper crafts are supposed to look homemade. If the goal is neat symmetry, a child often loses interest before the piece is done. If the goal is a recognizable shape with room for personal choices, the project works.

    For children under 6, the adult may need to do most of the cutting. That is not a shortcut around the craft; it is part of making it age-appropriate. The child still gets to choose colors, place features, and assemble the final piece.

    A simple 15-minute paper craft routine that works

    A 15-minute routine works best when the craft is pre-decided, the materials are limited, and the child knows the finish line. Choose one project, put out one sheet or one strip at a time, and end with one clear decoration step.

    1. Pick the project and set out only the needed supplies: for example, construction paper, scissors, glue stick, and markers.
    2. Pre-cut the hard parts if the child is under 7, such as circles for an animal or strips for a chain.
    3. Let the child assemble the base shape first, which gives the craft a fast early win.
    4. Add one decorating pass with markers or paper scraps, not five separate layers.
    5. Finish with a single check: eyes, ears, handles, or a headband fit.

    That routine is useful because it keeps the task small enough to finish in one sitting. It also works across ages. A 4-year-old can glue and color. An 8-year-old can cut and decorate. A child who wants more can always make a second version with a new color scheme.

    The drawback is that quick crafts are not always the most detailed. That is the point. Home paper crafts should feel easy to start and easy to stop.

    Paper craft comparisons and quick buying notes

    Project Best paper Time Typical cost Best for
    Paper animals Construction paper 10-15 min Low Shapes and pretend play
    Folded paper fans Printer paper 5-10 min Very low Folding practice
    Handprint trees and flowers Construction paper 10-15 min Low Younger kids
    Paper chains Construction paper 10-15 min Very low Repetition and decoration
    Puppets Paper bag or construction paper 10-20 min Low Play after making
    Crowns and headbands Construction paper 10-15 min Low Wearable crafts
    Simple paper masks Construction paper 10-15 min Low Costume play

    Construction paper is usually the better choice for the sturdier projects in this list, while printer paper is better when folding matters more than strength. That is why the supply list stays short: most easy paper craft ideas for kids at home do not need specialty materials.

    Key Takeaways

    • The easiest paper crafts for kids use paper, scissors, glue stick, and markers.
    • Simple shapes, folds, and strips beat detailed templates for home use.
    • Younger children do best with pre-cut pieces and larger shapes.
    • Construction paper is sturdier; printer paper is better for folding and tracing.
    • Less glue, fewer supplies, and one clear goal keep cleanup manageable.

    What paper crafts are easiest for kids?

    The easiest paper crafts for kids are ones built around one repeated action, such as folding, cutting circles, or gluing strips into a chain. Easy paper craft ideas for kids at home work best when the child can finish the project without needing constant help.

    Drafted with AI; not yet reviewed by a person.

  • Best Craft Stick Projects for School-Age Kids

    Best Craft Stick Projects for School-Age Kids

    Last updated: October 20, 2026

    Key Takeaways

    • Good school-age stick crafts have a simple frame, a clear result, and only a few extra supplies.
    • Choose projects with 3 to 10 steps, one main shape, and room to decorate right away.
    • Simple builds work best when the structure is easy to see and the child can stop after the first layer.
    • Use a thin line of wood glue, press the sticks together for 10 to 30 seconds, and let the piece dry flat before moving it.

    Quick Answer

    Children building stick crafts at a table

    The best craft stick projects for school-age kids are simple, flat builds that use 5 to 20 sticks, finish in one sitting, and leave room for quick decorating. For most children, the sweet spot is 6 to 12 sticks, 15 to 45 minutes of build time, and wood glue for the strongest joints. School-age kids also do well with projects that start decorating immediately after assembly, such as animal faces, boats, stars, signs, and puppets.

    Craft stick projects are a fast way to turn a small pile of popsicle sticks, wood glue, markers, and acrylic paint into something a school-age kid can finish in one sitting. The best choices are usually simple builds with 5 to 20 sticks, a short drying time, and a clear shape kids can decorate without advanced cutting.

    A good craft stick project should do three things: hold together with basic glue, look finished after a few markers or paint strokes, and keep the build time under about 30 minutes before drying. That makes it useful for classrooms, rainy afternoons, after-school clubs, and sibling projects where attention runs out fast. The CDC’s child development guidance also supports choosing age-appropriate activities that match attention span and fine-motor skill.

    Best craft stick projects for school-age kids

    These Best Craft Stick Projects for School-Age Kids are ones with a simple frame, a visible payoff, and only a few extra supplies. If the project needs precise measurements, a saw, or a long drying clamp setup, it belongs in an older-kid or adult category, not here. For comparison, the Smithsonian and NAEYC both stress choosing hands-on activities that fit a child’s developmental stage.

    A strong list for this age group usually includes flat shapes, not complex structures. Think bookmarks, mini signs, simple figures, picture holders, boats, or game pieces. These are the projects kids can finish in 15 to 45 minutes, then personalize with googly eyes, markers, and acrylic paint. The build is the main event, but the decoration is what makes the project feel like theirs.

    Here is the basic decision rule I would use. If a child can place the sticks, spread glue, and decorate without help beyond a nudge, the project fits. If the job depends on tight joins, exact symmetry, or very small parts, it stops being a kid craft and starts acting like a miniature construction assignment.

    A few examples work especially well because they are forgiving:

    • Flat animals made from 6 to 10 sticks
    • Mini rafts or boats from 8 to 12 sticks
    • Simple star or heart shapes from 5 to 8 sticks
    • Small desk signs from 6 to 9 sticks
    • Picture frames are popular, but they belong on a different page, so I would skip them here

    This is also the point where materials matter. Standard wood craft sticks are easier to handle than jumbo sticks for little hands, but jumbo sticks give more room for paint and marker details. Wood glue holds better than school glue, but it needs patience. If the child wants to move on in 5 minutes, glue sticks or school glue may feel easier, though the project may be weaker.

    The projects below are the ones I would choose first because they balance speed, decoration, and success rate. For more family-friendly ideas, the easy paper craft ideas for kids hub pairs well with these stick projects, and you can also compare supplies with easy kids’ art projects or DIY kids’ games for indoor use.

    How do I choose a craft stick project that kids will actually finish?

    Kids making a stick structure with glue

    Pick a project with 3 to 10 assembly steps, one main shape, and a decoration stage that can start right away. That combination keeps the child busy without demanding advanced technique.

    Start with the child’s age and attention span, then match the shape to it. For many school-age kids, a project that uses 6 to 12 sticks is the sweet spot. Fewer than that can feel too bare unless the design is very deliberate. More than that often means the glue stage drags on and the kid loses interest before the fun part.

    A useful filter looks like this:

    1. Choose a finished object the child can name in one sentence, such as “a butterfly” or “a boat.”
    2. Keep the supply list to 4 items or fewer when possible.
    3. Use pieces that lie flat on the table, since flat builds are easier to glue.
    4. Plan at least one easy decorating method, such as markers, paint, or googly eyes.
    5. Avoid anything that needs tiny angled cuts or long drying pressure.

    The project also needs a clear finish line. Kids do better when they can see, “I am done when the paint is on” or “I am done when the face is glued.” A vague craft, like “make something with sticks,” usually turns into hovering and second-guessing.

    One trade-off is that the easiest projects are not always the prettiest. A simple stick animal may look more charming than a complicated model because the child can finish it confidently. That matters more than making the craft look like it came from a display shelf.

    If the goal is a group activity in a classroom or library, choose a project that tolerates different skill levels. A single template or example helps, but do not make the whole table follow exact measurements. That is how a quick craft turns into a correction session.

    Simple craft stick builds that work well in one sitting

    Simple craft stick builds work best when the structure is obvious at a glance and the child can stop after the first layer. These are the most reliable choices for school-age kids because they leave room for personality without demanding engineering skill.

    1. Mini animal faces
    Use 2 to 6 sticks for the base, then add googly eyes, markers, and a mouth. A bear, fox, cat, or monster face is easy because the “wrong” version still looks intentional. This is ideal for 15-minute sessions and younger school-age kids.

    2. Flat boats and rafts
    Line up 6 to 10 sticks side by side, then glue one or two crosspieces across the back. A paper sail or marker-drawn flag finishes the look. This project is simple, but it does need patience while the glue sets.

    3. Star or heart shapes
    These use 5 to 8 sticks arranged into a recognizable outline. The shape is satisfying because the result appears quickly. It is a good choice when a child wants a decoration-first craft rather than a model.

    4. Stick puppets
    A single stick handle plus a cutout face or creature body gives an instant toy. This is one of the easiest projects for role-play because the craft becomes usable as soon as the glue dries.

    5. Tiny signs or name tags
    A few sticks make a border or backboard, then the child writes a name, a room label, or a short message with markers. This works well for school settings because it teaches neat lettering without requiring a long setup.

    6. Mini boxes or trays
    These need a little more glue discipline but still stay in the beginner range if the walls are short. They are useful when a child wants something that can hold erasers, beads, or paper clips.

    The drawback with these simple builds is obvious: they can look plain if the decoration is rushed. That is not a failure of the project. It is a sign that the paint or marker stage needs more attention than the structure stage.

    For a group activity, I would pick one build and let kids personalize it in different ways. That keeps the room calmer than offering six unrelated options at once.

    How do you glue craft sticks together?

    Use a thin line of wood glue, press the sticks together for 10 to 30 seconds, and let the piece dry flat before moving it. That is the most reliable method for craft stick projects that need stronger joints.

    Here is the cleanest assembly process for school-age kids:

    1. Lay the sticks on a flat table before adding glue. This keeps the shape visible and prevents rushing.
    2. Put a thin bead of wood glue where the sticks overlap. Too much glue makes the project slippery and slows drying.
    3. Press the pieces together for 10 to 30 seconds. The goal is contact, not force.
    4. Set the piece on wax paper, cardboard, or another surface that can handle a little squeeze-out.
    5. Let the project rest flat until the joint feels stable. Many small crafts need at least part of a class period before handling.
    6. Add paint, markers, or googly eyes only after the main structure is steady enough to hold its shape.

    Wood glue is usually the strongest choice for craft sticks because it bonds wood to wood well. The trade-off is drying time. If the child wants to decorate immediately, school glue can be more forgiving in the moment, but it tends to be weaker and messier on a slippery table.

    A few mistakes cause most of the frustration:

    • Using too much glue: this adds dry time and makes the sticks slide. Use less.
    • Moving the craft too soon: this breaks joints that looked fine a minute earlier. Leave it flat.
    • Building on a soft surface: couch cushions and laps tilt the pieces and weaken the shape. Use a hard table.
    • Skipping alignment: if the sticks are crooked before the glue sets, the finished craft stays crooked.

    If the project is for a classroom, keep a stack of paper towels nearby and limit the glue to small, controlled amounts. A squeeze bottle is easier to manage than a wide-tipped container. That single detail often matters more than the craft itself. For glue safety and drying guidance, check a manufacturer label and a classroom supply guide before starting.

    Easy paint and decorate ideas for popsicle sticks

    Easy paint and decorate ideas for popsicle sticks are what make the finished project feel personal instead of plain. A simple build can turn into a keeper with 10 minutes of color.

    Acrylic paint gives bright coverage on wood sticks, but it works best in a thin coat. Thick paint fills the grooves and can make pieces sticky for longer than expected. Markers are faster and cleaner for outlines, faces, patterns, and lettering. For many school-age kids, the best approach is to combine both: paint the base and use markers for details.

    Good decoration ideas include:

    • Rainbow stripes across the sticks
    • Polka dots with marker tips or paint daubs
    • Animal faces with googly eyes and a marker nose
    • Initials or short names
    • Simple patterns like zigzags, hearts, and stars
    • Background color on the whole piece, then drawn details on top

    Googly eyes are especially useful because they make even a very plain build feel finished. A pair of eyes on a stick monster, fish, frog, or robot can do more than a long list of painted details. That said, they are not ideal for very young children who still put small items in their mouths.

    One smart strategy is to separate the craft into two stages: build first, decorate later. That gives the glue time to settle and keeps paint from rubbing onto wet joints. It also helps if the child has a shorter attention span. A child can finish the structure in one session and come back for color after lunch or the next day.

    If the project is intended for display, choose one dominant color and one accent color rather than many competing shades. That keeps the piece from looking muddy. A red body with black marker details usually reads better than six random colors on the same surface.

    The biggest drawback of paint-heavy projects is mess. Use a covered table, aprons, or old shirts, and keep wet wipes nearby. That is not extra fuss; it is what keeps a quick craft from becoming a cleanup assignment.

    What craft stick projects are best for classrooms and after-school groups?

    The best classroom and after-school craft stick projects are flat, fast, and easy to repeat with the same supplies for 8 to 20 kids. Group settings reward projects with short directions and low drying drama.

    A classroom craft needs different traits than a solo project at home. It should be simple enough to explain once, but open enough that kids do not all end up with identical results. The best group projects usually use the same basic materials—sticks, glue, markers, acrylic paint, and googly eyes—but allow different final designs. If you need age guidance for a mixed group, the American Academy of Pediatrics and NAEYC both recommend matching activities to children’s developmental range.

    Good group projects include:

    • Animal faces on a stick base
    • Name signs
    • Boats or rafts
    • Puppets
    • Shapes like stars, hearts, or flowers
    • Mini masks made from a stick frame and paper details

    I would avoid anything that needs a 3-D structure with multiple angles. In a group, that kind of project creates a line of children waiting for help. A flat craft keeps the room moving and reduces the number of broken pieces.

    There is also a practical reason to keep supplies simple. When every child needs the same 6 tools, the setup and cleanup stay manageable. A project that demands specialty cutters, fast clamps, or a long list of embellishments stops being a craft and turns into logistics.

    For a school-age group, one solid template is enough. A sample finished piece can show the basic idea, but the best results come when kids are free to choose colors, expressions, and small extras. The project feels less like a worksheet and more like a finished object they want to carry home.

    If I had to choose one rule for group success, it would be this: pick the craft that can survive being slightly imperfect. That is the one children finish with pride.

    For more quick, low-mess ideas, the hub on easy paper craft ideas for kids pairs well with these stick projects, and DIY kids’ games can extend the same materials into play.

    Craft stick projects that are not worth the trouble

    Craft stick projects are not worth the trouble when they need precision, advanced cutting, or so many pieces that the child spends more time correcting than creating. That is especially true for school-age kids who want something finished today, not next week.

    A few warning signs tell me a project should be skipped:

    • It needs exact angles or tiny measured gaps
    • It depends on long clamping or heavy pressure
    • It uses more than one drying stage with no fun in between
    • It requires specialty supplies that the average classroom does not keep on hand
    • The final result is fragile enough that a child cannot play with it

    This is where a lot of generic craft lists go wrong. They keep recommending the same pretty projects without saying which ones create frustration. A child who likes decorating may still hate a build that takes 45 minutes of correction before a single marker appears. The most popular project is not always the best project.

    I would also skip any stick project that asks the child to copy a perfect sample. That can work for very patient kids, but it often drains the fun from the craft. The stronger choice is a shape that remains recognizable even when the sticks are a little uneven. Imperfection is part of the look.

    One more trade-off matters: the more structural the project, the less room there is for creative play. A kid may enjoy making a simple monster face more than a detailed basket because the monster is finished in 20 minutes and can be used right away as a puppet or desk mascot.

    If the goal is a quick, satisfying school-age activity, the best craft stick projects are the ones that finish well, decorate easily, and do not punish small mistakes. That is the standard worth keeping.

    What can kids make with craft sticks?

    Kids can make simple animals, signs, puppets, stars, hearts, boats, and other flat classroom crafts with craft sticks.

    Drafted with AI; not yet reviewed by a person.
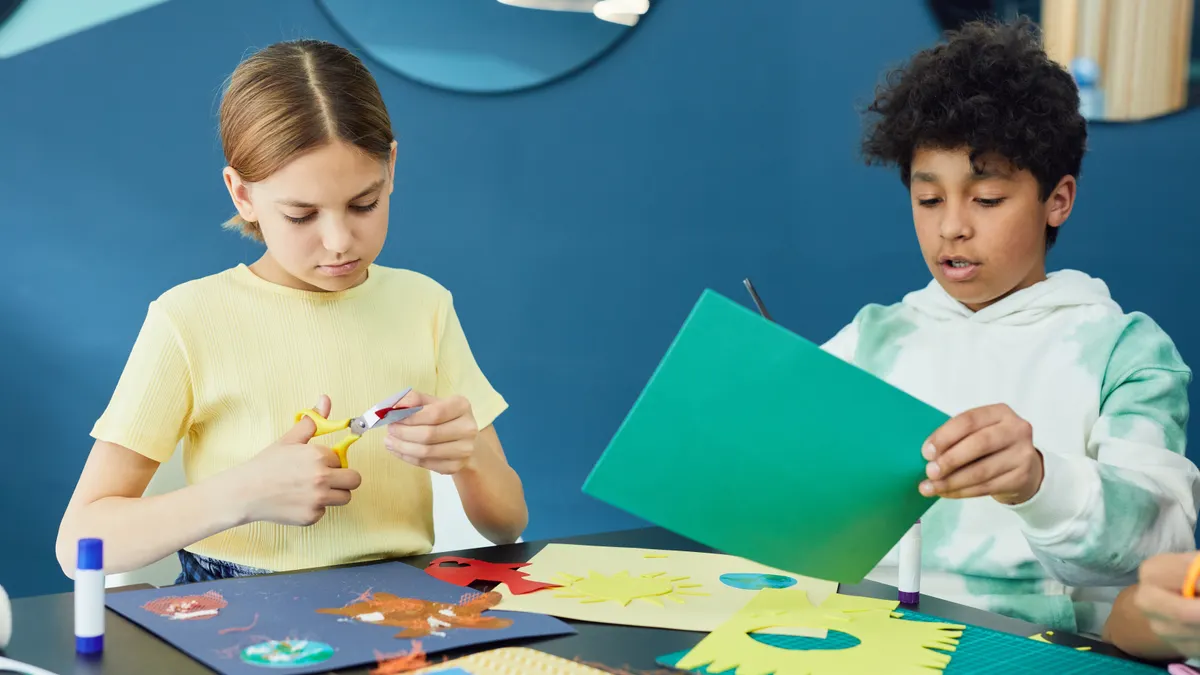
  • Beginner Craft Projects: The Complete Guide

    Beginner Craft Projects: The Complete Guide

    Last updated: October 20, 2026

    Quick answer: 1 good starter project is enough to begin. This guide to Beginner Craft Projects — The Complete Guide is written for the person who wants to make something real without turning a hobby into a second job. Beginner craft projects should be simple enough to finish in one sitting, cheap enough to abandon without regret, and forgiving enough to survive a crooked cut or a glue blob.

    Key takeaways

    • Start with projects that need one tool, not a full workshop.
    • Pick materials that hide mistakes: felt, paper, yarn, air-dry clay, and basic wood blanks.
    • Select the project by the finish line you want, not by what looks impressive on a shelf.
    • Skip anything that requires wet paint, precise stitching, or power tools if you want fast wins.
    • A good beginner project teaches one skill at a time: cutting, gluing, folding, wrapping, or simple assembly.

    What counts as a beginner craft project?

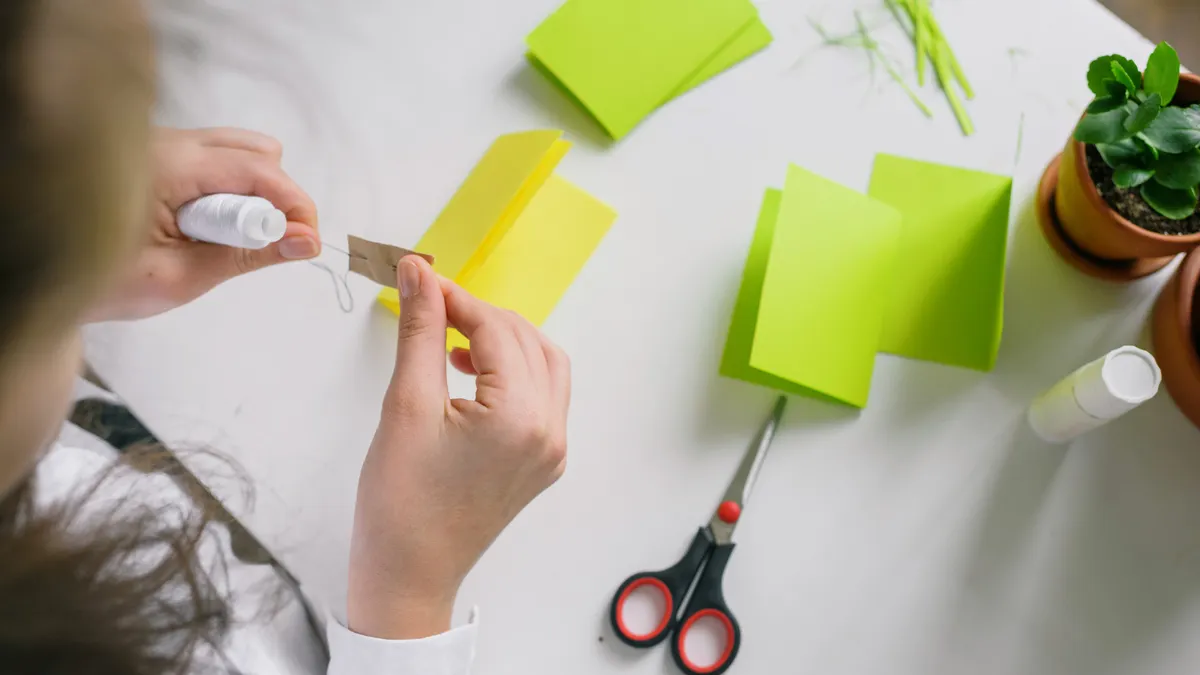
    Hands folding bright paper for a simple craft project

    A beginner craft project has a short materials list, few steps, and a low penalty for mistakes. A paper garland, a painted plant pot, a no-sew tote decoration, a simple bead bracelet, or an air-dry clay dish all fit that pattern because each one can be finished without specialized skill or expensive gear.

    Social media can fool people here. A project may look easy on a screen and still fall apart in real life when the cuts are uneven, the glue line shows, or the paint goes on too thick. Beginner projects should hide flaws instead of exposing them. Felt is friendlier than satin. Cardstock is easier than watercolor paper. Acrylic craft paint is more forgiving than thin stain. Those material choices matter more than the final look, because they decide whether the project ends in a finished object or a drawer of abandoned supplies.

    I would sort Beginner Craft Projects into three buckets: decoration, useful objects, and skill-builders. Decoration projects include paper flowers, framed collage, and painted rocks. Useful objects include coasters, keychains, and storage jars. Skill-builders teach one technique that transfers to other projects, such as wrapping yarn, folding paper, or making simple knots. Confidence is the point? Then skill-builders are a smart place to start.

    The simplest projects are not always the most satisfying, so a project can be easy and still feel pointless if it has no purpose. A coaster set, notebook cover, or wall hanging usually lands better than a random trinket because the result has a job to do. That matters when someone is new and easily discouraged.

    How do I choose the right first project?

    Match the project to your patience, your space, and the mess you can tolerate. Someone who wants a calm half hour should not start with hot glue and glitter. Someone who wants a visible result should not start with a ten-step paper model.

    The fastest way to make a decent choice is to run through four questions:

    1. How many tools does it need? One pair of scissors and a glue stick is ideal. Once a project adds a rotary cutter, pliers, or a heat tool, the difficulty rises fast.
    2. How permanent does it need to be? A paper wreath is easier than a sewn pillow because paper can be repositioned and trimmed.
    3. How much drying or curing time is involved? Air-dry clay, paint, and adhesives can turn a short project into a waiting game.
    4. How visible are the flaws? Dark felt, textured paper, and painted wood forgive more than glossy surfaces and white fabric.

    That last point saves beginners a lot of frustration. A project that looks beautiful on a desk may be brutal for a first attempt if every wobble shows. Choose materials that help you. Felt does not fray much when cut. Cardstock can be scored and folded cleanly. Wooden blanks from craft stores usually arrive already shaped, which removes the hardest part of woodworking: making a clean blank from scratch.

    Usually, the wrong first project piles several new skills together. Sewing, pattern reading, and stuffing in a single plush toy can be too much. So can resin, measuring, and pigment mixing. A better first project isolates one skill and gives a visible payoff; that is how a beginner keeps going.

    For crafting with children, the standards shift. The right project is shorter, sturdier, and less dependent on precision. Paper masks, foam stickers, sponge painting, and bead threading are better than anything with razor-sharp cuts or tiny parts. For adults, a practical starter project is often the one that fits on a kitchen table and can be cleared away in 10 minutes.

    Beginner craft projects that give the fastest wins

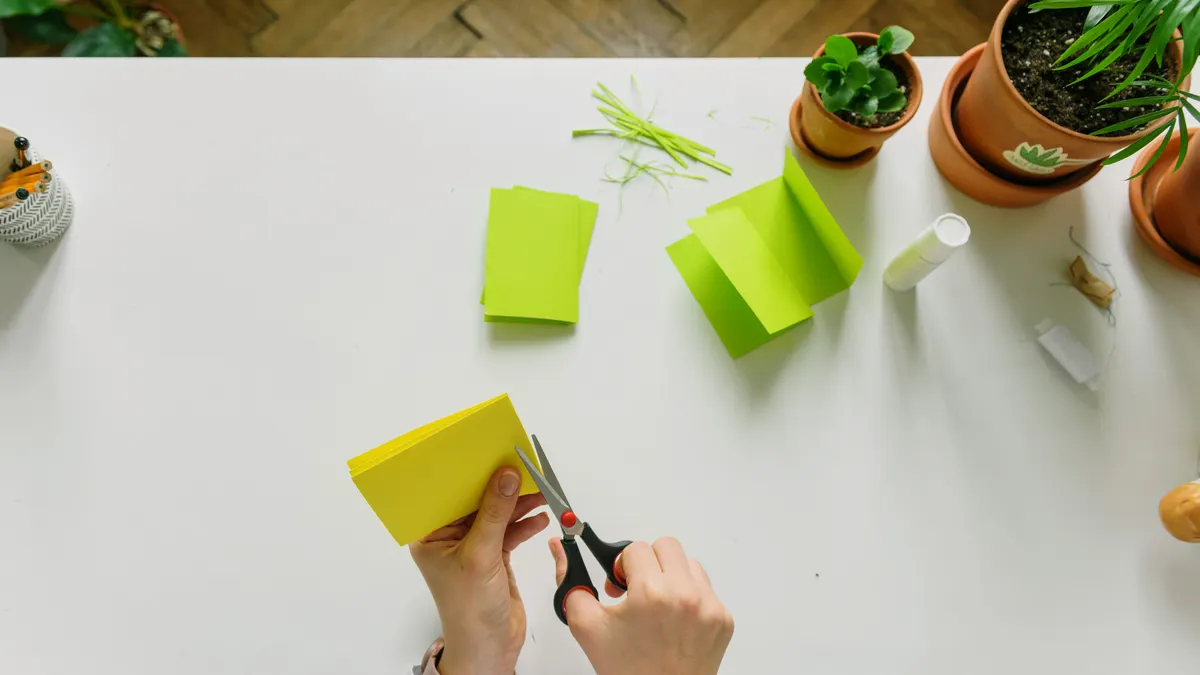
    Hands making paper decorations with scissors and colored paper

    Fast wins usually come from projects that rely on simple assembly rather than construction. That usually means paper, yarn, felt, mason jars, or pre-cut blanks.

    Paper projects

    Paper is a strong starting material because it is cheap, easy to replace, and quick to clean up. Paper chains, greeting cards, folded stars, scrapbook pages, and paper flowers teach cutting, folding, and layout without a big investment. Cardstock is better than printer paper for anything that needs shape, because it holds creases and weight more reliably.

    Paper projects suit people who want a finished result in under an hour. The drawback is durability. Thin paper tears, curls with humidity, and looks fragile once handled a few times. That makes paper a poor choice for anything expected to survive daily use.

    Felt projects

    Felt is one of the most forgiving craft fabrics. It does not fray the way woven fabric does, so edges can stay neat even with beginner cuts. Simple felt flowers, ornaments, bookmarks, and stuffed shapes are all realistic starting points. A straight stitch, blanket stitch, or fabric glue can be enough for many of them.

    But felt has a weak spot: it can look childlike if the design is too simple or the color palette is too loud. It also pills with wear. Felt works best when the goal is a soft decorative object, not a long-lasting garment or bag.

    Yarn projects

    Yarn works well for wrapping, knotting, braiding, and simple weaving. Yarn tassels, pom-poms, friendship bracelets, and basic coasters are all beginner-friendly. These projects teach rhythm more than precision, which helps someone who freezes up around exact measurements.

    Yarn can turn into spaghetti in a hurry, especially if it tangles or sheds. Thicker yarn is easier for a beginner than thin, slippery yarn. If a project needs consistent tension, it becomes harder quickly. That is why a simple wrapped letter or tassel usually beats a full macramé wall hanging for a first try.

    Clay and modeling projects

    Air-dry clay and oven-bake clay can produce satisfying results because the object feels substantial. Small dishes, pinch pots, beads, and trinket trays are common starter projects. These teach shaping and smoothing, not just decorating.

    The trade-off is drying time and cracking risk. Too thick, and the clay can split. Handle the surface too soon, and it can dent. Clay is a good first medium only if the maker is willing to wait and tolerate a few imperfections.

    Paint-and-decorate projects

    Painted plant pots, rocks, frames, and jars are good for beginners who want color without construction. A plain object becomes personal quickly with one or two colors, stencils, or simple patterns like dots and stripes.

    Paint projects are easy to start but just as easy to overcomplicate. Once a beginner starts layering colors, masking shapes, or chasing perfect coverage, the difficulty rises. Acrylic craft paint is the usual starter choice because it dries quickly and covers many surfaces reasonably well, but it can still show brush marks on smooth surfaces.

    What materials should a beginner actually buy?

    Buy only the materials that let one project finish cleanly. A beginner does not need a giant starter kit; a better kit is usually smaller and more deliberate.

    The most useful basics are these:

    • scissors
    • glue stick or tacky craft glue
    • acrylic craft paint
    • paintbrushes in one small and one medium size
    • cardstock
    • felt sheets
    • yarn in a medium weight
    • a ruler
    • pencil
    • masking tape
    • air-dry clay if a three-dimensional project is the goal

    That list is enough for many first projects. It also keeps waste down. A full craft aisle is a trap for beginners because every new tool promises a new hobby. The trick is to match materials to the project, not the reverse.

    If there is one material to buy carefully, it is adhesive. School glue is fine for paper. Fabric glue or tacky glue works better for felt and light embellishments. Hot glue is useful, but it can also create strings, burns, and lumpy joints that a beginner may not be ready to manage. Better to save it for simple assembly than for anything delicate.

    A shallow box, zip bags, or divided tray makes it easier to restart later. Craft supplies scattered in a drawer are a quiet form of discouragement. If the setup takes too long, the project gets postponed.

    For people who want authoritative safety guidance on tools and materials, the U.S. Consumer Product Safety Commission has general household and product-safety resources, and the American Academy of Pediatrics publishes child-safety advice for projects done with children. Those are useful reference points when a project involves sharp tools, heat, or small parts.

    Which beginner projects are best for different goals?

    The best beginner craft project depends on the finish line. Someone who wants quick relaxation should not pick the same project as someone who wants a gift or a home decoration.

    For calm and low pressure, paper garlands, simple doodled cards, and yarn tassels work well. They are repetitive, easy to stop midstream, and unlikely to go badly wrong. The downside is that they may feel less substantial when finished.

    For something useful, coasters, bookmarks, bookmarks with felt tabs, decorated jars, and simple trays are stronger choices. These projects are more satisfying because they get used. The downside is that useful items have to hold up under handling, so material choice matters more.

    For a gift, painted mugs are not as beginner-friendly as they look, because not every paint or surface treatment is food-safe or dishwasher-safe. If the goal is a gift, consider checking the paint and finish instructions from the manufacturer and, if needed, consulting a professional about food-contact safety before using a mug as a present. A safer choice is a framed paper collage, a fabric pennant, a hand-decorated notebook, or a small clay dish. Gifts should be simple enough to finish neatly. A beginner can wreck a good idea by adding too many colors or decorations.

    For learning a transferable skill, simple sewing by hand, wrapping, folding, and basic clay shaping are the best returns on time. Those skills can be reused in more complex projects later.

    Here is the simplest rule: pick a project that rewards imperfection. A deliberately rustic piece can look charming. A project that depends on symmetry and machine-like edges will punish a novice.

    The honest comparison: simple paper, felt, yarn, clay, and paint

    Simple paper and felt are the safest starting points; clay and paint create more satisfying objects, but they ask more of the maker.

    Criteria Paper Felt Winner for this condition
    Speed to finish Usually fastest; many projects can be done in 20–45 minutes Still quick, but cutting and assembly often take longer Paper for instant gratification
    Forgiveness of mistakes Good, but creases and tears show Excellent; edges hide small errors better Felt for beginners who cut unevenly
    Cost to start Very low; a pack of cardstock covers many projects Low to moderate depending on sheet size and color variety Paper for the smallest starter budget
    Durability Low; sensitive to moisture and bending Moderate; soft, but holds up better than paper in regular handling Felt for objects that will be touched
    Tool needs Scissors, glue, pencil Scissors, needle or glue Paper for the fewest tools
    Best for gifts Cards, collages, framed art Ornaments, bookmarks, small soft decor Felt for keepsakes
    Cleanup Very easy Very easy Both
    Risk of frustration Low, unless exact symmetry matters Low to moderate, especially with hand sewing Paper for pure simplicity

    Paper wins when speed and budget matter most. Felt wins when the finished object needs to feel soft, look polished, or survive more handling. Yarn sits in the middle: excellent for repetitive motion and texture, but more likely to tangle. Clay produces the most satisfying tactile result, but it is the least forgiving of rushed hands. Paint is the easiest way to personalize an object you already have, yet it can make a clean project look messy if coverage is uneven.

    A generic article would stop at “all of these are beginner-friendly.” That is not useful enough. The real choice is about friction. Paper creates the least friction. Felt hides the most mistakes. Clay creates the most consequence if you rush. Paint offers the biggest visual change for the least structural skill, but only if the base object is already good.

    If someone wants one recommendation, I would start with felt for most adults and paper for children or the impatient. Felt gives a better balance of finish quality and error tolerance. Paper is still the easiest on-ramp when attention span is short.

    What beginner craft projects should I avoid?

    Avoid any project that requires several new skills at once, especially when one mistake ruins the whole thing. That includes resin casting, elaborate sewing patterns, furniture refinishing, embroidery with tiny stitches, and anything involving power tools or open heat unless there is prior guidance.

    The most common beginner mistake is choosing a project for the photo rather than the process. A resin tray can look gorgeous online and still be a bad first project because mixing ratio, dust control, and curing time all matter. A sewn tote bag can seem simple until seam allowance, turning corners, and topstitching all arrive at once. A wood project can become expensive quickly when sanding, cutting, drilling, and finishing are all unfamiliar.

    Projects also become poor choices when the cleanup is harder than the craft. Glitter, spray adhesive, and pigment-heavy materials can turn a pleasant hour into a mess that lingers for days. That does not mean those materials are banned forever. It means they are not smart first steps.

    There is also a social trap. A beginner who feels judged may pick an advanced project to look capable. That is backward. A project is beginner-friendly if it gives a clean result with limited skill, not if it impresses other people while staying half-finished in a corner.

    If the materials list mentions a curing time of 24 hours, exact temperature control, or precision cutting, the project is probably not a starter project unless the maker already likes that sort of discipline.

    What should a first craft session look like?

    A first craft session should be short, prepared, and easy to stop after one success. Thirty to 60 minutes is enough for a starter project, with another small block of time for cleanup.

    The best setup is simple:

    • clear a table
    • gather every supply before starting
    • keep a trash bowl or bag nearby
    • use a cutting mat or newspaper if needed
    • set a timer if the craft tends to sprawl
    • stop when the core object is finished, even if extra decoration is tempting

    That last point matters. Beginners often ruin a perfectly good project by trying to make it more impressive. A basic paper star that is done is better than a complicated version that never gets assembled. The goal is to finish, not to squeeze in every idea at once.

    A first session should also include one small skill goal. For example: make three clean folds, glue one straight seam, or paint one even base coat. That kind of target builds confidence without requiring mastery.

    The session should end with a visible object. A half-built project tucked into a bag can feel like failure. A completed coaster, card, or ornament feels like progress. That emotional difference is the whole point of beginner crafting.

    The verdict: which beginner craft project should come first?

    Pick paper projects if the goal is speed, low cost, and the least possible setup. Pick felt projects if the goal is a more finished-looking object that tolerates crooked cuts and small mistakes. Pick yarn if repetitive motion is calming and the maker wants texture more than structure. Pick clay if a tangible object matters more than a fast finish. Pick paint if there is already a base object ready to personalize.

    Pick paper if this is for a child, a tight budget, or a first attempt with almost no tools. Pick felt if the maker wants the best balance of beginner-friendly handling and respectable results. Neither if the project requires precision, advanced tools, or a perfect finish on the first try.

    The best first craft is the one that will actually get finished. That usually means the simplest project, not the most ambitious one. A beginner who finishes one paper or felt project has a real starting point. A beginner who buys twelve supplies for a glamorous project often has only a pile of intentions.

    Where to go after the first project

    After one successful beginner project, the next step is to repeat the same technique with a small twist. That is how skill grows without turning the hobby into a test.

    A second project should change only one variable:

    • same paper, new shape
    • same felt, new stitch
    • same yarn, new pattern
    • same clay, new form
    • same paint, new surface

    That keeps the learning curve gentle. It also shows which part of crafting is actually enjoyable. Some people like cutting. Others like decorating. Some prefer assembling objects that already have a shape. The first project is often less about the object than about discovering the right kind of making.

    Beginner crafting works best when it is treated as a sequence of small wins. One finished item teaches more than ten half-finished ideas. The goal is not to become advanced quickly. The goal is to make the next project easier than the last one.

    FAQ

    What is the easiest beginner craft project?

    Paper crafts are often the easiest because they need few tools and little cleanup. A greeting card, folded star, or paper chain can usually be finished in under an hour.

    What is the best beginner craft project for adults?

    A felt project or a simple decorated object, like a jar or coaster, is often a good adult starter project. The best choice is usually the one that fits your space, your patience, and the time you have.

    Are beginner craft projects expensive?

    They do not have to be. Many beginner craft projects can start with scissors, glue, cardstock, and felt sheets. The table in this guide shows paper as the lowest-cost option.

    What beginner craft project is best for gifts?

    A framed paper collage, hand-decorated notebook, or small clay dish is often a safer gift choice than a mug. If you use paint or a finish on a mug, check the product instructions and consult a professional if food-contact safety matters.

    How long should a first craft project take?

    About 30 to 60 minutes is a good target for a first session. That leaves enough time to finish without making the project feel like homework.

    Drafted with AI; not yet reviewed by a person.