Last updated: October 22, 2026
Quick answer: For easy DIY candle holder ideas for the table, start with one heat-safe container, one candle, and 3 to 6 finishing items. Most versions can be made in under an hour.
Key Takeaways
- You need one heat-safe container or base, one candle type, and a few finishing materials to begin.
- At home, choose a stable base, fit the candle snugly, and add a finish that hides the plain container.
- Glass jar candle holders work best when the jar shape does most of the decorating.
- Upcycled candle holders can add character to a table with very few new purchases.
Candle holders for the table are easiest when they stay simple: a stable base, enough clearance for the flame, and a finish that looks intentional. Easy DIY candle holder ideas for the table usually use glass jars, tea lights, paint, twine, or Mod Podge to turn plain supplies into small tabletop pieces for everyday rooms.
What to gather before you start
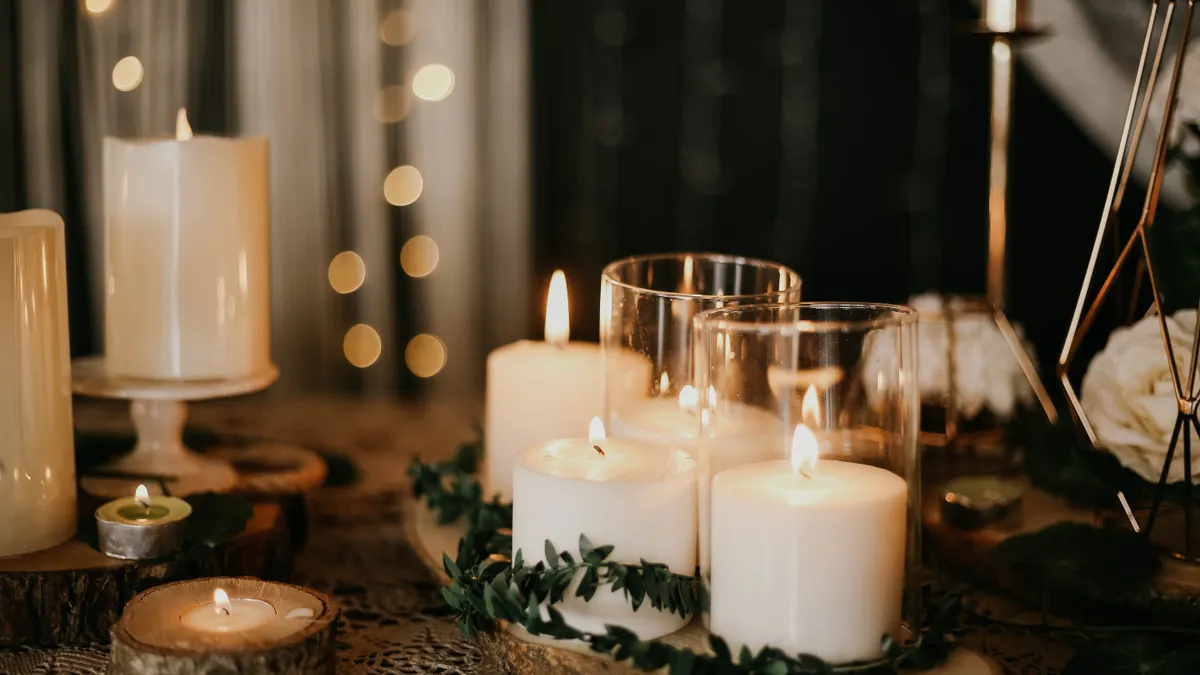
You need one heat-safe container or base, one candle type, and a few finishing materials before you start. For most table projects, that means glass jars, tea lights or votives, craft paint, twine, Mod Podge, scissors, and a clean cloth. If you want a more polished look, add sand, pebbles, or a small plate to anchor the holder.
Choose the candle first, not the decoration. A tea light needs a shallow cup or a stable ledge. A votive needs a holder with straight sides. A pillar candle needs a wider, heavier base. That choice affects the whole project, especially if the holder will sit beside dinner plates, napkins, or a centerpiece tray.
Keep the table scale in mind. A low centerpiece should stay below eye level so conversation stays open across the table. A single candle holder can be narrow and tall; a grouped centerpiece usually works better when each piece is under about 8 inches high and leaves space between settings.
For a cleaner build, wash jars and wipe them dry before any glue, paint, or wrapping goes on. If the surface is dusty or greasy, twine slips and paint streaks. A 10-minute prep step saves peeling later.
How do you make a candle holder at home?
You make a candle holder at home by choosing a stable base, fitting the candle snugly, and adding a finish that hides the plain container. Start with the holder itself, then build the look around it in 4 to 6 steps.
- Pick a heat-safe base such as a glass jar, small bowl, metal tin, or thrifted votive cup. The candle should sit flat without wobbling, which is the sign the base is the right size.
- Clean and dry the surface completely. Remove labels, fingerprints, and dust so paint or Mod Podge will stick instead of flaking off after the first use.
- Set the candle in place and check the fit. A tea light should rest level; a votive should not tilt; a pillar should have open space around the sides rather than touching the wall of the holder.
- Add the decorative layer. Wrap twine around the neck of a jar, brush on Mod Podge for paper or fabric accents, or paint the outside in one even coat. The holder should look finished even before you add the candle.
- Let glue or paint dry fully before lighting anything. A dry finish feels firm to the touch and does not smear when you lift the holder.
- Place the candle in the holder and set it on a flat table surface away from napkins, greenery, or loose ribbon. The final result should sit steady, with the flame centered and visible.
The simplest version is a clear glass jar with a tea light inside and twine tied around the rim. It is plain enough for daily use and neat enough for guests. If you want more color, a single coat of paint on the outside of the jar changes the mood without adding clutter.
This approach is not for anyone who wants a heavy sculptural centerpiece or a highly detailed craft project. It is for people who want something made in under an hour, using materials they already have or can pick up easily.
Glass jar candle holder ideas that look intentional
Glass jar candle holders work best when the jar shape does most of the decorating. Straight-sided jars are the easiest because they hold tea lights, small votives, or a bit of sand at the bottom without needing extra shaping. A wide-mouth jar also makes cleaning wax drips much easier later.
The wrapped jar is the fastest version. Brush a band of Mod Podge around the middle or lower third of the jar, press on twine in tight rows, and stop before it starts to bulge. That leaves the glass visible at the top and gives the piece a handmade texture. If the jar is clear, the candlelight will show through the upper section.
Painted jars work well when the table already has a strong color story. Use craft paint in one muted color rather than several bright ones; that keeps the candle holder from fighting the plates or tablecloth. A frosted look is useful if you want softer light. A solid painted lower half leaves the flame area open and keeps the effect cleaner than painting the entire jar.
For a layered centerpiece, group 3 jars of different heights on a tray. One jar can hold a tea light, one a votive, and one a small bundle of twine or pebbles at the base. The mix looks fuller than a single object but still stays easy to move when the table needs clearing.
Glass jars are not ideal if you want a very formal look or a candle holder that disappears into the decor. They are strongest when the goal is relaxed, everyday styling. They also show smudges, so they need a quick wipe before the table is set.
Upcycled candle holders from everyday materials
Upcycled candle holders from everyday materials can be a good choice when you want a table piece with character and almost no new purchases. Small tins, short stemmed glasses, ceramic ramekins, teacups, and shallow metal lids can all become candle holders if they are stable and the candle sits level.
A teacup holder gives a soft, old-fashioned look. Place a tea light inside the cup or use a small votive if the cup is deep enough. If the cup is patterned, keep the rest of the table simple so the print stands out. A chipped cup can still work if the rim is smooth and the base is level, but a crack is a hard stop.
A tin holder feels more casual. Clean the label off, paint the outside, and tie twine around the top edge. If the metal edge is sharp, cover it completely before handling it. This is a useful option for a rustic kitchen table because it pairs well with wood, linen, and plain white dishes.
A ceramic ramekin is one of the easiest upcycled bases for tea lights. It already has weight, it resists wobble, and it usually fits a single candle neatly. Fill the bottom with a thin layer of sand or pebbles if you want the candle to sit lower in the dish. That gives the holder a finished interior instead of a bare empty bowl.
The trade-off with upcycled pieces is consistency. They rarely match. That can be charming on a side table, but a formal dining table usually needs more visual order. If the shapes vary too much, the arrangement starts to look improvised instead of styled.
For ideas that bridge the table and the rest of the room, a simple candle display can echo other handmade accents from the DIY wall art ideas hub without repeating the same motif on every surface.
How to style tea lights and votives for a table centerpiece
Tea lights and votives work best in groups of 3, 5, or 7 because odd numbers look balanced without feeling stiff. The table centerpiece should leave space for plates, glasses, and serving dishes, so keep the arrangement compact rather than spreading it across the whole surface.
The easiest centerpiece formula is a tray, a few holders, and one grounding element. Put 2 or 3 candle holders on a tray with a small bowl of pebbles, a strip of twine, or a short piece of greenery. The tray makes the display movable, which matters when the table is used for meals, homework, or games.
For a low centerpiece, use tea lights in shallow holders and keep the tops of the flames below the seated eye line. For a slightly more elevated look, combine votives with one taller jar in the center. That gives height without blocking conversation. If the table is narrow, keep the tallest piece toward the middle and the lower ones along the edges.
Clear glass works when you want the flame to be the focus. Frosted glass, painted jars, or wrapped holders work when you want the holder itself to do more visual work. On a table with a patterned runner, plain holders usually read better. On a plain wood table, a little texture from twine, matte paint, or paper wrapped under Mod Podge gives the arrangement enough interest.
Do not overload the centerpiece. If the table already has napkin rings, a large vase, or a stack of serving bowls, the candles should stay minimal. A crowded centerpiece feels busy fast and makes it harder to reach across the table.
Easy table centerpiece combinations that look finished
The most polished DIY candle holder ideas for the table use repetition, not clutter. One repeated shape, one repeated finish, and one small contrast are usually enough to make a centerpiece feel planned.
Try three painted glass jars in a row with tea lights inside. Keep the paint in one color family, such as white, soft gray, or muted green, and vary the jar height slightly. The repetition ties the pieces together, while the slight height change keeps the row from looking flat.
Another strong combination is twine-wrapped jars mixed with clear votives. The wrapped pieces add texture, and the clear ones keep the arrangement from getting heavy. Put the taller holders in the center and the lowest ones on the ends. This works especially well on rectangular tables because it follows the shape of the surface.
If you want a more rustic result, use a shallow wooden tray with a few upcycled containers and one anchor object, such as a small bowl of shells or stones. The anchor gives the arrangement a clear center. Without it, even good pieces can drift into looking random.
Seasonal styling is easiest when you swap only one element. In autumn, add amber glass, brown twine, or a matte painted finish. In spring, switch to white paint, clear glass, or light ribbon. That keeps the candle holders useful all year instead of turning them into one-season crafts.
The main drawback of centerpiece styling is restraint. A handmade candle holder can be charming on its own and crowded as part of a group. If you cannot step back and see space around each piece, remove one holder before calling it done.
What to avoid so the holder still works on a real table
The biggest mistake is choosing a pretty container that is too light or too narrow for the candle. A holder that tips when the table is bumped is not table-safe, even if it looks good in a photo. Use a heavier base for taller candles and keep tall pieces away from the edge. For more decorating basics, see home decor ideas and table setting ideas.
Another common problem is covering every surface with decoration. Heavy paint, thick ribbon, and layered twine can make the holder look busy and can hide the shape that makes it attractive in the first place. One finish method is usually enough. If the jar already has strong shape, keep the decoration simple.
People also forget candle clearance. A candle set too close to paper, fabric, or dried stems can make the table look polished right up until the holder is moved. Leave open space around the flame area. That rule matters more than the color or style of the holder.
A final mistake is making every holder identical. A table centerpiece needs rhythm, not a row of clones. Vary height, texture, or opacity by a small amount. A set of 3 can share the same material and still look richer if one is wrapped, one is painted, and one stays clear.
For tabletop use, the right DIY candle holder is the one that looks finished, wipes clean, and stays steady when someone reaches for a glass. That makes it useful every day, not just on the one night it gets photographed.
How do you make a candle holder at home?
You make a candle holder at home by starting with a stable base, fitting the candle securely, and adding a finish that suits the table. A glass jar, ramekin, or metal tin can work. The key is to clean it, test the candle fit, and let any paint or Mod Podge dry fully before use.
What can i use as a homemade candle holder?
You can use glass jars, teacups, ramekins, small tins, votive cups, or other heat-safe containers with a flat bottom. The best homemade candle holder is one that keeps the candle upright and gives the flame enough space. Avoid anything cracked, unstable, or too small for the candle’s diameter.
How do i decorate candle holders safely?
You decorate candle holders safely by keeping decoration outside the flame zone and choosing finishes that dry hard. Use paint, twine, or Mod Podge only on the outer surface or upper rim, not where the candle sits. Leave enough open glass or space around the flame and avoid loose ribbon, paper, or dried material near heat.
Drafted with AI; not yet reviewed by a person.
Leave a Reply