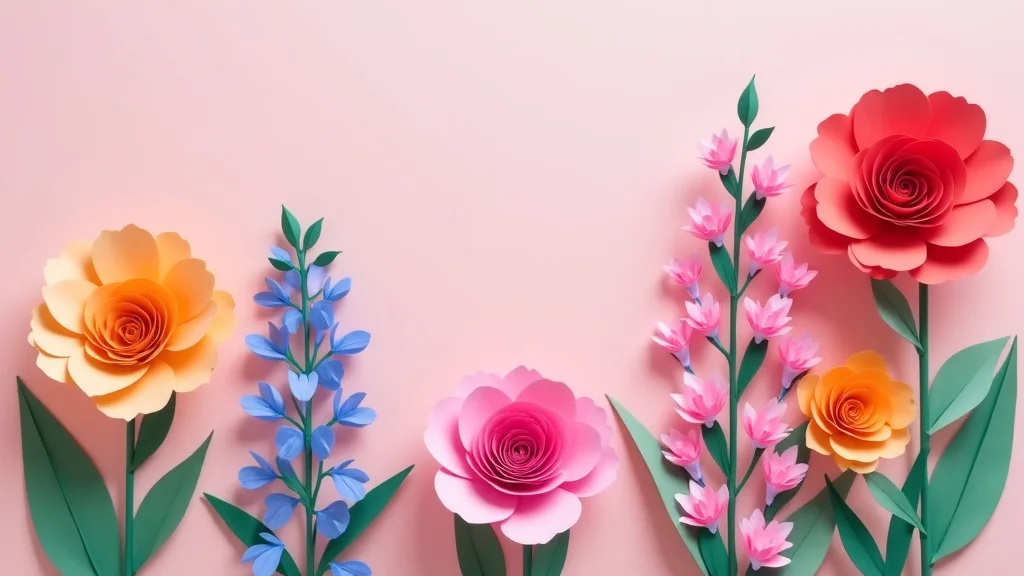
Remember that special occasion when you wanted the perfect decorations, but store-bought options felt impersonal? Or perhaps you’ve admired the intricate beauty of floral arrangements and thought, “I wish I could do that!” Well, you can! This guide explores crafting paper flowers at home, providing you with all the necessary knowledge and techniques. You’ll learn how to transform simple materials into stunning blooms. By the end, you’ll be able to create beautiful floral decorations for any event. This post equips you with essential skills, allowing you to create beautiful paper flowers, boosting your creative potential and providing handmade decorations.
Key Takeaways
- Learn the basic supplies needed for crafting paper flowers at home.
- Master essential cutting, folding, and shaping techniques.
- Discover various flower types and their unique construction methods.
- Gain inspiration for diverse projects, from bouquets to wall décor.
- Understand how to choose the right paper for different flower types.
- Explore techniques for adding color, texture, and realism to your creations.
Getting Started: Your Essential Paper Flower Toolkit
Before you begin crafting paper flowers at home, gather your essential tools and materials. Having everything ready ensures a smooth and enjoyable experience. This initial step sets the stage for success, allowing you to focus on the creative process. Here’s a comprehensive list of what you’ll need to begin:
Essential Materials
-
Paper: The foundation of your creations. Consider different types for diverse effects. Common choices include:
- Crepe Paper: Known for its stretch and texture, perfect for realistic petals. Its elasticity makes it easy to shape. Available in various weights, influencing the final look.
- Cardstock: Sturdy and available in many colors and textures. Ideal for flowers needing more structure. It can hold its shape well.
- Tissue Paper: Delicate and translucent, suitable for airy, lightweight flowers. Adds a touch of softness.
- Scissors: Sharp and precise scissors are vital for clean cuts.
-
Glue: A good adhesive secures your flowers. Options include:
- Craft Glue: Works for most paper types. Dries clear and is widely available.
- Hot Glue Gun: Provides an instant bond. Use with caution to avoid burns. Useful for complex projects.
- Floral Wire: Used for stems and structure. Available in various gauges (thicknesses). The gauge depends on the flower size.
- Floral Tape: A stretchy tape that adheres to itself, perfect for covering wire stems. Comes in green, brown, and other colors. Matches the stems’ appearance.
- Templates or Patterns: These guide the shape and size of your petals and leaves.
- Pencil and Eraser: For tracing and making temporary marks.
Having a well-stocked supply of these materials sets the stage for a delightful crafting experience. Remember to prioritize quality, especially with scissors and glue, to ensure optimal results. As you gain more experience, you may want to explore more specialized tools like petal shapers, but these basics will get you started.
Optional Supplies
- Cutting Mat and Rotary Cutter: Useful for straight lines and larger projects. Helps protect your work surface.
- Paint and Brushes: For adding color variations, shading, and details.
- Embellishments: Consider glitter, beads, or other decorative elements.
- Bone Folder: Used for crisp folding and scoring paper.
Optional supplies add extra dimensions to your creations. Experiment with these tools to personalize your flowers. They can help you achieve more intricate designs. Adding these allows for customization and unique touches to your projects.
Basic Techniques for Crafting Paper Flowers
Mastering these fundamental techniques elevates your crafting paper flowers at home from simple cut-outs to lifelike art. These techniques form the backbone of paper flower construction. Focus on precision and practice to hone your skills. These methods allow you to manipulate paper to create a variety of blooms.
Cutting
- Precision is Key: Use sharp scissors or a craft knife for clean lines. Ragged edges detract from the final product. Practice makes perfect.
- Templates: Trace petal and leaf templates accurately. Use a pencil to outline the shapes. Then carefully cut along the lines.
- Layering: For some flowers, layer multiple sheets of paper. This allows you to cut several petals simultaneously. This saves time and ensures uniformity.
Consistent cutting is vital. Ensure your tools are sharp and your hand steady. Proper cutting sets the foundation for your flower’s overall appearance. This step significantly impacts the look of your blooms.
Folding
- Creasing: A crisp crease adds dimension. Use a bone folder for precise folds. The bone folder ensures clean lines.
- Accordion Folds: Create volume by folding paper back and forth. This technique is often used for leaves and some petal styles. Vary the fold widths for texture.
- Curving: Gently bend or curve petals to give them a natural shape. Use your fingers or a rounded object. This adds depth and realism to your flowers.
Folding techniques bring life to flat paper. Experiment with different folding styles to create different effects. Practice these skills to make your flowers dynamic and visually appealing. These are useful in forming the final look.
Shaping
- Cuping: Bend the center of the petals inward. This mimics the natural shape of many flowers. Use your fingers or a shaping tool.
- Ruffling: Gently pull and stretch crepe paper to create a ruffled edge. This is a common technique used for delicate flowers. This adds texture and realism.
- Assembling: Combine cut, folded, and shaped pieces. Use glue or other adhesives to secure everything. The final step involves bringing all the elements together.
Shaping adds the final touches, bringing a three-dimensional quality to your paper flowers. With practice, you’ll learn to sculpt petals and leaves naturally. These final steps create a convincing look. These steps are what define the finished product’s appearance.
Exploring Different Flower Types
Each flower type has unique construction methods, offering a chance to explore a range of designs when crafting paper flowers at home. Experimenting with various flowers opens up endless possibilities. From roses to lilies, you can replicate many flowers. Each type requires specific techniques. This section helps you discover the beauty of different blooms.
Roses
- Spiral Petals: Cut a spiral from paper. Roll the spiral inward, starting from the outside. Glue the base to secure. The result is a classic rose shape.
- Layered Petals: Cut multiple petal shapes. Layer them, slightly offsetting each one. This creates a full, multi-layered rose. The overlapping adds dimension.
- Crepe Paper Advantage: Crepe paper is perfect for roses because of its stretch. This helps create realistic curves. The stretch also helps with shaping.
Roses are a favorite in paper flower crafting. Experiment with petal sizes and colors to personalize your roses. This allows for a great way to customize your flowers. You can change petal size and color for unique results.
Lilies
- Elongated Petals: Cut petals in an elongated, pointed shape. These petals are longer than those used for roses.
- Cuping and Curling: Cup and curl the petal edges for a natural look. This makes the petals appear realistic.
- Stamens: Add stamens using floral wire and small beads. They add detail to the flower’s core. These add realism to the lilies.
Lilies offer a more streamlined design. The elongated petals and detailed stamens bring this flower to life. Proper shaping and detail enhance its overall appeal. This flower type is ideal for achieving an elegant appearance.
Sunflowers
- Rounded Petals: Cut a large number of rounded petals. They are arranged around a central disk. The petals are what define this flower.
- Central Disk: Create the disk using brown or dark yellow paper. The disk can be a simple circle or have texture.
- Color Variations: Use varying shades of yellow and brown. This helps create a realistic appearance. This adds depth to the flower.
Sunflowers are cheerful and striking. The large petals and distinctive center make them a favorite. Sunflowers bring an unmistakable burst of sunshine. These flowers are known for their bright appearance.
Project Ideas for Crafting Paper Flowers
Once you’ve mastered the basics of crafting paper flowers at home, you can create various projects. These projects range from simple decorations to elaborate arrangements. These ideas inspire you and demonstrate the versatility of paper flowers. Each project allows you to test your skills.
Bouquets
- Mixed Blooms: Combine different flower types for a diverse and visually appealing bouquet. Incorporate roses, lilies, and other blooms. This adds variety to your work.
- Stem Support: Use floral wire stems, taped together with floral tape. They provide structural support. This allows the bouquet to stand upright.
- Wrapping: Use decorative paper or ribbon to wrap the stems. This provides a finished look to the bouquet. This adds the finishing touch.
Bouquets are a classic paper flower project. Experiment with color palettes and flower combinations to create unique arrangements. Use these as gifts for special occasions. Bouquets are a wonderful way to express yourself creatively.
Wall Décor
- Individual Flowers: Create large, individual flowers. Attach them to a wall. You can arrange them as a focal point.
- Wreaths: Construct a floral wreath. Use a foam base as the foundation. This creates a charming decoration.
- Shadow Boxes: Arrange paper flowers in a shadow box. This creates a three-dimensional art piece. You can add depth and interest.
Wall décor adds a touch of beauty to any space. The arrangements can personalize your home. Wall décor allows you to showcase your creativity. These projects create a lively and creative environment.
Table Decorations
- Centerpieces: Create centerpieces for special events. Use paper flowers, candles, and other decorations. This can create a beautiful environment.
- Place Settings: Add small paper flowers to each place setting. This adds a personalized touch to your table. These are useful for special occasions.
- Garlands: Create garlands. String paper flowers together. Drape them across tables or chairs. This adds festivity to the table.
Table decorations elevate any occasion. Paper flowers provide a unique and elegant look. These are ideal for weddings or other celebrations. Table decorations make any event feel special.
Choosing the Right Paper for Your Project
The type of paper you choose greatly impacts the look and feel of your creations when crafting paper flowers at home. Different papers offer unique qualities. These characteristics influence the final appearance of your flowers. This step is a critical aspect of the crafting process.
Crepe Paper
- Stretch: Crepe paper’s stretch is essential for shaping petals. It helps you create curves. This allows the petals to look realistic.
- Texture: Offers a textured surface. This adds depth to flowers. This is useful in crafting a realistic appearance.
- Weight: Comes in various weights. This affects how the paper behaves. Choose the right weight for your needs.
Crepe paper is a versatile choice for many flower types. Experiment with different weights to achieve the desired effect. This versatility makes crepe paper a favorite among crafters.
Cardstock
- Sturdiness: Holds its shape well. Ideal for flowers needing structural support. It offers the stability necessary.
- Color Variety: Available in a wide range of colors and finishes. This allows for diverse designs. The choices allow for various designs.
- Details: Better for intricate cuts and details. This allows for more precise petal shapes. Cardstock is excellent for achieving this effect.
Cardstock is a great choice for flowers needing a solid base. The vast color options allow for endless creative expression. Cardstock is often used for its durability.
Tissue Paper
- Delicacy: Creates lightweight, airy flowers. This adds a gentle, delicate appearance. The flowers look soft and light.
- Translucency: Allows light to pass through. Creates beautiful effects when used in layered petals. This produces a unique effect.
- Fragility: Requires careful handling. Avoid using too much glue. Be gentle when shaping the petals.
Tissue paper creates delicate, ethereal blooms. It is ideal for flowers needing a light and airy feel. It gives a unique translucent look.
Adding Color, Texture, and Realism
These techniques transform simple paper into convincing, lifelike flowers when crafting paper flowers at home. These details bring your creations to life. Using the right techniques can help add details to your work. This section enhances the visual appeal of your projects.
Coloring Techniques
- Watercolor: Use watercolor paints for subtle color gradients. Apply it to the edges of the petals.
- Crayons and Pencils: Add shading and details with crayons or colored pencils. Use these to add definition to your work.
- Spray Paint: Apply spray paint for a uniform color application. This helps create a smooth finish to your flowers.
Color is vital for realistic flowers. Experiment with different techniques to achieve depth and variation. Coloring is essential in producing vibrant colors. This is a crucial element of the process.
Texturing Techniques
- Embossing: Use embossing tools to add texture to the paper. This creates a three-dimensional effect. This is used for details in the petals.
- Ruffling and Curling: These techniques add natural movement. Use these techniques to create a more realistic look.
- Wrinkling: Gently crumple the paper. This adds an aged or rustic effect. This creates a unique texture.
Texture adds realism to paper flowers. Experiment with different techniques. These techniques make your flowers appear more natural. This creates a realistic, visual experience.
Realistic Details
- Veins: Use a scoring tool or a fine-tipped pen to create veins. This increases the realism of the leaves and petals. This adds a realistic effect.
- Stamens and Pistils: Add stamens and pistils to the center of the flowers. This increases realism. These help create a natural look.
- Color Variations: Mimic real flowers’ color variations with shading and highlights. This improves the overall realism of the flower.
Adding the details is the final step. These elements elevate the flowers’ appearance. These details significantly improve the look of the flower. Adding these details will create beautiful flowers.
Common Myths Debunked
Frequently Asked Questions
Question: What’s the best paper for beginners?
Answer: For beginners, crepe paper is highly recommended due to its stretch and forgiving nature. It’s easier to shape and manipulate. It’s a great paper to start with.
Question: What glue works best for paper flowers?
Answer: Craft glue works well. It dries clear and is easy to use. A hot glue gun is good for quick adhesion. It works well for instant results.
Question: How do I make my flowers look more realistic?
Answer: Focus on shaping, adding color variations, and including realistic details like veins and stamens. These details help create a natural look.
Question: Is it hard to make paper flowers?
Answer: It can be challenging, but it becomes easier with practice. Start with simple projects. These will build your skills and confidence.
Question: How do I store paper flowers?
Answer: Store them in a cool, dry place away from direct sunlight. This helps preserve the colors and shapes of your paper flowers.
Final Thoughts
Crafting paper flowers at home is a delightful hobby. It allows you to express your creativity. This guide has equipped you with the skills you need. You’ve discovered the tools and techniques required to create beautiful blooms. You’ve also explored various flower types and project ideas. Remember, the key to success is practice. Don’t be afraid to experiment with different papers and techniques. Each attempt improves your skills. Start with simple projects to build confidence. Slowly try more complex designs. As you continue crafting, you’ll develop your unique style. The possibilities are endless. Enjoy the journey of bringing paper to life. Your handmade paper flowers will add a special touch to any occasion. Now, grab your supplies and start creating!