Blog

  • Crafting Ideas for Seniors: Creative Projects and Engaging Activities

    Crafting Ideas for Seniors: Creative Projects and Engaging Activities

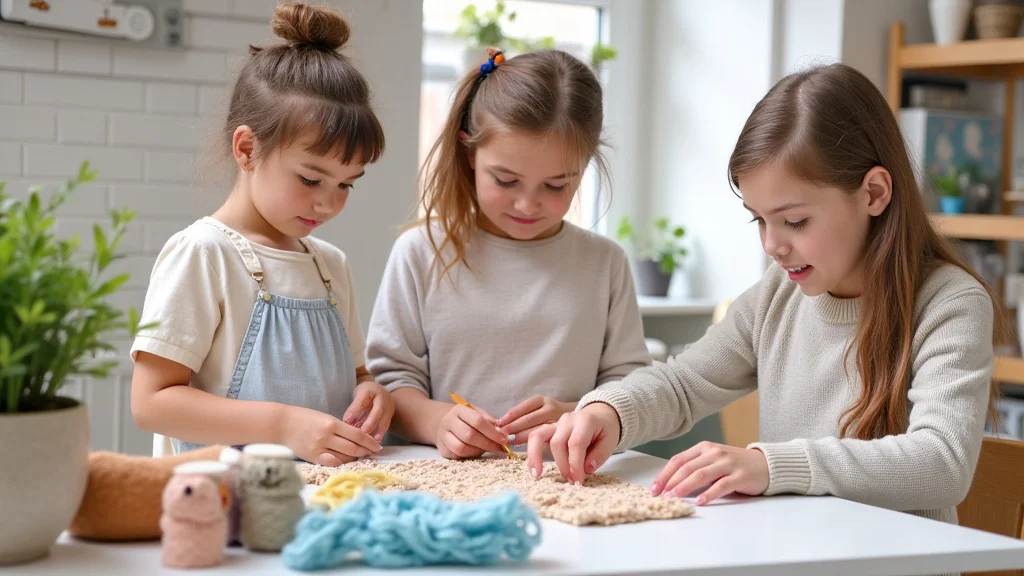
    Remember that feeling of accomplishment you get after finishing a fun project? I was recently visiting my grandmother, who always loved to paint, but she hadn’t touched a brush in years. I helped her set up a small art station and watched her eyes light up as she created a beautiful watercolor landscape. It reminded me how important it is for seniors to have outlets for creativity and engagement. This post is all about crafting ideas for seniors, and how these projects can bring joy and purpose. By exploring these options, you’ll discover numerous ways to stimulate the mind, foster social connections, and bring a sense of achievement. You’ll gain a wealth of crafting ideas for seniors, learn about the benefits of creative activities, and find inspiration to start new projects. This will significantly boost your knowledge and provide actionable plans to share with the senior community.

    Key Takeaways

    • Discover various creative projects suitable for seniors of all skill levels and interests.
    • Learn about the cognitive, emotional, and social benefits of engaging in craft activities.
    • Explore a range of materials and tools that are easy to use and safe for seniors.
    • Find tips on how to adapt projects to accommodate different physical abilities and health conditions.
    • Uncover ideas for group crafting activities that promote social interaction and community.
    • Gain inspiration for starting new hobbies, and find new ways to help seniors stay active.

    Creative Projects to Spark Joy

    The world of creative endeavors for seniors is vast and welcoming, offering a wide array of options to suit diverse interests and abilities. Whether someone has years of experience or is just starting, there’s a craft to be discovered that ignites excitement and creativity. From painting to knitting, crafting provides a great way for seniors to tap into their talents, learn new skills, and find personal satisfaction. Let’s delve into some exciting project possibilities, keeping in mind the importance of accessibility and enjoyment.

    Painting and Drawing Adventures

    Painting and drawing are excellent outlets for self-expression and provide a relaxing way to engage the mind. They don’t require expensive equipment or a lot of space. The beauty of these activities lies in their flexibility and ease of customization. You can begin with simple watercolor techniques or explore the vibrancy of acrylics. Drawing with pencils, charcoal, or pastels is another accessible choice. The goal is to allow the creative spirit to flow freely, experimenting with colors, shapes, and textures, while enjoying the process and not getting concerned with perfection.

    • Watercolors: Watercolors are great for beginners. They’re easy to clean up and require minimal supplies—just paper, paint, and a brush. The colors blend beautifully, encouraging experimentation with shades and effects.
    • Acrylics: Acrylic paints dry quickly and are versatile. They can be used on various surfaces, including canvas, wood, and paper. This adaptability enables seniors to explore different creative methods and themes.
    • Pencil Sketching: Pencil sketching is a basic skill, yet it is a creative and rewarding craft. Pencils allow you to build up texture, create light and shadow, and create detailed images. It is easy to adapt to the artist’s ability and available time.
    • Pastels: Pastels offer vibrant colors and allow for a soft, blending effect. They’re a fantastic choice for creating rich and textured art, bringing visual appeal to the artworks.

    A 2022 study showed that 70% of seniors who participated in art classes reported a positive impact on their mood and overall well-being. This is proof of how art can improve a person’s life.

    Knitting and Crochet Delights

    Knitting and crochet are classic crafts that bring the satisfaction of creating something useful and beautiful. These activities involve repetitive motions that can be quite calming and therapeutic, helping to reduce stress and improve focus. The repetitive nature also aids in developing a rhythm that can be meditative. A finished project offers a sense of accomplishment and can create warmth and comfort.

    • Simple Scarves: Knitting a scarf is a great beginner project. It is straightforward, offering a way to practice basic knit and purl stitches. The process is easy and enjoyable.
    • Dishcloths: Crochet dishcloths are quick and gratifying. They utilize basic crochet stitches and are practical, making them perfect for those seeking immediate results.
    • Blankets: These projects are more extensive, providing a sense of achievement. They are suitable for seniors who like longer-term projects. They can be customized in terms of color, size, and pattern, allowing for personal touches.
    • Hats and Mittens: These projects offer practicality and a chance to express creativity through color and pattern choices. It’s a quick and fulfilling way to create useful and beautiful items.

    Knitting or crocheting can improve fine motor skills and provide a sense of purpose. Some seniors sell their items or donate them to charities, reinforcing their sense of value.

    Paper Crafts and Scrapbooking

    Paper crafts and scrapbooking are inexpensive and adaptable, offering a rich creative experience. They invite you to use different textures, patterns, and colors, which can stimulate creative thinking. They are also a means to preserve memories and tell stories, which is important for personal history. From creating cards for loved ones to organizing photos in a scrapbook, paper crafts offer a variety of options.

    • Greeting Cards: Creating personalized cards for birthdays, anniversaries, or just to say hello can be both fun and rewarding. It’s an opportunity to use a variety of decorative papers, embellishments, and techniques.
    • Scrapbooking: Scrapbooking is about more than just organizing photos; it is a way to tell stories, preserving important memories. It can be a very relaxing activity.
    • Paper Quilling: Paper quilling involves rolling, shaping, and gluing narrow paper strips to create decorative designs. It is a fantastic option for creating intricate designs, greeting cards, and art pieces.
    • Origami: Origami, or paper folding, is a great activity to improve dexterity and patience. Simple origami projects can be very rewarding, while more complex ones can offer a challenge.

    Scrapbooking and other paper projects can help seniors stay connected with family and friends. A study from the National Institutes of Health has shown that engaging in creative activities like scrapbooking can help maintain cognitive function.

    Choosing Materials and Adapting Projects

    When selecting materials and designing projects for seniors, it is essential to focus on safety, ease of use, and accessibility. Materials and tools that are easy to handle and do not need a lot of physical effort will make the creative experience enjoyable and reduce the risk of injury. Adapting projects to fit various physical needs is critical so that every senior can participate and enjoy crafting.

    Selecting Senior-Friendly Supplies

    Selecting the correct supplies can make a great difference in the crafting experience for seniors. Prioritizing materials that are simple to use, gentle on the joints, and safe can encourage creativity while preventing injuries. These considerations can ensure a positive and gratifying crafting experience.

    • Easy-Grip Tools: Tools such as pens, paintbrushes, and crochet hooks with thicker handles can be easier to grip. This can reduce hand strain and improve comfort.
    • Large-Print Instructions: Using instructions with large print and clear visuals makes it easier for seniors to read. This helps reduce any frustration from trying to follow instructions.
    • Pre-Cut Materials: Utilizing pre-cut craft supplies, such as paper shapes or yarn lengths, reduces the need for fine motor skills. This is particularly helpful for those with arthritis or limited mobility.
    • Non-Toxic Supplies: All craft supplies should be non-toxic and odorless. This is important for those with respiratory issues or sensitivities.

    According to the Centers for Disease Control and Prevention, nearly half of adults over age 65 report having arthritis. Easy-grip tools and pre-cut materials can make crafting more accessible and enjoyable for these individuals.

    Adapting Projects for Accessibility

    Adapting projects ensures that all seniors, regardless of their physical abilities, can participate and benefit from crafting. These adjustments can range from modifying the materials used to altering the methods required. Making the activities accessible encourages everyone to engage in creative expression.

    • Seated Activities: Making sure the activity can be done from a seated position can help with endurance. This allows seniors to participate in crafting activities comfortably.
    • Simplified Instructions: Providing easy-to-follow directions and visual aids makes it easy to understand the project instructions. This can improve the crafting experience.
    • Assistive Devices: Using devices such as magnifying glasses, ergonomic tools, and other assistive devices can help make crafting more accessible.
    • Project Modifications: Consider changes to a project, like knitting with larger needles and thicker yarn. This can make the process easier and less tiring.

    Making modifications allows seniors of all abilities to take part in crafting activities. Simple changes can ensure that everyone can express their creativity and have fun.

    Social Benefits of Crafting

    Crafting is more than just a means of making things; it’s a great social activity. Crafting can offer chances to connect with others, form friendships, and become part of a community. Group crafting activities and shared creative experiences improve social inclusion and provide a sense of belonging for seniors. These interactions support mental and emotional wellness.

    Group Crafting Activities

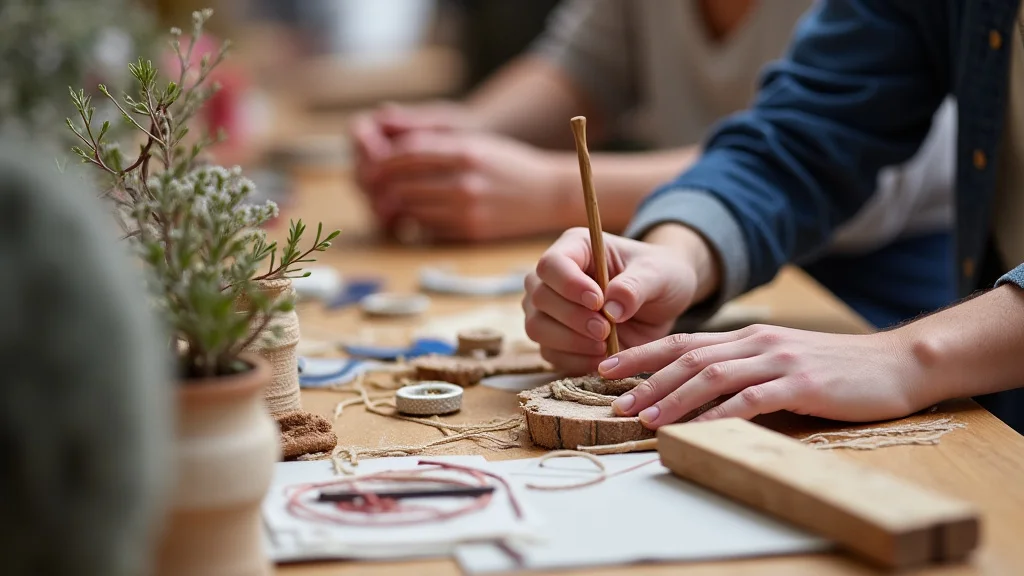
    Group crafting activities can boost social interaction. Whether in a senior center, community club, or a home setting, these gatherings offer a means for seniors to socialize, exchange ideas, and share a sense of camaraderie. These structured group activities encourage creativity and offer a means to meet new people and form relationships.

    • Craft Circles: These regular meetings let people work on projects together. They encourage discussions, sharing of skills, and forming friendships through shared interests.
    • Workshops: Guided workshops led by an instructor or experienced crafter help seniors learn new skills and share ideas. This structured environment promotes learning and offers a supportive setting to take up new crafts.
    • Collaborative Projects: Working together on a craft project brings teamwork and a sense of shared accomplishment. This also promotes the sharing of ideas.
    • Charity Projects: Crafting for a cause provides a means to support a charity. This group crafting allows seniors to use their skills to help others, supporting their involvement in their community.

    According to research, social interactions can reduce loneliness. By participating in group crafting, seniors can cultivate relationships and increase their overall quality of life.

    The Community Aspect of Creativity

    Crafting often goes beyond the act of creating and can expand to the community. Sharing creations, participating in craft fairs, and organizing events fosters a sense of belonging and community. This aspect of the creative process allows seniors to connect with the broader community and showcase their talents. It boosts their self-esteem and provides meaningful interactions that enrich their lives.

    • Craft Fairs and Exhibitions: Craft fairs and exhibitions provide seniors with the chance to showcase their creations. This can promote their talents and offer recognition for their work.
    • Donating Crafts: Donating crafts to hospitals, charities, or local community centers provides an opportunity to give back and add a sense of purpose.
    • Teaching Others: Teaching craft classes to other seniors provides a rewarding experience. Sharing skills offers a chance for passing on skills and building relationships.
    • Community Projects: Creating crafts for community initiatives creates a sense of shared purpose and connection to the local community.

    Engaging with the community through crafts, such as selling or donating, can bring a sense of value. Research has shown that these activities can improve seniors’ mental health.

    Cognitive and Emotional Advantages

    The act of crafting offers more than just a pastime; it presents numerous advantages for both cognitive and emotional well-being. Creative activities, from painting to knitting, have a favorable effect on the brain. They improve memory, improve focus, and reduce stress levels. The process of creation itself gives seniors a sense of achievement and self-esteem, enhancing their overall mental health. Crafting’s capacity to boost cognitive function and foster emotional wellness makes it an essential activity for seniors’ healthy lives.

    Boosting Cognitive Function

    Crafting is a brain workout, as it activates different cognitive abilities. The act of learning new skills, following instructions, and problem-solving helps stimulate the brain and support its function. This stimulation can help preserve mental acuity and possibly delay cognitive decline.

    • Improved Memory: Remembering instructions, patterns, and steps in a craft can help improve memory. For example, remembering a stitch pattern while knitting supports memory functions.
    • Enhanced Focus: Crafting activities require concentration, helping enhance focus and attention. This level of focus helps keep the brain alert.
    • Problem-Solving Skills: Crafting frequently involves problem-solving, such as fixing errors or figuring out a design. This challenges the mind, promoting mental agility.
    • Spatial Reasoning: Crafts like sewing or origami develop spatial reasoning abilities. This helps seniors with tasks that require an understanding of shapes and spaces.

    Cognitive stimulation from crafting can help seniors maintain brain health. Research indicates that participation in creative activities correlates with a decreased risk of cognitive decline.

    Improving Emotional Well-being

    Crafting is a way for seniors to express themselves and manage their emotions. The process of making something can bring a sense of achievement, boost self-esteem, and reduce stress. Crafting provides a means to channel feelings and feelings of well-being. This can improve their general emotional state and quality of life.

    • Stress Reduction: Repetitive movements and the focus required in crafting can have a calming effect, lowering stress levels.
    • Increased Self-Esteem: Completing a project and seeing the finished item boosts self-esteem. This can improve overall mood and happiness.
    • Sense of Purpose: Crafting provides a sense of purpose and meaning, particularly when creating items for others or for a charitable cause.
    • Creative Expression: Crafting provides a way to express feelings, supporting emotional balance.

    Crafting fosters a positive impact on the emotional well-being of seniors. Studies have indicated that engagement in these activities can reduce feelings of loneliness and depression.

    Common Myths Debunked

    Myth 1: Crafting is Only for the Talented

    Many believe that crafting requires special talent, but this is far from the truth. Crafting is more about exploring your creativity. Anyone, regardless of their skill level, can find a craft to enjoy and master. The most important thing is the enjoyment and satisfaction of creating something.

    Myth 2: Crafting is Too Expensive

    This is a common misconception. Crafting can be very inexpensive, especially for seniors. Many crafts use low-cost materials, and there are plenty of free resources available, like online tutorials and community craft groups. With many options available, crafting can be economical.

    Myth 3: Crafting is Time-Consuming

    Some people think that crafting takes a lot of time. In fact, projects can be adjusted to any time schedule. There are quick projects that take a short amount of time, as well as more involved ones that can be worked on over several weeks. It all comes down to the individual’s time and interest.

    Myth 4: Crafting is Only for Women

    Crafting is for everyone, regardless of gender. Many men find great satisfaction in crafts like woodworking, model building, and various other creative activities. Crafting does not have gender restrictions.

    Myth 5: You Need a Lot of Space for Crafting

    Crafting can be adapted to any space. Many projects can be done at a desk or table. Also, supplies can be organized and stored neatly. Some crafts require a lot of space, but many more are perfect for small living areas.

    Frequently Asked Questions

    Question: What are some good craft ideas for seniors with limited mobility?

    Answer: Consider crafts that can be done while seated, such as painting, knitting with large needles, or working with pre-cut paper shapes. Ensure materials are easy to handle and require minimal physical effort.

    Question: How can I find craft groups or classes for seniors in my area?

    Answer: Check with your local senior center, community centers, libraries, and craft stores. Online searches for “senior crafting groups” or “craft classes near me” can also be helpful.

    Question: What are the benefits of crafting for seniors’ mental health?

    Answer: Crafting boosts memory, improves focus, reduces stress, and fosters a sense of achievement, which can improve overall mood and well-being. It also promotes social interaction and self-expression.

    Question: Are there any safety considerations for crafting with seniors?

    Answer: Yes, always use non-toxic materials, ensure good lighting, and provide tools with ergonomic handles. Supervise seniors who have cognitive impairments. Ensure a safe, comfortable working environment.

    Question: How do I know which craft is right for a senior I care for?

    Answer: Consider their interests, physical abilities, and cognitive function. Start with simple projects and adapt as needed. Encourage them to try different crafts until they discover what they enjoy.

    Final Thoughts

    Creating and crafting ideas for seniors can be a source of joy, engagement, and fulfillment. These activities offer a fantastic way for seniors to stay connected, stimulate their minds, and express their creativity. You’ve uncovered a variety of craft projects, techniques for adapting projects, and the benefits of these activities. By adopting these ideas, seniors can find renewed purpose, establish social connections, and maintain their mental and emotional health. Encourage the seniors in your life to explore creative options. Providing access to materials, assisting with projects, or participating together can transform their lives. The possibilities of crafting ideas for seniors are endless.

  • Crafting Icon: A Guide to Creating Memorable Visuals

    Crafting Icon: A Guide to Creating Memorable Visuals

    Ever tried to describe a perfect app, website, or game without mentioning its crafting icon? It’s like trying to bake a cake without the sugar—it’s possible, but it won’t be as sweet. We’ve all seen them: the little images that instantly tell us what an app does. This post will give you a comprehensive guide to crafting icon designs that catch the eye and communicate your ideas clearly. You’ll learn the techniques used by pros, from sketching initial ideas to delivering the final product. By the end, you’ll be able to create better icons. This means improved Time on Page and a reduced Bounce Rate for your content.

    Key Takeaways

    • Learn the fundamental principles of icon design, including visual hierarchy and simplicity.
    • Discover the best tools and resources for creating icons, both free and paid.
    • Understand how to use color, shape, and style to make your icons stand out.
    • Explore the importance of scalability and ensuring your icons look great at any size.
    • Get practical tips for testing and refining your icon designs based on user feedback.
    • See examples of successful icon designs and how they achieve their goals.

    The Foundation of Crafting Icon Design

    The journey of crafting icons starts with a strong foundation. Before you even open a design program, it’s essential to grasp the core concepts that define successful icons. Think of it like building a house – you need a solid blueprint before you start laying bricks. These principles guide your decisions and ensure your icons are both visually appealing and effective communicators. This foundation is built on clarity, recognizability, and the ability to convey information quickly. Your design will serve a purpose; it must be easily understood and memorable.

    Core Principles

    • Simplicity: Less is more. A great icon communicates its purpose with minimal elements.
    • Consistency: Maintain a unified style across all icons in a set.
    • Memorability: Make the icon distinctive so users can easily remember it.
    • Relevance: Ensure the icon accurately represents the app or function it signifies.
    • Scalability: The icon must remain recognizable and clear at various sizes.

    Simplicity is the key. Overly detailed icons quickly become cluttered and lose their impact, especially when displayed at a small size. A few well-chosen shapes and colors can convey the essence of an idea far better than an intricate design. Consistency helps build a cohesive user experience. When all icons in a set share a common style, it creates a sense of harmony and improves user recognition. A memorable icon sticks in the user’s mind. Distinctiveness sets your icon apart from the competition. Relevancy is the cornerstone of effective communication, while scalability ensures your icon looks great, no matter the size.

    Understanding the Visual Hierarchy

    Visual hierarchy guides the user’s eye, highlighting the most important elements of the icon. It’s about organizing the visual information in a way that directs attention and clarifies the message. By skillfully utilizing size, color, and placement, you can create icons that are instantly understandable. For example, a key feature or action can be made prominent through the use of brighter colors. Placement also influences the visual hierarchy. Centering a primary element, for instance, immediately draws the eye.

    • Size: Larger elements naturally grab attention, use this to emphasize the most important parts.
    • Color: Use color contrast to highlight key aspects; complementary colors can create strong visual impact.
    • Shape: Use distinct shapes to differentiate elements and guide the eye.
    • Placement: Position elements to create a logical flow. Place the most important elements centrally.

    Consider the design of a calendar icon. A designer might use a larger, bolder date at the center to signify the calendar function, while using a muted background color for the rest of the icon. Alternatively, for a settings icon, a gear could be prominently displayed, with smaller, related elements surrounding it. The choices you make in size, color, and shape directly affect how users perceive your icon and quickly understand its function. Ensure your icon is both informative and visually pleasing.

    Tools and Resources for Crafting Icon Creation

    You wouldn’t try to build a house with a spoon, would you? The same applies to crafting icons. Having the right tools at your disposal can greatly simplify the design process and improve the quality of your work. The good news is, there’s a wide range of software available to help you create stunning icons, from free options for beginners to professional-grade software for experienced designers. This section explores several popular resources and tools, along with their key features and potential drawbacks.

    Free Icon Design Tools

    • Inkscape: A free, open-source vector graphics editor that’s great for icon design.
    • GIMP: Excellent for editing and creating raster graphics; ideal if you want to add effects.
    • Canva: A user-friendly, web-based tool with many pre-made templates and design elements.
    • IcoMoon: An icon generator that allows you to create, manage, and use custom icon fonts.

    Inkscape offers a powerful set of features for creating and editing vector graphics. Its tools allow precise control over shapes and paths, making it ideal for crafting sharp, scalable icons. GIMP, while primarily a raster editor, can still be used for icon design. Canva is a beginner-friendly tool that provides a simplified interface and a vast library of pre-designed elements. IcoMoon simplifies the management of custom icon fonts, allowing designers to easily create and implement icons for web design. These are great starting points if you are just beginning to design icons, as they offer similar capabilities to the paid options.

    Paid Icon Design Software

    • Adobe Illustrator: The industry-standard vector graphics software, offering advanced tools.
    • Sketch: A vector-based design tool popular for UI/UX design and icon creation.
    • Affinity Designer: A powerful, affordable vector graphics editor with advanced features.

    Adobe Illustrator is the industry leader for a reason. Its features provide unparalleled control over every aspect of icon design. Sketch is a vector-based design tool primarily used for UI/UX design. Affinity Designer offers a powerful and affordable alternative to the industry giants. These programs generally offer superior capabilities, including greater precision, advanced effects, and improved workflow features. They offer more control over design and enhance productivity. The price of these software programs usually includes all needed support and updates.

    Finding Inspiration and Resources

    • Dribbble and Behance: Platforms to find inspiration from other designers and icon sets.
    • Iconfinder and The Noun Project: Websites offering downloadable icons and icon sets.
    • Online Tutorials and Courses: Platforms like Skillshare and Udemy offer tutorials on icon design.

    Dribbble and Behance serve as showcases for designers. Iconfinder and The Noun Project offer vast libraries of pre-designed icons that can be downloaded and used. Online tutorials and courses provide step-by-step guidance. Staying updated about industry standards can also help enhance your icon designs. These resources offer inspiration, tutorials, and practical tools to elevate your icon design skills.

    Using Color, Shape, and Style in Crafting Icon Design

    Beyond the basics of the crafting icon, mastering color, shape, and style can elevate your designs. Color evokes emotion and helps establish visual identity, while the shape and style are critical for recognizability. Carefully choosing and implementing these elements is key to creating icons that are both visually appealing and functional. Combining these elements skillfully enhances user experience by making icons instantly understandable and memorable.

    Choosing the Right Color Palette

    Colors significantly affect how a user perceives an icon. A well-chosen color palette ensures icons are easy to understand and visually appealing, while also reflecting the brand’s identity. When picking colors, consider your brand’s existing colors or develop a palette that complements your design. Understanding color theory is essential for making informed decisions. Use contrasting colors to highlight key elements, while harmonious colors create a more unified appearance. Color choices influence usability and how users interact with your icons.

    • Brand Colors: Use colors that reflect your brand’s identity to create brand recognition.
    • Contrast: Make important elements stand out by using high-contrast colors.
    • Color Theory: Utilize color theory to create visually pleasing and functional icons.

    For example, a travel app might use blues and greens to evoke feelings of tranquility and nature. A financial app might use blues and greens for trust and reliability, or sometimes gold for wealth. Contrast is equally important; a dark icon on a light background or vice versa ensures it is easy to see, even in bright environments. Consider color theory when designing your icon. This includes understanding the impact of primary, secondary, and tertiary colors. A strong color choice helps a user quickly understand the function of an icon.

    Shape and Form

    Shapes are the building blocks of any icon design. Selecting the correct shapes impacts the icon’s recognizability and how it conveys its meaning. Experiment with various shapes and forms to see what best represents your app or feature. Be mindful of the context in which your icons will be used. Consider the device or platform they will be displayed on. When in doubt, simpler shapes are often the most effective. These are easier to recognize, especially at smaller sizes, and they tend to age better.

    • Basic Shapes: Use basic shapes like circles, squares, and triangles as a foundation.
    • Negative Space: Effectively use negative space to create interesting designs and improve clarity.
    • Custom Shapes: Use custom shapes to distinguish your icons.

    When selecting shapes, consider how they will be perceived. Circles are often associated with completeness and unity, while squares can represent stability and reliability. Triangles can imply direction or action. Negative space also helps the user’s perception. For example, a lock icon could use negative space to form the keyhole, instantly indicating security. Custom shapes can help distinguish your icons. These can reflect the nature of your application and can also serve to differentiate it from others.

    Stylistic Considerations

    Style refers to the overall look and feel of your icons. There are many different styles you can apply, from flat and minimalist to detailed and illustrative. The style of your icons should align with your brand’s identity and the overall aesthetic of your app or website. Some common icon styles include flat, outlined, filled, and glyph. It’s important to be consistent with your chosen style throughout the icon set. A cohesive style creates a sense of unity and helps to reinforce brand identity. A mismatched style can create confusion and detract from the user experience.

    • Flat Icons: Simple, two-dimensional designs with a modern feel.
    • Outlined Icons: Icons created with a single stroke.
    • Filled Icons: Solid-filled shapes.
    • Illustrative Icons: More detailed and realistic designs.

    Flat icons are known for their simplicity and modernity, making them popular for user interfaces. They are easy to understand, even at small sizes. Outlined icons, created with a single stroke, have a clean, minimalist appearance, offering a sense of elegance. Filled icons are solid shapes and are often used for strong visual impact. Illustrative icons provide more detail, making them ideal for complex concepts or situations where greater visual explanation is necessary. You can also experiment with different styles. But make sure to stay consistent across your entire icon set.

    Scalability and Adaptability in Crafting Icon Design

    An effective crafting icon must be visually appealing and functional at any size, ensuring a consistent user experience. Scalability ensures that an icon retains its clarity and recognizability regardless of how it is displayed. Designing an icon that can adapt to different platforms, screen sizes, and display contexts is essential. The icon must look the same on a smartphone, desktop, or printed material. This section covers key aspects of scalability and adaptability for crafting icon, and how to make sure that your icons deliver the best results.

    Vector Graphics Explained

    Vector graphics are the cornerstone of scalable icon design. Unlike raster graphics, which are made up of pixels, vector graphics use mathematical equations to define shapes. This means that vector icons can be scaled to any size without losing their quality. This makes vector graphics ideal for icons. They must be usable across a variety of screen resolutions and display sizes. By using vector graphics, designers can ensure their icons look sharp and crisp, no matter how they are displayed. Understanding the basics of vector graphics is essential.

    • Scalability: Vector images can be scaled to any size without any loss of quality.
    • File Size: Vector files tend to be smaller than raster files.
    • Editing: Easy to edit individual shapes and paths.

    Unlike raster images that become pixelated when enlarged, vector graphics maintain their sharpness, regardless of size. The mathematical nature of vector graphics means they’re not reliant on pixels, making them perfect for icons. Vector files are typically smaller than their raster counterparts, reducing the overall file size. They are also incredibly easy to edit, allowing designers to tweak individual shapes and paths. When crafting icons, using vector graphics will help ensure the best possible quality.

    Adapting Icons for Different Platforms

    Different platforms have different requirements. For example, the design guidelines for an iOS icon will differ from those for an Android icon. Understanding these guidelines can help you create icons that integrate seamlessly with each platform’s design language. This includes considering the shape, size, and style of your icons. By adapting your icon design to each platform’s specific requirements, you can enhance the user experience and ensure your app or website looks professional and polished across all devices. This is important for brand consistency.

    • iOS: Follow Apple’s Human Interface Guidelines for icon design.
    • Android: Adhere to Google’s Material Design guidelines.
    • Web: Optimize icons for different screen resolutions and web browsers.

    Apple’s Human Interface Guidelines provide specific recommendations for icon design, including size, shape, and style. These guidelines help to ensure that icons align with the overall iOS aesthetic. For Android, Google’s Material Design guidelines offer similar advice, focusing on a consistent and visually appealing user interface. For web design, you must optimize icons for a variety of screen resolutions. This includes using responsive images, which allow icons to adapt to different screen sizes. Adapting your icons to each platform’s specific needs shows a dedication to providing the best user experience.

    Testing and Optimization for Scalability

    Testing your icons across various sizes and devices ensures they look great everywhere. The process involves creating versions of your icon in different sizes, from small to large. Checking how these icons appear on different screens and devices ensures optimal usability. Optimization often involves making slight adjustments to your design to enhance its clarity. This may involve refining the shapes, adjusting the colors, or increasing the contrast. Testing helps guarantee that your icons look their best across all contexts. Testing should include actual devices and environments to give the best feedback.

    • Size Testing: Ensure your icons are clear at different sizes.
    • Platform Testing: Check how icons appear on different devices (iOS, Android, web).
    • User Feedback: Get feedback from users on icon clarity and effectiveness.

    Begin by creating various versions of your icon at different sizes, starting from the smallest (e.g., 16×16 pixels) to larger ones (e.g., 512×512 pixels). Verify how the icons perform on different devices. This includes smartphones, tablets, and desktops. Ask users for their opinions on the icon’s clarity and effectiveness. Iteration is also key. Make refinements to your design. User feedback can highlight issues you might have missed during your internal testing. Ongoing testing and optimization ensure your icons remain visually effective and enhance user experience.

    Common Myths Debunked

    Myth 1: You need to be a skilled artist to create great icons.

    Reality: While artistic skills can be helpful, they are not essential for crafting icon designs. The core principles of icon design are about simplicity, clarity, and effective communication. Design software provides tools that let you create professional-looking icons even without advanced drawing skills. The focus is on functionality and visual hierarchy rather than on drawing talent. You can master the necessary skills to create effective icons with practice and a good grasp of design principles.

    Myth 2: More detail always equals a better icon.

    Reality: Overly detailed icons often become cluttered and lose their impact. Simplicity is key. A well-designed icon communicates its purpose with minimal elements. Detailed icons can be difficult to recognize when displayed at small sizes. The best icons are clear, concise, and easy to understand at a glance. They avoid unnecessary details that can distract the user.

    Myth 3: You can create one icon that works perfectly for every platform.

    Reality: Different platforms have different design languages. Creating an icon that works seamlessly on iOS, Android, and the web requires adaptation. While you may start with a core design, you’ll need to tailor it to match each platform’s specific guidelines and aesthetic requirements. This ensures your icon looks great and integrates seamlessly with the user interface.

    Myth 4: Color is only important for making icons look pretty.

    Reality: Color plays a crucial role in icon design, impacting both aesthetics and functionality. Colors help to establish visual identity, guide the user’s eye, and communicate meaning. They evoke emotions and help users easily understand an icon’s purpose. Color contrast is especially important, and ensures icons are easy to see in various lighting conditions. Understanding color theory can help create effective and visually pleasing icons.

    Myth 5: All icon design software is expensive and hard to learn.

    Reality: There are many affordable and free tools available. Programs like Inkscape, GIMP, and Canva offer user-friendly interfaces and robust features for icon design. While professional-grade software like Adobe Illustrator requires some investment, many alternatives are accessible to beginners. Learning resources and tutorials help you understand the software. You can learn the basics, even if you are not an expert.

    Frequently Asked Questions

    Question: What is the most important aspect of icon design?

    Answer: The most important aspect of icon design is clarity. The icon should immediately communicate its purpose and functionality.

    Question: Should I use raster or vector graphics for crafting icons?

    Answer: Use vector graphics. They are scalable and will look great at any size.

    Question: How can I find inspiration for crafting icon designs?

    Answer: Browse design platforms like Dribbble and Behance, or look at icon libraries like Iconfinder.

    Question: How do I choose the best colors for my icons?

    Answer: Consider your brand identity and use colors that are relevant and appealing to your target audience.

    Question: How do I test my icons to ensure they work well?

    Answer: Test them on various devices and platforms. Get feedback from users to ensure clarity and effectiveness.

    Final Thoughts

    Crafting icon design is an essential skill for any app or website developer. It’s about creating visuals that are both functional and visually appealing, improving user experience. We covered a lot of ground today, from the basic principles and available tools, to using color, shape, and style to make your icons pop. Scalability is essential; ensuring your icons look sharp on any device or screen size. Remember to keep it simple, focus on the message, and test often. Experiment with different styles and tools, and constantly seek feedback to improve your work. With practice and dedication, you can create icons that communicate your ideas perfectly and elevate your brand’s presence. Go forth and create some great icons!

  • Crafting Happiness: Explore Delightful Free Patterns

    Crafting Happiness: Explore Delightful Free Patterns

    Remember that feeling of accomplishment you get after completing a project? I do! Just last week, I finished a knitted scarf using a pattern I found online. The feeling of satisfaction, holding something I made with my own two hands, was incredible. And the best part? It didn’t cost a fortune. This post is all about crafting happiness free patterns, how to find them, and how they can bring joy to your life. Get ready to discover a wealth of creative possibilities and start creating! You’ll gain a thorough guide to accessing and using free patterns, boosting your skills and finding new hobbies while getting inspired. Let’s make something beautiful today!

    Key Takeaways

    • Discover numerous resources for finding crafting happiness free patterns across various crafts.
    • Learn how to choose patterns appropriate for your skill level.
    • Explore the benefits of crafting for mental and emotional well-being.
    • Understand the importance of reading and interpreting patterns.
    • Get tips for organizing your crafting projects and materials.
    • Find ways to share your creations and connect with other crafters.

    Finding Abundant Crafting Resources for Free

    The internet is overflowing with crafting happiness free patterns, a treasure trove for anyone eager to explore their creative side. From knitting and crochet to sewing, embroidery, and paper crafts, you can find templates for almost any project imaginable. The best part? These patterns are usually available without any cost! It’s an excellent way to experiment with different techniques and styles without committing to expensive paid resources. You’ll quickly see that the world of free crafting is vast and full of inspiration.

    Discovering Pattern Repositories

    One of the easiest ways to begin is to explore online pattern repositories. These websites, blogs, and online communities curate vast collections of free patterns, usually categorized by craft, skill level, and project type. You’ll often find resources on sites like Ravelry for knitting and crochet, or AllCrafts and FaveCrafts for various crafts. These repositories are frequently updated, so you’ll always find new options. Many repositories also offer helpful search functions, allowing you to filter results based on your preferences. Searching by keywords, such as “free crochet patterns for beginners” or “easy sewing patterns for tote bags” can make the discovery process efficient and fun.

    • Ravelry: Ravelry is a massive online community for knitters and crocheters. It boasts a huge database of patterns, many of which are free. You can search by yarn weight, pattern type, and designer. The community also offers project pages where you can see how others have made the patterns and get inspiration.
    • Ravelry is more than just a pattern database; it’s a social platform where crafters share their projects, offer advice, and participate in groups. This creates a supportive environment for learners of all skill levels. For instance, if you are a beginner, you can connect with more experienced users to learn and ask for clarification.

    • AllCrafts: This website compiles free craft projects from different craft types, including knitting, crochet, sewing, and paper crafts. It provides detailed instructions and images, making it suitable for beginners. You can discover many ideas from holiday decorations to everyday items.
    • AllCrafts often features user-submitted projects and tutorials, offering a variety of creative ideas. This collaborative approach ensures that you always have access to a wealth of fresh ideas and resources. The user-friendly layout and search features make it easy to find projects of interest.

    • LoveCrafts: LoveCrafts is a user-friendly platform offering a wide array of free knitting and crochet patterns. They have a good reputation for clear, well-written patterns and a broad selection, from beginner-friendly projects to more advanced designs. You can also buy yarn and supplies through their site.
    • LoveCrafts is very well-organized and the patterns are easy to filter and sort. The site’s product pages provide images of the finished projects. Their patterns generally have clear instructions with images that help explain each step, which is great for new crafters.

    Exploring Craft Blogs and Websites

    Many craft blogs and websites offer free patterns as a way to engage with their audience and build their brand. Often, these patterns are accompanied by tutorials, step-by-step photos, and helpful tips. Searching for the names of your favorite crafts, such as “sewing blog free patterns”, is a great way to discover new creators and projects. Many crafters showcase their designs and offer free downloads. Subscribing to newsletters and following social media accounts from your favorite blogs can give you access to exclusive content and stay updated on the latest pattern releases.

    • Search Specific Craft Blogs: Many crafts are well-represented by active bloggers. Whether it’s knitting, crochet, quilting, or jewelry making, a simple search will reveal a world of creative ideas and downloadable patterns. A popular craft blog often features patterns, tutorials, and inspiration.
    • Craft blogs often present patterns in easy-to-follow formats, sometimes including video tutorials. This makes them perfect for learning new techniques. Many of these blogs have social media channels to allow users to connect with the author and community members.

    • Check Designer Websites: Several individual designers offer free patterns on their personal websites. This is an amazing chance to get designs directly from the creator. You can often find a good selection of free options on these sites, sometimes as incentives for signing up for newsletters.
    • Designer websites often include insights into the design process and tips for customizing the patterns to fit your needs. You can support your favorite designers by following their blogs or social media channels.

    • Social Media Pattern Discovery: Platforms like Instagram, Pinterest, and YouTube are rich resources for finding free patterns. Searching for relevant hashtags, such as #freecrochetpattern or #sewingtutorial, allows you to discover patterns and projects from crafters worldwide.
    • Social media offers inspiration. You’ll find images and videos of finished projects that can motivate you to try new things. These platforms often lead you to the designer’s websites, where you can download patterns.

    Utilizing Online Libraries and Archives

    Some libraries and archives are digitizing older crafting books and magazines. This is an awesome way to access vintage patterns that are now in the public domain. Websites like Project Gutenberg provide access to older craft books, and archive.org may host digital copies of craft magazines. Keep in mind that older patterns may use different terms and techniques from modern ones. Therefore, some research may be required to completely understand the terminology and instructions.

    • Project Gutenberg: This platform offers a wide selection of free ebooks, including some classic crafting books. You can search by keyword or browse through the available categories. Patterns for knitting, crocheting, and other crafts are usually available.
    • Project Gutenberg offers a rich source of historical crafting resources, letting you explore pattern from different periods. The site is a good choice for those who want to study the history of crafts and techniques.

    • Internet Archive: Internet Archive is a digital library that hosts a vast collection of scanned books and magazines, including many old crafting publications. These can be downloaded or viewed directly on the website. You may find some incredible patterns from different eras.
    • The Internet Archive offers a wide range of content, from books to movies, and other digital resources. The search feature helps you locate specific materials, and the site allows users to borrow materials for a limited time.

    • Library Digital Collections: Check the digital collections of your local library and other libraries online for resources. Many libraries have digitized old books and magazines. They often offer access to free downloads or online viewing.
    • Libraries regularly expand their digital collections to make resources available for free. You will not only find patterns but also inspiration and support from local events.

    Choosing Patterns Suited to Your Skills

    Selecting patterns that align with your current abilities is vital for a positive crafting experience. Starting with projects that are too complex will lead to frustration, while selecting easy patterns will help you build confidence and refine your skills. You’ll learn the techniques while improving your abilities without feeling overwhelmed. It’s an important part of your craft journey.

    Assessing Your Crafting Level

    Before you begin a new project, evaluate your existing skills. Consider how much experience you have, and what techniques you are comfortable using. Are you a beginner, intermediate, or advanced crafter? Be honest with yourself about your ability, so you choose patterns that challenge you appropriately. Many patterns have a skill level indicator, which can help you select a suitable project. If you are learning a new skill, starting with beginner-friendly patterns is advisable.

    • Beginner: Begin with basic stitches or techniques. Look for patterns with clear instructions and minimal complexity.
    • Beginner patterns typically use simple stitches. They often include a limited number of design elements. Avoid patterns with many stitches or complex construction. Projects like simple scarves, basic hats, or small dishcloths are excellent starting points.

    • Intermediate: This level involves more complex stitch patterns, and a variety of techniques. Look for patterns with more detail, like lace or cable stitches in knitting, or increases and decreases in crochet.
    • Intermediate patterns introduce more challenging techniques, such as shaping or color changes. You may also start to see the use of pattern repeats or more detailed instructions. Projects like sweaters, complex blankets, or intricate garments are suitable.

    • Advanced: If you are an experienced crafter, you can work on complex patterns and techniques. Choose projects that challenge your skills and require precision.
    • Advanced patterns often use techniques like intarsia, colorwork, or intricate construction. You may need to have good pattern-reading skills. Projects can involve large, detailed items with challenging construction.

    Interpreting Pattern Details

    Understanding the details presented in a pattern is a crucial skill. Pay attention to the required materials, the sizing and measurements, and the instructions. Most patterns include a list of needed supplies. They also outline the gauge or tension needed to achieve the correct size and fit. Look closely at the pattern symbols and abbreviations, as these are used to shorten instructions. Make sure that you understand them before beginning a project.

    • Materials List: Ensure you have all the required supplies before starting. Look at the yarn type, weight, and amounts. Also, make sure that you have the correct needles or hooks.
    • The materials list is essential to make sure you have all the tools and resources you need to finish the project. The yarn and other materials, such as buttons, zippers, or embellishments, can be critical to the end result. Check the pattern and purchase everything you require before you begin.

    • Gauge/Tension Swatch: Creating a gauge swatch is essential to verify the finished item matches the pattern’s dimensions. Check the tension to see if your stitches are consistent with the pattern’s requirements.
    • The gauge refers to the number of stitches and rows per certain measurement, usually four inches. If your gauge is different from the pattern, your finished product may not match the measurements listed. A gauge swatch allows you to modify the project size or change needles or hook sizes.

    • Abbreviations and Instructions: Familiarize yourself with the abbreviations used in the pattern. Break the instructions into smaller parts, and cross-reference them with visual aids if you are using them.
    • Abbreviations are a shorthand method for writing instructions. Make sure you understand each of them before starting your project. The instructions should be carefully read before beginning the project. Taking it step by step helps to avoid mistakes and misunderstandings.

    Starting Small and Growing Your Skills

    Beginners should focus on simple patterns to build a solid foundation. These projects allow you to become familiar with basic techniques, like casting on and binding off in knitting, or single crochet and double crochet in crochet. As you gain more experience, you can gradually move on to patterns with more details. Don’t be afraid to make mistakes; consider them learning opportunities. Remember that with each completed project, your skills will grow. You can always try again. Remember, the journey of learning is just as rewarding as the final result.

    1. Start with a simple project like a scarf, dishcloth, or small amigurumi.
    2. A simple project allows you to get used to the basic techniques of a craft. It helps you build confidence. It also lets you complete a project quickly and easily. This is great for a beginner.

    3. Review the instructions carefully, and watch tutorials if needed.
    4. Always review the pattern instructions thoroughly before you start. Many craft tutorials are available on platforms like YouTube or dedicated websites. These visuals can help you better understand the instructions and how to perform each step.

    5. Practice the basic stitches before starting the project.
    6. Practice basic stitches or techniques before beginning your project. This will help you get comfortable with the tools and techniques. Try creating a small swatch of stitches to get used to the pattern. This reduces the risk of making mistakes.

    The Benefits of Crafting for Well-being

    Crafting happiness free patterns offers more than creative opportunities; it also provides significant mental and emotional benefits. The process of creating something with your own hands can reduce stress, increase focus, and provide a sense of accomplishment. It’s an activity that can improve your well-being. Crafts provide a healthy outlet for relaxation and provide a fulfilling means of expression.

    Mindfulness and Stress Reduction

    Crafting involves repetitive movements, like knitting or crocheting, which allows you to enter a state of flow. In this mindful state, you become completely absorbed in the task at hand. This concentration can quiet your thoughts and reduce stress levels. The repetitive motions are calming, and the focus on the task at hand reduces anxieties. This peaceful activity provides a break from the daily demands, giving you space to relax and calm down.

    • Focus and Concentration: Crafting demands your attention, reducing the ability to think about worries.
    • The concentration required to follow a pattern and perform the necessary steps keeps your mind engaged in the present moment. This focused attention reduces the mind’s tendency to wander or become preoccupied with worries, leading to a calmer mental state.

    • Reduced Anxiety and Worry: The rhythmic and repetitive actions can soothe the nervous system and lower anxiety levels.
    • Crafting can reduce anxiety by engaging your mind in a repetitive task that helps calm your nervous system. Activities such as knitting or crochet provide a rhythm that promotes relaxation and a sense of calmness.

    • Mindfulness Practice: Crafting encourages being present, which helps you practice mindfulness.
    • When crafting, your focus is on the current stitch or row, which encourages you to be present. This mindfulness helps you become more aware of your surroundings, thoughts, and feelings without judgment. It encourages a sense of inner peace.

    Enhancing Creativity and Self-Expression

    Crafting is an ideal way to unleash your creativity and express your personality. You can use free patterns as a starting point, and adjust the colors, designs, or techniques to reflect your style. The creative freedom can boost self-esteem and give you a sense of satisfaction. Crafts are a way to convey your unique perspective and ideas. This leads to personal growth and self-discovery, helping you develop a stronger sense of self.

    • Creative Outlet: Crafting provides a means of personal expression. It allows you to transform raw materials into beautiful and functional items.
    • The ability to create something new boosts self-esteem and fosters a sense of purpose. You can explore different colors, textures, and techniques to produce something special. This also gives you the chance to experiment.

    • Boosting Self-Esteem: The sense of accomplishment from completing a project elevates your self-esteem.
    • As you progress through your crafting projects, you will learn new skills. Each completed project provides a tangible demonstration of your abilities. This helps to boost your confidence. Completing projects provides opportunities for praise and compliments.

    • Sense of Accomplishment: Finishing a project brings a satisfying feeling of achievement and pride in your work.
    • The sense of accomplishment from creating something with your own hands provides a strong sense of purpose. This achievement is a reward. The finished project becomes a tangible reminder of your dedication and effort. This encourages you to try new things.

    Social Connections and Community

    Crafting can create chances for social engagement and community. Joining craft groups or attending workshops gives you the chance to meet other crafters, share your creations, and get ideas. The craft communities are supportive spaces. They encourage collaboration and offer a sense of belonging. Sharing your passion with others makes the experience more fun and offers opportunities to learn from others and exchange ideas. This can lead to lasting friendships and a stronger sense of connection.

    • Joining Craft Groups: Joining groups brings opportunities for social interaction and learning.
    • Craft groups provide a social environment where you can connect with other people with similar interests. These groups provide the chance to share projects, exchange ideas, and ask for help. These groups also help in learning new techniques and tips.

    • Participating in Workshops: Attending workshops lets you learn from experts and get hands-on experience.
    • Workshops help you gain new skills and techniques. You’ll gain hands-on experience and receive guidance. These workshops are a great opportunity to explore different crafts and connect with people who share your passion.

    • Sharing Projects Online: Sharing your projects online can give you feedback and create connections.
    • Sharing your finished projects on social media or online craft communities offers a chance to get encouragement and comments. You can be part of a larger community of crafters from all over the world. Sharing your work lets you connect with people and get inspiration.

    Reading and Interpreting Crafting Patterns

    Understanding and correctly using patterns is important for a successful crafting experience. From selecting the right materials to following the instructions, each step is essential. Knowing how to read a pattern will make the crafting process easier and more enjoyable. It will also assist you in making projects that meet your expectations. Developing this skill opens a world of creative possibilities, and offers you the confidence to explore new designs and techniques. Reading patterns is an important skill.

    Understanding Pattern Structure

    Crafting patterns typically follow a standard structure that includes key components such as an introduction, a materials list, and detailed instructions. Knowing these components allows you to get important information about the project. As you become more familiar with the format, you will find it easier to find the information you need. This makes it easier to navigate through the pattern and start your work with confidence.

    • Introduction: The introduction includes the project’s details, the intended usage, and the project’s design goals.
    • The introduction gives an overview of the project, including its intended purpose, who made it, and other important aspects. Read the introduction to learn more about the item’s design, style, and features. These elements give you a full picture of the design.

    • Materials List: This section details everything that you need, including yarn, hooks, needles, and other materials.
    • The materials list is usually a concise, itemized list of all the materials that are needed to create the project. It includes specific information such as yarn weight, hook or needle size, and amounts required. Before beginning your project, verify you have all the necessary supplies.

    • Instructions: The instructions include detailed, step-by-step guidance on how to create the project.
    • The instructions section provides the project’s step-by-step guidance. Instructions usually use abbreviations and stitch symbols. The patterns give details on how to use them. For a successful outcome, the instructions must be followed carefully. Take each step carefully.

    Decoding Symbols and Abbreviations

    Craft patterns frequently use symbols and abbreviations to shorten the instructions. It is critical that you become familiar with these conventions. Different crafts, such as knitting and crochet, have their unique set of symbols. You should look for a key or legend in the pattern that explains what each symbol means. Understanding these symbols is important for accurately following the instructions. With practice, you will understand the meaning and significance of common abbreviations.

    • Pattern Symbols: Learn the meanings of the standard symbols used in your selected craft.
    • Symbols in a pattern represent different stitches or steps. For instance, in knitting, symbols represent knit, purl, and yarn over. In crochet, symbols represent single crochet, double crochet, and slip stitch. The pattern will usually include a key explaining the meaning of these symbols.

    • Abbreviations: Learn the most common abbreviations used in patterns.
    • Abbreviations are a quick way to write instructions. Abbreviations for knitting and crochet include “k” (knit), “p” (purl), “sc” (single crochet), and “dc” (double crochet). Knowing these abbreviations makes it easier to read and follow the instructions.

    • Referencing the Key: Always consult the key to learn the meaning of each symbol or abbreviation used.
    • The key or legend within the pattern gives the meaning of symbols and abbreviations. If you come across a symbol or abbreviation that you don’t know, consult the key. This will ensure that you understand the instructions correctly.

    Following Step-by-Step Instructions

    Carefully following the instructions is the heart of working with any pattern. Read through the instructions before starting. This allows you to plan out the sequence of steps. Break the instructions into smaller parts to make them more manageable. As you complete each step, double-check your work to ensure that you are staying on track. Patience and attention to detail will ensure that your finished project matches the designer’s intent.

    1. Read the instructions completely before starting your project.
    2. Reading the entire set of instructions allows you to get a comprehensive overview of the whole project before you start. It allows you to prepare your supplies and become familiar with the steps.

    3. Break down the instructions into manageable parts.
    4. Break up complex instructions into smaller, more manageable parts. This will help you keep the process from feeling overwhelming. Focus on completing each section before moving on to the next. This will help with the process.

    5. Check your work against the pattern frequently.
    6. Check your work to ensure it aligns with the instructions. This will help to reduce errors or making any mistakes. Checking your work helps to quickly identify and correct any mistakes. This prevents bigger problems and delays.

    Organizing Your Crafting Projects

    Organizing your craft projects is key for an easy and more enjoyable crafting experience. Keeping your materials organized will make it easier for you to find what you need. This increases your efficiency and reduces frustration. Create a good system to follow to make your crafting area functional and inspiring. It also helps you stay on track and maintain an organized, creative space. It’s an important part of any crafter’s routine.

    Setting Up a Dedicated Craft Space

    Establishing a designated craft space will improve your crafting experience. Whether it’s a corner of a room or an entire room, having a dedicated space helps you separate your crafting from other activities. Set up a well-lit work surface, which allows you to work comfortably. Arrange your materials and tools within easy reach. The area should inspire creativity, reduce clutter, and encourage you to start projects when your inspiration strikes.

    • Choose a location that meets your needs.
    • The location of your craft space is a critical decision. You may want a quiet space away from distractions or a location with plenty of natural light. Your work space needs to be large enough to accommodate your projects, materials, and equipment. Space can also make working more convenient.

    • Arrange your workspace to maximize its efficiency.
    • Organize your work area to make sure you have everything you need close by. Keep materials and tools within reach, and place items to ensure smooth workflow. A workspace that is organized enhances your workflow and keeps you focused.

    • Make sure your space inspires creativity.
    • Decorate your workspace with things that encourage inspiration. Add colors, artwork, or other items that motivate you. Create an inviting space that encourages you to begin your projects. Make it a joyful area.

    Storing and Managing Materials

    Efficient storage of materials is vital to keeping your crafting supplies organized and accessible. Use clear storage containers to see what you have. Label your containers to quickly identify what is inside. Think of systems that suit your materials and how you prefer to work. A well-organized storage system saves time and money. It also protects your supplies from damage and improves your crafting experience.

    • Use clear storage containers to see contents.
    • Using transparent storage containers is helpful. You can easily view your materials without opening boxes or drawers. This saves time and minimizes the need to unpack supplies. Transparency helps you assess what you have and quickly find what you need.

    • Label your storage for clarity.
    • Add labels to storage containers to identify contents. Labels can describe the project, material type, or color, and make it easier to locate items quickly. Proper labeling reduces the chance of misplacing materials and enhances your efficiency.

    • Organize by project to keep everything together.
    • Organize your supplies by project, which allows you to keep all the materials in one place. This makes it easier to work on each project. This will help you to prevent mixing up the materials and reduce the chance of losing essential supplies.

    Managing Projects and Progress

    Keeping a project journal or tracking your progress helps you keep track of your projects. You may use a notebook or a digital tool to record details. Note the pattern information, materials, and any notes about the process. Tracking your progress can help you keep track of what you have done and what still needs to be done. It will also help you learn from past projects and improve your future ones. This will help you to learn more about the whole process.

    • Keeping a project journal to write down all the details.
    • A project journal is a great resource. You can record pattern information, materials used, and any challenges that you came across. You can include pictures, sketches, and notes about modifications. This improves your ability to learn and troubleshoot problems in future projects.

    • Using a planner to schedule your time.
    • Use a planner or calendar to schedule crafting time and manage your progress. Set deadlines to make sure you stay on track. A planner is a great tool. It will help to prioritize projects. You will also improve your productivity.

    • Track your progress to observe your work and improvements.
    • Track your progress on your projects, and record your accomplishments. You may do this by taking photos, measuring the work, or taking notes. This will help you see your progress and motivate you to continue your work. It’s a great opportunity to reflect on your skills.

    Sharing Your Creations and Connecting With Others

    Sharing your finished projects with others can improve your crafting experience. Show your creations on social media or in craft groups to show your work. You can get valuable comments, inspiration, and encouragement from other crafters. These connections inspire collaboration, share ideas, and create a sense of community. Sharing also allows you to learn new techniques and expand your creative abilities. Remember, crafting happiness free patterns offers a way to share your creations and connect with others.

    Showcasing Your Work Online

    Sharing your completed projects online is an outstanding way to connect with other crafters and show your work. Platforms such as Instagram, Pinterest, and personal blogs are great for sharing photos of your creations. Consider writing detailed descriptions of your project. This will help others learn about the process. Participate in online discussions to learn more about the craft community and create relationships with other crafters. Remember that online sharing not only enhances your exposure, but also fosters a sense of community.

    • Instagram: You can use Instagram to show your creations by taking quality photos and adding hashtags.
    • Instagram is a very visual platform. High-quality pictures will grab attention. Use relevant hashtags, such as #knitting, #crochet, or #handmade, to increase visibility. You can also connect with others in the crafting community.

    • Pinterest: Pinterest is a great platform for sharing crafts. You can share your photos and connect them to your blog or online stores.
    • Pinterest is perfect for sharing visuals and providing links to additional resources. Create visually appealing pins. Link your pins to relevant web pages, such as your blog posts or pattern download pages. Pinterest’s layout gives good opportunities to share creations.

    • Personal Craft Blog: Start a blog to document the projects you make. Share step-by-step instructions.
    • Starting a personal craft blog is a good idea. Write detailed project descriptions and tutorials, with tips and tricks. This is an awesome way to share your projects with a community. You can also start a community or sell your patterns.

    Engaging With the Crafting Community

    Get actively involved in the crafting community, as it is a fantastic way to learn from others and exchange ideas. Join craft groups, participate in online forums, and attend workshops or craft fairs. You can ask for assistance, show your projects, and share your experiences with other crafters. This exchange of ideas will open doors to new techniques and ideas. It will also help you create a supportive environment to learn and share your passion.

    • Join Craft Groups: Find local groups or online communities. These can provide a supportive environment for you.
    • Joining local groups or online communities offers a chance to share your projects and get feedback and help. These groups can include people with many experiences. They offer valuable insights and support. This helps you to have a positive experience.

    • Participate in Online Forums: Participate in online discussions and share your knowledge.
    • Join online forums to discuss crafting projects, share techniques, and learn from others. This is a good way to get ideas. You may find helpful advice or support, and this can enhance your crafting experience.

    • Attend Craft Fairs: Attend craft fairs and sell your work.
    • Attending craft fairs is a fun way to display and sell your crafts and to connect with customers and other craftspeople. You can meet other people. You can find inspiration. You can also get valuable experience.

    Contributing to the Crafting World

    Contributing to the crafting world gives you the chance to leave a long-lasting impression. Share your knowledge with other crafters. Provide advice, tutorials, and inspiration. Contribute by designing your own patterns, teaching classes, or writing blog posts. By sharing your skills and supporting the creativity of others, you enrich the community. Your contributions will provide a positive impact and help others enjoy the beauty of crafting.

    • Offer Tutorials: Share your knowledge and expertise by creating tutorials.
    • Creating tutorials is an amazing way to share your expertise. You can guide others in making projects by writing detailed instructions. You can show step-by-step videos and photos to help them learn new skills.

    • Design Your Patterns: Explore your creativity by creating your own unique patterns.
    • Design your own patterns, and share them with the crafting world. This allows you to combine your skills. This is a great way to make a difference in the craft world. It also allows you to express your individual style.

    • Teach Classes: Teach classes, workshops, or workshops to share your skills.
    • Teach workshops or classes in your local community or online. You can offer classes in schools or libraries. You can also host online courses. Sharing your passion for crafting will make a difference in the lives of many people.

    Common Myths Debunked

    Myth 1: Free Patterns Are Always Low Quality

    In reality, many outstanding free patterns are available from skilled designers and experienced crafters. The quality of a pattern depends on the designer’s skills and the care they take in creating it. While some free patterns may be less professionally edited or detailed than paid ones, there are many exceptional resources available. You should look at the designer’s reputation, read reviews of the pattern, and see sample projects to help you determine the quality. Remember, a free pattern does not always equal low quality; many designers share excellent patterns to create community or promote their work.

    Myth 2: Free Patterns Are Only for Beginners

    The truth is, while many beginner-friendly patterns are available for free, many advanced patterns are also available. Experienced crafters can find complicated designs with advanced techniques. The availability of free patterns spans all skill levels and craft types. Whether you are a beginner looking to understand the basics or an expert looking to challenge yourself with a new project, there are options for you. Always consider your skill level and experience before choosing any pattern.

    Myth 3: Free Patterns Are Hard to Understand

    Actually, not all free patterns are difficult to interpret. Many patterns have detailed instructions, clear photos, and helpful videos. Some patterns have detailed instructions. Designers are aware of the importance of making their patterns accessible to crafters of all skill levels. When choosing a free pattern, always check for the pattern’s clarity. Pay attention to the use of images and videos, and see if the pattern includes a key of common abbreviations. You will find that many free patterns are clear.

    Myth 4: Free Patterns Are Not Worth the Time

    The truth is that free patterns are a great investment of time. Crafting is a great way to improve your well-being, explore your creativity, and produce unique items. The cost savings of using free patterns are a good thing. The chance to experiment with new crafts without financial risk is amazing. Free patterns may bring joy and a sense of accomplishment.

    Myth 5: You Have to be Highly Skilled to Use Free Patterns

    Not true! Free patterns are available for every skill level, including those starting out. Many designers offer beginner-friendly patterns that have clear instructions. When choosing a pattern, choose one that matches your current abilities. Start with a pattern with a small number of techniques. Do not be afraid to study and find help. Over time, your skills will develop, and you will be able to work on more complex projects. Your journey starts somewhere.

    Frequently Asked Questions

    Question: Where can I find free crafting patterns?

    Answer: You can find free crafting patterns on platforms like Ravelry, AllCrafts, LoveCrafts, and individual craft blogs and websites. Also, check online libraries and archives for vintage patterns.

    Question: How do I know if a free pattern is right for me?

    Answer: Consider your skill level, the materials needed, and the clarity of the instructions before deciding on a free pattern. Always read reviews or look at sample projects.

    Question: Is there a cost to use free patterns?

    Answer: Usually, free patterns can be downloaded or used without any financial charge. However, you will need to purchase the necessary materials, such as yarn, fabric, and tools.

    Question: How can I improve my pattern-reading skills?

    Answer: Practice, practice, practice! Start with simple patterns and carefully study the abbreviations, symbols, and instructions. Look for tutorials and join a crafting community for support.

    Question: Can I sell items made from free patterns?

    Answer: Many designers allow you to sell items made from their free patterns. Always check the terms of use. The designer may ask you to give credit to them.

    Final Thoughts

    Embarking on the world of crafting happiness free patterns offers an amazing avenue to express your creativity. You’ll gain access to countless free resources. You can explore different crafts and techniques without the financial constraints. From knitting and crochet to sewing and embroidery, the possibilities are endless. By starting with simpler patterns and gradually working towards more complex projects, you’ll develop skills. Remember to embrace the process. View mistakes as learning chances. As you become more confident, feel free to modify patterns and integrate your unique style into each creation. The most important thing is to enjoy the process of crafting and to

  • Crafting Guild Wars 2: A Comprehensive Guide to Success

    Crafting Guild Wars 2: A Comprehensive Guide to Success

    Remember that time you spent hours gathering materials, only to mess up that one important recipe? We’ve all been there, staring at a mountain of resources and a sinking feeling. This guide will help you avoid those pitfalls and become a crafting gw2 master. You’ll learn the ins and outs of professions, discover how to maximize your profits, and gain valuable insights that’ll transform your gameplay experience. You’ll get the best tips that will greatly improve your experience in the game. This will give you the knowledge you need to start building your wealth in Guild Wars 2. By the end, you’ll have the skills to build the items you want with ease.

    Key Takeaways

    • You’ll discover the different crafting gw2 professions and which one best suits your play style.
    • Understand the resource gathering system and how to efficiently acquire materials.
    • Learn how to optimize your crafting process to save gold and time.
    • Find out how to identify profitable recipes and capitalize on market trends.
    • You’ll grasp the significance of crafting levels and how to improve them.
    • Learn how to utilize crafting for end-game content and gear acquisition.

    Professions in Guild Wars 2

    Guild Wars 2 offers a diverse range of crafting gw2 professions. Selecting the right one is key to your success and enjoyment. Each profession has its unique focus, allowing players to create specific items, from weapons and armor to consumables and upgrades. Before diving in, explore each profession and its associated benefits to pick the one that fits your gaming preferences. Consider what kind of items you wish to create, if you want to make a lot of gold, or if you want to craft items for your own use.

    Weaponsmith

    Weaponsmiths are specialists in forging physical weapons. They can craft a variety of weapons, including swords, axes, hammers, and greatswords. These weapons are essential for characters that focus on melee combat. The higher the level of the crafting, the better the weapons that can be created. Weaponsmithing provides a direct benefit to players in combat, allowing them to create powerful equipment for their characters. Weaponsmiths contribute to the game’s economy by producing essential items.

    • Weaponsmiths create swords, axes, greatswords, hammers, and similar weapons. These weapons are often in high demand by players who want to increase their combat effectiveness.
    • Weaponsmithing can provide you with powerful gear. As you level up this profession, you’ll have the ability to create more powerful weapons. These weapons allow you to deal greater damage and improve your survivability in combat. This is particularly useful for newer players to craft gear for themselves.

    • Weaponsmiths require metal ores, wood, and leather for the production of weapons.
    • Acquiring these materials involves gathering resources, buying them from the trading post, or trading with other players. The need for these materials creates an active market, giving players opportunities to earn gold. Efficient resource management is key to success in this profession.

    • Weaponsmiths can craft weapons of different tiers and quality.
    • As the crafting level increases, weaponsmiths get access to superior recipes and materials. This allows them to create better weapons, making them more valuable. It is crucial to level your Weaponsmithing to be competitive in the market and make better weapons.

    • Weaponsmiths can make their own weapons or sell them on the trading post.
    • This can be a very lucrative activity, since many players will always look for better weapons. Weaponsmiths have the ability to customize their play experience by creating weapons that match their gameplay styles. The ability to craft weapons is one of the most popular reasons for choosing this profession.

    Armorsmith

    Armorsmiths are the backbone of protection, crafting heavy armor sets for professions such as Warriors, Guardians, and Revenants. They utilize metal ores and leather to create the armor pieces that are essential for survival in the harsh environments of Tyria. Armorsmiths are essential for players who want to survive in high-level content. The better the armor that is created, the better a player’s chance of survival. Their creations provide the defense needed for battles.

    • Armorsmiths can create heavy armor, including helmets, chests, leggings, boots, and gloves. These armor sets provide significant protection, boosting defense and reducing damage taken in combat.
    • This can directly improve a player’s survivability. Armorsmiths also contribute to the game’s economy by producing essential items that are always in demand. The armor they produce allows players to face formidable challenges in the game. Armor is one of the most important items that a player can equip.

    • Armorsmiths use metal ores and leather to produce armor pieces.
    • Players must gather or purchase these materials. Gathering materials involves exploring various areas in the game, mining ore veins, and skinning beasts for leather. This interaction fuels the game’s economy as players trade and barter for the needed supplies.

    • Armorsmiths can craft armor of different tiers and rarities, depending on their skill and access to recipes.
    • Advanced recipes and better materials let Armorsmiths create superior armor sets. Higher-level armor provides greater protection, making it popular among players who like to tackle more difficult challenges. This allows them to create gear that is sought after by a wider player base.

    • Armorsmiths can supply themselves or sell their armor on the trading post.
    • The ability to create high-quality armor provides a good opportunity to earn gold. Armorsmiths also customize their play experience by creating armor for their preferred playstyles. The demand for armor ensures that those specializing in armorsmithing are in constant demand in Guild Wars 2.

    Huntsman

    Huntsmen specialize in crafting ranged weapons. They create bows, rifles, and other ranged weapons, which are perfect for players who prefer to fight from a distance. Huntsmen’s products are popular among players who like to play from a distance. The gear huntsmen produce is crucial for gameplay success. Huntsmen play a key role in the crafting gw2 economy and player experience.

    • Huntsmen create a wide range of ranged weapons, including bows, longbows, shortbows, rifles, and pistols. These weapons are essential for players who enjoy combat from afar.
    • Ranged weapons are particularly useful in various situations. Huntsmen are essential in the game’s economy, as their items are always in demand. Huntsmen allow players to use different strategies, allowing for versatile gameplay.

    • Huntsmen use wood, leather, and metal ores.
    • These materials have to be gathered or bought from the trading post. The need for these resources gives rise to an active economy where players can buy, sell, and trade materials. Efficient resource management is very important in this profession.

    • Huntsmen craft weapons with different tiers and quality.
    • As the crafting level increases, the huntsman gets access to recipes that let them create superior weapons. The weapons are more powerful and offer players an edge in combat. This allows them to stand out in the marketplace.

    • Huntsmen craft weapons for their own use or to be sold.
    • This offers the ability to make gold. Huntsmen can create weapons for their preferred playstyles, offering an enhanced gameplay experience. They have a central role in providing items. The demand for ranged weapons ensures that these specializations are in demand.

    Artificer

    Artificers specialize in crafting magical weapons, focusing on staves, focuses, scepters, and off-hand weapons. These are specifically for classes that rely on magical abilities. Artificers contribute to the game’s economy. The gear they produce is crucial for gameplay. Artificers are in the top ranks of the game for their important contribution to the crafting of weapons.

    • Artificers focus on crafting magical weapons, including staves, focuses, scepters, and off-hand weapons. These weapons are often used by classes that use magical attacks.
    • These weapons offer magical abilities. Artificers play an important role in the game’s economy. These specializations help enhance the experience of each player.

    • Artificers use wood, metal ores, and crystalline components to make weapons.
    • These resources have to be gathered. The need for these materials fuels an active economy. Efficient resource management is key in this profession.

    • Artificers craft weapons of varying tiers and quality.
    • As the crafting level goes up, artificers get access to new recipes. This will allow the production of better weapons. These weapons are sought after, and this allows these players to excel in the marketplace.

    • Artificers make items for their own use or for sale.
    • They can create customized items. The demand for these weapons ensures that those specializing in this field are always in demand.

    Jeweler

    Jewelers create accessories like rings, amulets, and earrings. They are essential for enhancing a character’s stats. Jewelers are in high demand because they provide items that boost character stats. Jewelers are very important for high-level content. They help make sure that their creations are the most efficient possible.

    • Jewelers create accessories such as rings, amulets, and earrings. These items offer stats that help boost the attributes of the character.
    • These accessories offer important stat bonuses. Jewelers play a central role in the game’s economy. Jewelers help players be successful in end-game content.

    • Jewelers use gemstones and metal components.
    • These are obtained through gathering or the trading post. The resources have an active market, creating opportunities to buy and sell. Good resource management is important to success in the jeweler’s field.

    • Jewelers can craft accessories with varying stats.
    • The more a jeweler improves their skill level, the more they can craft accessories with more attributes. These are highly sought after by those players who have to gear up for high-level content.

    • Jewelers can craft for their personal use or to sell.
    • This provides an opportunity to earn gold. Jewelers enhance the experience by creating accessories that fit their playstyle. The demand for accessories ensures that jewelers are an essential part of the game.

    Chef

    Chefs are specialists in creating food and utility items. These consumables are used to improve character stats. They provide buffs in combat. They are critical for endgame activities. Chefs are in constant demand because of the consumables that they create. These specializations are crucial in the game.

    • Chefs create a variety of food items and utility items that improve stats.
    • These consumables are used to boost character abilities. Chefs are important to the game’s economy. Chefs are particularly important in end-game content.

    • Chefs use plants, meat, and other ingredients.
    • These are gathered through exploration. The demand for these ingredients helps drive the economy. Effective resource gathering is key.

    • Chefs craft food that can provide various buffs.
    • The higher the level of the chef, the better the buffs. This improves the gameplay experience. It is very important to get the best items for success.

    • Chefs create food items to be used or sold.
    • This can lead to significant profit. Chefs personalize the experience by providing buffs that work with their playstyle. The demand for consumable items ensures that these specializations are very much in demand.

    Resource Gathering and Acquisition

    Effective resource gathering is the foundation of successful crafting gw2. Knowing how to obtain the necessary materials can save you significant time and gold. This part will explain how to collect resources, where to find them, and how to maximize your gathering efficiency. To gather, you will need tools like harvesting sickles, axes, and pickaxes. Gathering tools can be bought from a merchant or the trading post.

    Gathering Tools

    Gathering tools are very important. They are required to harvest resources. Without them, you’re unable to collect materials. The tools have different tiers, allowing you to harvest different levels of resources. They can have different stats like harvesting speed and luck. Knowing your tools, their benefits, and where to buy them is important.

    • Gathering tools are essential items needed to harvest resources.
    • You cannot collect any resources if you don’t have the appropriate tools. Tools come in several different tiers. Each tool has the benefit of allowing access to different levels of resources.

    • Gathering tools can be purchased from merchants.
    • They can also be found on the trading post. Tools will have varying degrees of harvesting speed and luck. These are both very important. Make sure that you always have the best tools for the job.

    • Higher-tier tools have improved efficiency, speed, and resource yield.
    • Always go for the best tools. Higher-level tools will make gathering easier and quicker. These tools can increase the amount of materials that you acquire. This increases profits, and saves time.

    • The tools’ stats are important, but durability is also crucial.
    • Tools will break over time, so it is necessary to replace them. It’s often more cost-effective to upgrade to higher-quality tools.

    Resource Nodes

    Resource nodes are specific locations where materials can be collected. They come in the forms of trees, ore veins, plants, and harvesting nodes. Locations vary. It is important to know the locations. To collect resources, you will need the correct tools. Once the tools are equipped, you can gather the resources.

    • Resource nodes are the points where players can collect materials.
    • The resources are distributed throughout the game world. These nodes include trees, ore veins, plants, and gathering spots.

    • Resource nodes will provide different types of materials.
    • This depends on the nodes you choose to interact with. Knowing the specific locations will optimize your efficiency. Knowing the locations is key to success.

    • Materials are based on the level of the area that you are in.
    • The higher the level of the area, the better the materials. You can find materials that are tailored to the profession that you are playing.

    • You can get a gathering boost by using gathering boosters.
    • These are sold on the trading post. The boosters can increase your gathering speed and improve your luck.

    Gathering Routes and Efficiency

    Finding efficient gathering routes is crucial for maximizing your time. This means planning your routes. Use these methods to maximize your gathering efficiency. This will make your gathering quicker and more profitable. Always consider what you wish to make when planning your routes.

    • Planning your gathering route is important.
    • Consider the area that you are going to be gathering in. Choose areas with the resources you need.

    • Use websites and tools to find gathering locations.
    • These tools provide maps and will show where you can find gathering spots. This will also show you the most efficient routes to get the resources you need.

    • Optimize your inventory.
    • Make sure you have enough space. Get more storage so that you can gather more without having to go back to the storage area.

    • Gather at off-peak times.
    • This can give you access to more resources. During these times, there are often fewer people in the gathering locations, which can increase your efficiency. You can save time and get more materials.

    Optimizing the Crafting Process

    To succeed in crafting gw2, you need to optimize your crafting process. Efficiency is key to saving gold, and the right approach will greatly improve your output. By following key steps, you can streamline the crafting process, reduce waste, and improve your profits. The goal is to maximize efficiency, save gold, and improve crafting times. By carefully planning your approach, you can create more items for less money.

    Understanding Crafting Levels

    Crafting levels represent your proficiency within a particular profession. As you improve your levels, you can access better recipes and materials. Knowing how levels work is crucial. As you level, you’ll be able to create better items. This can improve your gameplay.

    • Crafting levels represent the level of experience.
    • They determine what recipes you have access to. The higher the level, the better the items that you can create. This will have a great impact on your ability to succeed. This will allow you to craft better equipment.

    • Crafting levels are increased by crafting items.
    • The more items you craft, the faster the levels will go up. As you increase the level, you will get access to better recipes. This will allow you to make more gold. It will also improve the quality of the items you can make.

    • The crafting level is separate for each profession.
    • You must level each profession separately. Leveling all professions will increase the options that are open to you. This can allow you to craft items for yourself, and for others.

    • The levels will open up new recipes.
    • These can be purchased, or found as rewards for playing the game. Keep in mind that as you level, you should have access to the best recipes to improve output.

    Using Crafting Stations

    Crafting stations are essential for crafting gw2. They are the spots where you create items. Crafting stations can be found in major cities, or in the player’s home instance. It is important to know the locations of the stations, and understand how to use them. Crafting stations will enhance the efficiency and speed of the crafting process.

    • Crafting stations are specific locations where you can craft items.
    • These can be found in major cities like Lion’s Arch. They can also be found in home instances. Having access to these stations is important.

    • To use a crafting station, you must have the required materials.
    • You must also have the recipe. When these are in place, you can proceed to create your item. Always make sure you have the right materials.

    • Each crafting station will have its specific functions.
    • The crafting stations may allow you to create different types of items. This depends on your profession. Always keep this in mind.

    • Using the crafting stations improves efficiency.
    • Stations provide an easier way to craft items. You can easily access the recipes, and then craft them without having to move around.

    Recipe Management

    Recipe management is a crucial factor. Understanding what to create, how to get those recipes, and how to organize them is important. Knowing your recipes will save you time. Effective recipe management helps improve your crafting efficiency. You will be able to plan your craft process. You can also monitor your profits.

    • Recipe management is an essential element for crafting.
    • Knowing the recipes is important. It is also important to know how to acquire them. The more recipes you have, the more items you can create.

    • Recipes can be learned by purchasing them.
    • You can also get them by leveling up your crafting profession. You can find them by exploring the world. Some recipes can be sold on the trading post. This is a crucial element of the crafting process.

    • Organize your recipes by category or use.
    • This can make the process simpler. You can keep track of which recipes you’re using most. You can also identify which recipes will make you the most money.

    • Keep track of material costs and the prices of finished goods.
    • This is key to making a profit. You should always ensure that you are making more money than you are spending.

    Identifying Profitable Recipes

    Understanding which recipes are profitable will maximize your income. It is necessary to monitor the trading post. You should know what is in demand, and what sells for the most. This is a very important skill in crafting gw2. It will show you how to identify popular items. This can maximize profits and help build a successful crafting business.

    Market Analysis

    Performing market analysis is a crucial skill. You need to know what players are buying, and what is in demand. Market trends can impact prices. Keeping an eye on the market is important. You have to consider what is being sold. This is key to making money.

    • Regular market analysis is very important.
    • Study the trading post frequently. Determine what items are in high demand and what prices are changing. This will give you insights.

    • The trading post data will provide a great deal of information.
    • You can use this data to see the prices of items. This can give you information about supply and demand. Knowing this is key.

    • Market trends change over time.
    • Keep an eye on trends. This is important to ensure you’re making the most gold possible. You may see a particular item is more popular at certain times.

    • Use online tools and resources.
    • Websites provide real-time data on price fluctuations. You can make an informed decision on whether or not to craft and sell an item.

    Understanding Supply and Demand

    Supply and demand is a fundamental principle. If a lot of players are looking for a specific item, the price will go up. If there are many of that item available, the price may be lower. Understanding supply and demand will help you determine how to make a profit. You can balance production based on the market conditions.

    • Supply and demand are the most important factors that impact prices.
    • If demand is high, and the supply is low, the prices will be high. This is the time when you can make the most profit. If the demand is low, and the supply is high, the prices will be low.

    • Keep an eye on the item listings.
    • If you see that there are few of an item for sale, you can craft that item. You can set the price at a higher price.

    • Consider seasonal trends.
    • There are some items that are more popular during certain seasons. Making these during those seasons is one way to increase your profits. You can tailor your strategy.

    • Adapt your crafting based on the state of the market.
    • If prices drop, you can reduce production. You can then wait for demand to increase. This strategy keeps your profits at the maximum.

    Analyzing Crafting Costs and Profits

    Knowing your costs and profits is very important. You can use the numbers to see if you are making money. This analysis will guide your crafting. You can make informed decisions. This is key to success.

    • Track all your costs.
    • This includes materials, and the costs of the items. You can determine how much you are spending. Accurate records allow for better planning.

    • Calculate the profit margin.
    • This is the difference between the price you sell the item for, and what it cost you to make it. Always focus on increasing profit margins. Be realistic, and make sure that you consider the costs.

    • Use spreadsheets or apps.
    • Use these tools to keep track of prices. This makes it easier to track costs, profits, and identify what is most profitable. Use the tools to create a budget and track spending.

    • Set your prices competitively.
    • Look at what others are selling it for. Try to price your items competitively, but still make money. Adjust the price based on supply and demand.

      Crafting for Endgame and Gear

      Crafting plays a very important role in endgame content. Crafting is essential for building better gear. It is a critical component of endgame progression. Knowing how to use crafting for endgame gear is very important. This allows you to improve your character and succeed in end-game activities. Having good gear will help you get past the challenges.

      Crafting Ascended Gear

      Ascended gear is the best available gear. It is essential for endgame content. It offers stats that are above the gear of lower levels. Ascended gear will make your character more powerful. It is worth the investment because it will allow you to take on tougher challenges.

      • Ascended gear has the best stats that can be created.
      • Ascended gear gives a significant advantage in endgame content. This includes fractals, raids, and high-level events. This includes weapons, armor, and accessories.

      • To craft ascended gear, you need to be at a high crafting level.
      • You will need specific materials. You must complete certain achievements. You must also gather materials from different content types. Always make sure that you are up to date on your goals.

      • Ascended gear requires specific recipes.
      • They can often be expensive. You need to keep track of the prices of materials. You can decide if you want to make the gear. Making the gear allows you to make your character stronger.

      • Crafting ascended gear is an investment.
      • This allows you to take on tougher challenges. It is essential for success in end-game content. It gives you an advantage against other players. This can improve the gameplay experience.

      Crafting Legendary Weapons and Armor

      Legendary gear is a pinnacle. These items have the best stats and unique effects. Legendary items are very difficult to create. They require many materials. Legendary items have special skins and other cosmetic features. Legendary gear can also be moved between characters.

      • Legendary weapons and armor offer the best stats.
      • They come with unique effects. Legendary gear also provides the best stats. They are very hard to create. You must follow a long crafting process. These are the peak of crafting gw2.

      • Crafting legendary items requires multiple crafting professions.
      • You must gather materials from many different game modes. The goal is to obtain different components. Make sure you complete the content. Consider the effort you will have to put in. You must gather the materials to complete the tasks.

      • Legendary items have unique features.
      • These include special skins and effects. Legendary items can be moved between characters. This reduces the time that you have to spend on the process.

      • Crafting legendary items is a long-term goal.
      • The process is rewarding. Legendary items improve gameplay. Legendary items improve your prestige within the game. Crafting these items allows you to stand out.

      Using Crafting to Optimize Builds

      Crafting is an important part of optimizing your character. This can allow you to create a specific build. The gear that you make will enhance your gameplay. It is possible to change your character’s stats. This allows you to create a specific build that is suitable for the game mode.

      • Crafting lets you tailor your character’s stats.
      • You can create a build that fits your playstyle. You can choose specific stats. This can improve your gameplay.

      • Select the right attributes for the content.
      • This could include power, precision, or healing power. You must craft gear with the proper stats. This is the key to creating a winning build. Make sure that you are prepared for what you must face.

      • Experiment with builds.
      • Try different combinations to find what you like. The trading post is important because it allows you to get what you want. It is important to know the gear and the stats.

      • Crafting enables you to compete in endgame content.
      • You can adjust your character. You can prepare to compete. This is a very important part of crafting gw2. This will enhance the overall experience.

      Common Myths Debunked

      Myth 1: Crafting is Only for Beginners.

      Many players think crafting gw2 is an activity that is only for those who are starting out. Crafting is critical for all stages of the game. Crafting is essential for creating powerful gear. It is critical for the endgame. Players need to level their professions to craft ascended and legendary items.

      Reality: Crafting is a skill that is important for all players. From creating starter gear to crafting ascended and legendary items, crafting is always a good idea.

      Myth 2: Crafting is Too Time-Consuming.

      Some players think that crafting is too slow. With the right strategies, you can minimize the time spent. Efficiency is key. This helps improve profits and gameplay.

      Reality: Effective gathering routes, knowing the markets, and using online tools will reduce the time spent. Crafting can be very profitable if done right.

      Myth 3: Crafting is Not Profitable.

      Some players think that crafting is not a good way to earn gold. Crafting can be very profitable. You have to know the market, and know what the players want.

      Reality: The most profitable players track market trends and understand supply and demand. Knowing this is very important. You can craft in the right time periods.

      Myth 4: You Must Level All Crafting Professions.

      Some players think that you need to level all crafting professions. Players can choose which professions they want to use. You can craft the items that you want for yourself.

      Reality: Focus on the professions that match your gameplay. Focus on the ones you enjoy, and the ones that let you craft the items that you need.

      Myth 5: Crafting is a Solo Activity.

      Some players think crafting is a solo activity. Crafting involves interactions with other players. You will have to buy materials, and use the trading post.

      Reality: The Guild Wars 2 economy is driven by crafting. Trading materials and sharing information are a big part of the crafting experience. Trading with others is key to success.

      Frequently Asked Questions

      Question: Which crafting profession is best for making gold?

      Answer: The most profitable professions often depend on market trends. Weaponsmith, Armorsmith, and Jeweler are often good choices. The most profitable profession depends on what players are looking for.

      Question: How do I level my crafting professions quickly?

      Answer: Crafting items while leveling is the fastest way. Crafting higher-level items gives you more experience. Always use crafting boosters to improve your speed.

      Question: Where can I find recipes for crafting?

      Answer: Recipes can be bought, or found as rewards. You will get them by leveling up your profession. You can find them by exploring the game world.

      Question: What is the home instance, and why is it important for crafting?

      Answer: The home instance is your personal base. You can have a crafting station and a gathering spot. Having a crafting station will make crafting easier.

      Question: How do I track market prices and make informed crafting decisions?

      Answer: Regularly monitor the trading post and use external websites. Use the tools to see price fluctuations. Look at supply and demand, and make crafting decisions.

      Final Thoughts

      Mastering crafting gw2 is more than just clicking a button, it’s about making choices that impact your character’s abilities and your financial success. By exploring the professions, understanding resource management, optimizing the crafting process, and identifying profitable recipes, you’ll be able to create powerful gear, dominate the market, and enhance your overall gameplay. Remember, the journey of a thousand items begins with a single recipe. Put your newly acquired knowledge to work, experiment with different strategies, and don’t be afraid to adapt to the market trends. The more you put in, the more you will get out, so keep improving, and start crafting today. The next great item is waiting to be crafted.

  • Crafting Guild RS3: A Complete Guide for RuneScape Players

    Crafting Guild RS3: A Complete Guide for RuneScape Players

    Remember that feeling when you first started playing RuneScape? You’re wandering around, maybe chopping some trees, and you stumble upon the crafting guild rs3. It’s an exciting place, full of possibilities. This guide will walk you through everything you need to know about the crafting guild rs3, from gaining access to the benefits it provides. You’ll learn how to get the most out of your crafting experience. Get ready to level up your crafting skills, make some serious money, and become a crafting master! By the time you finish, you’ll be well-prepared to excel.

    Key Takeaways

    • Discover the requirements and location of the crafting guild in RuneScape 3.
    • Learn about the unique benefits and resources available within the crafting guild.
    • Understand the best methods for leveling your crafting skill efficiently.
    • Explore useful strategies for making money through the crafting guild.
    • Get tips for optimizing your crafting experience and maximizing your profits.
    • Master the crafting guild’s secrets, enhancing your RuneScape adventure.

    Getting Started with the Crafting Guild RS3

    The crafting guild is a special area in RuneScape 3 that’s exclusively for players with a certain level of crafting. It’s full of useful resources and is the ideal place to hone your crafting skills. It’s also an excellent spot for making money. Many players find the crafting guild an enjoyable part of their RuneScape experiences, as it provides a focused environment for skill improvement and economic activity.

    Requirements for Entry

    Before you can enter the crafting guild, you need to meet some conditions. The first, and most important, is your Crafting skill level. You must have a Crafting level of 40 to enter the guild. This can take some effort, but the rewards are worth it. The second requirement is that you should have completed the quest “Family Crest”. You’ll also need to have a membership, as the crafting guild is for members only. Completing the “Family Crest” quest opens up additional benefits within the crafting guild. These steps are a necessary precursor to maximizing the benefits offered by the guild.

    • Crafting Level 40: This is the main requirement. You’ll need to reach level 40 in Crafting to get in.
    • Quest Completion: You must finish the “Family Crest” quest to be able to enter.
    • Membership: You must be a member of RuneScape.

    Consider these as stepping stones to gain access and fully utilize the benefits the guild provides.

    Finding the Crafting Guild

    The crafting guild’s location is in the southwest of Falador. You can reach it by various routes. One easy way is to use the Falador lodestone. Once you’re in Falador, head west. The guild is a large building, making it easy to spot. The entrance is a door. If you meet the requirements, you can walk right in! The area is well-populated, so you should be able to ask for help if needed. Just follow these directions, and you’ll find the crafting guild.

    • Falador: Head southwest of Falador.
    • Lodestone: Use the Falador lodestone for easy travel.
    • Look for the Building: It’s a large, distinctive structure.

    This location provides a secure place to improve skills.

    Navigating the Crafting Guild

    Once inside the crafting guild, you’ll find several key features. There are crafting stations for making items from various materials. There’s also a bank where you can store your materials and crafted goods. The guild offers convenient facilities that streamline your crafting tasks. These conveniences allow you to spend more time crafting and less time running around. These tools will save you time and improve your overall experience.

    • Crafting Stations: Various stations for different crafting tasks.
    • Bank: A bank to store your materials and crafted goods.
    • Anvil: Used for making jewelry and other metal items.

    Learn the layout for efficient use.

    Inside the Crafting Guild: Resources and Benefits

    The crafting guild offers several benefits. The main advantage is access to specific resources that make crafting easier and more efficient. Within the guild, you’ll discover new ways to improve skills and earn in-game money. This can include valuable resources and crafting stations, as well as the chance to learn from other players. The guild’s environment encourages you to improve your crafting abilities.

    Exclusive Resources

    The crafting guild offers several exclusive resources. These can increase the efficiency of your crafting activities. For instance, there are resources that can increase your success rate and make it easier to make items. Access to these resources is a significant advantage. This allows you to produce high-value items faster than ever. Take advantage of these benefits by frequently visiting the guild. Using these resources will increase your efficiency in the game.

    • Gem Rocks: You can mine gem rocks, which provide gems.
    • Special Stations: Exclusive stations for crafting specific items.
    • Resource Nodes: Convenient access to crafting materials.

    These exclusive advantages enhance your gameplay.

    Benefits for Skill Training

    The crafting guild offers numerous benefits to enhance your skill training. You can train your skill in a supportive environment, alongside other players. The area also features unique bonuses. You can achieve experience gains more quickly. The resources inside the crafting guild are often more plentiful than those found outside. This enables faster advancement. The crafting guild supports skill training.

    • Faster Experience: Increased experience rates are possible.
    • Focus on Skill: A dedicated environment for training.
    • Improved Efficiency: Access to resources helps to skill up faster.

    This promotes continuous skill development within the game.

    Making Money in the Crafting Guild

    The crafting guild presents many opportunities for earning money. High-value items, such as jewelry, can bring in significant profits. You can also craft items for other players. This creates a market where you can make money. Using the resources efficiently will cut costs and maximize income. This environment also helps you learn to manage resources and time, important skills for any player. This makes the crafting guild a valuable location for making money.

    • Craft Valuable Items: Craft items such as jewelry.
    • Sell to Players: Sell your creations to others.
    • Efficient Resource Management: Optimize the use of resources to maximize profit.

    This also gives you ways to monetize your game skills.

    Leveling Crafting Efficiently at the Guild

    Improving your crafting skills efficiently is crucial. The crafting guild offers several advantages, like access to exclusive resources and specialized stations. This will accelerate your training. By taking advantage of the resources, you will level your crafting much faster. These strategies will ensure your progress.

    Best Training Methods

    There are several optimal methods for improving your crafting. These methods are designed to maximize your skill. You will need to consider the materials you have, and your goals, to find the best method. The key is to find activities that offer a good amount of experience. This will get you from the starting level to the higher levels in a shorter period. It also makes leveling a more enjoyable process.

    • Crafting Jewelry: A good way to gain experience.
    • Using Specific Stations: Use stations that give high experience rates.
    • Utilizing Exclusive Resources: Use resources found within the guild.

    These methods help to get the most experience for your time.

    Material Acquisition Strategies

    To improve your crafting, you need to acquire materials. The resources within the guild will make this easier. This includes mining gem rocks. Another strategy is to buy materials from other players. Proper management of materials is the cornerstone of effective crafting. Ensure you have the right supplies. This will allow you to craft continuously. A steady supply of materials lets you maximize the time you spend training.

    • Mine Gem Rocks: Mine in the guild for a quick supply of gems.
    • Buy from Players: Purchase materials to save time.
    • Efficient Banking: Store materials carefully to avoid waste.

    By learning these strategies, you can improve your skill quickly.

    Optimizing Experience Gain

    The goal is to get the most experience for your time. Start by choosing methods that give high experience per hour. Focus on completing crafts that earn you more points. This will increase your leveling speed. By combining various techniques, you can make your skill training sessions highly efficient. Careful planning and execution will give you the experience. You can get more from each session by using a combination of the best methods.

    • Prioritize High XP Rates: Select activities to maximize experience gain.
    • Use Bonuses: Use bonuses from the crafting guild.
    • Stay Focused: Limit distractions and concentrate on the task.

    Following these steps will provide the best possible results.

    Making Gold in the Crafting Guild

    The crafting guild can be a profitable location if you know how to make money. This skill is linked to your ability to recognize market trends. Efficiently managing your resources and crafting the right items will maximize your profits. The key is to find the right items to create. This can be a rewarding way to improve your crafting skill.

    Identifying Profitable Items

    Knowing which items sell well is a key skill to make money. Jewelry is consistently in demand. Monitor the Grand Exchange to identify in-demand items. Choose items that sell quickly and at a good price. Focus on making these items. The more you know, the better your chances of earning a profit. Research items, and track prices to find the most profitable crafts.

    • Jewelry: Always in demand.
    • Market Analysis: Use the Grand Exchange to track prices.
    • High-Value Items: Choose items that give a good return.

    These items can be made using the crafting guild’s resources.

    Efficient Crafting for Profit

    Profitability comes from using your time efficiently. By minimizing costs and reducing waste, you can increase your profits. You should also consider using the bank in the crafting guild. This will save you time. Always compare prices. These steps will let you take full advantage of the crafting guild.

    • Reduce Waste: Be efficient.
    • Use the Bank: Store materials in the bank.
    • Compare Prices: Keep an eye on market prices.

    This will increase your profit margin.

    Selling Your Creations

    The final step is selling your crafted items. You can use the Grand Exchange. Another option is to sell directly to players. Each method has its advantages. Always be aware of the market. Consider offering discounts or other incentives. You want to make sure your items sell quickly. The better you are at selling, the more money you will earn.

    • Use the Grand Exchange: Trade safely.
    • Sell Direct: Sell directly to other players for a personal touch.
    • Competitive Pricing: Offer good prices.

    This helps you turn your crafting skills into a consistent source of income.

    Enhancing Your Crafting Experience

    You can optimize your crafting with a variety of techniques. This includes things like managing time effectively and using the guild to its full potential. By taking these extra steps, you can create a better experience. Try these strategies to make your crafting sessions fun and profitable. Learn what the crafting guild has to offer.

    Maximizing Efficiency

    Efficiency involves several aspects. By reducing downtime, you’ll maximize your experience and profit. Organize your time to focus on crafting tasks. By reducing wasted actions, you will improve your efficiency. The more efficient you are, the faster your crafting skills will develop. This makes it more rewarding and enjoyable.

    • Minimize Downtime: Plan out your sessions.
    • Organize Inventory: Sort your materials.
    • Use Teleports: Use the best teleports for fast access.

    This will help you be as productive as possible.

    Community and Social Interaction

    The crafting guild is an excellent place to meet people. You can share advice. You can also join a clan or group. Participating in the community enhances your experience. The support of others will improve the enjoyment of the game. Sharing ideas and strategies makes crafting more engaging.

    • Join a Clan: Meet other players.
    • Share Tips: Exchange crafting advice.
    • Attend Events: Participate in community events.

    This makes the game experience better.

    Setting Goals and Tracking Progress

    Set goals to measure your progress. You can start by setting a Crafting level goal. You can also decide how much money you want to make. You can track your progress. Setting goals and tracking progress will make it easier to stay focused. It can be satisfying to see your improvements. It will also help you stay motivated.

    • Set Crafting Goals: Determine your skill goals.
    • Track Progress: Monitor your progress.
    • Celebrate Achievements: Acknowledge your accomplishments.

    This is a great way to improve your gameplay.

    Common Myths Debunked

    Myth 1: You Need to be Maxed Out to Benefit

    Some players believe the crafting guild is only useful for max-level players. However, this is not true. The crafting guild rs3 provides benefits for players of all levels. While high-level crafters have access to the best resources, players can still find it useful at lower levels. Even reaching level 40 will give you a big advantage. You will have access to gem rocks, making it easier to craft jewelry. The crafting guild rs3 is a helpful place for players of any level.

    Myth 2: Crafting is a Waste of Time

    It’s easy to think that crafting is not as important as combat skills. However, this is wrong. High-value items, such as jewelry, can be created through crafting. These items sell for a good profit. Crafting offers another way to make money. It is a good way to improve your skill. The crafting guild rs3 will allow you to gain experience. Crafting can also improve other areas of your RuneScape experience.

    Myth 3: The Guild is Only for Expensive Items

    Many players think the crafting guild is only for those who craft expensive items. While it’s true that high-value items can earn you money, there are options for all levels. You can create other items as well. You can still gain experience. You can craft low-level items for profit. The crafting guild rs3 is beneficial for all. You can use it even if you do not focus on expensive items.

    Myth 4: The Crafting Guild is Crowded and Difficult

    Some players might imagine the crafting guild is always busy. The reality is often different. While the guild can have more players, there’s typically enough room. The bank and crafting stations are generally available. Even if the guild is busy, it is still worth using. It has unique resources. The crafting guild rs3 provides an easy experience.

    Frequently Asked Questions

    Question: How do I get to the Crafting Guild?

    Answer: Head southwest from Falador. The nearest lodestone is at Falador, making travel quick and easy.

    Question: What level do I need to enter the Crafting Guild?

    Answer: You must have a Crafting level of 40 to enter the crafting guild.

    Question: Is there a cost to enter the Crafting Guild?

    Answer: You must be a member of RuneScape to enter the guild.

    Question: What can I do in the Crafting Guild?

    Answer: You can use crafting stations, bank items, and mine gem rocks to craft items and level up your skills.

    Question: Can I make money at the Crafting Guild?

    Answer: Yes, you can craft items to sell, such as jewelry and other valuable goods. You can earn a good income.

    Final Thoughts

    This guide has explored the ins and outs of the crafting guild rs3. You now know the requirements for entry. You also know how to get the most out of the guild. You now have the knowledge to improve your Crafting skill, and make more money. This guide covers how to level up quickly, and find valuable items. Don’t be afraid to experiment, and learn the best strategies. Start by visiting the crafting guild. See for yourself the advantages. Start crafting and gain experience in crafting guild rs3! This will take you to success. Practice, and enjoy the adventure.

  • Mastering Minecraft: Your Definitive Crafting Guide

    Mastering Minecraft: Your Definitive Crafting Guide

    Remember that first night in Minecraft? The sun was setting, creepers were hissing, and all you had were a few blocks of dirt and a whole lot of panic. Building a shelter, gathering resources, and figuring out how to make anything beyond a crafting table felt impossible. This guide is here to change that. We’ll explore everything you need to know about crafting guide Minecraft, transforming you from a bewildered newbie into a resourceful master builder. Get ready to expand your gameplay and build like a pro. This guide offers insights that’ll help improve your time on page and reduce bounce rates, helping you become a crafting master.

    Key Takeaways

    • Learn the fundamental concepts of crafting in Minecraft.
    • Discover how to create essential tools and equipment.
    • Explore advanced crafting techniques and recipes.
    • Master resource gathering and management for crafting.
    • Improve building skills by building a strong foundation.
    • Optimize your crafting efficiency for maximum output.

    Getting Started with Minecraft Crafting

    The core of Minecraft is, at its heart, a crafting game. It’s all about taking raw materials and transforming them into something useful, whether that’s a simple wooden pickaxe to mine stone or a complex redstone contraption to automate a farm. The crafting guide Minecraft players need goes beyond simply knowing recipes; it requires an awareness of resource management, material properties, and the creative potential of block-based construction. Understanding these basics is essential to creating nearly anything in the game.

    The Crafting Table: Your Workbench

    The crafting table is the most important tool. It’s the essential workbench for crafting. You craft it using four wooden planks of any kind, placed in the four slots of your inventory’s crafting grid. Once placed, the crafting table expands your crafting grid from 2×2 to 3×3, allowing you to create more complex items. You’ll use it to create almost everything that isn’t a basic block or tool made at your character’s default crafting grid.

    • Crafting Grid Functionality: The 3×3 grid lets you combine up to nine different ingredients to create more advanced items like weapons, armor, and tools. This significantly expands the range of items you can create.

      This larger grid is essential for crafting items requiring multiple components. You cannot create most items without one. By placing ingredients in a specific pattern, you can “recipe” items. You can use it to create anything from simple torches to complex machinery.

    • Placement and Usage Tips: Place your crafting table somewhere safe and accessible. Right-clicking on the crafting table opens its interface.

      Always keep it in a safe spot near your base. Consider placing multiple tables for convenience. If you build it near the entrance of a home, you’ll have easy access to crafting. Placing them near resource areas is also a strategic option.

    • Recipe Books and Guides: Utilize in-game recipe books and online guides to learn new recipes. The crafting recipe book available in the game will change how you play.

      The recipe book is your in-game reference for all possible crafting recipes. These resources are incredibly helpful, especially when you’re starting. The book filters options depending on what ingredients you have.

    Basic Crafting Recipes

    Before you get into the more advanced crafts, it’s vital to have a solid base. Knowing how to craft the basics is key to surviving. This knowledge underpins every aspect of your game. Knowing how to craft a pickaxe, a sword, or a furnace will help you survive and build better.

    • Wood-Based Essentials: Start by crafting wooden planks from logs, then use them to create a crafting table, sticks, and tools such as axes, shovels, and pickaxes.

      These early tools are fundamental to your survival. They’ll help you quickly gather resources like wood, stone, and coal. They are also vital for crafting other items. Your progression hinges on these early crafts.

    • Stone Tools: After getting your tools, you’ll need to upgrade them. Craft a stone pickaxe from cobblestone. This is the first significant upgrade. It lets you mine iron and other resources.

      Stone tools are more durable and faster. They’ll allow you to gather resources. They’ll also allow you to create stronger and better gear. Upgrading tools is a key part of progressing through the game. That includes building better armor, tools, and weapons.

    • Furnace: The furnace is crucial for smelting ores and cooking food. Craft it using eight pieces of cobblestone.

      The furnace lets you smelt raw ores into ingots and cook food. You’ll use it to turn iron ore into iron ingots or raw chicken into cooked chicken. It’s an essential part of your survival and progression.

    Advanced Crafting Techniques

    Once you are comfortable with the basics, it’s time to explore advanced techniques. Crafting guide Minecraft players will find new ways to improve their game. This includes better resource gathering. It also helps with the creation of more sophisticated structures. The more you learn, the more fun you’ll have. This includes new building techniques.

    Smelting and Refining

    Smelting and refining materials is a key part of the game. It’s how you turn raw ores into useful ingots. It’s also how you cook food. Knowing the ins and outs of smelting is a part of becoming an expert crafter. It will help you expand your gameplay.

    • Smelting Ores: Place raw ores (iron, gold, etc.) in the top slot of a furnace and fuel (coal, wood, etc.) in the bottom slot. This begins the smelting process.

      Smelting is how you extract useful metals from raw ores. It’s a key part of your ability to create advanced tools and equipment. The process takes a few seconds and consumes fuel.

    • Fuel Efficiency: Explore different fuel sources for optimal efficiency. Coal is a common choice, but wood and charcoal are also options.

      Different fuels provide varying amounts of smelting time. Using more efficient fuels will speed up production. This will reduce your need to constantly restock fuel.

    • Advanced Smelting: The Blast Furnace smelts ore faster. The Smoker cooks food at an accelerated rate.

      Later in the game, you’ll find different types of furnaces. These specialized blocks can speed up specific processes. Both furnaces need to be crafted and placed.

    Enchanting and Potions

    Enchanting and potions are used to create stronger armor. They also help improve your tools and weapons. These mechanics greatly enhance your abilities. They’ll also improve your chances of survival in the game. You’ll need the right resources and a bit of game knowledge.

    • Enchanting Tables: Craft an enchanting table to apply magical properties to your gear. Place bookshelves around it to boost enchantment levels.

      The enchanting table is your gateway to adding powerful enchantments. Bookshelves near the table increase the quality of available enchantments. You’ll need Lapis Lazuli and levels to perform enchantments.

    • Potion Brewing: Brewing potions requires a brewing stand. This requires blaze powder to brew. Learn different recipes.

      Potions provide a variety of effects. This includes healing, strength, and speed. Brewing requires knowledge of different ingredients and recipes.

    • Experimentation and Combinations: Try various combinations of ingredients to discover new potions and enchantments.

      The game allows you to explore different options. This includes different enchantments or potions. Combining different elements lets you learn more about the game. This can lead to unexpected and powerful results.

    Resource Gathering and Management

    Effective resource gathering and management are key to long-term success. It’s essential to plan. This includes efficiently gathering and storing materials. It also includes the conservation of resources. Mastering these aspects will help your builds.

    Mining Techniques

    Mining is one of the most fundamental activities in Minecraft. It is a key method of acquiring important resources. Different techniques are used depending on what you’re trying to mine. Proper mining helps maximize efficiency. It also prevents wasting resources.

    • Strip Mining: Strip mining is when you create long tunnels. You dig through the ground.

      Strip mining involves creating long tunnels. You look for valuable resources in a systematic manner. Leave a block of space between the tunnels. This is a common and efficient method for finding ores.

    • Branch Mining: Branch mining involves digging a main tunnel. Then, you dig branches from it.

      It’s similar to strip mining, but it is more organized. You dig a main tunnel, then create branches. This method lets you cover more area more quickly. It helps with efficient resource acquisition.

    • Cave Exploration: Caves contain a lot of resources. Be careful exploring them.

      Caves can be dangerous, but they are full of resources. Be careful of mobs and plan your escape route. Exploring caves can be rewarding but risky.

    Farming and Sustainable Practices

    Farming provides a reliable source of food and other resources. Proper farming techniques improve your survival. It also allows you to make more advanced items. It lets you create new structures.

    • Crop Farming: Plant seeds and create crop farms to ensure a constant food supply. Farming will allow you to obtain ingredients for advanced recipes.

      Build basic farms. Plant seeds and harvest your crops. This helps you to have a steady food supply. This is a basic skill for all players.

    • Animal Husbandry: Breeding animals will give you a constant supply of food and other items.

      Breeding animals, like cows and sheep, provides a source of food. You can also harvest resources. You’ll need a fence and the proper resources. Breeding also opens the way for advanced crafting.

    • Resource Conservation: Focus on sustainable harvesting. Avoid wasting materials.

      Always try to conserve your resources. This helps reduce wasted materials. It can help prevent resource depletion. Always replace blocks or replant crops.

    Building Basics and Advanced Builds

    Building is a key element of Minecraft. You can create various structures and express your creativity. Knowing the basics and expanding your skills over time opens up new ways to play the game.

    Foundation and Structural Integrity

    A strong foundation is essential. It’s the base on which you build everything. Ensuring proper structural integrity is key to buildings. They also help prevent collapses. The more you know, the better your buildings will be.

    • Base Leveling: Ensure your foundation is level to avoid uneven structures. This is a key part of your base.

      Leveling your foundation ensures that your building will stand. It’s important for large buildings. This also helps with the overall look.

    • Supporting Structures: Implement support beams and columns. This is important for larger builds.

      Adding support to a building will help it stand. Support beams will let you build bigger buildings. You should do this on a large scale. Always incorporate them to ensure safety.

    • Material Choices: Select appropriate materials based on the structure and aesthetics.

      Different materials offer different properties. You need to pick them according to your build. Consider the aesthetic and your structure.

    Interior Design and Aesthetics

    Interior design and aesthetics are key. This is how you make your builds unique. This allows you to create a functional and welcoming space. Adding small details will enhance your project.

    • Room Layouts: Plan out room layouts. This includes thinking about furniture and functionality.

      How you plan your rooms depends on what you are creating. Consider furniture. Prioritize functionality.

    • Lighting and Ambiance: Use different lighting techniques. Consider how the light will look in your build.

      Lighting can completely change the mood of your builds. There are different types of lighting you can use. This helps define the overall aesthetic.

    • Details and Decoration: Add details such as furniture and decorative blocks.

      These extra details bring your structure to life. Adding decorations will help bring your vision to life. This will improve the overall aesthetic.

    Crafting Efficiency and Optimization

    Crafting efficiency can have a big impact on your time. You can craft more items. You can also become more efficient at gathering resources. You’ll also minimize waste. The more you learn, the better you’ll become.

    Automation and Redstone

    Automation with Redstone changes the way you play Minecraft. Using automation will minimize manual effort. It is used to create some of the most complex builds. This can simplify any process. You can apply it to farms or even storage systems.

    • Basic Redstone Circuits: Learn the basics. Understand how to power blocks and transmit signals.

      Understanding basic redstone will help you automate parts of the game. Explore the different components that can be used. Experiment with different circuits.

    • Automated Farms: Build farms for resources.

      Automated farms allow for constant resource production. You’ll gain a large amount of resources without constant manual input. This includes crops, food, and other resources.

    • Storage Systems: Create systems to organize and access your items.

      Automated storage systems help keep your items organized. This will make inventory management much easier. This helps maximize efficiency.

    Inventory Management and Planning

    Effective inventory management is key to ensuring you’re able to craft. Careful management improves the efficiency of your crafting. It also helps with the efficiency of gathering materials. It’ll also improve how you store materials. The better you manage, the better your experience will be.

    • Inventory Organization: Organize items to find them easily. Create a system.

      Organizing your inventory can save time. Place similar items together. Use tools like the ‘shulker boxes’ to expand your storage.

    • Storage Solutions: Create storage systems. This helps to manage your items.

      Design storage solutions to manage your items. Use chests to store a lot of items. Automated storage systems will help organize the items automatically.

    • Resource Prioritization: Prioritize resources. Understand which ones you need the most.

      Prioritize your resources to maximize your efforts. Know which resources you need most to complete your builds. This will help with your planning.

    Common Myths Debunked

    Myth 1: Crafting is Too Difficult for Beginners.

    In reality, the initial steps of crafting guide Minecraft players need are designed to be accessible. You will learn the basics easily. The game’s crafting system gradually introduces more complex recipes. The recipe book and online resources make it easy to learn new recipes.

    Myth 2: You Need to Memorize Every Recipe.

    While knowing some key recipes helps, you don’t need to memorize everything. Minecraft offers in-game recipe books and online resources. You can easily find the recipe you need. Focus on understanding the material logic, not memorization.

    Myth 3: Advanced Crafting Requires Complex Coding Knowledge.

    Advanced crafting, such as redstone contraptions, relies on game mechanics. The game involves logical thought rather than coding skills. There are many tutorials and guides. Experimentation and practice are key to developing your abilities.

    Myth 4: Crafting is Only for Beginners.

    In fact, crafting is a core element of the game. It is a tool used by experts and newcomers. Advanced players constantly use crafting for automation and unique builds. Crafting remains relevant and essential at every stage of gameplay.

    Myth 5: You Must Always Use the Optimal Tools.

    The optimal tool will help increase your output, but it can be time-consuming. You can use your inventory to craft tools. The best tools will vary based on your circumstances. This will help you balance your crafting needs.

    Frequently Asked Questions

    Question: How do I create a crafting table?

    Answer: You can make a crafting table using four wood planks. Place them in any of the crafting grid slots.

    Question: What is the best way to get started in Minecraft crafting?

    Answer: Start with the basics. Craft tools like a pickaxe and shovel. Then, explore more complex items.

    Question: What is the crafting grid size on the crafting table?

    Answer: The crafting table has a 3×3 grid. This provides more space. This makes it possible to create advanced items.

    Question: How do I make stone tools?

    Answer: You can get stone tools. This is done by combining sticks and cobblestone.

    Question: How can I improve my crafting skills in Minecraft?

    Answer: Practice, experiment, and research new recipes. Watch tutorials to improve your skills.

    Final Thoughts

    Crafting guide Minecraft will allow you to explore a universe of creativity. You’ve taken the first steps into the world of Minecraft crafting. Starting with the basics and moving to the complex techniques is what separates the novices from the veterans. You’ve now explored the foundations of crafting, from essential tools and recipes to the advanced concepts of automation and resource management. Embrace experimentation. Explore different combinations. Learn from the environment around you. The more you know, the more possibilities will become available. So, grab your pickaxe, fire up your furnace, and start building. Enjoy the journey of discovery, and your creations will change.

  • Crafting FiveM: A Guide to Creating Your Own Game Experience

    Crafting FiveM: A Guide to Creating Your Own Game Experience

    Ever feel lost in a city full of players, wishing you could change things up? Maybe you’ve envisioned your own custom vehicle, a unique roleplaying scenario, or even a whole new economy in the online world of Grand Theft Auto V. Well, you’re not alone! Many players dream of personalizing their gaming experience within the crafting fivem environment. This guide is your starting point. You’ll learn the essential steps to build your own modifications, from simple script tweaks to more elaborate game features, ensuring you can tailor your experience. By the end, you’ll gain the knowledge to improve your enjoyment and feel like a true creator, which will boost your Time on Page and reduce that pesky Bounce Rate.

    Key Takeaways

    • Learn the fundamental building blocks of crafting fivem modifications.
    • Discover essential scripting languages and tools used for development.
    • Understand the process of creating custom vehicles and other in-game assets.
    • Explore server-side and client-side scripting to control game behavior.
    • Get tips on optimizing your modifications for smooth performance.
    • Find useful resources and communities to help you along the way.

    Getting Started with FiveM Development

    Before jumping into the code, it’s essential to grasp the basics. FiveM is a modification for Grand Theft Auto V that allows players to join custom multiplayer servers. Instead of playing the standard GTA V online mode, you connect to servers with unique rules, gameplay, and modifications. These modifications are what make FiveM so exciting – they’re created by the community and range from simple scripts that change how a car handles to entire new game modes. Think of it as a blank canvas where you can paint your own game experience. Developers use Lua scripting as the primary language, along with other tools to build and implement the assets they desire for their server. You’ll need to install the FiveM client, set up a development environment, and familiarize yourself with the game’s structure.

    Essential Tools for FiveM Developers

    A few essential tools are needed to get started on crafting fivem projects. First, you’ll need a good code editor. Visual Studio Code (VS Code) is a popular choice among developers because it is free, has great support for Lua, and is highly customizable. You can download it directly from Microsoft. Next, you need a resource manager or a way to organize your files. Many people use the FiveM resource structure within the server files. Furthermore, understanding the resources’ structure and the ability to organize the files is a must. For debugging, you’ll need the FiveM client itself and a way to observe the server’s activity. The built-in FiveM console and the developer tools will be important during testing. Lastly, a basic understanding of Git is useful to manage your projects, track changes, and collaborate with others.

    • Code Editor: VS Code is the go-to choice, offering syntax highlighting and extensions.
    • Resource Manager: Helps organize files and manage different scripts.
    • Debugging Tools: FiveM’s built-in console for testing.
    • Version Control (Git): Allows for tracking code changes and collaboration.

    Using the proper tools helps streamline the development process and avoids unnecessary challenges. Using these key tools is more than helpful for newcomers who are new to crafting fivem experiences, and is critical for developers that want to build successful servers.

    Understanding Lua Scripting in FiveM

    Lua is the scripting language at the heart of FiveM development. It’s a lightweight and easy-to-learn language, making it accessible to beginners. In FiveM, Lua scripts control almost every aspect of the game, from player interactions and vehicle mechanics to custom jobs and game events. Learning the basics of Lua, such as variables, functions, conditional statements, and loops, is crucial. You’ll use these to manipulate game elements, create custom behaviors, and interact with the server. Lua is well-documented, with plenty of online resources and tutorials. Experimenting with simple scripts to get a feel for how the language works is a great way to start. Start with basic actions, like printing messages to the console or changing a player’s appearance, to get familiar with the syntax and structure. Over time, you can progress to more advanced projects.

    • Variables: Store information like player names or vehicle speeds.
    • Functions: Blocks of code that perform specific tasks.
    • Conditional Statements: Make decisions based on certain conditions.
    • Loops: Repeat actions multiple times.

    Knowing Lua will enable you to create everything from simple user interfaces to complex game logic. A strong command of Lua can transform your ideas into reality inside the world of crafting fivem.

    Creating Custom Game Assets

    Besides scripting, creating your own assets is another way to personalize your FiveM server. This could involve making new vehicles, clothes, weapons, or even custom map elements. This process generally involves using third-party software and tools to create or modify existing game assets. Understanding the file formats FiveM supports, such as .yft, .ytd, and .ymap, is essential. Once you’ve created your asset, you’ll need to import it into your FiveM server, which involves using specific tools and techniques to ensure compatibility and correct placement. There are many tutorials and resources available online, and practicing by modifying simple assets is a great way to start.

    Adding Custom Vehicles

    Custom vehicles are a popular addition to FiveM servers. They provide players with more choices and can match the theme of the server. The process involves multiple steps: First, you’ll need a 3D modeling program, such as Blender or 3ds Max, to create or modify the vehicle model. These programs let you change the look of the vehicle by altering the mesh, textures, and other visual details. After you have your model, you’ll need to prepare it for FiveM. This includes converting the model to the appropriate file formats and configuring the vehicle’s handling data. This data determines how the car handles, its speed, and its other characteristics. Tools like OpenIV are used to convert and import the files into the game. Finally, you’ll need to add the vehicle to your server using a resource that loads the vehicle and makes it available to players. This can involve scripting to spawn the vehicle, make it purchasable, or include it in game events.

    • 3D Modeling: Create or modify vehicle models using software like Blender.
    • File Conversion: Convert the model to .yft and .ytd formats.
    • Handling Data: Configure the vehicle’s speed, handling, and other features.
    • Server Integration: Add the vehicle to your server using a FiveM resource.

    Creating custom vehicles enhances the player experience, adding diversity and personalizing the server’s environment. Mastering this aspect of crafting fivem can dramatically transform your server.

    Modifying Textures and Textures

    Textures define the visual appearance of objects in the game. You can change these to personalize your server by changing the color of a car, applying new patterns to a building, or creating unique character outfits. You’ll need an image editing program like Photoshop or GIMP to work with textures. You can either create them from scratch or modify existing textures. The textures are usually stored in .ytd files (GTA V Texture Dictionary). You can use OpenIV to extract existing textures for modification. After you have your edited texture, you can add it to the game through your script. The process often involves linking the texture to the appropriate model or object in your FiveM server resource. There are tutorials online that will demonstrate how to perform the steps.

    • Image Editing Software: Use software like Photoshop or GIMP to create or modify textures.
    • .ytd Files: These files store the texture data for in-game objects.
    • Texture Application: Link the modified textures to specific in-game models or objects.

    Texture modification offers a way to customize the visual environment, making your server stand out and providing a unique visual experience that is a key component of crafting fivem.

    Server-Side and Client-Side Scripting

    In FiveM, scripts are executed either on the server or on the client (player’s machine). Understanding the difference and how they work is vital for crafting fivem projects. Server-side scripts run on the server and control core gameplay elements, such as player data, economy, and general server behavior. They provide a secure and consistent game environment. Client-side scripts run on each player’s computer and handle the player’s interactions, such as UI elements, animations, and visual effects. Both are essential for creating the ideal FiveM experience. They provide the server and client components that you can use to build your FiveM server. Learning both is the goal for a good server-side and client-side balance.

    Server-Side Scripting Explained

    Server-side scripts manage the core gameplay, player data, and server logic. All players’ actions must be managed and verified on the server. This prevents cheating and maintains game integrity. Example actions would be player money, inventory, and other important aspects of a server. You can write scripts in Lua. These scripts handle things such as: controlling the economy (managing player money, businesses, and transactions), enforcing rules (preventing cheating and other undesirable behaviors), handling database interactions (storing player data and game progress), and managing resource management. Optimizing server-side scripts is crucial for ensuring server performance and preventing lag. The less the server must process, the better the performance. This ensures that the gameplay is smooth for all players on the server. Server-side scripting is essential for any FiveM server. It creates a stable, fair, and engaging experience for everyone.

    • Gameplay Management: Controls the core game mechanics, such as player movement and actions.
    • Data Storage: Stores player data, such as inventory and money.
    • Security: Protects against cheating and exploits.
    • Resource Management: Manages and optimizes server resources to prevent lag.

    Efficient server-side scripts are critical for a stable and engaging crafting fivem experience.

    Client-Side Scripting Explained

    Client-side scripts improve the player’s experience. These scripts control everything that the player sees and interacts with. This can be animations, UIs, and audio effects. The most important actions client-side scripting does is to render everything on the player’s computer. Client-side scripts are primarily responsible for: the user interface, player controls, animations, visual effects, and sound effects. They are responsible for making the player’s experience more immersive. This includes creating custom HUDs, player indicators, animations, and sound effects. By creating a better user experience for players, it encourages them to stay on the server. However, it’s also important to follow security precautions. While client-side scripts enhance the player’s experience, remember that they operate on the player’s machine. Careful attention is needed to prevent potential exploits. They are very important for the visual and auditory experience. The combination of server-side and client-side allows for powerful and interactive FiveM experiences.

    • User Interface: Custom HUDs, menus, and other UI elements.
    • Player Controls: Manage player actions, such as movement and interactions.
    • Visual and Sound Effects: Add animations, particle effects, and sound cues.

    Mastering client-side scripting helps create more engaging and customized crafting fivem interactions.

    Optimizing Your Modifications

    Creating unique content is only half the battle. If your scripts and assets are not optimized, they can cause lag, slow down the server, and make the game unplayable. Good performance is key to an enjoyable experience. There are some simple guidelines that you can follow to keep your server running smoothly. The goal is to maximize performance while creating the best gaming experience. This involves various techniques, from efficient scripting practices to careful management of game resources. Regularly testing and analyzing your work will help to maintain a smooth gameplay experience. Addressing performance issues can be the most rewarding part of crafting fivem experiences.

    Scripting Efficiency Best Practices

    Script efficiency is critical for FiveM performance. One simple step is to make your code as efficient as possible. This means avoiding unnecessary loops, using appropriate data structures, and optimizing function calls. Every line of code can affect the server’s performance. The first step in writing an efficient script is to understand Lua’s built-in functions, which are much more efficient than user-defined functions. Regularly update your code. Code updates can fix bugs and improve performance. Make sure to profile your code. This can identify performance bottlenecks and the most resource-intensive operations. Regularly optimize. This involves removing any unnecessary functions or code that is not critical. With scripting efficiently, you can significantly enhance your FiveM server’s performance. Efficient scripting ensures a smooth and enjoyable experience for all players on the server.

    • Avoid Unnecessary Loops: Minimize the number of times a script repeats a certain action.
    • Use Efficient Data Structures: Choose appropriate data structures, such as tables and arrays.
    • Optimize Function Calls: Minimize the use of resource-intensive functions.
    • Profile and Optimize: Regularly test and refine your scripts to identify and address any performance bottlenecks.

    Prioritizing efficient scripting practices is essential for a smooth crafting fivem environment.

    Resource Management and Optimization

    Besides efficient scripting, managing your server’s resources correctly is important. The use of textures, models, and scripts all consume resources. The goal is to optimize these without removing content. Here are a few ways to keep performance at a high level. Only load what’s needed. This means not loading assets or scripts that aren’t necessary for the current gameplay. Make use of streaming methods. Streaming means loading resources only when needed. Streaming keeps the game from loading everything at once. This significantly reduces memory usage and loading times. The next tip is to compress your assets. Compressing textures and models can reduce their file size without greatly affecting visual quality. This lowers memory usage and improves loading times. This makes your experience better. Finally, regularly review and remove unused files and resources. By prioritizing effective resource management, you ensure a smoother and more responsive experience.

    • Only Load What’s Needed: Stream resources to load only when required.
    • Compress Assets: Compress models and textures to reduce file sizes.
    • Review and Remove Unused Resources: Remove unnecessary files and scripts.

    Good resource management is critical to deliver an optimized and enjoyable crafting fivem experience.

    Advanced Techniques in FiveM Development

    As you progress in your FiveM development, you may want to explore more advanced concepts. These concepts are key to taking your projects to the next level. Advanced techniques will give you more control and creative freedom. This exploration allows for more unique and involved projects. As you improve, you’ll be able to create truly amazing game content. These advanced methods can be very difficult at first, but with persistence, you’ll reach the level that you desire. There are many opportunities to learn, and by using your initiative, you will be able to create some amazing things in crafting fivem.

    Database Integration

    Database integration is a key step in creating persistent game elements. By using a database, you can store and retrieve player data, such as inventory, money, character information, and progress. One of the most common databases for FiveM is MySQL. This database allows you to easily store information such as character data and inventories. You’ll need to set up a database server and learn how to write queries to are many libraries available. Libraries simplify database interactions. Integrating a database allows for complex systems and saves player progress. This way, your players will be able to return to a server and resume where they left off. Learning the basics of database integration will improve your crafting fivem abilities.

    • MySQL: A common and popular database for storing player data.
    • Database Queries: Write queries to interact with your data.
    • Persistence: Save player data, like inventory and character info.

    Successfully integrating a database into your FiveM project unlocks more advanced features and improves player engagement and enjoyment.

    Creating Custom UI Elements

    Custom UI elements give you more control over the user interface, improving the overall user experience. This means creating custom menus, HUD elements, and in-game displays. Creating custom elements requires knowledge of HTML, CSS, and JavaScript. You’ll need to use FiveM’s built-in web browser and API to render and interact with your UI elements. The combination of these technologies lets you create rich, interactive interfaces, which can be tailored to match the theme of your server. These can include inventory systems, job menus, and other elements that make the server more interactive. This improves the player experience, making it easier for players to do the things they want. Custom UIs provide a way to create an immersive game world that offers a unique crafting fivem experience.

    • HTML, CSS, JavaScript: Web technologies for building custom UI elements.
    • FiveM Browser: Use FiveM’s browser and APIs to render and manage your custom UI.
    • UI Customization: Create unique in-game interfaces and displays.

    Building customized UI elements is very important for an engaging and well-polished crafting fivem experience.

    Common Myths Debunked

    Myth 1: You Need to Be a Professional Coder to Start

    Many players think they need years of coding experience to begin crafting fivem mods. However, this is untrue! While a background in programming can be helpful, it’s not a requirement. FiveM utilizes Lua, a beginner-friendly language, and many community resources and tutorials can guide you. The essential thing is a willingness to learn and experiment. Begin with basic scripts and then gradually explore more complex projects as you improve. With patience and practice, you can get started creating the things that you desire.

    Myth 2: Free Mods Are Always Low Quality

    It’s a common misconception that free FiveM mods are low quality or riddled with problems. There are a variety of excellent free mods available. Many experienced developers are actively involved in the FiveM community, and they offer high-quality modifications for free. The quality of a mod depends more on the developer’s skill and dedication than its price. Before installing any mod, it is essential to review it and use some due diligence to ensure its safety and quality. Many free mods offer significant value, and you can find great options if you put in some work. This is very important when crafting fivem projects.

    Myth 3: Modding Will Get You Banned

    A common concern is that using mods will lead to a ban. However, the use of mods in FiveM, which is a separate platform, does not usually affect the original Grand Theft Auto V online. As long as you follow the guidelines and rules of the specific FiveM server, you will not have any issues. When joining a FiveM server, make sure to read the rules and guidelines of the server. You can also create and use mods on your own server without any risk of a ban from Rockstar Games. Using the FiveM platform correctly is the main point when crafting fivem.

    Myth 4: It’s Impossible to Make Money From FiveM

    While the goal of many FiveM developers is not to make money, it’s still possible to generate revenue. Some developers provide premium mods or custom scripting services. There is always a market for these services, and you may find buyers. Running a FiveM server can also generate revenue through donations, in-game purchases, or advertisements. A well-designed and maintained server can attract a large player base and open up opportunities for income generation. Remember to be transparent and fair in all transactions and interactions. There are several ways to improve your position in crafting fivem.

    Myth 5: You Have to Be a Tech Genius to Understand It

    The field of crafting fivem may seem challenging, but it is accessible to anyone with an interest and some determination. While having previous experience with coding is beneficial, it is not essential. There are many tools, resources, and a supportive community. It is possible for anyone to build mods and servers. Take your time, study the concepts, and be persistent. The FiveM community is welcoming and always ready to support new developers. You can also explore the documentation and tutorials to improve your knowledge. With a positive attitude and willingness to learn, you can get started quickly.

    Frequently Asked Questions

    Question: What is the best way to get started?

    Answer: Begin by learning the basics of Lua scripting, then try working with simple projects to get a feel for things. Join the community to seek help and learn from others.

    Question: Where can I find help if I get stuck?

    Answer: Visit the FiveM forums, Discord servers, and YouTube channels to find tutorials and assistance from other developers.

    Question: Is it difficult to create custom vehicles?

    Answer: It can be, but with the right tools and tutorials, you can learn to create custom vehicles. Start with easy models and then progress to more complex vehicles.

    Question: What are the main benefits of a custom server?

    Answer: Custom servers provide a personalized experience and increase player engagement and replayability, allowing for more creative freedom.

    Question: Can I use FiveM without the original GTA V?

    Answer: No, FiveM requires a legally purchased copy of Grand Theft Auto V to operate.

    Final Thoughts

    This exploration of crafting fivem reveals how you can customize your gameplay. We have explored the fundamental steps of creating mods and how to use them. You have now learned how to get started in the world of FiveM development. By understanding Lua scripting, the creation of custom assets, and the importance of server-side and client-side scripts, you’re now equipped to bring your own ideas to life. Remember to focus on optimization and resource management for a smooth and enjoyable experience. Take advantage of the online community, tutorials, and available resources. Go out there and start building, experimenting, and bringing your vision to life. The possibilities are vast, and the community is ready to help! Dive in, test your ideas, and enjoy the process of creating. Happy crafting fivem!

  • Crafting FFXIV: A Beginner’s Guide to Success and Rewards

    Crafting FFXIV: A Beginner’s Guide to Success and Rewards

    Picture this: You’re staring at an empty inventory, dreaming of a shiny new set of armor, or a delicious meal to boost your stats. The market board looks tempting, but the prices. well, let’s just say they’re not friendly to your gil stash. Sound familiar? It’s a common experience in Eorzea! This guide is for anyone looking to master crafting FFXIV. You’ll go from novice to artisan and learn the tips and tricks to make the best items while making the most gil. You’ll learn the techniques to get you well on your way to crafting FFXIV in a way that is easy to understand. You will learn the basics, advanced tips, and the secrets of profitability. You’ll gain a solid foundation for your crafting adventures.

    Key Takeaways

    • Learn the basics of crafting classes and their roles.
    • Discover the best ways to level up your crafting skills efficiently.
    • Explore how to get the materials you need for your creations.
    • Find out how to maximize your gil through selling crafted items.
    • Understand how to use cross-class skills and equipment for crafting.
    • Master the different crafting actions to make high-quality items.

    Getting Started with Crafting in FFXIV

    The first step in your crafting FFXIV adventure is to choose your classes. FFXIV offers eight Disciple of the Hand (DoH) classes, also known as crafting classes. These classes allow you to create various items, from weapons and armor to food and potions. Each class has its unique specialty and uses different resources. Some classes focus on producing armor and accessories, while others specialize in creating tools, furniture, or consumables. Taking the time to decide which class aligns best with your interests and playstyle is important.

    Choosing Your Crafting Classes

    Selecting your crafting classes is the first big step. Each class offers unique advantages and focuses on different types of items. It’s best to explore the classes that appeal to you. Do you want to make weapons and tools? Try Blacksmith or Carpenter. Are you more interested in making clothes and accessories? Look at Weaver or Leatherworker. Consider your play style, and the items that are most valuable or that you want to be able to make for yourself. Starting with one or two classes and then expanding is a great way to grow.

    • Carpenter (CRP): Creates wooden weapons, tools, furniture. This class is great for making housing items and various tools that are always in demand.
    • Blacksmith (BSM): Crafts metal weapons and tools, including armor and tools. A valuable class for making high-level gear.
    • Armorer (ARM): Focuses on plate armor and tools. They make defensive gear, that is always needed.
    • Goldsmith (GSM): Makes jewelry and accessories. This class creates accessories that players need for stats.
    • Leatherworker (LTW): Produces leather armor and accessories. It’s crucial for gear sets.
    • Weaver (WVR): Creates cloth armor and clothing. Important for many types of gear, from casual wear to high-end sets.
    • Alchemist (ALC): Produces potions, oils, and other consumables. Useful for boosting stats, or making consumables.
    • Culinarian (CUL): Crafts food items that provide stat buffs. Important for raiding and other high-end activities.

    For example, if you love gathering and using resources from the environment, Carpenter or Blacksmith might be perfect. Maybe you enjoy experimenting with different materials and crafting. In that case, Alchemist or Culinarian might be great starting points. Having a class for gear and a class for consumables is usually a good idea.

    Starting Your Crafting Journey

    Once you’ve decided on your classes, it’s time to get started. You can begin by talking to the appropriate guildmaster in the city-states to start the class quests. The guildmaster gives you the basic tools and equipment. These are essential for crafting FFXIV items. You’ll complete quests to learn the basic actions, like “Synthesis” and “Manipulation”. The first few levels are usually easy to get through.

    • Locating Guilds: You can find the crafting guilds in the major cities: Limsa Lominsa (for Carpenter, Goldsmith, and Culinarian), Ul’dah (for Blacksmith, Armorer, and Weaver), and Gridania (for Leatherworker and Alchemist).
    • Acquiring Basic Tools: The guildmaster will provide you with basic tools and initial equipment. These tools are the foundation of your crafting process.
    • Completing Class Quests: These quests will guide you through the basics of your class. They unlock key actions and recipes.
    • Learning Basic Actions: The basic actions are Synthesis, which combines materials, and Manipulation, which affects the quality of the items. You will get to learn the basics as you level up.

    Completing these initial quests will provide you with fundamental knowledge. These quests are important. They will equip you with what you need to begin crafting FFXIV items and leveling your chosen classes. They’ll also give you some basic crafting tools. Be sure to equip your tools when you start crafting.

    Leveling Up Your Crafting Classes

    Leveling your crafting classes is crucial to access better recipes and items. Leveling efficiently is the key to enjoying the crafting FFXIV experience. You can do this by completing class quests and crafting items. Prioritizing efficiency will save you time and resources. As you level up, you will unlock new crafting skills and recipes.

    Understanding Experience and Levels

    In FFXIV, experience (EXP) points determine your crafting level. You gain EXP by crafting items, completing class quests, and turning in crafted items. Your level unlocks new crafting actions and recipes. The higher the level, the better items you can craft. You will be able to make higher quality gear for yourself and others.

    • EXP from Crafting: The EXP earned depends on the item level and the quality of the crafted item.
    • EXP from Class Quests: Class quests provide a significant boost in EXP and unlock new abilities.
    • EXP from Turn-Ins: Turning in items to your Grand Company or specific NPCs can give large EXP rewards.

    The EXP needed to level up increases as you progress. So, it’s helpful to maximize EXP gains. Make sure you use food buffs to provide extra EXP. This will help you level up faster. Also, be sure to complete your daily Grand Company turn-ins, as they offer substantial experience bonuses.

    Efficient Leveling Strategies

    To level your classes quickly, focus on a few key methods. Crafting items that give you a lot of EXP relative to the cost of materials is key. Use the crafting log to keep track of items you can make and level with. Also, aim for high-quality crafts to maximize your EXP gain. Using food buffs and making sure you have good gear will also help.

    • Levequests: These repeatable quests give significant EXP rewards. They are a quick way to level up.
    • Crafting Log: Use the crafting log to find recipes that are appropriate for your level. They give the most EXP per item.
    • Turning in Crafted Items: Daily Grand Company turn-ins and other NPC turn-ins provide substantial EXP.
    • Using Food and Gear Buffs: Food buffs and crafted gear can increase your stats. They are important for quality and efficiency.

    Crafting items that are easy to make while giving good EXP is the key to speeding up the leveling process. Taking advantage of the bonus EXP from Levequests or turning in items can accelerate your progress. Using these strategies lets you advance quickly and efficiently.

    Gathering Materials for Crafting

    You can’t craft FFXIV items without materials. They are a must. Most materials in the game come from gathering, buying, or a combination of both. Some materials are easy to get, while others are rarer. Getting materials means you’ll need to use gathering classes, buy them, or even get them from other classes. So, let’s explore this in more detail.

    Gathering Classes and Their Roles

    FFXIV has three gathering classes: Miner (MIN), Botanist (BTN), and Fisher (FIS). Miners gather ores, gems, and other minerals. Botanists gather plants, wood, and other natural resources. Fishermen, well, they fish. The materials these classes gather are used by crafters to make items.

    • Miner (MIN): This class gathers ores, gems, and other minerals from mining nodes found in various locations.
    • Botanist (BTN): Botanists gather plants, wood, and other natural resources from harvesting nodes.
    • Fisher (FIS): Fishermen catch fish, which are used as ingredients or for food.

    These classes are crucial for crafting. To craft effectively, you will want to level a gathering class. This helps you get resources yourself and save gil. It also gives you access to the resources needed for your crafting classes.

    Acquiring Materials

    You can get materials in different ways: gathering, buying from the market board, or getting them from other players. Gathering is the most direct way. But it may require you to level your gathering classes. The market board is a place to buy materials. Trading with other players gives you materials at an affordable price.

    • Gathering: Leveling your gathering classes and gathering materials yourself is cost-effective.
    • Market Board: Buying materials from the market board is quick. But it may be more expensive.
    • Trading and Collaboration: Trading with friends or other players can be useful for getting materials.
    • Retainers: You can send your retainers to gather materials for you. This is an excellent passive way to collect materials.

    Each method has pros and cons. Gathering is the most time-consuming but cheapest option. Buying materials is convenient but can be costly. Trading and retainers offer a balance of price and convenience. Using all of these methods maximizes your material acquisition.

    Crafting Actions and Techniques

    Knowing your crafting actions and techniques helps make higher-quality items. These are all the actions and skills you can use to craft items. These will let you improve your crafting process and get better results. Mastering the actions is the key to quality and efficiency.

    Understanding Crafting Actions

    Crafting actions are the tools you use to create items. Each action has a specific purpose. There are actions to increase quality, progress, and durability. Using these actions strategically is the key to making high-quality items. They will also improve the chance of success.

    • Synthesis: This action is the main action for progressing an item’s completion. It’s the most basic action.
    • Basic Touch/Careful Synthesis: These actions increase the quality of the item. They are used to improve the final quality of the item.
    • Rapid Synthesis/Hasty Touch: These are actions that can speed up the crafting process. They can be useful in certain situations.
    • Manipulation/Waste Not: Actions that help you manage your resources and durability. They keep your crafting efficient.

    Learning how to use each action and knowing when to use them is essential. Learning to sequence them to get the best results is important. Experiment with different combinations to learn the best way to craft certain items. You will also want to plan for durability.

    Advanced Crafting Techniques

    Advanced techniques will help improve your crafting. These are used to increase the quality and efficiency of your crafts. These techniques require more skill. But they will improve your crafting. So, let’s explore these techniques.

    • Using Cross-Class Skills: Mixing skills from different crafting classes can enhance your crafting. These offer additional utility.
    • Quality Management: Optimizing your actions to maximize the quality of the item is essential. It will determine the final product’s quality.
    • Progress Management: Knowing how to advance the progress of your item without wasting durability is also important. This impacts the speed of your crafts.
    • Durability Management: Understanding and using actions that preserve your item’s durability is important. This way you can finish the craft.

    Mastering these advanced techniques is what separates good crafters from the best. It takes practice and experimenting. But you’ll get better over time. Learning and practicing is the only way to get better.

    Making Gil through Crafting

    Earning gil through crafting FFXIV is one of the most rewarding aspects. There are many ways to make gil, from selling gear to crafting consumables. Some items are always in demand. You can make gil by focusing on these items. But, let’s look at it more closely.

    Identifying Profitable Items

    Finding profitable items is the first step in making gil. Some items are consistently in demand because they are needed for leveling, raiding, or other activities. Understanding the market, checking prices, and knowing your competition are key to making gil.

    • Analyzing the Market Board: Watching the market board allows you to see the prices of items. It also allows you to see the demand for them.
    • Identifying High-Demand Items: Items used for gear, consumables, or housing are always in demand.
    • Understanding Current Trends: Changes in the game can lead to demand for certain items. Understanding these trends can help you make a profit.

    Keeping an eye on the market and knowing what players need is important. This can change rapidly, so checking the market regularly helps. Knowing these trends gives you an edge in the market. This way, you can tailor your crafting to make more gil.

    Selling Your Crafted Items

    The market board is your primary tool for selling items. Make sure to price your items competitively to attract buyers. Understanding the market and the competition is also important. Making sure your items are of high quality will also help. This allows you to stand out from the crowd.

    • Setting Competitive Prices: Research the market to determine the best price for your items. Pricing your items competitively is crucial for sales.
    • Utilizing the Market Board Effectively: Learn the market board features. Understand how to manage your listings.
    • High-Quality Crafts: High-quality items often sell for a premium. This helps you get more gil.

    Selling your items for the best price, using the market board, and offering high-quality items is key. Making a profit from your crafting FFXIV is all about making the best product. Being able to sell it quickly and at a good price will let you earn more gil.

    Common Myths Debunked

    Myth 1: Crafting is Only for Endgame Content

    Many players think crafting FFXIV is only for high-level content. The truth is you can benefit from crafting at any level. You can craft gear to improve your levels. You can also craft consumables for yourself or others. Even low-level crafting can be a good source of gil.

    Myth 2: Crafting is Too Expensive to Get Started

    Some players believe crafting is expensive to start. However, this is not true. Initial investments in tools and gear can be manageable. Many resources are accessible through quests or can be bought cheaply. You can also start selling basic items to cover the costs. This can make the process quite accessible.

    Myth 3: Crafting Is Too Time-Consuming

    Some players consider crafting FFXIV to be a time sink. While leveling your crafting classes takes time, it doesn’t have to be overwhelming. You can streamline your progress by focusing on efficient methods. Using Levequests, daily turn-ins, and crafting in batches can reduce the time commitment.

    Myth 4: You Need to Be a Master Crafter to Make Gil

    Many believe that only the most advanced crafters can make gil. The reality is that there’s always demand for all types of items. This includes beginner-level gear, consumables, and even housing items. You don’t have to be a master crafter to make a profit. The market offers opportunities at all levels.

    Myth 5: All Crafted Items Are Always Easily Available

    The availability of crafted items can be unpredictable. Market fluctuations and demand changes can impact the prices and availability of items. If an item is required for a current event, or high-end activities, the prices may go up. Also, the availability depends on the time of day.

    Frequently Asked Questions

    Question: How do I unlock crafting classes?

    Answer: You can unlock crafting classes by speaking to the guildmaster in each city-state and completing the introductory quests.

    Question: What’s the best way to level up crafting classes quickly?

    Answer: Completing Levequests, Grand Company turn-ins, and crafting items at your level is the most efficient method.

    Question: Where can I find the materials I need for crafting?

    Answer: You can gather materials using gathering classes, buy them from the market board, or obtain them through trading with other players.

    Question: How do I sell my crafted items?

    Answer: You can sell your crafted items on the market board. Price your items competitively to attract buyers.

    Question: What are cross-class skills?

    Answer: Cross-class skills are abilities you unlock in one crafting class that you can use with other crafting classes. They provide extra benefits.

    Final Thoughts

    Mastering crafting FFXIV is an adventure. You’ll explore all the resources and possibilities the game has to offer. The process begins with selecting your classes and learning the fundamentals. You will need to level your skills, get the resources, and learn the techniques. You’ll quickly see that you can get some great gear by crafting items yourself. You will also learn that you can improve your income by selling your creations. Don’t be afraid to experiment, explore, and learn from your experiences. With dedication and some practice, you’ll be crafting like a pro, creating masterpieces, and filling your pockets with gil. Now go out there and craft!

  • Crafting Events Near Me: Find Fun, Learn Skills, and Connect

    Crafting Events Near Me: Find Fun, Learn Skills, and Connect

    Remember that time you tried to find something fun to do on a Saturday, but all you found were the same old boring options? Wouldn’t it be great to discover local crafting events near me where you could learn new skills, meet awesome people, and create something unique? This post is your guide to exploring the exciting opportunities in your community, helping you find those hidden gems and maximize your free time. Get ready to discover a world of creative possibilities, building your skills and finding new friendships. You’ll gain a roadmap for easily finding and attending crafting events near me, improving your ability to make your own projects and connect with others.

    Key Takeaways

    • Learn how to locate various crafting workshops and classes in your local area.
    • Discover the benefits of attending these events for both personal and social development.
    • Gain tips on how to prepare for a crafting event, ensuring a positive experience.
    • Understand how to choose events that align with your interests and skill level.
    • Get inspired with examples of crafts you can learn at local events.
    • Find ways to connect with local crafting communities.

    Uncovering the World of Crafting Events Near You

    The desire to create, build, and express oneself is deeply ingrained in human nature. Crafting provides a fantastic outlet for this, and participating in local events offers a chance to learn, socialize, and explore your creativity. From pottery to jewelry-making, the variety of possibilities is vast. Finding these events, however, can sometimes feel like searching for a needle in a haystack. This is where our guide comes into play, providing you with the tools and information to find the perfect creative outlets near you.

    Discovering Local Crafting Venues

    The first step involves identifying the places hosting these crafting experiences. Libraries, community centers, and local art studios often schedule workshops and classes. Many small businesses, like independent craft stores, host events to attract customers and foster a sense of community. Coffee shops and bookstores sometimes partner with local artisans to offer craft nights. The goal is to cast a wide net and explore all the potential locations near you. These venues often advertise events on their websites, social media pages, and through local community newsletters.

    • Local Libraries: Libraries are goldmines for free or low-cost events. They frequently offer classes like knitting, scrapbooking, and basic painting, often run by volunteers or experienced craftspeople. Check your local library’s website or visit in person to view their calendar of events.
    • Community Centers: These centers frequently offer a range of classes catering to various age groups and skill levels. Look for events focused on things like sewing, woodworking, or even digital crafting using software. Registration is usually required, so check websites for details.
    • Craft Stores: Local craft stores are directly involved in crafting events. These events are often demonstrations, workshops, or classes, where you can learn new techniques and purchase necessary supplies. They sometimes host events that are free or offer discounts.
    • Art Studios: Art studios focus on more specialized crafts and offer classes taught by professional artists. You might find workshops on pottery, glassblowing, or advanced painting techniques. These events often require pre-registration and a fee.
    • Online Platforms: Explore sites such as Eventbrite, Meetup, and Facebook Events. Search for “crafting events” or specific crafts like “pottery workshops” to find listings in your area. These sites list events from various venues.

    Consider the types of crafts that excite you. Are you fascinated by the intricacy of origami, or do you crave the tactile experience of working with clay? Knowing your preferences will help narrow your search. Use specific keywords like “pottery classes,” “jewelry making workshops,” or “sewing circles” when searching online.

    Utilizing Online Resources to Find Crafting Events

    The internet is your best friend when it comes to finding local events. Several websites and apps are designed to help you discover everything happening in your area. Using the right search terms and filtering options is crucial. Don’t just type in “crafting events.” Get specific. Try “pottery classes near me” or “jewelry making workshops in .” Use your city’s name or a nearby landmark to narrow down your results. Online event calendars are usually kept up-to-date, so check them regularly for new listings. They also provide crucial details such as dates, times, prices, and event descriptions.

    • Eventbrite: Eventbrite is a well-known platform with a comprehensive collection of events across various categories, including crafts.
    • Meetup: Meetup allows you to join groups based on your interests, like crafting or specific crafts. This is an excellent way to connect with local crafters.
    • Facebook Events: Many local businesses and organizations use Facebook Events to promote their crafting workshops and classes.
    • Google Search: Using a search engine like Google is a simple way to find events.
    • Local Community Websites: Check your city or county’s website for community event listings. Local news outlets also sometimes publish event calendars.

    Remember to filter your searches by date, time, and distance to narrow down options. Reviews and ratings can provide insights into the event quality and the instructor’s expertise. Read event descriptions carefully to ensure they match your skill level and interests. Some classes are designed for beginners, while others may require prior experience.

    Building Relationships in Local Crafting Communities

    Attending a crafting event is an excellent starting point, but building connections within a local crafting community can amplify your enjoyment and learning. These communities frequently offer support, inspiration, and opportunities to collaborate on projects. You can find groups online and offline. Participating in these groups enables you to learn from others, share your work, and establish friendships with those who share your creative interests.

    • Join a Local Craft Group: Find crafting groups on platforms like Meetup or Facebook. These groups frequently organize workshops, meetups, and outings. This offers a supportive environment to practice your skills and get feedback.
    • Attend Craft Fairs and Markets: Craft fairs provide exposure to a variety of crafters and their products. Visiting these markets is an opportunity to meet artisans, learn about their work, and even take classes.
    • Volunteer at Craft Events: Volunteering at crafting events will help you connect with organizers and participants. You may be able to assist in setting up, helping with activities, or providing guidance to attendees.
    • Participate in Online Forums: Online forums or social media groups dedicated to specific crafts are excellent places to ask questions, share your work, and connect with crafters.
    • Follow Local Artisans and Craft Businesses: Follow local artisans and craft businesses on social media. They may host events or provide updates on local crafting opportunities.

    Networking at crafting events can open doors to collaborations, learning opportunities, and new friendships. Bring your finished projects to share and discuss with others. The supportive environment of a crafting community motivates you to explore, experiment, and keep improving your skills.

    Choosing the Right Crafting Events for You

    With so many options, choosing the right crafting events can be tricky. It’s important to consider your skills, interests, and goals to ensure a fulfilling experience. Do you want to try a completely new craft, or improve your skills in one you already enjoy? Are you looking for a relaxed social setting or a more structured learning environment? The answers to these questions will lead you towards the most appropriate events.

    Assessing Your Skills and Interests

    Before selecting a crafting event, you must understand your current skills and interests. If you’re a beginner, opt for introductory classes that cover the basics. If you are already skilled in a particular craft, seek out advanced workshops or courses. Consider what kinds of projects appeal to you. Do you like making wearable items, creating home decor, or working with different materials? Narrowing down your preferences will simplify your search. Reflecting on your creative goals will help you select the events that meet your learning needs.

    • Beginner-Friendly Classes: If you are new to crafting, start with beginner classes that cover essential techniques and provide step-by-step instructions.
    • Intermediate Workshops: Once you have the basics, move to intermediate workshops to hone your skills.
    • Advanced Courses: For more experienced crafters, explore advanced courses and specialized techniques to deepen your expertise.
    • Consider Your Interests: If you enjoy jewelry, look for events that teach you how to make bracelets, necklaces, or earrings.
    • Explore New Crafts: Be open to trying new things. Attending a workshop in a craft you know nothing about might become your new passion.

    Remember that experimentation is key. Don’t be afraid to step outside of your comfort zone and try new things. Crafting is all about learning, trying, and having fun. The more you explore, the more you will discover the crafts you enjoy the most.

    Understanding Event Details and Structure

    Pay close attention to event details such as the duration, cost, materials provided, and required skill level. Some events are one-time workshops, while others are a series of classes that meet over several weeks. Some provide all the materials, while others require you to bring your own. Thoroughly reading the event description allows you to select events that meet your criteria. You must consider the event’s structure, instructors, and the expected outcome of the event.

    • Duration and Time Commitment: Determine how much time you can dedicate. Workshops range from a few hours to several days.
    • Cost and Included Materials: Confirm the event cost and whether it includes all the materials, tools, and supplies.
    • Skill Level and Prerequisites: Ensure the event is appropriate for your skill level. Some events have prerequisites, such as prior experience.
    • Instructor Qualifications: Learn about the instructor’s background, teaching style, and any reviews or recommendations.
    • Event Structure: Find out the teaching format and what you will achieve by the event’s end.

    Reading event descriptions carefully and asking questions are key to a positive experience. Make sure you know what to expect. Don’t hesitate to reach out to the event organizers if you have any questions or doubts. They are usually more than happy to provide additional information.

    Setting Realistic Expectations and Goals

    When attending a crafting event, manage your expectations to avoid disappointment. Remember that creating something new can take time and effort, and mistakes are inevitable. Focus on enjoying the learning process, even if your finished product isn’t perfect. Set realistic goals, such as learning a new technique or finishing a small project. The ability to embrace the process and make progress will allow you to feel rewarded.

    • Embrace the Learning Process: Crafting is a skill that develops over time. Accept that there will be mistakes and focus on learning from them.
    • Set Achievable Goals: Begin with manageable projects and gradually increase the difficulty as your skills grow.
    • Focus on Enjoyment: The primary goal should be to enjoy the experience and express your creativity.
    • Don’t Strive for Perfection: Perfection is the enemy of progress. Focus on making something you are proud of.
    • Stay Curious and Adapt: Be open to trying new techniques and materials. Embrace change and evolve your skills.

    Celebrate your accomplishments, no matter how small. Every project, regardless of the outcome, is a learning opportunity. The ability to set realistic goals, embrace challenges, and enjoy the creative process contributes significantly to a positive and rewarding crafting experience.

    Preparation Tips for a Successful Crafting Event

    Attending a crafting event requires more than just showing up. Proper preparation ensures that you are comfortable, organized, and ready to learn. Packing the right supplies, understanding the event’s rules, and managing your time can greatly enhance your overall experience. Preparing ahead of time also removes any unnecessary stress, allowing you to focus on having fun and learning new skills.

    Packing the Essentials

    The right tools and supplies will make your crafting experience smoother and more enjoyable. The required materials may vary depending on the craft, but some essentials include your chosen craft supplies, any tools specified in the event information, and personal items like a notepad and pen. Carrying a reusable water bottle and a small snack can keep you refreshed and energized. Being organized will save time and allow you to stay focused on the project.

    • Craft Supplies: Always check the event description to see if you need to bring any materials or supplies. If the event provides all the materials, make sure you know what will be provided.
    • Tools: Bring any specific tools you need, such as scissors, rulers, or specialized equipment.
    • Personal Items: Consider bringing a notepad, pen, or pencil to take notes and sketch ideas. A small bag can help keep everything organized.
    • Comfort: Make sure you are dressed comfortably in clothes that you don’t mind getting dirty. Wear comfortable shoes.
    • Snacks and Drinks: Pack a snack and a water bottle to stay hydrated and energized throughout the event.

    Carefully read the event description and list the tools and supplies you need. Organizing your supplies in advance reduces stress and helps you stay focused during the event. Consider bringing a small bag or tote to carry all your supplies.

    Understanding Event Etiquette and Guidelines

    Understanding event etiquette and guidelines will ensure a smooth, enjoyable experience. Be sure to arrive on time or a few minutes early to set up and avoid disrupting the instructor or other participants. Be mindful of the space, cleaning up your workspace as you go and disposing of waste properly. Participate respectfully, listening attentively to instructions and asking questions when needed. The ability to be prepared and behave appropriately contributes to the overall success of the event.

    • Punctuality: Arrive on time or early to set up and avoid disrupting the session.
    • Respectful Behavior: Listen to the instructor, follow instructions, and ask questions respectfully.
    • Workspace Cleanliness: Keep your workspace tidy, cleaning up any messes and disposing of waste properly.
    • Participation: Engage in the activities, ask questions, and be open to learning.
    • Respect for Others: Treat the instructors and participants with kindness and courtesy.

    Respect for the venue, the instructors, and the fellow attendees improves the overall environment. Following all event guidelines will help you have a productive and enjoyable experience. If you are unsure about anything, do not be afraid to ask for assistance.

    Time Management and Project Planning

    Effective time management is essential, especially at events with a time limit. Review the event’s schedule and plan accordingly. Make a list of your project goals and break them down into smaller tasks. Prioritize these tasks, allowing enough time for each step. If you finish your project early, you can start another project, assist others, or ask the instructor for further advice. The ability to manage your time will help you achieve more and leave feeling satisfied with your output.

    • Review the Schedule: Understand the event schedule and planned activities.
    • Set Project Goals: Define what you want to achieve during the event.
    • Break Down Tasks: Divide your project into smaller, achievable steps.
    • Prioritize Tasks: Focus on the most important steps.
    • Manage Time: Stay on track and avoid rushing. Use any extra time productively.

    Always have a flexible approach to your project plans. If a task takes longer than expected, adjust your approach, and do not be discouraged. Effective time management helps you stay organized, achieve your goals, and leave the event with a sense of accomplishment.

    Examples of Crafts to Explore at Local Events

    The variety of crafts available at local events is astonishing. Exploring different crafts expands your creative horizon, allowing you to discover new talents and interests. Discovering a new hobby is always exciting. The following examples represent just a small portion of the creative possibilities waiting for you at a crafting event near me.

    Pottery and Ceramics

    Pottery involves shaping clay into various forms using hands, tools, and a pottery wheel. These events can vary from beginner-friendly hand-building workshops to advanced wheel-throwing classes. The creation of pottery offers a tactile and rewarding experience. Ceramic events also give the opportunity to explore different decorative techniques, such as glazing and firing. The ability to create functional and artistic pieces is a significant reward.

    • Hand-Building Classes: Learn basic techniques like pinch pots, coil pots, and slab construction.
    • Wheel-Throwing Workshops: Experience the art of shaping clay on a pottery wheel.
    • Glazing and Firing: Discover the process of applying glazes and firing pottery in a kiln.
    • Specialty Techniques: Try out techniques such as slip casting or sgraffito.
    • Decorative Elements: Learn how to add decorative elements like handles and textures.

    The physical act of working with clay, the possibilities for creative expression, and the satisfaction of producing a unique piece make pottery an appealing craft. These classes are frequently offered in community art centers, local studios, or even pop-up workshops.

    Jewelry Making

    Jewelry making allows you to create unique accessories. These events frequently include classes focused on beading, wire wrapping, metalwork, and other techniques. From simple beaded bracelets to more complex metal pendants, you can learn skills to create beautiful and personalized jewelry. The ability to customize your accessories and create something unique is one of the rewards of jewelry making.

    • Beading Workshops: Learn how to string beads, create patterns, and design bracelets, necklaces, and earrings.
    • Wire Wrapping: Explore how to use wire to create pendants, earrings, and other jewelry.
    • Metalwork and Soldering: Discover how to work with metals, solder, and create metal jewelry.
    • Chainmaille: Try chainmaille to create intricate patterns with individual rings.
    • Resin Jewelry: Learn to incorporate resin with various materials to create unique jewelry pieces.

    The opportunity to create fashionable items, experiment with different materials, and express creativity makes jewelry making an appealing craft. Find these classes in craft stores, art studios, and community centers.

    Painting and Drawing

    Painting and drawing events offer an avenue for developing your artistic talents. Whether you’re a beginner or an experienced artist, these events cover various mediums such as watercolor, acrylics, oils, and drawing. You can experiment with different styles, from landscape painting to abstract art. The chance to express yourself and develop new skills is a great reward. Participating in painting and drawing events provides an opportunity to explore your artistic potential.

    • Watercolor Painting: Explore the basics of watercolor techniques, including washes, layering, and color mixing.
    • Acrylic Painting: Learn how to use acrylic paints and different painting techniques.
    • Oil Painting: Learn to create oil paintings, including mixing colors and working with different textures.
    • Drawing Fundamentals: Learn the fundamentals of drawing with pencil, charcoal, and other drawing materials.
    • Specialty Classes: Try out classes focused on painting portraits, landscapes, or abstract art.

    From a relaxing pastime to a means of self-expression, painting and drawing offer something for everyone. Art studios, community centers, and libraries frequently host these events.

    Textile Arts (Sewing, Knitting, Crochet)

    Textile arts include a wide array of crafts, from sewing and quilting to knitting and crocheting. These workshops enable you to learn skills for creating clothes, accessories, and home decor items. You can make anything from simple scarves to intricate quilts. The ability to create functional and decorative items is one of the joys of textile arts. The classes provide an excellent introduction to various techniques and projects.

    • Sewing Classes: Learn the basics of sewing, including working with a sewing machine, creating patterns, and finishing projects.
    • Quilting Workshops: Learn the basics of quilting techniques.
    • Knitting Lessons: Explore how to knit using needles and various stitches.
    • Crochet Workshops: Learn the basics of crocheting, including chains, single crochet, and double crochet.
    • Specialty Textile Arts: Try out classes like weaving, embroidery, or fabric dyeing.

    These crafts offer an excellent avenue for creative expression, relaxation, and functional items. From community centers to local craft stores, these classes are found in many places.

    Mixed Media and Collage

    Mixed media and collage events enable you to combine different materials and techniques to create unique works of art. You can combine painting, drawing, collage, and other elements to create visually stunning pieces. These workshops are ideal for those who enjoy experimenting with different textures and materials. The chance to explore and create art is a great reward. Mixed media and collage events provide an excellent outlet for imagination and experimentation.

    • Collage Techniques: Learn how to create collages using paper, fabrics, and other materials.
    • Mixed Media Painting: Explore combining painting with other elements.
    • Assemblage Art: Learn how to create three-dimensional art by assembling various objects.
    • Journaling and Scrapbooking: Explore how to create visually appealing journals and scrapbooks.
    • Experimental Art: Try out various materials and techniques to create unique art.

    The flexibility and freedom of mixed media offer a great way to express creativity and experimentation. Art studios, community centers, and local craft events frequently offer these events.

    Common Myths Debunked

    Myth 1: Crafting Events Are Only for Experienced Artists

    Many people believe that crafting events are only for those with prior experience or professional-level skills. The truth is that many events are designed with beginners in mind. Many workshops are designed to teach foundational skills, allowing individuals to start at any level. Classes usually offer different levels of difficulty, so beginners can learn at their own pace.

    Myth 2: Crafting Is Too Expensive

    Some believe crafting is an expensive hobby, assuming the cost of materials and event fees are too high. While some specialized workshops can have higher costs, many affordable options exist. Libraries, community centers, and local craft stores often provide cost-effective classes. Furthermore, you can find events that provide all the necessary materials, lowering the up-front cost. By researching different options, you can locate cost-effective experiences.

    Myth 3: Crafting Is Too Time-Consuming

    People assume that crafting requires significant time commitments, making it difficult to fit into a busy schedule. However, many events are designed to be flexible. Many workshops only require a few hours, while others may be offered in short series. Moreover, you can make your own project choices, which may allow you to start and complete a project within a single class. You can attend these events according to your availability and schedule.

    Myth 4: You Need to Be Naturally Talented to Craft

    Many believe that crafting talent is something you are born with. Crafting is a skill developed with practice. Anyone can learn various crafts and improve with time and training. Events provide the opportunity to learn new techniques and enhance existing skills. The primary requirement is a willingness to learn and experiment. With each event, you are likely to enhance your expertise.

    Myth 5: Crafting Events Are Only for Women

    Crafting events are open to everyone, regardless of gender. Throughout history, men have engaged in various crafts and artistic pursuits. Crafting provides a means of self-expression and skill development. Crafting offers something for everyone, regardless of background or gender. The events are welcoming to all participants, and all are encouraged to explore their creative interests.

    Frequently Asked Questions

    Question: How do I find out about events in my area?

    Answer: Search online event calendars, social media (Facebook Events, Meetup), community websites, local libraries, community centers, and craft stores.

    Question: What should I bring to a crafting event?

    Answer: It depends on the event, but generally, bring any required materials or tools, a notepad, a pen, and personal items like snacks or drinks.

    Question: What if I have no experience with a particular craft?

    Answer: Look for beginner-friendly classes. These are specifically designed for people with no prior experience.

    Question: How much do crafting events usually cost?

    Answer: Costs can vary. Some are free (like library events), while others (like specialized workshops) may charge a fee. Materials often factor into the cost.

    Question: How can I connect with other crafters?

    Answer: Join local craft groups, attend craft fairs, and participate in online forums or social media communities.

    Final Thoughts

    Finding and attending crafting events near me can greatly enrich your life, offering opportunities to learn new skills, meet interesting people, and unleash your creative potential. From pottery to painting, the variety of choices is impressive, and the rewards are numerous. By utilizing the advice in this guide, you can confidently locate the best events, prepare effectively, and connect with a community of fellow enthusiasts. Remember to embrace the learning process, experiment with different crafts, and most importantly, have fun! Take the first step today; search for local events and see where your creativity takes you. The world of crafting is waiting to be explored, so go and make something amazing!

  • Crafting Empty Toilet Paper Rolls: Fun & Creative DIY Projects

    Crafting Empty Toilet Paper Rolls: Fun & Creative DIY Projects

    Remember that stack of empty toilet paper rolls you almost threw away? Well, you’re in for a surprise! We’ve all been there, staring at the remnants of everyday household items, wondering if they could be repurposed. This post is all about turning those seemingly useless tubes into amazing creations. You’ll learn how to transform them into everything from practical organizers to fun toys. Get ready to unleash your creativity and discover the endless possibilities of crafting empty toilet paper rolls. This guide will provide you with easy-to-follow instructions, inspiring ideas, and plenty of tips to maximize your crafting experience, improving your Time on Page and reducing your Bounce Rate.

    Key Takeaways

    • Learn various methods for crafting with empty toilet paper rolls.
    • Discover how to transform rolls into practical organizers and storage solutions.
    • Explore creative craft ideas for kids and adults.
    • Find inspiration for decorating and customizing your creations.
    • Understand the environmental benefits of upcycling toilet paper rolls.
    • Get tips on the tools and materials needed for successful crafting.

    Creative Uses for Your Empty Rolls

    Empty toilet paper rolls are surprisingly versatile. Their cylindrical shape and sturdy construction make them perfect for a wide range of crafts and projects. From simple art projects for children to more complex home decor items, the possibilities are vast. This section will explore some of the most common and interesting ways to put your empty rolls to good use. You might be surprised at how many things you can make with these humble materials. It’s a great way to recycle, reduce waste, and unleash your inner artist.

    Organizing and Storage Solutions

    One of the most practical uses for empty toilet paper rolls is creating organization solutions. They can help declutter your home, keep things tidy, and make it easier to find what you need. These tubes are ideal for storing small items like cords, ribbons, and office supplies. They can be painted, decorated, or left plain, depending on your style. These storage solutions are both functional and visually appealing.

    • Cord Organizers: Prevent tangled cords by storing each one inside its own toilet paper roll. Label each roll with the type of cord.
    • This is a super simple way to keep your cords neat and easily accessible. Just tuck each cord inside a roll. You can then label the roll with a marker so you can quickly find the right cord when you need it. This eliminates the frustration of untangling a mess of cords and makes your drawers or desk space more organized. This also protects your cords from damage.

    • Drawer Dividers: Create dividers for drawers to separate items like socks, underwear, or craft supplies.
    • Cut the rolls to fit the depth of your drawer and arrange them inside. This helps to separate items and prevents them from mixing together. You can customize the size and number of dividers to match your needs. This is an inexpensive way to organize any drawer in your house, from your kitchen to your bedroom. This simple trick adds a lot of usability to the space.

    • Ribbon Dispenser: Store spools of ribbon inside rolls and thread the ribbon ends through the center.
    • This allows you to neatly store your ribbon collection and easily dispense the ribbon when you need it. You can prevent tangled ribbon with this method. It is a simple and effective solution for crafters or anyone who uses ribbon frequently. You can also label each roll to make it easier to find the exact ribbon color or pattern that you need.

    • Pencil Holders: Decorate and use the rolls as pencil and pen holders on your desk.
    • This is a fun and easy craft project for both kids and adults. Simply decorate the rolls with paint, markers, or decorative paper. You can then glue the rolls together to create a customized pen holder or desk organizer. This keeps your pens and pencils within easy reach. Plus, it’s a great way to add some personality to your workspace. This repurposing project is both practical and a creative expression.

    Craft Projects for Children

    Empty toilet paper rolls are an excellent resource for children’s craft projects. They are safe, readily available, and can be transformed into a variety of exciting creations. From animals to vehicles, the possibilities for creative expression are limitless. This section offers ideas to engage children in fun and educational activities, enhancing their fine motor skills and encouraging imaginative play. They will enjoy learning while creating and using their own toys.

    • Animal Creations: Create animals like cats, dogs, or birds by adding paper, paint, and other craft supplies.
    • Children can easily transform toilet paper rolls into adorable animal figures. Simply paint the rolls in appropriate colors and add details like ears, eyes, and tails made from construction paper. You can find free templates online to simplify the process. This activity stimulates a child’s imagination. It encourages them to think creatively. This is also a perfect way to introduce concepts like animal habitats and characteristics.

    • Car and Truck Designs: Make toy cars and trucks by adding wheels, windows, and other decorative elements.
    • Turn those empty rolls into a fleet of toy vehicles! Use bottle caps for wheels and cut out windows from paper. Let kids use paint, markers, and stickers to customize their cars and trucks. This project helps with basic design skills. This type of play fosters creativity and allows kids to build and play with their own vehicles. It’s an easy, fun way to create a collection of toys.

    • Binoculars: Join two rolls together, decorate, and add a string to create pretend binoculars.
    • This is a simple project that encourages imaginative play. Kids can “look” for wildlife or explore their surroundings. Decorate the rolls with colorful paper, stickers, or paint. Then, attach a string or yarn for easy carrying. This helps develop social and imaginative play skills. This is a quick and easy craft that can keep children entertained for hours. It encourages them to embrace their adventurous side.

    • Paper Roll People: Craft fun and cute paper roll people with construction paper, glue, and markers.
    • Give kids a chance to develop their character-building skills. You can create family members, superheroes, or even historical figures with this project. Cut out shapes for clothes, hair, and facial features. Glue them onto the roll to create a unique character. This boosts creativity and helps kids explore concepts of identity and expression. This provides a great way for them to make their own toys and stories.

    Crafting Empty Toilet Paper Rolls: Step-by-Step Guides

    This section provides detailed instructions for several specific projects, guiding you through each step. Whether you’re a beginner or an experienced crafter, these guides offer clear instructions. These projects are easy to adapt and personalize. Each step will explain the necessary materials, techniques, and any creative modifications. Learn how to transform simple items into something useful and beautiful.

    Building a Toilet Paper Roll Castle

    Creating a toilet paper roll castle is a fun and engaging project for kids and adults. It encourages creativity and provides a rewarding sense of accomplishment. The project can be scaled to different sizes. You can customize the castle design, making it a unique and personalized creation. This project involves a few basic steps and materials.

    • Gather Materials: Collect empty toilet paper rolls, cardboard (for the base), paint, glue, scissors, and decorative elements.
    • You’ll need a good supply of empty toilet paper rolls, depending on the desired size of your castle. Cardboard provides a sturdy base. Select paint colors to match your design. Make sure you have enough glue to secure the rolls to each other and the base. Gather any extras like glitter, small toys, or stickers to add to your creation. Ensure you have proper safety scissors to prevent injuries.

    • Construct the Base: Cut a base from cardboard and arrange the toilet paper rolls to determine the castle’s layout.
    • Cut a suitable base shape from the cardboard. Then, arrange the rolls in a castle-like design, using glue to secure them. Make sure the arrangement is stable. Consider adding towers and walls. A rectangular, square, or circular base could all work, depending on your preferred style. Experiment with the arrangement before gluing everything permanently. This planning helps avoid surprises in the final structure.

    • Glue the Rolls: Attach the toilet paper rolls to the base and to each other using glue. Let it dry completely.
    • Use glue generously to attach the rolls to the cardboard base and secure them to each other to create the castle walls and towers. Use a strong glue that will bond cardboard and paper effectively. Make sure that the glue is completely dry to prevent structural problems. Consider reinforcing joints with additional glue or supportive materials if needed. Allow sufficient drying time before moving on to painting or decorating.

    • Paint and Decorate: Paint the castle with the desired colors and add decorative details like flags, windows, and doors.
    • Once the glue is dry, use paints and craft supplies to bring your castle to life. Paint the exterior walls, towers, and base. Use markers, construction paper, or stickers to add details like windows, flags, and doors. You might want to consider adding small toys inside the castle or decorating with craft gems. Allow the paint to dry thoroughly before handling or playing with the castle.

    Creating DIY Seed Starter Pots

    Making seed starter pots from empty toilet paper rolls is an excellent way to start seeds indoors before planting them in the ground. It is an environmentally friendly alternative to plastic pots. The rolls are biodegradable, making them ideal for plant roots. The process is easy and uses readily available materials.

    • Prep the Rolls: Cut small slits around the bottom of each toilet paper roll, creating flaps.
    • Cut about 1-inch-long slits vertically around the bottom edge of the toilet paper roll. These slits will become the flaps that form the bottom of your seed starter pot. The number of slits and their spacing will depend on the size of the roll. Make sure that all the slits are the same depth and evenly spaced to make the base stable.

    • Fold the Flaps: Fold the flaps inward to create the bottom of the pot. Secure them with tape or glue.
    • Fold each flap inward, overlapping them to close the bottom of the roll. You can use tape or glue to secure the flaps in place and create a sealed base. Ensure that the flaps are tightly secured to prevent any soil or water from leaking. If using glue, allow time for it to dry before adding soil and seeds. A good base ensures your seed starter pots will hold the soil and water.

    • Add Soil and Seeds: Fill the pots with potting mix, plant the seeds, and water gently.
    • Fill the prepared toilet paper roll pots with a quality potting mix, leaving a little space at the top. Plant your seeds according to the directions on the seed packet. Gently water the soil, being careful not to overwater. Make sure that your soil is damp and not too wet. Place your pots in a location with adequate sunlight for the seeds to germinate and grow.

    • Planting the Seedlings: When the seedlings are ready, plant the entire pot directly into the ground.
    • When the seedlings have grown enough, they are ready to be transferred to the garden. Plant the entire toilet paper roll pot directly into the ground. The roll will break down in the soil over time and will not hinder the roots. This method avoids disturbing the roots of the seedlings. It helps reduce transplant shock and gives your plants a better start.

    Transforming Rolls into Decorative Items

    Empty toilet paper rolls are not just for organizing or entertaining children; they also serve as materials for beautiful decorative items. With a little creativity, you can create unique pieces of home decor that are both eco-friendly and stylish. This section provides ideas and techniques for transforming plain rolls into items that enhance the look and feel of your living space.

    • Wall Art: Create unique wall art by cutting rolls into different shapes and arranging them on a canvas.
    • Cut the rolls into various shapes like circles, petals, or geometric forms. You can then glue these shapes onto a canvas or wooden board. Paint the assembled forms to create visually appealing patterns and designs. This project can be customized to match your room’s decor. Consider using contrasting colors, metallic paints, or textured finishes to make the artwork more interesting. The result is a unique piece of art.

    • Vases and Planters: Decorate and waterproof the rolls to create vases and small planters.
    • Wrap the rolls with decorative paper, fabric, or paint them with acrylic paint. To make them waterproof, line the inside with plastic or a waterproof sealant. You can then place small plants or flowers inside to add a touch of nature to your home. Place them on a windowsill, desk, or shelf to bring life and beauty. Make sure to choose waterproof lining. This will prevent any damage to the rolls.

    • Napkin Rings: Cover rolls with fabric, paper, or paint to make custom napkin rings.
    • Cut the rolls into shorter segments to fit around napkins. Cover these sections with decorative paper, fabric, or paint. Add embellishments like ribbons, beads, or buttons to further personalize them. These napkin rings add a creative touch to your table settings. They make a great accessory for a special dinner or any occasion. Customize the rings to match your table decor.

    • Candle Holders: Decorate the rolls and use them as unique candle holders (use with caution and never leave unattended).
    • Cover the rolls with decorative paper, paint, or fabric to match your room’s decor. Add embellishments such as glitter, beads, or other decorative elements. Make sure to place candles inside the roll with care. Always place the candle holder on a fire-resistant surface. Be careful about using a match and take care never to leave candles unattended. These can add a cozy and inviting atmosphere.

    Crafting Empty Toilet Paper Rolls: Advanced Techniques

    For those looking to take their crafting skills to the next level, there are various advanced techniques. These methods involve more complex designs and require a bit more skill. You can create detailed crafts that showcase your creativity. This section provides an overview of advanced crafting techniques.

    • Quilling with Rolls: Using the cardboard rolls as a base, create decorative quilled paper designs.
    • Quilling is a paper craft that involves rolling, shaping, and gluing thin strips of paper to create decorative designs. Use the roll as a base and attach the paper quills to the cardboard. You can create intricate designs. Consider flowers, abstract patterns, or personalized messages. This technique requires patience and precision but offers stunning results. This is a great way to add detail to your crafting.

    • Creating 3D Sculptures: Use rolls to construct 3D sculptures of various shapes and sizes.
    • Cut the rolls and manipulate them into different shapes and arrange them to create a 3D structure. Consider building animals, buildings, or other complex forms. This technique requires planning, precise cutting, and a good adhesive. You can paint the sculptures or add various decorations. This technique requires patience but allows for a higher level of creative expression. Make sure your structures are stable.

    • Paper Mache Projects: Combine rolls with paper mache techniques to create unique shapes.
    • Paper mache involves creating shapes using a mixture of paper and glue. Tear strips of paper and apply the mixture to the rolls. You can build up layers to create the desired form. Once the paper mache is dry, you can paint and decorate the creation. This technique allows you to create sturdier and more durable creations. You can experiment with various shapes and sizes using this versatile method.

    • Upcycling into Gift Boxes: Cut, shape, and decorate the rolls to craft custom gift boxes.
    • Cut the rolls to size, shape the tops and bottoms, and decorate them with paper, paint, or fabric. Consider adding ribbons, bows, or other embellishments to enhance the look. You can create boxes of various sizes and shapes. This makes a great alternative to traditional gift packaging. You can customize each box to reflect the recipient’s preferences. It adds a special touch to any gift.

    Common Myths Debunked

    There are many misconceptions about crafting with empty toilet paper rolls. These are commonly encountered and should be addressed for accuracy. This section will clear up some of the most common myths and provide accurate information.

    Myth 1: Crafting with toilet paper rolls is only for kids.

    Reality: While crafting with rolls is an excellent activity for children, it also appeals to adults. Many adult crafters enjoy using rolls for art projects, storage solutions, and home decor items. Crafting with toilet paper rolls is not limited by age. It provides a creative outlet for people of all ages.

    Myth 2: Projects made from rolls are not durable.

    Reality: With the right techniques and materials, crafts made from rolls can be durable. The durability depends on the materials used. Gluing, reinforcing with additional materials, and applying protective coatings can extend the life of these crafts. Proper finishing and handling will enhance their longevity.

    Myth 3: Toilet paper roll crafts are messy and difficult.

    Reality: While some projects might require a bit of mess, many toilet paper roll crafts are simple and easy. There are numerous easy projects, even for beginners. With clear instructions and readily available materials, the crafting process can be straightforward. The messiness varies from project to project, but planning and preparation can help minimize it.

    Myth 4: Crafting with toilet paper rolls is a waste of time.

    Reality: Crafting with rolls provides many benefits, including promoting creativity, providing relaxation, and enabling upcycling. The activity reduces waste. It provides a means to personalize your home decor. Crafting offers a sense of accomplishment. It promotes creativity and problem-solving skills.

    Myth 5: It’s difficult to find enough toilet paper rolls for crafts.

    Reality: Toilet paper rolls are a readily available and easily accessible resource. You can save rolls from your own household or ask family and friends to save them for you. Many people are happy to donate their used rolls for crafting purposes. You can accumulate a good supply without much difficulty.

    Frequently Asked Questions

    Question: What kind of glue works best for crafting with toilet paper rolls?

    Answer: White glue, craft glue, and hot glue are all good options. White glue is great for general use, craft glue is more secure, and hot glue provides an instant bond.

    Question: Can I paint on toilet paper rolls?

    Answer: Yes, you can paint on toilet paper rolls using acrylic paints, watercolors, or tempera paint. Apply a primer first if you want the paint to adhere better.

    Question: How can I make my toilet paper roll crafts waterproof?

    Answer: Line the inside with plastic or a waterproof sealant, or coat the outside with a waterproof varnish or sealant.

    Question: Are toilet paper rolls recyclable?

    Answer: Yes, toilet paper rolls are generally recyclable in most communities. Check with your local recycling guidelines.

    Question: Where can I find ideas for crafting with toilet paper rolls?

    Answer: You can find inspiration online at websites like Pinterest, craft blogs, and YouTube channels. Search terms like “toilet paper roll crafts” or “DIY toilet paper roll projects.”

    Final Thoughts

    Crafting empty toilet paper rolls is a fun, rewarding, and sustainable hobby. From simple organizers to detailed artwork, these everyday items can be turned into functional and decorative pieces. You don’t need expensive materials or complicated tools to start. The joy of crafting is in the process and the satisfaction of seeing your ideas come to life. The possibilities are endless. So, next time you finish a roll of toilet paper, don’t throw it away. Instead, gather your supplies, explore these ideas, and embrace the opportunity to upcycle and create. Get creative and start crafting!