Blog

  • Crafting Room Minecraft Building Guide and Ideas

    Crafting Room Minecraft Building Guide and Ideas

    Remember that time you spent hours building a magnificent castle in Minecraft, only to realize your inventory was a chaotic mess? Finding that one specific block or tool felt like searching for a needle in a haystack. We’ve all been there! This guide is for you. Learn how to design and build a fantastic crafting room Minecraft players dream of, transforming your base from messy to magnificent. You’ll gain practical building strategies, innovative design concepts, and organizational tips that boost your efficiency and make building even more fun. Get ready to level up your Minecraft experience!

    Key Takeaways

    • Learn essential design principles for crafting rooms that prioritize organization and function.
    • Discover a variety of room layouts suitable for different playstyles and resource availability.
    • Explore useful storage solutions and how to arrange them for easy item access.
    • Understand how to implement automated systems to streamline resource management.
    • Get creative building and decorating ideas to customize your crafting space.
    • Find ways to improve your Minecraft building skills and be a better player.

    Planning Your Minecraft Crafting Room

    Before you start placing blocks, a little planning can make a big difference. Think of your crafting room as a workshop – you need space, good organization, and easy access to everything you need. This section will guide you through the initial stages of crafting room design, giving you the foundation for a useful and enjoyable space. The design should integrate seamlessly into your overall base, so it looks great while being useful.

    Choosing Your Location

    The location of your crafting room is key. Consider where you spend most of your time and what resources you access frequently. It should be easily accessible from your main base and near areas where you do a lot of mining or farming. Think about safety, too. Placing your crafting room in a well-lit and easily defensible area will keep you safe from monsters. A central location saves time. You’ll move around less, and everything you need will be right at your fingertips. Take some time to think before you act.

    • Near Your Main Base: This allows you to quickly access your crafting room when you need to make changes to your house.
    • Proximity to Resource Farms: Having it close to farms saves time when processing materials like wood, wheat, and cobblestone.
    • Safe and Well-Lit Area: Ensures you can build without the worry of mobs interrupting you, especially at night.
    • Accessibility: Choose a location that’s easy to reach, whether by foot, rail, or other transport methods.

    Consider the space available and the amount of resources you regularly use. It might seem like a small detail, but these simple steps have a significant influence on your play style.

    Room Size and Layout

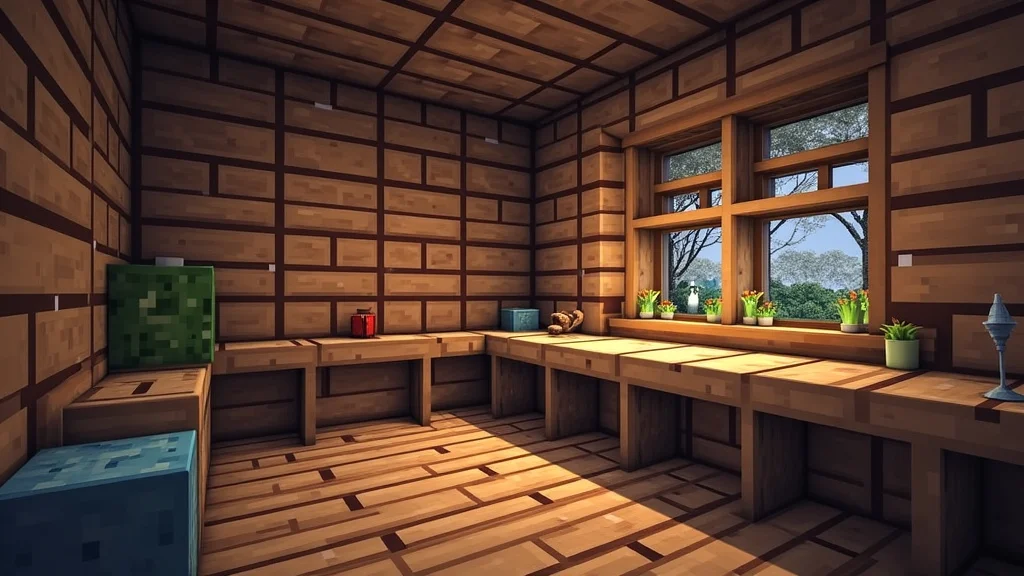
    The size of your crafting room Minecraft build will influence how organized it can be. Start small and expand as your needs change. A basic setup might include a crafting table, furnace, and a few chests. As your resources grow, you can add more storage, automation, and special workstations. Think of it as a living space that grows with you. Plan your layout to make the best use of the space. Consider placing the most important stations in a central location, making it easier to work. Leave room for expansion.

    • Start Small: Begin with a small room to get a feel for the space. You can always expand it.
    • Centralized Workstations: Place important stations like crafting tables and furnaces in the center for quick access.
    • Consider Future Needs: Leave space for additional storage, automation, or workstations.
    • Experiment with Layouts: Try different room shapes and arrangements to find what works best.

    Good planning keeps everything within reach. That will improve your speed. It also creates a more enjoyable and user-friendly experience.

    Essential Features for Your Minecraft Crafting Room

    Now that you’ve got your foundation set, it’s time to equip your crafting room. This is where you bring the room to life with everything you need for efficient resource management. From basic tools to advanced automation, these elements will turn your crafting space into a powerhouse. Think of it as upgrading from a simple shed to a high-tech workshop. Having the right tools makes all the difference.

    Storage Solutions

    Storage is the heart of any crafting room. Without a good system, your inventory and your base will quickly become a mess. Choose storage solutions that fit your needs, from simple chests to complex sorting systems. Consider accessibility and how often you’ll access different items. You can organize your storage based on material type, tool type, or any system that suits your needs. Labeling your chests is a smart move. That way you know what’s inside at a glance. You’ll save time and stress.

    • Chests: The most basic storage, ideal for small quantities of items.
    • Double Chests: Offer more storage space for larger quantities of materials.
    • Shulker Boxes: Portable storage that keeps your inventory organized while traveling.
    • Automated Sorting Systems: Use hoppers and droppers to automatically sort items into chests.

    Effective storage will make it easier to find what you need. That will make the whole building experience much better.

    Essential Crafting Stations

    No crafting room is complete without crafting stations. These are the tools of your trade, and you’ll rely on them constantly. Make sure you have all the necessary stations and place them in locations that make sense. Arrange them in a way that minimizes movement. For example, have your furnace and crafting table near your storage for easy access to resources. Position essential items, like crafting tables and furnaces, in central locations.

    • Crafting Table: The cornerstone of your crafting operations, used for making a huge variety of items.
    • Furnace: For smelting ores, cooking food, and making glass.
    • Blast Furnace: Smelts ores faster than a regular furnace.
    • Smoker: Cooks food much faster.
    • Anvil: Used for repairing and renaming tools and equipment.
    • Brewing Stand: Used for crafting potions.

    Having easy access to your crafting stations is key to building efficiently. Organize these stations in a manner that’s intuitive to you.

    Automated Systems

    Automation is the secret weapon of efficient crafting. Once set up, automated systems will reduce the amount of time you spend manually gathering and processing resources. This lets you focus on the more fun aspects of the game, like building and exploring. From automatic farms to item sorters, these systems will transform your crafting room into a well-oiled machine. This will make your gameplay more rewarding. The payoff is worth the effort. It also reduces the need to manually move materials.

    • Item Sorters: Use hoppers and chests to automatically sort items as they enter your storage system.
    • Automatic Farms: Construct farms for resources like wheat, carrots, and potatoes, which will feed your other systems.
    • Smelting Automation: Use hoppers to feed items into furnaces automatically, saving you time.
    • Resource Collection Systems: Design systems for collecting items from mob farms or mines automatically.

    Automation will free up your time for more exciting Minecraft activities. It’s a game changer when it comes to resource management.

    Design and Decoration of Your Minecraft Crafting Room

    With the essentials in place, it’s time to make your crafting room your own. This section covers the design and decoration choices that allow you to express your creativity. Consider what you want from your design. Do you want it to be functional, beautiful, or both? From block choice to lighting, every detail contributes to the character of your space. It’s an opportunity to create a room that reflects your personal style. It can be a simple, functional room, or an elaborate masterpiece.

    Choosing Your Block Palette

    Your choice of blocks sets the tone of your crafting room. Choose a color palette and materials that create the atmosphere you want. Consider the materials that are easy to obtain. Use wood, stone, and other readily available blocks. This will make building the room quick. Experiment with different textures and colors to make your space interesting. Contrasting colors can add depth and visual appeal. Using a uniform palette can also make the room visually pleasant and create a good vibe.

    • Complementary Colors: Combine colors that create visual harmony.
    • Textured Blocks: Use blocks like stone bricks or wood planks to add character.
    • Contrast: Create contrast by using blocks with different colors and textures.
    • Natural Materials: Consider using wood, stone, and other natural materials for a rustic look.

    Your choice of blocks will influence the vibe and functionality of your space. Consider them before you start building to ensure your crafting room fits your design. You can modify things as you get new resources.

    Lighting and Ambiance

    Lighting is important for both function and decoration. Good lighting ensures that you can see what you’re doing and creates a pleasant atmosphere. Use a combination of natural and artificial light sources to illuminate your space. Experiment with different lighting designs to find what works best. Make it look nice and inviting. Incorporate light sources in your design, such as lanterns, torches, or glowstone. This helps make the space feel bright and safe. Good lighting makes it a nice place to be.

    • Torches: Simple and effective for basic lighting.
    • Lanterns: A more stylish and brighter alternative to torches.
    • Glowstone: A bright and clean light source, good for ceilings.
    • Creative Lighting Designs: Integrate light into your build using hidden lighting or decorative fixtures.

    With smart use of lighting, your crafting room will feel safe, and you’ll be able to see everything. It also adds character to the room.

    Customization and Decoration

    Customization lets you add personality. Decorate your room with items that reflect your style and interests. Add details like banners, paintings, and item frames. These decorations will make the space more interesting. You can also customize your room with crafting-themed decorations, such as tool displays, resource showcases, and mini-builds. Add personal touches, such as banners, armor stands, and custom art to express your personality. Customization is all about adding your personal touch to it.

    • Banners and Paintings: Add artistic touches to walls.
    • Item Frames: Display tools, weapons, and other items.
    • Tool Displays: Showcase your best tools and equipment.
    • Mini-Builds: Create miniature versions of your favorite structures.

    Decorate to make the room unique. It can show off your style and make the room more enjoyable to spend time in.

    Advanced Crafting Room Ideas

    Ready to take your crafting room to the next level? This section will show you how to enhance your space with some advanced builds and features. From complex automation to unique designs, these ideas will make your crafting room a true center of power in your Minecraft world. It’s time to build a space that’s both functional and impressive.

    Multi-Level Crafting Rooms

    Expand vertically to maximize space. A multi-level crafting room allows you to dedicate each level to a specific function or resource. This organization can make it easier to find what you need. You can use ladders, stairs, or elevators to move between levels. Each level could hold a different function, such as storage, smelting, brewing, or enchanting. This also allows you to make your base more compact. Making a good vertical space will make it easier to manage your base.

    • Level Specialization: Assign each level a specific function, such as storage, smelting, or brewing.
    • Vertical Transportation: Use ladders, stairs, or elevators to move between levels.
    • Aesthetic Integration: Design the levels to complement each other visually.
    • Resource Flow: Plan for easy movement of resources between levels.

    You can create a compact and extremely effective base by using multi-level crafting rooms.

    Integration with Redstone

    Redstone is the key to advanced automation and can add extra features to your crafting room. Use redstone to create automated systems that will make your game easier. Integrate redstone into your crafting room to create automated item sorters, smelting systems, and more. Use redstone to create hidden entrances, secret storage, and interactive displays. Redstone can add extra features to your space. You can easily make your space much more fun.

    • Automated Item Sorters: Sort items into the appropriate chests.
    • Smelting Systems: Automatically feed items into furnaces.
    • Hidden Entrances: Use redstone to create secret passages.
    • Interactive Displays: Create displays that respond to player actions.

    Redstone can also add cool things, like hidden doors. That is where it really comes into play.

    Themed Crafting Rooms

    Create a crafting room Minecraft players will enjoy by developing themed rooms. Choose a theme that fits your playstyle. Design your crafting room around a specific theme. This will make your base stand out. A pirate-themed room might include treasure chests, wooden planks, and nautical decorations. Choose a theme that reflects your interests. Themes can add a bit of personality. You will always have a favorite space.

    • Choose a Theme: Select a theme that inspires you, such as a medieval workshop or a futuristic lab.
    • Block Palette: Use blocks that complement your theme.
    • Decorative Elements: Incorporate decorations that add to the theme, such as tool displays and banners.
    • Functionality: Ensure the room is still functional.

    A themed room is an excellent way to express your creativity. It can also make your base unique and memorable.

    Common Myths Debunked

    Myth 1: Crafting Rooms Need to Be Huge

    Many people think that you need a huge space to create an efficient crafting room. The reality is that the size doesn’t matter as much as smart design. Even a small room can be super efficient with good organization, compact storage, and smart layouts. You can begin with a small space and expand it as you collect more resources and your needs change. Prioritize organization over sheer size.

    Myth 2: Redstone Automation Is Too Difficult

    Some players avoid redstone because they think it’s too complicated. Actually, you can start with basic redstone circuits and learn as you go. There are tons of tutorials online. You can begin with simple item sorters and expand to more complex systems. Learning redstone is a fun way to take your crafting room Minecraft builds to another level. The more you explore, the easier it gets.

    Myth 3: The Design Doesn’t Matter

    Some people believe that function is all that matters. While functionality is important, design greatly influences the overall experience. A well-designed room can be a joy to spend time in, boosting your enjoyment of the game. A good design also makes it easy to find what you’re looking for. A great design also inspires creativity. Good design makes a huge difference in the long run.

    Myth 4: Automation Ruins the Fun

    Some players fear that automation takes away from the game. Instead, automation frees you from tedious tasks. It also gives you more time for the parts of the game you enjoy. It allows you to explore, build, and interact with the world. You’re trading repetitive tasks for more time to enjoy your favorite things about Minecraft. Automation also helps you to improve. It makes gameplay more rewarding.

    Myth 5: You Need Expensive Materials

    Some people believe you need rare or hard-to-find materials. The best crafting rooms use readily available materials. Wood, stone, and other common blocks can look amazing. You can always add accents with more rare blocks. Building with common materials means you can start building right away without needing to spend a long time looking for resources. That also makes it possible for everyone to have a great crafting room.

    Frequently Asked Questions

    Question: How do I start planning my crafting room?

    Answer: Begin by choosing a location that’s accessible and safe. Then, decide on the size and layout you want. That might change. Next, think about what you want to store and arrange your items in a way that’s simple for you.

    Question: What are the best storage solutions for my crafting room?

    Answer: Chests are a good start. For more storage, use double chests or Shulker boxes. Use automated sorting systems to keep everything neat and accessible.

    Question: How can I improve my crafting room design?

    Answer: Start with a block palette you like. Use good lighting. Incorporate decorative elements. Experiment with themes to make the room feel special to you.

    Question: How can I incorporate redstone into my crafting room?

    Answer: You can use redstone for automated item sorting, automatic smelting, and secret passages. You will be able to control many functions.

    Question: How do I know when to expand my crafting room?

    Answer: When you run out of space or find it hard to store and retrieve items. When you’ve outgrown your existing setup, that means it’s time to expand.

    Final Thoughts

    You now have a complete guide to crafting a fantastic crafting room Minecraft players always hope for. You’ve explored the design process, storage options, essential features, customization, and advanced strategies. Keep in mind, the best crafting room is one that meets your needs and expresses your creativity. Don’t be afraid to experiment with different layouts, designs, and automated systems. Take inspiration from the ideas you’ve seen and incorporate them into your own unique crafting space. Build a space that you enjoy using. Your crafting room can evolve as your needs grow. Take action and start building. Your ideal crafting room is now within reach. Let your imagination run wild!

  • Crafting RNG Codes: A Comprehensive Guide for Beginners

    Crafting RNG Codes: A Comprehensive Guide for Beginners

    Ever feel like you’re constantly getting the short end of the stick in online games? Whether it’s loot drops, critical hits, or the outcome of a card draw, random number generators (RNGs) influence nearly every aspect. I remember the frustration of countless hours spent trying to get a specific item, only to come up empty-handed. This guide explores the fascinating process of crafting RNG codes, offering insights into how these systems function and what you can do to improve your odds in games. You’ll gain a solid grasp of RNGs, learn about their inner workings, and discover effective ways to approach these systems. This will boost your Time on Page and minimize the Bounce Rate as you explore a fascinating topic.

    Key Takeaways

    • Learn the fundamental principles behind how crafting RNG codes function in various applications.
    • Discover the different types of RNGs and their respective strengths and weaknesses.
    • Understand the importance of randomness and how to ensure its quality in your code.
    • Explore methods for creating and using RNGs in programming languages like Python and JavaScript.
    • Identify common pitfalls and challenges encountered when working with RNGs, and how to avoid them.
    • Gain practical knowledge through examples and coding scenarios to solidify your skills.

    Unveiling the Mechanics of Random Number Generation

    At the core of many digital experiences, from video games to scientific simulations, lies the concept of randomness. This randomness isn’t arbitrary; it’s generated by mathematical processes implemented in software. Creating this seemingly unpredictable behavior involves complex algorithms and techniques. These processes aim to produce numbers with statistical properties similar to truly random sequences. The foundation for crafting RNG codes is built on the understanding of these core principles.

    Pseudo-Random Number Generators (PRNGs)

    Most RNGs used in computing are actually pseudo-random number generators (PRNGs). This means they aren’t truly random; instead, they are deterministic algorithms that produce sequences of numbers that appear random. A PRNG starts with a “seed” value and applies a mathematical formula to generate the next number in the sequence. These sequences look random, but given the same seed, the same sequence will always be produced. PRNGs are used because they are fast and efficient.

    • Seed Value: The starting point of the PRNG, determining the sequence of numbers it generates.
    • Algorithms: Mathematical formulas that produce the next pseudo-random number from the current number.
    • Period: The length of the sequence before it starts repeating itself.

    Consider a simple PRNG: Linear Congruential Generator (LCG). An LCG uses a formula like: X(n+1) = (a * X(n) + c) mod m, where X(n+1) is the next number, a is the multiplier, X(n) is the current number, c is the increment, and m is the modulus. This demonstrates how a seed value and mathematical operations produce a sequence of numbers. While simple, LCGs can have predictability issues if the parameters (a, c, m) aren’t chosen carefully.

    True Random Number Generators (TRNGs)

    Unlike PRNGs, TRNGs aim to produce truly random numbers. They rely on external physical processes, such as atmospheric noise, thermal noise from electronic components, or radioactive decay, to generate unpredictable data. This makes TRNGs more secure and suitable when high-quality randomness is required. However, they are generally slower and more expensive than PRNGs. When you are crafting RNG codes, it is crucial to understand the limitations of each type.

    • Physical Processes: The source of randomness, like thermal noise or radioactive decay.
    • Hardware Requirements: TRNGs often require specialized hardware to measure physical phenomena.
    • Applications: Used in security applications like cryptography, where unpredictability is essential.

    Think about a system using atmospheric noise to generate random bits. The system measures the variations in the electrical signal caused by the atmospheric activity. These variations are then converted into a sequence of random bits, serving as a source of randomness. The unpredictability of these physical processes ensures the generation of truly random numbers. Contrast this with the deterministic nature of PRNGs, where the same seed always yields the same sequence.

    Choosing the Right RNG for Your Project

    The choice between PRNGs and TRNGs, and the specific algorithms within each category, depends on the project’s requirements. For many applications, a well-designed PRNG offers sufficient randomness and speed. When security or high-quality randomness is paramount, TRNGs are the preferable option. Carefully consider factors such as security needs, performance constraints, and the acceptable margin for error when crafting RNG codes.

    Considerations for PRNG Selection

    When selecting a PRNG, focus on its period, statistical properties, and implementation speed. A longer period means the sequence of numbers will repeat less frequently. Good statistical properties mean the generated numbers will be evenly distributed and appear random. Consider the specific PRNG algorithms like Mersenne Twister or Xorshift. These algorithms are commonly used for their balance of quality and speed. This will ensure that your code has proper random output.

    • Period Length: The length of the sequence before it repeats. Longer periods are better.
    • Statistical Tests: Passing statistical tests, like the Diehard tests, is crucial to verify randomness.
    • Algorithm Speed: Faster algorithms improve performance, especially in time-sensitive applications.

    Imagine you’re designing a card game. You want to shuffle a deck randomly, so you select a PRNG that is fast and produces a sufficiently long sequence before repeating. You might use the Mersenne Twister for its good statistical properties and reasonable speed. Proper selection of the PRNG will help ensure fairness and avoid predictable game outcomes.

    Situations that Require TRNGs

    TRNGs are typically used in high-security applications where predictability is not acceptable. This includes cryptographic key generation, secure password creation, and any system where a breach of randomness could be exploited. Since they rely on physical processes, TRNGs offer a level of security that PRNGs can’t match. When crafting RNG codes for these applications, consider using a hardware-based TRNG.

    • Cryptographic Applications: Generate keys and salts for encryption and authentication.
    • Security Protocols: Ensure the security of communication channels and data storage.
    • Financial Systems: Used in systems to prevent manipulation and ensure fairness.

    Consider a cryptocurrency wallet. The wallet needs to generate cryptographic keys securely. A TRNG can generate truly random numbers to create the keys, protecting the wallet from attacks. This contrasts with PRNGs, which could potentially be predicted if the seed is known or compromised. The secure, unpredictable nature of TRNGs is essential for protecting sensitive financial information.

    Implementation of RNGs in Programming

    Implementing RNGs in programming involves using the built-in functions provided by the programming language or utilizing external libraries that offer more advanced RNG algorithms. Programming languages such as Python and JavaScript provide functions to generate pseudo-random numbers, offering ease of use and flexibility. When crafting RNG codes, mastering these functions is key.

    Using RNGs in Python

    Python’s `random` module provides several functions for generating pseudo-random numbers. You can generate random integers, floating-point numbers, and even shuffle sequences. This makes it an ideal language for simulation, statistical analysis, and game development. A strong understanding of the random module is important for crafting RNG codes.

    • `random.randint(a, b)`: Returns a random integer between a and b (inclusive).
    • `random.random()`: Returns a random floating-point number between 0.0 and 1.0.
    • `random.shuffle(x)`: Shuffles a sequence, like a list.

    Here’s a simple example in Python:

    1. Import the `random` module: `import random`
    2. Generate a random integer between 1 and 10: `random_number = random.randint(1, 10)`
    3. Print the result: `print(random_number)`

    This will output a random integer each time you run the script, illustrating the basic usage of the random module.

    Using RNGs in JavaScript

    JavaScript also provides built-in methods for generating pseudo-random numbers, which are particularly useful for web development and interactive applications. While JavaScript’s `Math.random()` function is the most basic, more sophisticated libraries can enhance the randomness and control when crafting RNG codes.

    • `Math.random()`: Returns a random floating-point number between 0.0 and 1.0.
    • Generating Integers: Use `Math.floor(Math.random() * (max – min + 1)) + min` to generate random integers within a range.
    • Libraries: Consider using libraries such as `seedrandom` for more predictable results.

    Here’s an example in JavaScript:

    1. Generate a random number: `let randomNumber = Math.random();`
    2. Generate a random integer between 1 and 10: `let randomNumber = Math.floor(Math.random() * 10) + 1;`
    3. Display the result: `console.log(randomNumber);`

    These commands demonstrate how to generate a random number and a random integer in JavaScript.

    Advanced Techniques in Crafting RNG Codes

    Building on basic implementation, more advanced techniques can improve the quality and control over the randomness generated by RNGs. This includes methods for seeding the RNG, ensuring the statistical properties of the output, and developing custom RNG algorithms. When crafting RNG codes, understanding these concepts is important.

    Seeding and Initialization

    Seeding is the process of initializing a PRNG with a starting value. The seed impacts the sequence of numbers generated. The choice of seed is important; you can select a seed based on current system time, user input, or a source of randomness. Good seeding ensures that each run of the code produces a different sequence. This is essential for preventing predictability.

    • System Time: Seed the PRNG with the current time for varying sequences.
    • User Input: Incorporate user actions, like a mouse click, to generate a seed.
    • External Sources: Use data from external sources for more unpredictable seeding.

    Imagine a game where you want the outcome of each game to be different. The game can use the current system time as the seed for its PRNG. This will help ensure that each play session produces a unique sequence of pseudo-random numbers. This approach prevents the same sequence from recurring. This is important for preventing players from exploiting the system.

    Ensuring Statistical Properties

    To ensure high-quality randomness, it’s essential to test the output of your RNG. Utilize statistical tests, such as the Diehard tests or the NIST test suite, to assess the distribution, uniformity, and independence of the generated numbers. This testing will help you identify any patterns or biases in your RNG. When you are crafting RNG codes, consider using these tests to validate the quality of the RNG.

    • Uniformity Tests: Verify that all values have an equal chance of being generated.
    • Independence Tests: Check that each number in the sequence is independent of the others.
    • Distribution Analysis: Confirm that the generated numbers match the desired distribution.

    To test a card shuffling algorithm, run the algorithm many times and then analyze the distribution of each card across all positions in the deck. The cards should be evenly distributed in each position, indicating proper randomness. These tests will help in verifying if the random numbers generated are suitable for your application.

    Addressing Common Challenges

    While working with RNGs, some typical challenges can affect the quality of randomness. These include the problem of bias, the importance of avoiding predictability, and the impact of non-uniform distributions. Addressing these issues involves understanding their root causes and employing specific strategies to correct them. Understanding these pitfalls is a crucial part of crafting RNG codes.

    Understanding Bias in RNGs

    Bias in an RNG means certain numbers or sequences are produced more frequently than others. This can lead to skewed outcomes and undermine the purpose of randomness. It can arise from issues in the algorithm, improper implementation, or flawed seed selection. Recognizing the sources of bias is the first step to mitigating its effects.

    • Algorithm Flaws: Certain PRNG algorithms may produce biased outputs.
    • Implementation Errors: Mistakes in the code can skew results.
    • Seed Selection: The seed value can also affect the distribution of generated numbers.

    A simple example of bias is in a coin-flipping simulation. If the RNG favors heads over tails, then the results will be skewed. This bias could be caused by an error in the code, or a flawed algorithm. Testing the RNG will help in identifying and fixing bias.

    Avoiding Predictability

    A predictable RNG undermines security and the fairness of applications. Predictability can result from improper seeding, weak algorithms, or repeated usage of the same seed. Ensure that your RNG is unpredictable by using a strong seed, diverse algorithms, and regular testing. When you are crafting RNG codes, keep predictability in mind.

    • Strong Seeding: Use methods to ensure that the initial state of the RNG is not easily guessable.
    • Algorithm Choice: Select algorithms known for their good randomness properties.
    • Regular Testing: Testing helps in identifying patterns or biases.

    In a cryptographic application, a predictable RNG could allow an attacker to predict the keys and compromise the system. Use a TRNG to create keys, or use a PRNG with a strong seed. Using an RNG with these characteristics will increase the security of the application.

    Common Myths Debunked

    Myth 1: All RNGs are truly random.

    Reality: Most RNGs used in computing are pseudo-random number generators (PRNGs), which are deterministic algorithms that produce sequences of numbers that appear random but can be replicated if the seed is known. True random number generators (TRNGs) rely on physical processes. Understanding this distinction is key for crafting RNG codes.

    Myth 2: More complex RNG algorithms always equal better randomness.

    Reality: While complex algorithms can offer certain advantages, simplicity is sometimes better. The best algorithm depends on the requirements of the system, including factors such as speed and level of unpredictability. A simpler RNG, well-implemented and tested, might be superior to a more complex one with undiscovered flaws. This is important when crafting RNG codes.

    Myth 3: Using the system clock is a reliable source of randomness for seeding.

    Reality: The system clock can be a good starting point, but it’s not always reliable. On its own, the system clock is predictable. Better practice is to combine the system clock with other sources of entropy, such as user input. Proper seeding is an essential part of crafting RNG codes.

    Myth 4: If an RNG passes statistical tests, it is perfectly random.

    Reality: Passing statistical tests confirms that the output numbers have certain statistical properties, but it doesn’t guarantee perfect randomness. There’s always a possibility that patterns remain, and different tests can reveal different weaknesses. Using statistical tests is one aspect when you are crafting RNG codes.

    Myth 5: All online games use fair RNGs.

    Reality: RNG implementation can vary greatly in online games. Some games may use flawed or biased RNGs, or the RNG might be deliberately manipulated. When you are crafting RNG codes, remember that the fairness of RNGs in online games is not always guaranteed.

    Frequently Asked Questions

    Question: What is the seed in a random number generator?

    Answer: The seed is the starting point for a pseudo-random number generator. It determines the sequence of numbers that the generator will produce.

    Question: How can I generate random numbers in Python?

    Answer: Use the `random` module in Python. You can generate random integers with `random.randint()`, floating-point numbers with `random.random()`, and shuffle sequences with `random.shuffle()`.

    Question: What is the difference between PRNGs and TRNGs?

    Answer: PRNGs are deterministic algorithms that produce sequences of numbers that appear random. TRNGs use physical processes to generate numbers that are truly random.

    Question: How do I choose the best RNG for my project?

    Answer: Choose based on factors such as security, speed, and the required quality of randomness. If security is critical, then TRNGs are preferable. For other applications, a PRNG may be appropriate.

    Question: What are some common challenges when working with RNGs?

    Answer: Bias, predictability, and non-uniform distributions are common challenges. These issues can be mitigated by careful selection, seeding, testing, and implementation.

    Final Thoughts

    Crafting RNG codes involves more than just a function call. It requires careful consideration of the application’s requirements, the strengths and weaknesses of different RNG types, and a vigilant approach to testing and validation. From understanding the basics of PRNGs and TRNGs to implementing them in various programming languages, this exploration underscores that crafting good random numbers is a fundamental aspect of many software projects. Mastering these techniques will enhance your ability to build more secure, fair, and engaging applications. When building the next exciting game or secure application, remember the principles discussed, and use them to make your project successful.

  • Crafting Recipes Grow a Garden: A Guide for Flourishing Plants

    Crafting Recipes Grow a Garden: A Guide for Flourishing Plants

    Remember that feeling of anticipation when you first planted a seed? The tiny promise of life, the hope of a bountiful harvest. Gardening is amazing, but it can sometimes feel like a puzzle. What if I told you there’s a delicious way to boost your crafting recipes grow a garden? This post will share the essential methods to enhance your garden with clever crafting recipes to help it thrive. You’ll gain practical knowledge about making your garden the envy of the neighborhood, and improve your skill in the garden. By the end, you’ll be equipped with the recipes to maximize your garden’s output!

    Key Takeaways

    • Learn how to use crafting recipes to improve your garden’s soil and health.
    • Discover recipes for natural pest repellents and disease treatments.
    • Find out how to create nutrient-rich compost and fertilizers.
    • Explore methods to increase plant growth and yield using simple crafting.
    • Get tips on the importance of companion planting to improve crop health.
    • Master the art of seed saving to build a sustainable and efficient garden.

    Enhance Your Garden with Crafting

    Gardening isn’t just about planting seeds and waiting. It’s an art, a science, and a practice of patience. The best gardeners know it’s a constant process of learning, adapting, and experimenting. One of the ways to supercharge your garden is by using simple crafting recipes grow a garden, creating your own supplies. These DIY solutions can significantly improve your garden’s health, yield, and resistance to pests and diseases. This includes homemade fertilizers, pest control sprays, and soil amendments. This will help you become a more self-sufficient and successful gardener.

    Making Soil Amendments

    Healthy soil is the foundation of any thriving garden. It provides the necessary nutrients, water, and air for your plants to grow. However, soil quality can vary greatly depending on its location, and it can become depleted over time. Luckily, you can improve your soil structure and fertility with crafting recipes. You can craft soil amendments that boost your garden’s health by following some simple steps. Learn how to craft compost teas, worm castings, and other homemade additions that improve the quality of your soil.

    • Composting: This is a way of recycling food scraps, yard waste, and other organic materials into a nutrient-rich soil amendment. Composting is very simple, and your plants will be much better off. You can craft compost by layering “greens” (nitrogen-rich materials like grass clippings and food scraps) with “browns” (carbon-rich materials like leaves and straw). Turn the compost pile regularly to help it break down, and in a few months, you’ll have a rich, dark compost to add to your garden.

      Compost improves soil structure, increases water retention, and provides essential nutrients. It’s a key ingredient in many crafting recipes for a healthy garden. For example, adding compost to your soil can increase its water-holding capacity by up to 30%, which means you’ll need to water less.

    • Worm Castings: Worm castings, also known as vermicompost, are another excellent soil amendment. They are essentially worm poop, and they are packed with nutrients and beneficial microbes. You can set up a worm bin using a plastic container, some bedding material (like shredded paper), and red wiggler worms.

      As the worms eat your food scraps, they produce nutrient-rich castings that you can harvest and add to your garden. Worm castings provide a slow-release of nutrients, which means your plants get a steady supply of what they need over time. Worm castings increase your soil by improving its texture and increasing its ability to hold water.

    • Making Compost Tea: Compost tea is a liquid fertilizer made by steeping compost in water. It’s a quick and easy way to deliver nutrients directly to your plants. To make compost tea, mix compost with water in a bucket or container, and let it steep for a day or two. You can then strain the tea and use it to water your plants.

      Compost tea is packed with beneficial microorganisms that help your plants fight off diseases. Compost tea is also a very popular liquid fertilizer that enhances the growth and health of your plants. Compost tea adds nutrients, boosting plant immunity and overall health, resulting in more bountiful harvests.

    Creating Natural Pest Repellents

    Pests can be a huge problem for any gardener. They can damage your plants, reduce your harvest, and cause a lot of frustration. Using synthetic pesticides can be harmful to your health and the environment. This is why learning to make natural pest repellents is such a useful skill. These repellents will keep pests at bay. These recipes will usually involve ingredients you may already have on hand. Making your own pest control gives you a natural way to protect your plants.

    • Garlic Spray: Garlic is a natural pest repellent because of its strong smell. To make garlic spray, blend garlic cloves with water and let it sit for a day or two. Strain the mixture and add a small amount of liquid dish soap to help it stick to the plants. Spray your plants with garlic spray, especially on the leaves and stems.

      Garlic spray can deter a variety of pests, including aphids, whiteflies, and spider mites. A study by the University of California found that garlic spray reduced aphid populations by up to 80% in some cases. You can use garlic spray as needed, usually every week or two, or after a rain.

    • Neem Oil Spray: Neem oil is an extract from the neem tree. It is a very effective natural insecticide. Neem oil disrupts the life cycle of many pests, so it’s a perfect solution to keep pests away. Mix neem oil with water and a small amount of liquid dish soap. You can spray your plants with this solution.

      Neem oil is effective against a wide range of pests, including aphids, mealybugs, and caterpillars. Unlike synthetic pesticides, neem oil is safe for bees and other beneficial insects when used correctly. Neem oil can also help control fungal diseases.

    • Diatomaceous Earth (DE): DE is a powder made from the fossilized remains of diatoms, a type of algae. The sharp edges of DE can scratch the exoskeletons of insects, causing them to dehydrate and die. You can dust your plants with DE or mix it with water to create a spray.

      DE is effective against many pests, including slugs, snails, and various insects. Be sure to use food-grade DE. This is to avoid any harmful chemicals. Apply DE when the plants are dry and reapply after rain. DE is a safe option for your plants and the environment.

    Developing Companion Planting Strategies

    Companion planting is a powerful gardening technique that involves growing different plants together to benefit each other. Certain plants can protect each other from pests, improve soil quality, and boost growth. Learning about companion planting is like having a team of allies in your garden. By using these crafting recipes grow a garden, you’ll be well on your way to maximizing your yields. It’s a key technique in sustainable gardening, that helps reduce the need for chemicals and increases your garden’s overall health and productivity.

    • Examples of Good Companions: Basil is a great companion plant for tomatoes, peppers, and eggplants, because it repels pests. Marigolds deter nematodes and other harmful insects, so they are great to plant alongside tomatoes and other vegetables. Carrots grow well with onions, which repel carrot rust flies.

      By understanding which plants thrive together, you can create a balanced ecosystem in your garden. This can lead to reduced pest problems and an increase in overall yield. For example, planting basil near tomatoes can increase tomato production, as basil helps repel tomato hornworms.

    • Benefits of Companion Planting: Companion planting reduces the need for pesticides. It increases biodiversity in your garden, which improves soil health. It attracts beneficial insects. These are just some of the reasons for companion planting.

      For instance, planting dill with cucumbers can help attract beneficial insects that prey on cucumber beetles. Companion planting also makes your garden more resistant to disease. It does this by creating a more diverse and resilient ecosystem.

    • Planning Your Garden: Before you start planting, research the best companion plants for your crops. There are many online resources and gardening books that can help you plan your garden effectively. Be aware of how much sun, water, and space each plant needs, and organize your garden accordingly.

      When planning your garden, make sure to consider the different growth habits of the plants. For instance, tall plants can be planted in the back to provide shade for shorter plants. Using a garden plan helps to maximize space, and improve the overall effectiveness of your garden.

    Composting and Fertilizers Recipes

    Composting and making your own fertilizers are excellent ways to boost your garden’s health and yields. These crafting recipes grow a garden by providing essential nutrients. They also help improve soil structure and water retention. By crafting your own fertilizers, you can also reduce your reliance on commercial products. These are not only expensive but can also contain chemicals. Homemade fertilizers are more sustainable. They are also tailored to meet your plants’ unique needs.

    Creating Nutrient-Rich Compost

    Composting is a core element in a sustainable garden. It transforms kitchen scraps, yard waste, and other organic materials into a nutrient-rich soil amendment. Compost improves soil structure, increases water retention, and provides a slow-release of essential nutrients. Following simple recipes, you can make high-quality compost that is perfect for your garden’s health. You will find that creating your own compost is much better for your garden and for the environment.

    • Compost Pile Recipe: The perfect compost pile includes a mix of “greens” (nitrogen-rich materials) and “browns” (carbon-rich materials). Greens include grass clippings, food scraps, and manure. Browns include dried leaves, straw, and shredded paper.

      Aim for a ratio of approximately two-thirds browns to one-third greens. Turn your compost pile regularly to provide aeration and speed up the decomposition process. Composting is an easy, cost-effective way to improve soil health and reduce waste.

    • Compost Tea Recipe: Compost tea is a liquid fertilizer made by steeping compost in water. You can make it by adding one part compost to five parts water. Let the mixture sit for 24-48 hours, stirring occasionally.

      The tea is then strained to remove any solid particles. The resulting liquid can be used to water your plants. Compost tea is packed with beneficial microorganisms that help plants absorb nutrients. This makes it an ideal fertilizer for both vegetable gardens and flowerbeds.

    • Worm Castings Tea Recipe: Worm castings tea is similar to compost tea. It offers concentrated nutrients. Use one cup of worm castings per gallon of water. Let this mixture steep for 24 hours before using it to water your plants.

      Worm castings tea helps boost plant growth and disease resistance. Worm castings tea has more nutrients compared to compost tea. This fertilizer is great for supporting the overall health of your plants.

    Crafting Homemade Fertilizers

    Creating your own fertilizer is a sustainable way to provide your plants with the nutrients they need to thrive. Many natural ingredients can be combined to make effective fertilizers. These fertilizers can be crafted to meet specific plant needs. It helps you avoid harsh chemicals. The recipes are simple to follow and can improve your soil. Here are a few essential recipes for different types of fertilizer.

    • Compost Tea Fertilizer: Compost tea is a versatile fertilizer. It’s easy to make, and provides nutrients and beneficial microbes. In a bucket, combine one part compost with five parts water. Allow the mixture to steep for 24-48 hours. Strain the liquid and use it to water your plants.

      This fertilizer is great for boosting plant growth, and disease resistance. Compost tea is a perfect choice for your vegetable gardens and flowerbeds. It provides a balanced diet for all types of plants.

    • Banana Peel Fertilizer: Banana peels are rich in potassium, which is a key nutrient for plant growth and fruit production. You can make banana peel fertilizer in two ways: Soak the peels in water for several days. Then, use the water to water your plants.

      The banana peels can also be buried directly in the soil around your plants. As they decompose, they will release potassium into the soil. Banana peel fertilizer is great for flowering plants. Plants will have healthier, stronger blossoms.

    • Eggshell Fertilizer: Eggshells are rich in calcium, which is essential for strong cell walls. The eggshells need to be thoroughly cleaned, dried, and crushed into a fine powder. Sprinkle the eggshell powder around your plants, or mix it into the soil.

      Eggshell fertilizer helps prevent blossom end rot in tomatoes and peppers. It also helps improve the overall health of your plants. This is a very simple recipe to increase plant health and yield.

    Seed Saving: A Recipe for Sustainability

    Seed saving is one of the most rewarding parts of gardening. It allows you to preserve the best traits of your plants. This practice can make your garden more sustainable and resilient. Learning how to save seeds is like creating a recipe for future success. By saving seeds, you can adapt your garden to your local climate and conditions. You’ll be self-sufficient and promote biodiversity. This means that each year you’ll have more and more experience.

    Selecting and Harvesting Seeds

    The first step in seed saving is selecting the right plants. Choose plants that are healthy and strong, and that have produced the best yields. You also need to select plants that have the traits you want to preserve. It can be disease resistance, flavor, or appearance. Next, you need to harvest the seeds. This requires specific techniques. Make sure you harvest the seeds at the right time. Here are some essential steps.

    • Choosing the Right Plants: Select plants that are the healthiest and most productive in your garden. Look for plants that have desirable traits. Such as disease resistance, size, and flavor. Avoid saving seeds from hybrid plants. These plants may not produce offspring.

      If you want to create a successful garden, select plants that grow well in your climate. These are more likely to thrive in your garden. The best plants for seed saving are open-pollinated varieties. These plants are true to type. They produce seeds that will grow into plants that are similar to the parent plant.

    • Harvesting Seeds: The harvest time varies. It depends on the plant species. For many plants, such as beans and peas, you will need to allow the pods to dry on the plant. Seeds need to be fully mature before they are harvested. The seeds should be hard and dry.

      For tomatoes and other fleshy fruits, the seeds need to be extracted and cleaned. Remove any pulp and debris. Then, spread the seeds on a paper towel to dry completely. Proper drying is crucial to prevent mold and spoilage.

    • Seed Cleaning and Drying: After harvesting the seeds, clean them to remove any debris. This will include pieces of leaves or stems. Spread the seeds on a paper towel or screen. Let the seeds dry for several weeks.

      Make sure the seeds are completely dry before storing them. Seeds can be dried by placing them in a well-ventilated area away from direct sunlight. To ensure that the seeds are completely dry, you can test them by trying to bend them. If they break, they are dry enough.

    Storing and Using Saved Seeds

    Proper storage is essential to preserve your seeds. When seeds are stored correctly, they can remain viable for several years. The way you store the seeds affects their lifespan. The way you use the seeds you’ve saved can significantly impact your garden’s health. The goal is to start new generations of plants. The information below will give you tips for storing and using your saved seeds.

    • Seed Storage Methods: Store your seeds in a cool, dry, and dark place. You can use airtight containers. Label each container with the plant type. Include the date the seeds were harvested. The refrigerator or freezer is an ideal place to store seeds.

      Avoid storing seeds in humid conditions, which can cause them to mold. Ensure your seeds are thoroughly dry before storing. This will help prevent fungal growth. Seed storage is a key part of your seed-saving recipe, and it can help you maintain healthy plants.

    • Seed Viability Testing: Before planting your saved seeds, it is a good idea to test their viability. This can be done by taking a small sample of seeds. These seeds are put in a moist paper towel. Roll it up, and place it in a plastic bag.

      Leave the paper towel in a warm place, and check it every day for germination. Record the number of seeds that sprout. This will give you an idea of the germination rate. It will also help you determine how many seeds you need to plant to get the desired number of plants.

    • Using Your Saved Seeds: You can plant your saved seeds in the same way you would buy seeds. Note the germination rate. This may require some extra planting to ensure you get enough seedlings.

      Save seeds from the best plants in your garden, and you can steadily improve the quality of your harvests. By saving and replanting seeds year after year, you can select for traits that are well-suited to your local climate and soil conditions. This can make your garden more self-sufficient and resilient over time.

    Common Myths Debunked

    Myth 1: All Plants Need Commercial Fertilizers

    Many gardeners believe that commercial fertilizers are the only way to get the nutrients their plants need. While commercial fertilizers can be helpful, they aren’t the only option. In fact, relying solely on commercial products can sometimes do more harm than good. They are often high in synthetic chemicals. These chemicals may build up in the soil and potentially disrupt the soil ecosystem. Also, many homemade fertilizers are just as effective, and they can provide essential nutrients. Compost tea, worm castings, and banana peel fertilizer are all effective alternatives. These are also sustainable. They help improve soil health and provide the right nutrients for your plants.

    Myth 2: Pest Control Requires Synthetic Pesticides

    Pests are a common challenge in any garden. Many gardeners turn to synthetic pesticides to control these pests. Pesticides can be very effective, but they also have negative side effects. They can kill beneficial insects, harm pollinators, and contaminate the soil and water. Thankfully, many effective, natural pest control options are available. These include garlic spray, neem oil spray, and diatomaceous earth (DE). These natural repellents work without harming your plants. They also won’t damage the beneficial insects. Companion planting and introducing beneficial insects, such as ladybugs, are other effective ways to manage pests naturally.

    Myth 3: Seed Saving Is Too Difficult

    Some gardeners avoid seed saving because they believe it’s too complicated or time-consuming. While seed saving does require some attention, it isn’t difficult. Most plants are relatively easy to save seeds from. You need to learn a few basic techniques, which include selecting the right plants and harvesting the seeds at the right time. You will also need to clean and dry the seeds properly, and then store them in a cool, dry place. With a little practice, anyone can learn to save seeds and build a sustainable garden. Seed saving can be a simple, rewarding activity.

    Myth 4: All Compost Piles Need to Be Turned Regularly

    Turning a compost pile is a common practice. Many gardeners think that it’s required for successful composting. Turning helps aerate the pile and speeds up the decomposition process. In reality, turning isn’t always essential. There are many different ways to make compost. You can also make a “no-turn” compost pile. Build the pile and let nature do the work. The microorganisms will still break down the organic materials. Turning can be helpful if you want to speed up the process. A no-turn compost pile is a great option for people who have limited time or physical ability. Compost is still produced at a slower rate.

    Myth 5: All Plants Need the Same Soil pH

    Many people think that plants need the same soil pH. The pH is a measurement of how acidic or alkaline the soil is. The truth is that different plants have different pH requirements. For example, blueberries need acidic soil, while many vegetables prefer a neutral pH. You can test your soil’s pH using a soil test kit. Then, you can adjust the pH to suit the needs of the plants you want to grow. You can add materials to lower the pH, such as sulfur or peat moss. You can add materials to increase the pH, such as lime or wood ash. It is very important to use the correct soil pH for each type of plant.

    Frequently Asked Questions

    Question: How often should I water my garden?

    Answer: This depends on the type of plants, the soil, and the weather. Generally, water deeply but less frequently, rather than shallowly and often. Check the soil moisture by sticking your finger an inch or two into the soil. If it feels dry, it’s time to water.

    Question: What are the best plants for beginners to grow?

    Answer: Some easy-to-grow plants for beginners include lettuce, radishes, beans, and zucchini. They are relatively low-maintenance and quick to produce. They are perfect for those just starting out.

    Question: How can I control weeds in my garden without using chemicals?

    Answer: Mulching is an effective method. It involves using organic materials like straw or wood chips to cover the soil. Hand-weeding, regular cultivation, and using a hoe are other effective alternatives.

    Question: How do I know if my plants are getting enough sunlight?

    Answer: Most vegetables and flowering plants need at least 6 hours of sunlight each day. If your plants are not getting enough light, they may become leggy or not produce as many flowers or fruits.

    Question: How can I prevent pests from eating my plants?

    Answer: You can use natural pest repellents, such as garlic spray or neem oil. Regularly inspect your plants for signs of pests. Attract beneficial insects like ladybugs, and companion plant to deter pests.

    Final Thoughts

    Embracing the crafting recipes grow a garden approach transforms gardening from a chore into a creative pursuit. The journey of transforming your garden is filled with rewarding achievements. With homemade soil amendments, natural pest repellents, and the art of companion planting, you’re building a thriving ecosystem. Learning these recipes, you’re not just growing plants. You’re building a healthier, more productive, and more sustainable garden. You can enjoy the satisfaction of seeing your garden flourish. Start experimenting with these recipes, and get ready to enjoy the fruits (and vegetables) of your labor!

  • Crafting Recipe Generator Explore Tools for Your Next Project

    Crafting Recipe Generator Explore Tools for Your Next Project

    Ever feel stuck, staring at your crafting materials, unsure what to build? You have a bunch of wood, some nails, and a bit of glue, but the creative spark just isn’t there. Sound familiar? We’ve all been there. This post will explore how a crafting recipe generator can help you break through those creative blocks. You’ll gain practical knowledge on how to find the right tool for your needs, discover new project ideas, and get inspired to create something amazing. Get ready to explore the exciting possibilities and transform your crafting experience. This detailed guide offers insights to boost your crafting prowess.

    Key Takeaways

    • Learn the benefits of using a crafting recipe generator.
    • Understand the various types of generators and their features.
    • Discover how to input your available materials to get relevant project suggestions.
    • Gain tips for choosing the ideal generator for your specific crafting needs.
    • Explore example projects and practical applications of generators.
    • Find useful resources for finding the right crafting recipe generator.

    Understanding Crafting Recipe Generators

    A crafting recipe generator is essentially a digital assistant for your projects. It’s a tool designed to provide you with project ideas based on the materials you have available, often including details on required materials, steps, and sometimes even visual aids. These tools can vary greatly, from simple calculators to more sophisticated platforms, but their core function remains the same: to inspire and simplify your crafting process. They can be invaluable when you’re looking for new projects or struggling with what to do with specific materials.

    Types of Crafting Recipe Generators

    There is a variety of recipe generators, each with unique features. Knowing the differences can help you pick the best one. Some focus on specific craft types, like woodworking or sewing, while others are general, covering a broad spectrum. Some are simple, providing a basic list of materials and instructions, while others offer detailed tutorials and visual guides.

    • Material-Based Generators: These are typically the most common type. They allow you to input the materials you have on hand and generate projects that utilize those items. This is particularly useful when you’re trying to use up leftover materials. For example, you have a lot of scrap wood. Entering that information helps the generator provide useful projects.

      This approach saves you money and reduces waste. The generator is all about using what you have. Instead of buying new materials, you’re transforming what already exists. It encourages resourceful crafting and decreases the environmental impact of your hobbies. For example, if you have old t-shirts, you could use a material-based generator to find ideas for making reusable shopping bags or cleaning cloths.

    • Project-Based Generators: These generators let you input the type of project you want to create, such as a “wooden bookshelf” or a “knitted scarf.” The generator then suggests recipes and required materials. This is helpful when you know what you want to make, but need help with the specifics.

      This type of generator can also provide a range of ideas. Inputting “wooden bookshelf” could lead to a variety of styles. The generator would then propose options: a simple shelf, a corner shelf, or even a fancy built-in unit. These tools are beneficial for beginners who need clear, step-by-step guidance. They offer structured planning, so beginners don’t feel overwhelmed. By providing easy-to-follow directions, these generators build confidence and skill.

    • Specialty Generators: Some generators focus on particular crafts or skill levels. These are great for experts or those new to a specific craft. For example, a woodworking generator may focus on different joinery techniques, project scale, or wood types.

      Specialty generators offer detailed project instructions and can explain complex processes in easier ways. They cater to a niche audience. This helps avoid information overload. Someone interested in leatherwork, for example, could input “leather wallet,” and the generator would provide tailored instructions. It ensures that the information aligns perfectly with the crafter’s needs. If you like detailed instructions, these are ideal.

    • AI-Powered Generators: Some tools use AI to offer more personalized experiences. By analyzing your crafting history, current skill set, and material inventory, these generators suggest projects that match your preferences. Some advanced AI generators are capable of adapting the complexity of the project based on the crafter’s skill level.

      AI generators learn your preferences, saving you the time of sorting through projects that are not relevant. They can understand different styles and incorporate those into project suggestions. Imagine being able to tell a generator that you love rustic decor and it generating project ideas that fit that aesthetic. These generators also update regularly. They ensure that users access current trends and ideas. You can also get more creative ideas with AI.

    Features to Look For in a Crafting Recipe Generator

    When selecting a crafting recipe generator, consider the features that will best support your crafting goals. Look for ease of use. A clean interface will get you crafting faster. Beyond user-friendliness, a good generator should have features like a comprehensive material database, detailed instructions, and perhaps even visual aids or a community forum.

    • Material Database: A generator with a large database of materials is vital. It should have common materials, such as wood, fabric, and yarn, but also unique items, such as beads, buttons, and various hardware.

      A thorough database provides many options. It allows you to enter a wider range of supplies. It enhances the generator’s effectiveness, giving you relevant project recommendations. Look for features like material categories, search filters, and the ability to add custom materials. Consider a woodworker who can add uncommon wood types to the database to tailor the projects to their specific needs.

    • Instruction Clarity: Clear, step-by-step directions are essential for project success. Look for generators that provide easy-to-understand instructions, accompanied by illustrations or video tutorials when possible.

      Clear instructions minimize confusion and errors. They enable crafters of all skill levels to follow the steps easily. Look for details, such as measurements, tool lists, and safety advice. Detailed instructions also provide a smoother crafting experience. Using a generator with clear instructions minimizes wasted materials.

    • Search and Filter Options: The ability to quickly find projects that suit your needs is a must. Search filters should be available by material, project type, skill level, and more.

      Search options save time and frustration. It allows you to explore projects relevant to your criteria. Suppose you want to create a beginner-level sewing project using cotton fabric. Filter options help you find projects that meet these exact requirements. Good search functionality helps you narrow down thousands of projects to a few relevant options.

    • Visual Aids: Illustrations, diagrams, and video tutorials enhance understanding. They clarify complex steps and help crafters visualize the finished project.

      Visual aids greatly improve the overall crafting experience. They make instructions easier to follow, particularly for visual learners. A photo of a finished project helps the crafter see what they’re trying to create. Video tutorials are even better because they let you see the steps in real-time. This reduces confusion and promotes accuracy.

    • Community Features: Community features like forums or social media integration can provide invaluable support. You can ask questions, share projects, and learn from other crafters.

      Community features are a great way to improve your crafting knowledge. They let you get advice and encouragement. Participating in a community gives you a sense of belonging. The community can offer advice if you struggle with a step. Access to a community enhances the crafting experience.

    Generating Crafting Project Ideas

    Using a crafting recipe generator efficiently begins with the right input. This ensures that the generated project ideas are suitable for your skills and available materials. The better your input, the more rewarding your experience. Knowing how to input your materials, set your skill level, and select the project type will improve your chances of getting amazing results.

    Inputting Materials

    The success of the generator is directly tied to the information you feed it. Inputting the available materials precisely is essential. This not only includes the type of material, like wood, fabric, or yarn, but also the quantity, dimensions, and specific characteristics.

    • Material Type and Quantity: Be as accurate as possible. Include the type of material and the amount you have on hand. For example, instead of just “wood,” specify “pine, two 2x4s, 8 feet long.”

      Entering specific material types and quantities helps the generator match your needs. Giving precise details helps the generator pick appropriate projects. Providing accurate information will reduce waste. Using the right information boosts project success and reduces waste. Using precise information means less wasted materials.

    • Material Dimensions and Characteristics: Note the size, color, and any special features of your materials. For example, “10-inch diameter wood slice, with bark edge” or “red cotton fabric, 5 yards.”

      Material dimensions are key. They influence the types of projects the generator recommends. Specifying the color or finish of your materials helps you discover projects you’ll love. Knowing your material’s unique aspects lets the generator suggest the perfect projects. Detailed specifications lead to more focused and tailored suggestions. This helps create better projects.

    • Combining Material Information: If you have multiple types of materials, be sure to input them all. This allows the generator to suggest projects that combine various items.

      Combining the materials helps you come up with creative projects. Including all available materials boosts your project options. For instance, if you have wood and fabric, the generator can help you create a wooden storage box with a fabric-lined interior. Inputting your materials allows for the generation of more options.

    • Using Descriptive Keywords: To get the best results, use descriptive words that capture your materials’ look and feel. Keywords enhance search results by helping you refine project ideas.

      Descriptive keywords help narrow down your options. Keywords such as “rustic,” “vintage,” or “modern” can help you find ideas for your materials. These keywords help you get creative results. They make the generator’s search functionality more effective. When you add descriptive details, you get better project suggestions.

    Setting Skill Level and Project Type

    In addition to material input, it’s vital to identify your skill level and project type. This guides the generator towards projects that are fun and suitable for you. Identifying these factors also prevents frustration from overly complex projects.

    • Skill Level: Most generators ask you to specify your crafting skill level, from beginner to expert. Selecting the correct skill level ensures the suggested projects are within your capabilities.

      Setting your skill level is crucial for ensuring success. Beginners can find projects that are easy to start with. Experienced crafters can find projects that are challenging and more complex. Inputting your skill level is very important. This also lets the generator suggest projects with the appropriate difficulty.

    • Project Type: Many generators allow you to choose the type of project you want to create. This could range from home decor to jewelry. Defining your project helps to narrow down project ideas.

      Specifying the project type is beneficial if you have a specific goal. This provides the generator with a focus. If you select “sewing,” the generator will offer sewing projects. If you want to make decorations, the generator will suggest those. Specifying the project type is an excellent way to personalize the suggestions.

    • Combining Skill Level and Project Type: The combination is powerful. For example, if you are a beginner and want to create a “wooden toy,” the generator will suggest projects of that type.

      Combining skill level and project type enables the generator to make targeted project recommendations. It’s a great strategy to create a seamless crafting experience. Skill level is the key to creating crafts that are challenging. This combination makes it easier to focus the search.

    • Experimentation and Exploration: Don’t be afraid to experiment with different combinations of skill levels and project types. This will help you discover a wide variety of possibilities.

      Testing different combinations leads to surprising discoveries. Try combining different options to broaden your project pool. This strategy opens the door to new projects you might have never considered. This lets you explore and refine your creative interests.

    Scenarios for Generating Project Ideas

    Let’s consider a few situations where a crafting recipe generator proves helpful:

    1. Scenario 1: Using Scrap Wood: A crafter has a collection of scrap wood pieces from previous projects. They input the various dimensions and types of wood (pine, oak, etc.) into the generator.

      The generator suggests: a small wooden storage box, a set of coasters, a birdhouse, or a picture frame. The crafter then picks the birdhouse, getting instructions and cutting diagrams.

    2. Scenario 2: Sewing with Fabric Scraps: A crafter has multiple fabric scraps of different sizes and patterns. They input the colors, dimensions, and types of fabric (cotton, linen, etc.). The crafter specifies that they have beginner sewing skills.

      The generator suggests: fabric bookmarks, small pouches, or a patchwork pillow. The crafter picks the patchwork pillow, using the generator’s step-by-step tutorial.

    3. Scenario 3: Knitting with Leftover Yarn: A crafter has several balls of leftover yarn in different colors and weights. They input the yarn details and specify a desire for a scarf project, with an intermediate skill level.

      The generator suggests: a striped infinity scarf, a textured cowl, or a woven scarf. They choose the cowl project, and it provides a pattern and instructions.

    Resources and Tools for Crafting Recipe Generators

    You can find many online tools to assist with your crafting. The best generators offer a wide range of functions, catering to many crafts. This means you will find a crafting recipe generator tailored to your interests. Some resources are free, while others are subscription-based, but all are accessible.

    • Online Crafting Recipe Websites: Many websites host recipe generators and project ideas. Some are free to use, supported by ads, while others require a subscription.

      These websites are a primary resource. Some of these sites offer forums and communities. These forums are helpful for getting assistance with projects. The subscription-based platforms typically have more features. Websites allow you to compare features and find a platform that matches your crafting preferences.

    • Mobile Applications: Some generators come in mobile app form. These apps provide on-the-go access to project ideas, instructions, and community features.

      Mobile apps offer ease of access. Apps are perfect if you enjoy crafting on the move. Mobile apps allow you to browse and plan projects anywhere. App-based tools are beneficial for crafters who need flexibility. This ensures the best information is available.

    • Software and Desktop Applications: Some advanced crafting recipe generators are available as downloadable software. They offer more comprehensive features.

      Software applications may be useful for intricate crafts. These platforms usually have advanced functionality. They are ideal for crafters. You’ll have better control. If you have advanced skill, this is a good choice.

    • Community Forums and Social Media: Community platforms have a wealth of resources. They let you ask for help. They have tutorials.

      Community platforms help with support and inspiration. Joining these online groups is very helpful. They can provide feedback and inspiration. It is a great way to stay up-to-date with trends. It fosters a feeling of connection to other crafters.

    Common Myths Debunked

    Myth 1: Crafting Recipe Generators are Only For Beginners

    Many people believe that crafting recipe generators are only helpful for those new to crafting. However, this is not correct. Generators offer resources to crafters of all skill levels. They provide new ideas and new techniques.

    Myth 2: All Generators are the Same

    Generators can be very similar, but they aren’t the same. Many types of generators provide a range of capabilities and features. Some are basic, offering simple recipes. Other generators are very advanced, integrating features that help create crafts.

    Myth 3: Using a Generator Reduces Creativity

    Some think generators limit creativity, but this is false. Generators are designed to inspire projects. They offer a starting point. They free up crafters’ time, letting them focus on design and execution. Generators encourage exploration. They provide creative stimulation, helping to expand your crafting journey.

    Myth 4: Generators are Always Accurate

    While most generators offer great resources, they don’t always provide accurate, detailed instructions. It’s crucial to check directions. If something is unclear, it is essential to search for clarification. By doing this, you’ll improve your projects.

    Myth 5: All Generators are Free

    It’s a mistake to think all generators are free. Many generators have free and paid versions. Premium versions offer more features, more detailed instructions, and fewer advertisements. You can pick the generator that fits your budget.

    Frequently Asked Questions

    Question: Are crafting recipe generators always accurate?

    Answer: No, while most generators are reliable, always check the instructions and materials. You might need to adjust or clarify steps.

    Question: Can I use a generator if I have no experience?

    Answer: Absolutely! Many generators have beginner-friendly features and provide step-by-step instructions. Look for those.

    Question: Are there generators for specific crafts, like woodworking?

    Answer: Yes, there are generators specializing in different crafts, such as woodworking, sewing, and knitting.

    Question: Do I need to pay for a crafting recipe generator?

    Answer: There are many free generators. However, some offer premium versions with additional features or detailed projects.

    Question: Can I use a generator on my phone?

    Answer: Yes, many generators have mobile apps. This allows you to find ideas and directions anywhere.

    Final Thoughts

    A crafting recipe generator is not just a tool; it’s a gateway to limitless creativity. From providing inspiration to simplifying your projects, these resources can elevate your crafting. As you explore the features, you’ll find generators offering guidance on your crafting journey. To maximize your experience, begin by inputting your materials and skill level. Experiment with different project types, and explore the resources available. Don’t be afraid to try new techniques and materials. Embrace the possibilities. With these tools, you can transform the way you approach crafting. The projects will be a testament to your innovation and patience. So, gather your materials, explore the world of crafting recipe generators, and get creating.

  • Crafting Recipe for Fence: A Guide for Building Success

    Crafting Recipe for Fence: A Guide for Building Success

    Picture this: you’re planning a weekend project and dreaming of a beautiful, sturdy fence to define your property and boost your curb appeal. But wait, where do you begin? Maybe you’ve already started researching, only to find a tangle of options. Or perhaps you’re worried about the crafting recipe for fence, the hidden knowledge needed to turn your dream into reality. This guide will provide the blueprints and insights you need. By the end, you’ll be prepared to begin building your own fence, or at least, know where to start. You’ll learn the different materials and options, empowering you to create a fence that is secure, attractive, and suits your needs.

    Key Takeaways

    • Learn the essential materials and tools needed for building a fence.
    • Discover how to calculate the dimensions and plan the layout for your fence.
    • Gain insights into the step-by-step process of constructing different types of fences.
    • Explore design choices, from basic picket fences to more elaborate styles.
    • Understand fence maintenance and how to extend your fence’s lifespan.

    Materials Needed for Crafting Recipe for Fence

    The first step in any crafting recipe for fence is gathering your supplies. Think of it like a chef preparing to cook. You wouldn’t start a dish without the ingredients, right? For a fence, the primary ingredients include the posts, the rails, and the pickets or panels that will make up the main structure. The material choice influences the fence’s appearance, durability, and cost. There are also essential tools you’ll need, like a post-hole digger, level, measuring tape, and safety equipment. The choice of materials will depend on the type of fence you intend to build. Are you aiming for a classic wooden picket fence, or a more modern design, or something else entirely?

    Types of Fence Materials

    Understanding the variety of materials available for your fence is important before you start. Each material has unique properties and benefits, so the best choice depends on your specific needs and preferences. Consider your budget, the look you want to achieve, and how much time you are willing to spend on maintenance. Popular choices include wood, vinyl, chain-link, and composite materials, each offering different advantages. The climate in your area, and the style of your home, can also influence your choices.

    • Wood: Wood fences are a classic choice, offering a natural look that can blend seamlessly into any landscape. They come in various types, such as cedar, redwood, and pressure-treated pine. Wood is easily customizable, allowing for various styles and designs. However, it requires regular maintenance, including staining, painting, and treatment to protect it from the elements and pests.

      Cedar is naturally resistant to decay and insects, making it a good choice for longevity. Redwood is another excellent option, known for its beauty and durability. Pressure-treated pine is a more affordable alternative, but it needs regular maintenance.

    • Vinyl: Vinyl fences are a low-maintenance option that provides a clean, modern aesthetic. They are made from PVC (polyvinyl chloride) and are available in many styles and colors. Vinyl fences are resistant to weather, pests, and require only occasional cleaning. However, they can be more expensive than wood initially and may not always offer the same aesthetic appeal.

      Vinyl fences will not rot, warp, or peel, making them a great option for people who want a long-lasting fence. They’re also available in various heights and styles to suit different needs.

    • Chain-Link: Chain-link fences are a very economical and practical choice, especially for security. They are made from galvanized steel wire and are highly durable and weather-resistant. Chain-link fences provide excellent visibility and are easy to install. However, they lack aesthetic appeal and are not usually chosen when privacy is a high priority.

      Chain-link fences are ideal for containing pets, protecting your property, and are often used for athletic fields. They are less visually appealing, but their practicality makes them a sensible choice for many property owners.

    • Composite: Composite fences combine wood fibers and plastic, offering the appearance of wood with the low-maintenance benefits of vinyl. They are more expensive than wood or vinyl but are very durable and resistant to weather, pests, and decay. Composite materials come in various colors and styles, allowing you to create a customized look.

      The use of composite materials makes this a good option for environmentally conscious homeowners. They typically come with longer warranties than wood.

    Essential Tools for Fencing Projects

    Besides the materials, you’ll need the correct tools to bring your crafting recipe for fence to life. Having the right tools makes the project easier, safer, and ensures a better result. Some tools are essential for all types of fences, while others might be needed for specific materials or designs. Make a list of all necessary tools. These are generally available at hardware stores and rental companies. Safety always comes first, so don’t forget personal protective equipment.

    • Post Hole Digger: This tool is used to dig holes for fence posts. You can choose from manual post hole diggers, which are less expensive and suitable for smaller projects, or power augers, which are faster and more efficient for larger projects.

      The depth and width of your post holes are critical for the fence’s stability. Be sure to check the local codes for depth requirements.

    • Level: A level is essential for ensuring your fence posts are perfectly vertical. Use a spirit level or a laser level to get accurate measurements. It guarantees the fence will look neat and professional.

      Incorrectly installed posts can lead to an uneven and unsightly fence that won’t provide the expected security or visual appeal.

    • Measuring Tape: An accurate measuring tape is used to measure and mark the fence’s layout, post spacing, and panel or picket sizes. Precision is key to a smooth installation.

      Precise measurements help you to avoid costly mistakes. Ensure that the fence fits your property and meets all local regulations.

    • Hammer, Screwdriver, or Drill: Depending on your fence material, you’ll need tools to fasten the fence components. A hammer is useful for nailing pickets to the rails in a wood fence, while a screwdriver or drill is needed for screws when using other materials.

      Choosing the correct fasteners for your materials guarantees a strong and long-lasting fence. Use galvanized nails or screws to resist corrosion.

    • Safety Gear: Safety glasses, work gloves, and potentially ear protection are vital to keep you safe from accidents. Protect yourself from flying debris and the physical demands of fence building.

      It is better to be safe than sorry. Consider the specific hazards related to the type of fence project you are undertaking.

    Planning and Layout for Crafting Recipe for Fence

    Planning is a pivotal element of the crafting recipe for fence process. Before you even lift a tool, carefully plan the layout, dimensions, and necessary materials for the fence. This step helps prevent costly mistakes, ensures the fence meets your needs, and makes the construction process easier. A well-prepared plan simplifies every step of the process.

    Assessing Property Lines and Regulations

    Before any construction begins, clearly understand your property lines. You can consult property surveys or local records to mark the boundaries accurately. This is very important to avoid constructing a fence on a neighbor’s property or violating local regulations. You also need to find out about local zoning laws, building codes, and any homeowner’s association rules that apply. Failure to comply can result in fines or the requirement to remove or modify the fence.

    • Property Surveys: Locate a copy of your property survey. This document will show the exact boundaries of your land and any easements. If you don’t have one, consider hiring a surveyor to accurately determine your property lines.

      Property surveys prevent boundary disputes with neighbors and ensure that your fence is placed correctly.

    • Zoning Laws and Building Codes: Research the local zoning laws and building codes that apply to fence construction in your area. These regulations often specify height restrictions, setback requirements (how far the fence must be from property lines), and permitted materials.

      Make sure your planned fence meets these requirements to avoid any legal problems or need for rework.

    • Homeowner Association Rules: If you live in a community with a homeowner’s association (HOA), review their guidelines for fences. HOAs typically have specific requirements for fence styles, materials, and colors to maintain the aesthetic consistency of the neighborhood.

      Violating HOA rules can lead to fines or the need to modify your fence to meet the required standards.

    • Contacting Utility Companies: Before you dig, contact your local utility companies to locate any underground utilities. They will mark the location of gas lines, electrical cables, and other utility lines to prevent accidental damage during construction.

      Hitting an underground utility line can be dangerous and costly. Contacting these companies is a free service, and it is a crucial safety measure.

    Calculating Dimensions and Materials

    To accurately plan your fence, you need to calculate its dimensions and the required materials. You will need to calculate the total length of the fence and determine the number of posts, pickets, rails, and panels, depending on the fence design and materials. Accurate calculations prevent waste and ensure you purchase enough supplies for the job.

    • Measure the Perimeter: Use a measuring tape to measure the total length of the area where you want to install the fence. Measure along the property lines, following any curves or angles. This measurement is crucial for determining the total linear feet of fencing material you will need.

      Consider any existing structures, such as gates or walls, when measuring. This will help you get accurate measurements for your fence project.

    • Determine Post Spacing: The spacing between fence posts depends on the type of fence and the material used. Generally, posts are spaced between 6 and 8 feet apart, but some materials might require closer spacing. Check the manufacturer’s instructions for the specific material you have selected.

      Proper post spacing is essential for the fence’s stability and strength. Closer spacing may be required for tall fences or in areas with high winds.

    • Calculate the Number of Posts: Divide the total length of your fence by the post spacing to determine the number of posts needed. Remember to account for any gates or corner posts. Add a few extra posts in case of errors or damage.

      For example, if your fence is 100 feet long and you plan to space posts every 8 feet, you’ll need approximately 12 to 13 posts.

    • Estimate Material Quantities: Calculate the amount of materials needed for the pickets, rails, or panels. The number of pickets will depend on the picket spacing and the total length of the fence. For rail-style fences, calculate the total length of the rails needed. For panel fences, measure the width of each panel and the total length of the fence to determine how many panels you need.

      It is always a good idea to add a bit extra to account for waste from cutting or any damage during construction.

    Crafting Recipe for Fence Construction Steps

    The construction steps of your crafting recipe for fence will vary depending on the type of fence. However, some basic principles are generally applied. Understanding these steps will guide you through the process, whether you are building a simple picket fence or a more complex design. With careful planning and execution, you can create a beautiful and functional fence that will last for years.

    Preparing the Site and Installing Posts

    The initial steps involve preparing the site for construction, and installing the posts, which form the structural foundation of the fence. This phase requires attention to detail, accuracy, and compliance with local regulations. Improperly installed posts can undermine the fence’s integrity and appearance, so this section is critical.

    • Marking the Fence Line: Use stakes and string to clearly mark the exact path of the fence. This helps to visualize the layout and ensure it follows your property lines and planned dimensions. Make sure that the string line is level to create a consistent height for the fence.

      Checking the string line is a good way to keep everything lined up before any actual work is done.

    • Digging Post Holes: Using a post hole digger or power auger, dig holes for the fence posts. The depth of the holes should be at least one-third to one-half the total height of the post above ground, as specified by local building codes. Ensure that the holes are wide enough to accommodate the posts and allow for concrete.

      Proper depth provides essential stability to the fence. The width should be suitable for the post and the concrete.

    • Setting the Posts: Place the posts in the holes and use a level to ensure they are perfectly vertical. Pour concrete around the posts, filling the hole to the ground level. Allow the concrete to cure completely before continuing with the construction.

      Precise leveling guarantees that the fence will be straight and visually appealing. Curing time is crucial for the concrete’s strength.

    • Bracing the Posts: While the concrete cures, brace the posts with temporary supports to prevent them from shifting. This can be done using wooden supports or braces that are removed once the concrete is fully set.

      Bracing helps posts stay in the correct position until the concrete hardens. Be sure to check the level again after the posts are braced.

    Attaching Rails, Pickets, or Panels

    Once the posts are set and cured, you can proceed to the next phase of your crafting recipe for fence: attaching the rails, pickets, or panels. The way you attach these elements will depend on the fence design and materials used. Careful and accurate execution is key to creating a fence that is both aesthetically pleasing and structurally sound.

    • Attaching Rails: For rail-style fences, attach the horizontal rails to the posts. Measure and cut the rails to fit between the posts, ensuring a level and even installation. Use screws or nails, depending on the material, to firmly secure the rails to the posts.

      Properly installed rails provide support to the vertical pickets and contribute to the fence’s overall stability.

    • Installing Pickets: For picket fences, attach the pickets to the rails, maintaining a consistent spacing between each picket. Measure and cut the pickets to the desired height, then use nails or screws to attach them. The spacing of pickets can vary depending on your aesthetic preferences and privacy needs.

      Consistent spacing makes the fence visually balanced and ensures a professional look.

    • Installing Panels: For panel fences, install the pre-made panels between the posts. The panels are typically secured to the posts using screws or brackets. Ensure the panels are level and evenly aligned.

      Panel installation can be quicker than building with individual pickets. This is a common choice for privacy fences.

    • Adding Gates: Install gates at any points where access is needed. The gates should be properly hung and aligned with the rest of the fence. Use appropriate hardware for the specific gate type and materials.

      Gates need to be practical and fit well with the overall design. Check the hinges and latches regularly.

    Finishing Touches and Safety Measures

    The final stage of the crafting recipe for fence involves finishing touches to improve its appearance and ensure safety. These details can transform a good fence into a great one. Ensure that the fence is not only attractive but also safe for everyone.

    • Painting or Staining: If you are using wood, consider painting or staining the fence to protect it from the elements and enhance its appearance. Applying a sealant will further extend the life of your fence.

      Painting or staining provides a protective barrier against moisture, sunlight, and insects. Choose colors or stains that complement your home and landscape.

    • Adding Decorative Elements: Customize your fence with decorative elements such as caps, finials, or lattice panels. These additions can improve the fence’s aesthetic appeal.

      These extras add personality and character to the fence. The details are a great way to express your style.

    • Ensuring Safety: Check the fence for any sharp edges, protruding nails, or loose parts that could pose a safety hazard. Smooth any rough spots and ensure that all fasteners are securely in place.

      Ensuring the safety of your fence is important for both children and pets. Perform routine inspections and maintenance.

    • Cleaning Up and Inspecting: Remove any construction debris and clean up the work area. Perform a final inspection of the fence to ensure that all elements are properly installed and that the fence meets your expectations.

      This final step will help you catch any mistakes. Address them as soon as possible.

    Common Myths Debunked

    Myth 1: Building a Fence Is Always Very Difficult

    Building a fence can seem challenging, but it is very manageable with proper planning, the correct tools, and following step-by-step instructions. While some projects may require more skill, many basic fence designs are suitable for DIYers.

    Myth 2: All Fences Are the Same

    Fences vary widely in style, material, and purpose. From simple picket fences to privacy fences and decorative options, there is a design for every need. The choice depends on your property, aesthetic preferences, and privacy needs.

    Myth 3: You Can Build a Fence Anywhere Without Permits

    While the rules vary by location, permits are often required for fence construction. Permits ensure that your fence meets local building codes and zoning regulations. Without a permit, you might face fines or the need to remove the fence.

    Myth 4: Wood Fences Are Always the Cheapest Option

    While wood can be a cost-effective choice, the cost depends on the type of wood and labor costs for the installation. Vinyl, chain-link, and composite materials can also be competitively priced, offering varied benefits.

    Myth 5: Vinyl Fences Are Always Maintenance-Free

    Although vinyl fences require significantly less maintenance than wood, they still benefit from occasional cleaning to keep them looking their best. Though vinyl is resistant to many problems, some maintenance is still needed.

    Frequently Asked Questions

    Question: What is the best material for a fence?

    Answer: The best material depends on your specific needs, budget, and preferences. Wood offers a classic look, vinyl is low-maintenance, chain-link is economical, and composite combines aesthetics and durability.

    Question: How high can I build a fence?

    Answer: Fence height restrictions vary by location. Check local zoning laws and building codes for specific height limits in your area.

    Question: Do I need a permit to build a fence?

    Answer: You usually need a permit to build a fence, depending on your location. Check with your local building department for specific requirements.

    Question: How far from the property line should the fence be?

    Answer: Building codes and HOA rules usually specify the minimum distance from property lines. Consult your local regulations.

    Question: How often should I maintain a wooden fence?

    Answer: Wooden fences require regular maintenance, including staining or painting every 2-5 years and cleaning as needed.

    Final Thoughts

    Embarking on the crafting recipe for fence project can transform your property’s look and functionality. From choosing your materials, such as wood, vinyl, or chain-link, to the meticulous steps of installing posts, rails, and panels, each stage brings you closer to your goal. Remember to carefully plan your layout, comply with local regulations, and prioritize safety throughout the process. Don’t be discouraged by potential challenges; building a fence is a rewarding experience that will significantly boost your property’s value and curb appeal. Begin your planning, gather your materials, and take the first step toward a beautiful new fence. With a bit of effort and attention to detail, you’ll be enjoying the fruits of your labor in no time!

  • Crafting Recipe for Enchantment Table: Build Your Knowledge

    Crafting Recipe for Enchantment Table: Build Your Knowledge

    Ever wish you could instantly make your tools super powerful, like a superhero’s gear? Maybe you’re stuck with a wooden sword in a monster-filled cave, or your pickaxe is just too slow. Well, you’re in luck! This guide will show you how to build the crafting recipe for enchantment table, the key to boosting your items with amazing abilities. You’ll go from basic tools to powerful weapons and armor. You’ll also learn the best enchantments for different situations. This post is your secret weapon. By reading this guide, you’ll learn how to get the most out of your game. You’ll boost your skills and have more fun. It’s time to level up!

    Key Takeaways

    • You will discover the exact ingredients needed for the crafting recipe for enchantment table.
    • You’ll explore the best ways to gather resources for this important table.
    • You’ll get a list of the enchantments you can use and how to get them.
    • You’ll understand the importance of bookshelves to boost the power of your enchantment table.
    • You will be ready to enchant your tools for any challenge in your game.

    The Core Ingredients: What You’ll Need

    Before you can start boosting your gear, you need to know what to gather. It’s like baking a cake – you need the right ingredients! Fortunately, the crafting recipe for enchantment table isn’t too tricky, but it does require some specific items. Getting these materials takes some time and effort, but the rewards are well worth it. This section will guide you through the materials you’ll need.

    Diamonds: The Sparkle of Power

    Diamonds are a valuable resource. They’re found deep underground, and you’ll need three of them for your enchantment table. Finding diamonds takes patience and some basic mining skills. You’ll want to dig down to the diamond level (usually around Y-level 11 or below) and search for diamond ore. This ore is a light blue color. After finding some, use an iron pickaxe or better to mine it. Diamonds are also used in other important recipes. You might get them by trading with villagers, but this isn’t a reliable source. A good pickaxe with the Fortune enchantment helps you get more diamonds from each ore block. Consider carrying a water bucket to quickly put out any lava you may encounter.

    Obsidian: The Volcanic Block

    Obsidian is the next important ingredient, and you’ll need four blocks of it. Obsidian is formed when water comes into contact with flowing lava. This can happen in underground caves or when you create a lava source near a water source. It’s a dark purple block, and you need a diamond pickaxe to mine it. This is the hardest block that can’t be easily destroyed, so make sure you bring the right tool. You can find Obsidian in naturally generated structures, such as ruined portals. They are great for decoration, too.

    A Book: The Written Word

    One book is all you need, but it can be used for lots of things. Books are crafted from three pieces of paper and one piece of leather. Paper is made from sugar cane, which grows near water. You can find leather by defeating cows, horses, and llamas. Remember, librarians in villages often trade books, which can save you the effort of crafting your own. A book can also be used as part of creating a book and quill for writing down notes about your adventures.

    Crafting Table Instructions

    You’ll need a crafting table, of course. Fortunately, crafting tables are easier to craft than the enchantment table. You can make one with just four wooden planks of any type. Once you’ve got everything, put them in the crafting table in the right order. Place the diamond at the top row in the middle, then the book right below that. Surround the diamond and book with obsidian blocks. Now you have an enchantment table.

    Building Your Table: Step-by-Step Guide

    Now that you have all the ingredients, it’s time to combine them to create the enchantment table. Building the table is a simple process, but it’s important to get it right. This section breaks down the steps.

    Setting Up Your Crafting Table

    Start by placing your crafting table down. Right-click on it to open the crafting interface. This is where you’ll arrange the ingredients. Once the crafting table is placed, you can start gathering materials. The crafting table is the heart of your building. This table lets you transform raw materials into useful tools, blocks, and structures. It’s the starting point for almost everything.

    Arranging the Ingredients

    Follow the crafting recipe exactly. You’ll need three diamonds, four obsidian blocks, and one book. Place these items in the crafting grid in the correct order: Put the diamonds in the top middle slot, the book directly beneath them, and then surround all that with obsidian blocks. This arrangement activates the recipe. You can now claim your enchantment table. Remember, getting this arrangement right is important! You must place the ingredients in the correct order in the crafting table. If you don’t, you won’t get your enchantment table.

    Placing Your Enchantment Table

    Now that you have your new table, find a good spot to place it. You’ll want an area that’s accessible and well-lit. Make sure you have enough space to build bookshelves around it. This is a very important part, as bookshelves increase the power of your enchantments. Placing the table near your other important crafting areas, such as your furnace or anvil, is a good idea. This placement helps you stay organized and efficient when you’re crafting and enchanting your gear.

    Maximizing Your Enchanting Power: Bookshelves and More

    A bare enchantment table is only part of the story. To get the best enchantments, you need to surround it with bookshelves. Bookshelves give the table more “power.” With enough bookshelves, you will gain access to higher-level enchantments. This section covers what you need to know about setting up your enchanting area.

    Bookshelves: The Key to Higher-Level Enchantments

    Place bookshelves around your enchantment table. They must be within one block of the table, and between one and two blocks away. You can have up to 15 bookshelves. Building bookshelves is easy, but it takes time. Make sure that there’s no obstruction between the bookshelves and the table. This is important. If there’s a block or something in the way, the bookshelf’s power won’t reach the enchantment table. This means that you’ll have to build around them. You can use glass panes to keep the books visible.

    Leveling Up Your Enchantments

    As you add more bookshelves, you will unlock stronger enchantments. Without bookshelves, you’ll be limited to low-level enchantments. When you have enough bookshelves, you can get the best abilities for your tools and armor. The more bookshelves you use, the better your chances of getting great enchantments. As you add more, the range of possible enchantments will improve. This lets you craft some pretty powerful items.

    Other Helpful Tips

    • Consider building your enchanting room near your storage area to get supplies quickly.
    • You can use different types of wood to make your bookshelves.
    • Don’t be afraid to experiment with different arrangements to maximize the effectiveness of your bookshelves.
    • If you want to use the same enchantment multiple times, use a grindstone to remove an existing enchantment.

    Unveiling Enchantment Options: A Guide to the Best

    Once your enchantment table is ready, you can start enchanting your items. There are many different enchantments, each with unique effects. Picking the right enchantment for the job is important. This section covers some of the best enchantments. Knowing what enchantments are available and how they help will help you craft the perfect gear for your adventure.

    Enchantments for Tools

    • Efficiency: This enchantment increases the speed at which you mine blocks or chop trees. The higher the level, the faster you can get things done. This is great for resource gathering.
    • Fortune: This is a key enchantment for mining! It increases the number of resources you get from breaking blocks. If you mine a diamond ore, you will get more than one diamond.
    • Unbreaking: This enchantment makes your tools last longer before breaking. It greatly extends the time before you need to repair or replace your favorite tools.
    • Silk Touch: This one is a bit more complex. It allows you to mine blocks without changing them. You can mine a block of ore and get the ore block itself.

    Enchantments for Weapons

    • Sharpness: This enchantment increases the damage your sword does. You will be able to do more damage to enemies.
    • Fire Aspect: Sets enemies on fire when you hit them. It’s useful against any enemy and has the added benefit of cooking food.
    • Looting: This enchantment increases the chance of getting rare items when you kill enemies. It’s excellent if you want to find more of a particular item.
    • Knockback: It sends your enemies flying back when you hit them. This can create space between you and your foes.

    Enchantments for Armor

    • Protection: This enchantment reduces the amount of damage you take from all sources. It’s a key enchantment to survive.
    • Thorns: When you get hit, your attacker takes damage. This is a great way to deal damage passively.
    • Unbreaking: Just like with tools, this makes your armor last longer. You can avoid repairs.
    • Respiration: You will be able to breathe underwater for a longer time.

    Enchanting Strategies: Best Practices

    Enchanting isn’t just about clicking buttons. There are smart ways to get the most from your enchantment table. Planning your enchantments and knowing what items to prioritize can make a huge difference in your game. This section looks at the best ways to enchant your gear and get the most from your experience.

    Planning Your Enchantments

    Before you start enchanting, think about what you want to achieve. What are the biggest challenges you face? What type of gear do you use the most? Think about your playstyle. If you spend a lot of time mining, Efficiency and Fortune are great choices. If you fight a lot of monsters, you should try Sharpness, Protection, and Thorns. Plan ahead, and prioritize the enchantments that will help you the most.

    Prioritizing Your Gear

    You can’t enchant everything at once, so focus on the most important items first. A diamond pickaxe with Efficiency and Fortune is a great early investment. A diamond sword with Sharpness is also very valuable. Armor with Protection and Unbreaking is important for surviving. Consider the situation and choose what matters the most. You want to make sure you have the best gear for survival and collecting resources.

    Repairing and Combining Enchantments

    Over time, your tools will take damage. Use an anvil to repair them. By combining items, you can transfer enchantments. This also can make your gear more efficient. Be careful, though, because each time you combine items, the cost increases. Repairing or combining items can be expensive, so try to balance durability and the use of your most powerful enchantments.

    Real-Life Examples and Scenarios

    Let’s look at how these strategies work in action. Here are a couple of scenarios. These will show you how to use your enchantment table to craft awesome items.

    1. Scenario 1: Mining Expedition You’re planning a long mining trip. First, you enchant your pickaxe with Efficiency and Fortune to increase your mining speed and resources. You then enchant your armor with Protection to keep safe. With these enchantments, you have the edge on your journey. You can mine faster and find more resources while staying safe.
    2. Scenario 2: Dungeon Delving You want to explore a dangerous dungeon. First, you enchant your sword with Sharpness and Fire Aspect. Then, you put the best possible enchantments on your armor. You also try to get Unbreaking for your gear to keep it running longer. With the right gear, you are prepared for whatever challenges you will face in the dark dungeon.

    Common Myths Debunked

    Myth 1: You need an enchantment table to get enchantments.

    This is false. You can sometimes get enchanted gear from villagers, chests, or fishing. However, the enchantment table is the best way to control the quality of the enchantments you get. You are able to pick from a range of possible choices.

    Myth 2: More bookshelves always equals better enchantments.

    False. You will get the best enchantments with enough bookshelves. You don’t need any more than 15 bookshelves. Making sure that the bookshelves are placed correctly and that nothing is blocking them is more important.

    Myth 3: You can only enchant items once.

    That is not true. You can often add multiple enchantments to the same item. You can use an anvil to combine items with different enchantments. In some cases, you can remove unwanted enchantments with a grindstone.

    Myth 4: Diamonds make the enchantment table more powerful.

    This is wrong. The diamonds are only an ingredient. It’s the bookshelves around the table that boost the enchantment power. If you don’t have bookshelves, you won’t get advanced enchantments, regardless of the quality of the diamonds you use.

    Myth 5: It’s all luck when you enchant something.

    You have a large amount of control. While some chance exists, the bookshelves are what controls the quality and range of enchantments that you get. Planning your enchantments will also help.

    Frequently Asked Questions

    Question: Can I enchant any item?

    Answer: No, not all items can be enchanted. You can enchant tools, weapons, armor, and books.

    Question: How do I know what enchantments are available?

    Answer: When you place an item in the enchantment table, you will see a list of potential enchantments. The higher level, the better the enchantments.

    Question: Do enchantments wear off?

    Answer: No, enchantments don’t wear off, but items with enchantments can break. If your tool breaks, the enchantment is lost.

    Question: Can I change an enchantment on an item?

    Answer: You can’t directly change an enchantment, but you can use a grindstone to remove one and try again.

    Question: What do the levels mean?

    Answer: The levels indicate the power of the enchantment. Higher levels provide more effective abilities. They also cost more experience to use.

    Final Thoughts

    You now know how to build and use the crafting recipe for enchantment table. You have the knowledge and tips to create powerful items. You know about the ingredients, placement, and the value of bookshelves. You also know the key enchantments and how to use them. You can pick the right gear. Remember to plan your strategy and focus on the enchantments that best fit your play style. Don’t be afraid to experiment and test the different combinations to find the best gear. It’s time to gather your materials and start boosting your tools and weapons. Go out there and start enchanting. The adventures that await will be easier than ever.

  • Crafting Quotes and Sayings A Guide to Writing Powerful Phrases

    Crafting Quotes and Sayings A Guide to Writing Powerful Phrases

    Remember that time your friend posted a perfectly worded quote on their social media, and it just clicked? Maybe it resonated with a feeling you had, or maybe it gave you a fresh perspective. That’s the power of crafting quotes and sayings! It’s about capturing a thought, an emotion, or a truth in a concise and memorable way. This post will explore how to write your own impactful phrases. You’ll learn the essential elements, techniques, and tricks to help you create quotes that stick with people. By the end, you’ll be equipped with the knowledge to formulate and use your own compelling sayings, boosting your content’s impact and attracting a wider audience.

    Key Takeaways

    • Learn the fundamental principles that make a quote effective.
    • Discover practical strategies for generating creative ideas for your sayings.
    • Understand how to refine your crafting quotes and sayings skills.
    • Explore different methods of using quotes across various platforms.
    • Get insight into common mistakes to avoid when writing quotes.
    • Find inspiration from various resources and famous examples.

    The Core Elements of Powerful Phrases

    Every effective quote, from a simple adage to a profound statement, hinges on a few core elements. These are the ingredients that make a phrase memorable, impactful, and shareable. Without these key components, your quote might fall flat, failing to connect with your audience. Understanding these elements is essential before you even start formulating phrases. This foundation will guide your writing and help you create phrases that resonate with your readers.

    Clarity and Simplicity

    Clarity is king. The best quotes are easy to grasp quickly. Avoid using complex jargon or overly ornate language that might confuse readers. The goal is to convey your message directly and clearly. Think of it like this: a quote is a snapshot of an idea, and it needs to be immediately recognizable. Remember, simplicity doesn’t mean the idea itself has to be basic; it just means the expression of that idea should be straightforward. This focus on easy-to-understand language ensures your quote is accessible to a wide audience.

    • Use plain language that everyone can understand.
    • Avoid using complicated terms or words.
    • Keep sentence structure direct and concise.
    • Prioritize the main point over intricate wordplay.
    • Ensure your message is easy to understand on the first read.

    Emotional Resonance

    People connect with feelings. A quote that taps into an emotion—joy, sadness, inspiration, frustration—is far more likely to stick in someone’s mind. The most memorable phrases often speak to universal experiences. Consider what your audience feels or has felt. Tap into shared human experiences. The stronger the emotional connection, the more memorable the phrase. Your quotes should be crafted to reflect the human experience. It can be a simple feeling, but it must be felt.

    • Identify emotions your target audience experiences.
    • Use words that evoke strong feelings (e.g., hope, fear, love).
    • Reflect on universal human experiences in your crafting quotes and sayings.
    • Choose words that are authentic and heartfelt.
    • Aim to create a lasting emotional impact on the reader.

    Originality and Uniqueness

    While some quotes are universal, originality helps you stand out. While you can draw inspiration from others, ensure your phrases have a unique voice. Your personal perspective is what gives a quote its power. The originality of a quote comes from a distinct perspective. Don’t be afraid to experiment with your writing. Try different ways to express your ideas. Make your phrases memorable. Aim for a distinctive voice. If your quote sounds similar to other quotes, then it loses its originality and impact.

    • Find a unique perspective on common themes.
    • Use fresh language and avoid clichés.
    • Reflect your unique experiences and insights.
    • Test different writing styles and approaches.
    • Ensure the message is truly your own.

    Generating Ideas for Crafting Quotes and Sayings

    Coming up with great quotes can be easy. The ability to generate quote ideas comes down to observation and preparation. Here’s a look at some of the things you can do to get those creative juices flowing. This section explores several different techniques to help you brainstorm and collect ideas. It is important to know your options so that you can craft the best possible quote.

    Reflecting on Experiences

    Your life is full of potential quote material. Think about the lessons you’ve learned, the challenges you’ve overcome, and the moments that have shaped you. These are often rich sources of inspiration. What are your feelings regarding that experience? What have you learned from the experience? Personal experiences add authenticity to your writing, making your quotes more relatable. By reviewing and reflecting on your own life experiences, you can identify strong emotions. This can help you better formulate meaningful phrases.

    • Keep a journal to record your thoughts and feelings.
    • Reflect on experiences that have had a significant impact.
    • Note the core lessons you have learned from these experiences.
    • Identify emotional triggers and themes from your life.
    • Use these reflections to generate ideas for crafting quotes and sayings.

    Observing the World Around You

    Pay attention to the world around you. This includes interactions with others, current events, and trends. Look for patterns, ironies, and insights that might be turned into a quote. Being observant expands your range of potential ideas. You can find inspiration anywhere, from a simple conversation to a complex social phenomenon. Look at the people around you and see what you can observe. Keep a running list of observations. What do you see around you that could inspire a phrase?

    • Read news articles and books from different genres.
    • Pay attention to conversations you have with others.
    • Observe how people interact with one another.
    • Note common themes and trends in society.
    • Let these observations spark creative ideas.

    Using Prompts and Exercises

    Sometimes, you need a little nudge. Several exercises can help you generate ideas. This may include using word associations, brainstorming sessions, and writing prompts. These prompts can help you break out of creative ruts and discover new paths to follow. Try different exercises to get your thoughts flowing. Use tools like word associations to generate a range of ideas. These exercises can help unlock your creative potential and enhance the crafting quotes and sayings process.

    • Use word association exercises to connect ideas.
    • Try using different writing prompts to encourage creativity.
    • Engage in brainstorming sessions to generate ideas.
    • Set time limits to improve creativity and get started.
    • Combine these techniques for a more powerful effect.

    Refining Your Crafting Quotes and Sayings Skills

    Writing isn’t just a one-time thing; it’s a process. After generating initial ideas, you’ll need to work on refining them. This refinement process can ensure that your quotes are polished, clear, and impactful. This involves editing, receiving feedback, and revising your phrases. It involves polishing your phrases, which helps make them more powerful. This will refine your writing and develop your abilities.

    Editing and Proofreading

    Reviewing and correcting your work is an essential part of the process. Editing your quotes ensures they are grammatically correct, concise, and impactful. Check for any errors in spelling, grammar, and punctuation. Make sure your language is clear and flows well. Editing helps you get rid of clutter and improve clarity. You can find problems in the language. By focusing on each element, you will be able to refine your message.

    • Correct all spelling and punctuation errors.
    • Check for correct grammar in all sentences.
    • Ensure sentences are clear and easy to understand.
    • Eliminate any unnecessary words or phrases.
    • Read your quotes aloud to catch any issues.

    Seeking Feedback

    Getting a second opinion is a great way to improve your writing. Ask trusted friends, family, or colleagues for feedback on your quotes. They can help you identify areas for improvement and can help you see where your messages may not be clear. Constructive criticism helps improve the clarity and impact of your work. Encourage honest feedback to enhance your skills. Learn from others’ perspectives. Make improvements based on their suggestions. This will enhance the overall impact of your crafting quotes and sayings.

    • Share your quotes with trusted people you know.
    • Ask for feedback on clarity, emotional impact, and originality.
    • Encourage honest critiques and suggestions for improvement.
    • Listen attentively to any feedback you receive.
    • Use this feedback to refine your writing.

    Revising and Iterating

    Don’t be afraid to make changes. Revising involves improving your quotes based on feedback and your own analysis. This can involve adjusting your language, rephrasing sentences, and even completely rewriting parts. This process helps you perfect your writing skills. Editing is just one part of the process. The process of iteration can make your quotes even better. The more you work at it, the better you will become.

    • Review feedback and your own analysis of your phrases.
    • Make changes as necessary to improve the impact.
    • Adjust your language to make it more clear.
    • Try rewriting your phrases from time to time.
    • Keep working to refine and improve your writing.

    Utilizing Quotes Effectively

    Knowing how to write quotes is only part of the process. You also need to know how to use them to your advantage. Where you choose to share your quotes, and how you present them, can affect their reach. This section explains how to use quotes effectively across various platforms. This information can help you maximize the impact of your phrases. It will show you how to share your quotes in ways that reach a large audience.

    Social Media

    Social media is a great platform to share your quotes. Platforms like Instagram, Facebook, and Twitter are ideal for sharing your phrases. Create visually appealing graphics and posts. Use relevant hashtags to increase visibility. Tailor your content for each platform to ensure maximum impact. The visual and context are extremely important. Using different platforms can increase your reach. Social media can become a great tool for your crafting quotes and sayings.

    • Use visually attractive images or graphics.
    • Choose hashtags that relate to the quote.
    • Use different platforms to reach your audience.
    • Post quotes at the best times for engagement.
    • Interact with your followers through likes and shares.

    Blogs and Websites

    Quotes can enhance the overall appeal of a blog or website. Add quotes to your blog posts, articles, and website pages. You can use quotes to emphasize key points, illustrate ideas, or provide inspiration. When used well, quotes can improve the user experience. By sharing them, you can increase audience engagement. When you add quotes to your blog, you can help people connect to your work.

    • Include quotes within the body of your text.
    • Use quotes in your headers and introductions.
    • Add quotes to your website’s about page.
    • Include quote images with a link to your content.
    • Incorporate quotes to inspire your visitors.

    Presentations and Speeches

    Quotes can be a powerful tool for public speaking. Adding quotes can add depth to your words and captivate the audience. Select quotes that are related to your main points, and use them to illustrate your ideas. Use quotes to create an emotional connection. These sayings can help give your audience something to remember. By adding quotes to your speeches, you can make your presentations better.

    • Use quotes to start your speech.
    • Choose quotes that match the theme of your speech.
    • Use quotes to add emphasis to key ideas.
    • Use visuals to reinforce your quotes.
    • Use quotes to create an emotional impact on your audience.

    Common Mistakes to Avoid

    Avoid these common mistakes in order to improve your writing. To achieve the best results, you must avoid the common pitfalls in crafting quotes and sayings. This section lists common mistakes to avoid. These tips can help you create more effective quotes and sayings. Making these changes can help you improve your writing overall.

    Using Clichés

    Overused phrases and clichés may dilute your message. Clichés are phrases that have become too common and lose their impact. They may sound unoriginal and dull to your audience. When crafting phrases, it’s very important to avoid using clichés. Look for more original and distinctive ways to express your thoughts. The ability to do this will help create more memorable quotes.

    • Avoid using phrases that have been used a lot.
    • Substitute common phrases with original wording.
    • Seek different perspectives on common topics.
    • Think about your own unique voice.
    • Choose phrasing that is new and interesting.

    Being Too Vague

    Being unclear can render your message meaningless. Vague language can confuse the audience. It is important to focus on clarity and precision. Make sure your meaning is easy to understand. Be clear and specific in all your word choices. This is a very important part of crafting quotes and sayings. Don’t leave your audience guessing, and ensure the message is clear.

    • Ensure your message is understandable.
    • Avoid using ambiguous language in your writing.
    • Focus on direct and clear wording in your messages.
    • Use specific examples to show your ideas.
    • Ensure your thoughts come across clearly to your audience.

    Ignoring Your Audience

    Writing for yourself can decrease your impact. Your writing can benefit from the ability to consider your audience’s perspective. It can ensure your quotes resonate with the people you are trying to reach. Understanding your audience helps you make better quotes. Knowing the audience will help you choose your words, tone, and the context for your message. Always remember who you are writing for.

    • Think about who you are writing for.
    • Consider the experiences of your readers.
    • Use language that will connect with the audience.
    • Tailor your quotes for a specific group of people.
    • Choose themes and topics that appeal to them.

    Common Myths Debunked

    Myth 1: Only Writers Can Create Great Quotes

    Many people think that only professional writers can create memorable sayings. The reality is that anyone can develop the skill of creating powerful phrases. Great quotes are the product of inspiration, practice, and the ability to express ideas clearly. Everyone has ideas to share, and with effort, anyone can write great phrases. With enough practice, you can have a great impact with your own sayings.

    Myth 2: A Quote Must Be Long To Be Meaningful

    Some people think that great quotes have to be long and complex. In truth, many of the most popular quotes are very short and concise. The key to an effective quote is not length, but its ability to convey an idea or emotion efficiently. Short, impactful phrases are sometimes better. This focus on clarity ensures your message is easy to understand on the first read. You can have a great impact with very few words.

    Myth 3: You Need a Thesaurus To Write Quotes

    People often believe that you need a thesaurus to write a good quote. Using a thesaurus can sometimes hinder the process. While it’s helpful to be knowledgeable of words, using complex vocabulary isn’t always best. The most effective quotes often rely on simplicity and direct language. The best sayings come from your own experiences, not a list of vocabulary. Focus on being clear, and on using the language you prefer.

    Myth 4: Quotes Are Only for Inspiration

    Many believe quotes can only be for inspirational purposes. Quotes can serve multiple purposes. While many are made to inspire, they can also be used to explain ideas, offer advice, or add humor. Quotes can be a very versatile tool. There are many ways to make use of crafting quotes and sayings. They can also be used for entertainment and education. This is how you can use them in different areas.

    Myth 5: All Quotes Need to Be Original

    The idea that all quotes have to be original is a misconception. While originality is important, it’s also acceptable to use existing quotes from others. You can use these phrases, as long as you give credit. When using a saying from someone else, you can still add your own spin. The goal is to build on your ideas and the ideas of others. This is one way to create phrases that are authentic to you.

    Frequently Asked Questions

    Question: How do I find the right words?

    Answer: It can be very helpful to find the right words to use. Start by considering the central idea or feeling you want to share. Then, choose words that express your thoughts. Use a thesaurus to help you find suitable synonyms, but make sure the words align with your voice.

    Question: Can I use quotes for commercial purposes?

    Answer: Yes, you can use quotes for commercial purposes. However, it’s necessary to ensure you own the rights. This includes verifying that the quote isn’t protected by copyright, or if you have permission to use it. Be sure to be aware of the laws surrounding intellectual property.

    Question: How can I remember my quotes?

    Answer: You can write them down. Keep a notebook or digital file for all your quotes. You can also create memory techniques, such as using visual associations or repeating your sayings. By taking notes, you can keep your best phrases nearby, and easily recall them.

    Question: What’s the best way to share my quotes?

    Answer: There are many different ways to share your quotes. You can share your quotes through different social media platforms. You can create images for the phrases, or incorporate them into your blogs or websites. Consider your audience when you decide how and where to share your writing.

    Question: How can I improve my crafting quotes and sayings skills?

    Answer: Practice is one of the best ways to improve. You can develop your skills by writing regularly. You can also ask for feedback on your writing. The more you write, the better you will become. There are several ways to improve your abilities. The more you put into your writing, the better you become.

    Final Thoughts

    Crafting quotes and sayings is a blend of creativity, thoughtfulness, and skillful use of language. You’ve discovered the fundamental elements, learned to generate ideas, and seen how to refine your process. It is the ability to distill complex ideas into memorable phrases. Remember, the journey of writing quotes is about more than just expressing thoughts; it’s about making a real connection with your audience. The most powerful quotes come from your own unique perspective. Don’t be afraid to experiment, refine your approach, and embrace the process of making your own phrases. The more you create, the better you will become. Get started today, and let your words inspire and connect with others!

  • Crafting Quests W101: A Beginner’s Guide for Wizard101 Players

    Crafting Quests W101: A Beginner’s Guide for Wizard101 Players

    Ever find yourself staring at a quest in Wizard101, feeling a bit lost on what to do next? Remember that feeling of being stuck, desperately seeking the right crafting reagents to progress? Well, you’re not alone! Many players experience the same thing when they begin to crafting quests w101. This guide aims to clear up the confusion and equip you with the knowledge to craft with confidence. You will learn to easily build better quests in the game. You’ll gain practical tips, examples, and strategies that will transform you into a crafting pro. Get ready to level up your crafting skills, make progress, and boost your enjoyment of the game!

    Key Takeaways

    • You’ll discover the basics of crafting quests.
    • Understand the types of crafting recipes.
    • Learn how to obtain crafting stations and reagents.
    • Become proficient in completing crafting quests.
    • Explore tips for efficient crafting quest progression.
    • You will be able to master the crafting aspect of Wizard101.

    Getting Started With Crafting Quests

    The first step into crafting quests w101 is understanding what crafting is and why it’s a critical part of Wizard101. Crafting involves creating items, such as gear, housing items, and even spells, using recipes and gathering ingredients. It adds a whole new dimension to your Wizard101 experience, allowing you to create items you might not find otherwise. Think of it as a way to personalize your game and gain a competitive edge. This will include how the crafting process itself works and the types of items you can create. Let’s start with the basics.

    What is Crafting?

    Crafting in Wizard101 is the process of making items through a recipe. These recipes require specific ingredients and a crafting station. You will go to a crafting station like the one in Wizard City to begin. The process is straightforward, but finding the right materials and recipes is where the challenge lies. Crafting rewards your exploration, patience, and ability to trade with others. Crafting gear can enhance your character’s power. It can also create a cozy, personalized space to show off your achievements. The game is full of exciting recipes for you to unlock, creating an added layer of depth to your adventures.

    • Crafting allows you to create unique items, providing access to gear or housing items that can enhance your gameplay experience.
    • Crafting extends beyond simple gear; it’s about customising your wizard’s life in the game. Think of creating a personalized dwelling filled with trophies and decorations, all made by your hands. From spells that provide unique advantages to housing items that reflect your style, crafting gives you an ability to express your creativity. Items are crafted at specific crafting stations and provide an advantage.

    • Recipes act as blueprints. They tell you what ingredients you need.
    • Recipes are your guides to crafting, offering the necessary information to create various items. Each recipe lists the specific ingredients and the crafting station required. You can find recipes in different locations, from vendors to specific quest rewards. Recipe selection is important. Carefully choose what to craft to maximize your efforts. Recipes are the initial step.

    • Crafting stations are essential. They are the places where you perform the crafting process.
    • Crafting stations provide a dedicated space for crafting. You’ll visit stations in different areas of the Spiral to complete your projects. Each station has a particular function. They come in various types, depending on the item you want to create. This is where your ingredients and recipe come together. Be sure you know where these stations are, since they are necessary.

    The Importance of Crafting

    Crafting opens up many possibilities for your character. It allows you to obtain gear that boosts your stats, customize your dwelling, and even create powerful spells. Crafting is not just an optional activity. It’s a core element of the game that can significantly improve your gameplay. It’s a way to personalize your Wizard101 experience, allowing you to showcase your achievements. It’s also a fantastic way to engage with the Wizard101 community. Crafting also enhances the player experience.

    • Crafting gear boosts your character.
    • Crafting allows you to build gear with stats that directly impact your character’s strengths. You can create items that boost your health, damage, resistance, and other important aspects. This can give you an advantage, and help you deal with the challenges in the game. Crafting gear will enhance your chances of success.

    • Personalize your dwelling.
    • Crafting expands to include housing items, allowing you to personalize your dwelling with unique decorations and furniture. From simple tables and chairs to elaborate trophies and themed rooms, crafting gives you the freedom to build a space that reflects your style. Crafting housing items lets you showcase your journey and creativity.

    • Craft spells and other advantages.
    • Crafting also includes the ability to create certain spells and other advantageous items that can give you an edge in combat or assist in gameplay. These craftable spells often provide unique effects. They expand your arsenal with more options and strategies. This is a very useful way to boost your gameplay experience.

    Types of Crafting Recipes

    The type of items you can craft varies. There are many recipes in Wizard101. These recipes require different reagents. Some are readily available from vendors. Some are found throughout the Spiral. This variety gives you a chance to expand your crafting knowledge. By the end, you’ll have mastered different recipes. You’ll gain the knowledge to create the best gear for your wizard.

    Gear Recipes

    Gear recipes allow you to build armor, weapons, and accessories. These items provide bonuses to your character’s stats, which helps you survive. The process involves finding the right recipe. You need to gather the correct materials, and visit the right crafting station. Gear recipes are often tied to specific worlds or events. These items are important as you level up. Crafting gear is a useful way to become stronger.

    • Armor and Clothing.
    • Recipes for clothing include robes, hats, and boots. These often provide critical health and resist stats. These items will help you survive attacks from enemy wizards. They also are very important when you are facing difficult bosses. Armor crafting is something to consider. Choosing the right armor can make a big difference in battles.

    • Weapons and Wands.
    • Weapons and wands can boost your damage output and provide other abilities. These recipes allow you to create wands, swords, and other instruments of power. These can come with unique effects, like critical hit boosts. They are a good way to improve your combat strategy. Finding the right weapon can significantly impact your character.

    • Accessories.
    • Accessories like rings and amulets are important. They grant bonuses. You can also craft accessories that will improve your stats. They can add additional health, and damage. Crafting these items is essential for maximizing your character’s strength. When crafting accessories, consider what your character needs.

    Housing Item Recipes

    Housing item recipes let you personalize your dwelling. You can craft everything from furniture to decorations. These recipes let you customize your home, providing an avenue for creativity. These recipes often require special ingredients. They can sometimes be collected in particular areas. Housing items make the game fun for many players. Decorating your house is an enjoyable way to show your unique style.

    • Furniture.
    • Furniture includes crafting beds, tables, and chairs. These items can transform your dwelling into a personalized space. With these recipes, you can create a place that reflects your style and personality. There are a variety of themes, so you can decorate your home in a way that is unique to you. Furniture allows you to create a personalized space.

    • Decorations.
    • Decorations, such as paintings and statues, can add flair to your house. You can craft various decorations that align with your personal preferences. These items are a good way to add a personal touch to your dwelling. Decorations will make your house stand out. They are useful for expressing your personality.

    • Functional Items.
    • Crafting extends to functional items such as crafting stations. Crafting allows you to create useful items. This expands beyond decor to include items with practical purposes. Crafting functional items can enhance your gaming experience. They will improve your home.

    Obtaining Crafting Stations and Reagents

    To successfully craft in Wizard101, you’ll need the right stations. You’ll also need the essential ingredients to start the process. This section provides an overview of crafting stations and how to get your hands on those important reagents. Knowing how to obtain and use crafting stations is essential to making the items you want. It also includes how to acquire reagents from various sources.

    Crafting Station Locations

    Crafting stations are the core of crafting. These are the places where you mix your ingredients. They come in many types, each suited to different recipes. Knowing where to find the right station is as important as the recipe itself. There are several different stations, which cater to different types of crafting. Understanding how to access and use each station is important for your crafting journey.

    • Wizard City.
    • The first crafting station is in Wizard City. This station is where you’ll begin your crafting journey. You’ll be using this station for many of the initial crafting quests. This is a good place to start because it offers beginner-friendly recipes. Always have access to the station.

    • Krokotopia.
    • Krokotopia hosts stations for more advanced recipes. The station becomes available as you level up and venture into new areas. Mastering the crafting stations here will allow you to craft more powerful items. Krokotopia offers different crafting experiences.

    • Celestia.
    • Celestia is home to stations with advanced recipes. It’s designed for wizards who have explored much of the game. These stations are the best source of crafting gear. To unlock these stations, you must advance in the game and progress through quests.

    Reagent Acquisition

    Reagents are the building blocks of crafting. They are the essential ingredients used in crafting. Collecting reagents requires exploring various areas in the Spiral. The locations for these resources can be found in the game, such as from vendors or from other players. Reagents come in different rarity levels. Each is essential for different recipes. Knowing where to find these reagents is important.

    • Gathering.
    • Gathering is the primary method of acquiring many reagents. You can collect reagents at designated locations within each world. These appear as sparkling nodes on the ground. They are easily identifiable. Be sure to explore each world thoroughly to find all the different types of resources. Gathering is a very good starting point for collecting reagents.

    • Vendors.
    • Some reagents can be bought from vendors. These vendors are in various locations throughout the game. They usually sell common ingredients that are frequently used in crafting. These are a good way to quickly restock. Vendors will save you from having to look for the materials.

    • Creature Drops.
    • Some reagents are only obtained by defeating enemies. These reagents are often the rarer materials used in advanced crafting. This can require some effort. There is no sure way of getting the item. Reagent drops can sometimes be random, but worth the effort.

    Completing Crafting Quests

    Crafting quests w101 guide you through the initial stages of crafting. Completing crafting quests is a straightforward process. The quests teach you the fundamentals of crafting, like finding recipes and gathering ingredients. These quests can be a rewarding experience. Mastering crafting quests is a good way to begin your crafting journey. You will learn the process and the basic mechanics. They are also useful for earning rewards.

    Finding Crafting Quests

    Crafting quests are the initial tutorials. They are a good way to learn how to craft. You can start these quests in the early parts of the game. Quests offer step-by-step instructions. They guide you through the crafting process. Crafting quests also provide experience points. You also get gold and other valuable resources. Completing these quests is a good way to familiarize yourself with crafting.

    • Quest Givers.
    • Crafting quests are obtained from specific quest givers. They often stand near crafting stations. These NPCs will give you instructions and the recipe for the task. Talking to them will give you all the information you need. Following their instructions is the most important step in the quest.

    • Quest Logs.
    • Make sure you understand your quest log. This is your go-to place for all crafting quest details. The log will explain each step of your crafting quest. It will detail what you need to do next. The quest log is very helpful for any quest.

    • World Progression.
    • Crafting quests are usually tied to world progression. As you venture into new areas, more crafting quests will unlock. Each world offers unique recipes and reagents. These quests will make you learn about the content in each area. Progress through the worlds to unlock new crafting opportunities.

    Crafting Workflow

    The crafting workflow is a clear series of actions. Knowing the process helps you to efficiently complete crafting quests. The first step involves getting the recipe. Gather the ingredients, go to the right station, and craft your item. Then, hand in your item for rewards. Following these steps helps in crafting. This process can be applied to many different items.

    • Obtaining Recipes.
    • Recipes are your guide for each crafting project. Recipes can be obtained from quest givers or vendors. Before you begin crafting, you need to obtain the recipe for the item. Recipes include detailed ingredient lists. Be sure to check the recipe carefully before you begin crafting.

    • Gathering Ingredients.
    • Gathering is essential. You’ll need to collect the reagents listed in the recipe. Gathering might involve searching through areas or defeating enemies. Always check your recipe. It’s a critical step in the crafting process. Gathering might require time and effort.

    • Using Crafting Stations.
    • Crafting stations are essential to perform your crafting. Each station has a specific purpose. These stations are usually located in specific areas. Once you’ve gathered all the items, go to the appropriate station and craft your item. The station will guide you through the process, and will tell you if you are missing any ingredients.

    Efficient Crafting Quest Progression

    Being efficient in crafting quests w101 helps you achieve your goals faster. You can gather reagents and find the best locations, and learn how to plan your crafting sessions. This section offers tips and strategies to speed up your crafting tasks. Learning to improve your game will enhance your efficiency. It helps you maximize your gains while reducing wasted time and effort. Efficient crafting helps your enjoyment in the game.

    Resource Management

    Resource management is a key skill to master in the game. Knowing how to efficiently manage your resources ensures you can craft regularly. It’s not just about gathering reagents. Resource management includes planning your crafting efforts and optimizing your gameplay. Careful management helps you to maximize your gains. It prevents wasted time and effort.

    • Prioritize gathering.
    • Make sure you gather often. Focus on gathering reagents you’ll need. Gather them every time you’re in a specific area. Collecting resources frequently will help you be prepared. Focus on collecting reagents you regularly use. This will keep your crafting supply constant. Keep in mind which reagents are in high demand.

    • Inventory Management.
    • A tidy inventory is essential for efficient crafting. Keep your inventory organized. Make sure to regularly clear out your inventory. This allows you to collect reagents without disruption. Always keep the necessary crafting reagents. Managing your inventory is a very important part of the game.

    • Planning and Preparation.
    • Planning is key to success. Before you begin crafting, check what reagents you need. Make sure you have all the necessary items. Planning ensures you can complete quests quickly. Check the recipe carefully. It’s important to craft efficiently. Preparing your crafts will reduce interruptions.

    Optimizing Your Crafting Route

    Crafting efficiently also involves knowing the best routes. This involves identifying the locations where you gather reagents. It involves creating a route that you can follow while playing. Knowing the fastest path lets you gather reagents and complete quests. This improves your productivity. You can also explore different paths. Consider the location and frequency of reagents.

    • Identify Gathering Spots.
    • Map the spots in each area. Identify which areas have the ingredients you need. Knowing where they are is essential to fast crafting. You can create a route that maximizes your time. Knowing the locations lets you craft more efficiently. This will help you to gather materials quickly.

    • Create a Gathering Route.
    • Once you know the location of the reagents, create a route. Follow this route to collect everything. This is a very useful way to consistently gather your resources. Plan your route according to the location. Make sure the route does not include dead ends.

    • Combine Gathering with Quests.
    • Combine your reagent gathering with your regular quests. You might find resources while exploring. Combining gathering with quests allows you to save time. This can increase your overall productivity. This is a good way to save time and to maximize your gameplay.

    Common Myths Debunked

    Frequently Asked Questions

    Question: Where can I find crafting stations?

    Answer: Crafting stations are usually found in central locations within the areas of Wizard101, such as Wizard City, Krokotopia, and Celestia.

    Question: How do I get crafting recipes?

    Answer: Crafting recipes are obtained from quest givers or vendors, or as rewards for completing certain quests or activities.

    Question: Are some crafting recipes better than others?

    Answer: Yes, some crafting recipes offer items that are more powerful or useful than others. They depend on the stats of the item.

    Question: Can I trade crafted items with other players?

    Answer: Yes, you can trade the items you craft. These items are able to be used in gameplay, or for display in housing.

    Question: What do I do with extra reagents?

    Answer: Extra reagents can be sold to vendors for gold, or used for future crafting endeavors.

    Final Thoughts

    Mastering crafting quests w101 is a rewarding experience that will expand your capabilities. By understanding the basics, exploring different recipes, and learning efficient techniques, you can transform your crafting capabilities. We discussed the fundamentals of crafting, different recipes, and practical strategies. You now have the knowledge to acquire reagents and access crafting stations. Take the time to gather reagents and progress through the levels. Crafting also includes creating your own equipment to enhance your character. Experiment with recipes and seek out crafting opportunities. Crafting will enhance your gameplay. It is an important part of the Wizard101 experience. You can become a crafting pro in Wizard101!

  • Crafting Quests OSRS A Guide to Quest Creation Success

    Crafting Quests OSRS A Guide to Quest Creation Success

    Remember that frustrating moment when you’re stuck on a quest in Old School RuneScape? The cryptic clues, the endless backtracking. it can be a real headache! But have you ever considered the people who crafting quests OSRS? They’re the masterminds behind those challenges, the architects of our adventures. In this guide, we’ll explore how these quests are made, giving you a better appreciation for the game’s intricate design and maybe even inspiring you to try your hand at creating your own. You’ll gain a deeper appreciation for quest design and learn valuable tips to improve your own gameplay. This exploration will also give you an edge in the game, boosting your knowledge of the questing system and saving you valuable time during gameplay.

    Key Takeaways

    • Discover the essential steps involved in crafting quests OSRS.
    • Explore different quest types and how they influence the player experience.
    • Learn how to create engaging storylines that keep players invested.
    • Understand the importance of balanced challenges and rewards.
    • Get tips on incorporating unique mechanics and puzzles.
    • Gain knowledge of tools used in the quest creation process.

    The Fundamentals of Crafting Quests OSRS

    The core of any good quest lies in its structure. Think of it like building a house – you need a solid foundation before you can add walls and a roof. For crafting quests OSRS, this foundation consists of a clear objective, a logical sequence of events, and a compelling reason for the player to participate. This fundamental understanding is key to creating quests that players will enjoy and remember. Without this foundation, the quest will feel disjointed and ultimately unfulfilling. A well-structured quest provides a sense of accomplishment and encourages players to continue playing.

    Defining the Quest Objective

    Every quest begins with a purpose. What does the player need to achieve? Is it to find a lost item, defeat a powerful enemy, or solve a mysterious puzzle? The objective provides direction and focus. Without a defined objective, the quest becomes aimless and players will lose interest quickly. Think of the objective as the destination on a map; it tells players where they need to go. Objectives should be clear, concise, and easy to grasp. A good objective also hints at the challenges the player will face. A compelling objective will also be connected to the game’s lore.

    • Clarity: The objective must be immediately apparent to the player. Avoid vague or confusing goals.
    • Relevance: Ensure the objective fits within the context of the game’s story and world.
    • Feasibility: The objective should be achievable within the game’s mechanics and the player’s level.

    For example, in the quest “Cook’s Assistant”, the objective is to gather specific ingredients for the Cook. The objective is clearly stated, relevant to the game’s setting, and achievable by low-level players. This is a model for clear objective setting.

    Building a Logical Quest Sequence

    Once you have an objective, you need a plan to achieve it. This involves breaking the quest into a series of steps or tasks. Each step should logically lead to the next, creating a sense of progression and rewarding the player’s efforts. The sequence should be intuitive. Avoid arbitrary tasks that feel disconnected from the main objective. A good sequence builds momentum, keeping players motivated to keep playing. It provides a roadmap for the player’s journey.

    • Linear Progression: A straightforward path with clear steps. Good for beginners.
    • Branching Paths: Offer choices to the player, with different routes leading to the same goal.
    • Non-Linear Approach: Allows players to tackle tasks in any order, offering freedom and flexibility.

    Take the quest “Restless Ghost” as another example. The sequence includes talking to a ghost, fetching bones, and using them at an altar. Each step builds on the previous, creating a cohesive and satisfying experience. The logical sequence of this quest enhances immersion.

    Storytelling and Quest Design in OSRS

    A great quest isn’t just about completing tasks; it’s about telling a story. Storytelling gives context to the objective and the tasks, making the experience more engaging. Think of the quest as a mini-movie, with characters, settings, and conflicts. A well-crafted narrative adds depth and personality, making players care about the outcome. A strong narrative makes the quest memorable. It creates a connection with the player.

    Crafting an Engaging Narrative

    The best stories have relatable characters, exciting conflicts, and compelling settings. The characters should feel real and have their own motivations. A quest should have conflict – something that creates tension and drives the plot forward. The setting can impact the story. The narrative should also create anticipation to encourage players. The goal is to capture the player’s imagination. You want players to be curious about what happens next.

    • Character Development: Give characters unique personalities, backstories, and motivations.
    • Conflict and Tension: Introduce challenges, obstacles, and mysteries to keep players engaged.
    • World-Building: Use the quest to showcase the game’s lore, history, and unique locations.

    The quest “Romeo & Juliet” beautifully uses character development (Romeo and Juliet), conflict (their families’ feud), and the game’s setting (Varrock) to create a compelling story. The quest’s success is directly linked to the emotional investment of the player in these elements.

    Dialogue and Narrative Delivery

    How the story is told is as important as the story itself. The dialogue should be well-written, with each line serving a purpose. Dialogue should reveal character, advance the plot, and provide clues to the player. Keep the dialogue concise, avoiding unnecessary fluff. Use descriptive language to set the scene and evoke emotions. The dialogue should feel natural and fit the tone of the game. A great dialogue enhances the overall narrative.

    • Concise and Purposeful: Avoid long, rambling speeches. Every line should move the plot forward.
    • Character Voices: Give each character a unique way of speaking.
    • Visual Presentation: Use text boxes, cutscenes, and environmental details to enhance the storytelling.

    The quest “Monkey Madness” excels in this area. Dialogue is used to portray the personalities of the characters, the story is moved forward through clever exchanges, and hints are provided for the player to proceed. The way the information is revealed contributes to the player’s immersion.

    Balancing Challenges and Rewards When Crafting Quests OSRS

    A good quest is a balance of challenge and reward. The tasks should be difficult enough to provide a sense of accomplishment, but not so hard that they become frustrating. Rewards should be meaningful, offering incentives for completing the quest. This balance creates a satisfying experience. It motivates players to keep playing. Finding the right balance will make your quest memorable.

    Designing Appropriate Challenges

    The challenges should match the difficulty of the quest. This includes combat encounters, puzzles, and resource gathering. A beginner’s quest should have easy challenges. More advanced quests can use complex strategies. Provide clues to help players overcome the challenges, but don’t make it too easy. The challenges should test skills and knowledge, keeping players interested. The player should experience a sense of achievement.

    • Combat Challenges: Use enemies that are appropriate for the player’s level, or have unique mechanics.
    • Puzzle Design: Create engaging puzzles that test the player’s problem-solving skills.
    • Resource Gathering: Ensure the resources are accessible and not overly time-consuming to obtain.

    The quest “Death Plateau” introduces a combat challenge that requires using the environment to your advantage. It requires the player to engage with a new concept while testing their existing combat skills. This element adds depth to the experience.

    Rewarding Quest Completion

    Rewards should motivate the player. The rewards can be experience points, items, or access to new areas. The rewards should be appropriate for the difficulty of the quest. Consider the needs and desires of the player. A good reward gives the player a feeling of progression. The reward also encourages players to tackle more quests. It creates a satisfying ending. It is a reward the player will appreciate.

    • Experience Points: A direct reward that helps the player level up.
    • Items and Equipment: Valuable items that can be used for combat, skilling, or other tasks.
    • Access to New Content: Unlock new areas, quests, or activities for the player to explore.

    The quest “Waterfall Quest” rewards players with a significant amount of experience in Attack and Strength, making it a popular choice for new players. The value of this reward in terms of the game’s progression is apparent to the player.

    Incorporating Unique Mechanics and Puzzles

    To make a memorable quest, think outside the box. Adding unique mechanics or puzzles creates a fresh and engaging experience. These elements can set your quest apart from others. The unique mechanics provide a sense of novelty. These can create moments the player will remember. They add flavor and excitement to the quest.

    Designing Engaging Puzzles

    Puzzles should test the player’s problem-solving skills, and they can range from simple riddles to complex logic problems. Make sure the puzzles are intuitive, with enough clues to guide the player without giving everything away. Consider using different types of puzzles. Varying puzzle types keeps the experience fresh. Avoid puzzles that are overly repetitive or frustrating. Puzzles should add to the narrative of the quest. They should be integrated with the story.

    • Riddles: Test the player’s knowledge of the game’s lore or the specific context of the quest.
    • Logic Puzzles: Challenge the player to solve a problem using logical reasoning.
    • Environmental Puzzles: Involve the environment, such as manipulating objects or finding hidden clues.

    The quest “Desert Treasure” includes a series of complex puzzles that require players to think outside the box. The puzzles challenge the players’ skill and create a feeling of achievement upon completion.

    Introducing New Mechanics

    If you wish to create a quest that stands out, then introducing a new mechanic is an effective tool. Introducing new mechanics can change the player’s approach to the game. These can add depth and excitement to the quest. However, balance is key: Don’t overwhelm the player. Mechanics should enhance the experience and fit within the game’s setting. New mechanics can be exciting.

    • Unique Combat Styles: Introduce fights that involve dodging, special attacks, or environmental interactions.
    • Skill-Based Challenges: Incorporate elements that require specific skills like Runecrafting, Thieving, or Agility.
    • Environmental Interactions: Design quests that allow players to interact with the environment in creative ways.

    The quest “Recipe for Disaster” involves a complex cooking minigame, which requires the player to combine different ingredients to create the perfect meal. The minigame breaks up the standard quest format and adds a layer of depth.

    Quest Creation Tools and Resources

    Several tools and resources are available. These tools make the process of crafting quests easier. Familiarize yourself with these tools. The information is helpful for any aspiring quest creator. This is a path to a more efficient and effective workflow.

    Game Resources and Editors

    These are the tools for creating and testing quests. You should explore the possibilities they offer. You can start by reviewing the official OSRS resources for game development. Then explore the possibilities that editors offer. Learning how these work is essential for anyone interested in crafting quests OSRS. You will be able to visualize the results as you create. The editors help with organization. They offer a simple environment.

    • Official RuneScape Wiki: Provides detailed information about quests, items, and game mechanics.
    • Quest Editors: Tools to create and edit quest scripts and dialogue.
    • Testing Environments: Game clients that allow you to test your quest before it’s released.

    The RuneScape Wiki is invaluable for learning about existing quests. The wiki offers a comprehensive look at the structure and components used in the game’s quest design. It is a key tool for new quest creators.

    Community and Collaboration

    Join the community and find others to collaborate with. Find ways to connect and exchange ideas. The community offers many possibilities. Community engagement can inspire ideas. Other players can also offer valuable feedback. Collaborate with other players to improve the end result. Find ways to work together. This will give you insights into the creative process.

    • Online Forums and Communities: Discuss quest design, share ideas, and get feedback from other players.
    • Collaboration Platforms: Work with other players on your quests.
    • Playtesting Groups: Gather feedback from others.

    Sharing your quest ideas with the community through forums can provide valuable feedback on your design. This gives players a voice in the process. It will help make a more balanced and engaging quest. Players will be more likely to want to play it.

    Common Myths Debunked

    Myth 1: Quest Creation Is Only for Developers

    Reality: While developers certainly create quests, the game is also open to community contributions. Player-made quests are a possibility, and the skills needed are accessible. The focus is on creativity and the ability to tell a story through the game. The community can shape the game by designing their own quests.

    Myth 2: Quests Must Be Extremely Long and Complex

    Reality: Quests can range from short, simple tasks to extensive, intricate adventures. A well-designed short quest can be just as enjoyable as a long one. Focus on creating a memorable experience instead of aiming for extreme length. The best quests are not measured by their duration.

    Myth 3: Rewards Are the Most Important Part of Quest Design

    Reality: While rewards are vital, the story, challenges, and overall experience often leave a more lasting impression. An engaging narrative and fun gameplay can make a quest memorable even with modest rewards. A good reward is only part of the equation.

    Myth 4: You Need to Be a Professional Coder to Create Quests

    Reality: Many quest-creation tools simplify the process, often using visual editors or script-based systems that don’t require advanced coding knowledge. The emphasis is more on creativity and narrative design rather than coding skills. Coding is not an essential requirement.

    Myth 5: It’s Impossible to Get Community Feedback on a Quest Idea

    Reality: There are numerous online forums, social media groups, and Discord servers dedicated to RuneScape. These platforms are perfect for sharing quest ideas. You can then get feedback from the community. A large audience can also give advice on quest design.

    Frequently Asked Questions

    Question: What’s the first step in creating a quest?

    Answer: Define the quest’s objective – what the player needs to achieve.

    Question: How important is dialogue in a quest?

    Answer: Dialogue is extremely important. It helps tell the story, develop characters, and provide clues.

    Question: Should I make my quest very long?

    Answer: Length doesn’t determine quality. A well-designed short quest can be just as enjoyable.

    Question: What’s the best way to get feedback on a quest idea?

    Answer: Share it with the community via forums, social media, or dedicated groups.

    Question: Do I need to be a programmer to create a quest?

    Answer: No, many tools simplify the process, and focus is more on storytelling.

    Final Thoughts

    From brainstorming ideas to implementing them, crafting quests OSRS is a rewarding experience. As you delve into quest creation, remember that the core of the process rests on delivering an engaging narrative, balanced challenges, and meaningful rewards. It’s about designing an experience that draws players in and leaves them wanting more. Experiment with different quest types, characters, and puzzles to find your creative voice. Don’t be afraid to seek feedback from others, and always remember to test your quest thoroughly. With a bit of practice and imagination, you’ll be well on your way to designing adventures that players will explore, enjoy, and remember. Embrace the creative process. You can bring your own unique twist to the game’s expansive universe!

  • Crafting Pictures: A Guide to Visual Storytelling and Creation

    Crafting Pictures: A Guide to Visual Storytelling and Creation

    Remember that time you tried to bake a cake, only for it to end up looking. well, less than appetizing? It’s a bit like crafting pictures! You have an idea, you gather your ingredients (in this case, your tools and ideas), and you put it all together. This post aims to help you avoid the burnt cake scenario when you’re crafting pictures. We’ll explore how to transform your visual ideas into something truly captivating. Get ready to learn how to express yourself and captivate your audience through the art of visuals. You’ll gain valuable knowledge that will improve your time on page and reduce your bounce rate by giving the reader exactly what they are looking for.

    Key Takeaways

    • Learn the fundamental elements of effective visual composition.
    • Discover various techniques for creating compelling visual narratives.
    • Explore the best tools and resources available for picture creation.
    • Understand how to use color, light, and perspective to enhance your images.
    • Gain tips for sharing and showcasing your pictures to an audience.
    • Find inspiration and ideas to get started on your creative journey.

    Elements of Visual Composition

    The foundation of any successful picture lies in its composition. Composition refers to how the different elements within your image are arranged. Think of it as the blueprint for your visual story. By understanding the key principles of composition, you can guide the viewer’s eye, create visual interest, and effectively communicate your message. Mastering these elements will help make your pictures stand out.

    The Rule of Thirds

    One of the most essential composition guidelines is the rule of thirds. Imagine dividing your picture into nine equal parts using two horizontal and two vertical lines. The key idea is to place the important elements of your picture along these lines or at the points where they intersect. This technique creates a sense of balance and directs the viewer’s attention to the most important parts. It avoids a static, centered composition, making it more dynamic and pleasing to view. Applying this simple rule can dramatically improve the visual impact of your images. It’s a foundational skill for crafting pictures.

    • Placement: Position the main subject off-center, along the lines or at the intersection points. This naturally draws the eye.
    • Horizon Line: When photographing landscapes, place the horizon line along either the top or bottom third of the frame.
    • Dynamic Composition: Avoid centering subjects. The rule of thirds makes the picture feel less static.
    • Engagement: Effective use of the rule keeps the viewer involved.

    For example, in a portrait, placing the subject’s eyes at an intersection of the lines creates a more compelling image than centering the face.

    Leading Lines

    Leading lines are lines within your picture that guide the viewer’s eye towards the focal point or another important area. These lines can be roads, paths, fences, or any other linear element in the scene. By carefully using leading lines, you can control the flow of the viewer’s gaze and emphasize specific elements. Effective use of leading lines adds depth and visual interest to your images, drawing the viewer deeper into the picture’s story. These lines also contribute to the overall balance and harmony of the composition.

    • Direction: Use lines that lead the eye towards the subject.
    • Examples: Roads, rivers, or architectural lines are good examples.
    • Depth: Leading lines create the illusion of depth.
    • Control: Guides the viewer’s focus.

    Imagine a winding road disappearing into the distance, leading the viewer’s eye to a distant mountain. Or think of the architecture of a building using the lines to draw the eyes up to the apex.

    Symmetry and Patterns

    Symmetry and patterns can create visually appealing and engaging images. Symmetry involves creating mirror images across a central axis, resulting in a sense of balance and harmony. Patterns, on the other hand, use repetition of elements to create visual rhythm and interest. Both symmetry and patterns can make a picture more visually pleasing and communicate a specific aesthetic or message. These elements can be found in a variety of places, from natural settings to modern architecture, offering ample opportunities for creative expression when crafting pictures.

    • Balance: Symmetry creates a feeling of balance.
    • Repetition: Patterns use repeated elements.
    • Impact: Both increase visual impact.
    • Examples: Reflecting images, repeating shapes.

    Photographing a perfectly symmetrical building or capturing a pattern of falling leaves can create stunning and memorable images.

    Visual Storytelling Techniques

    Beyond the basic elements of composition, storytelling is an important part of crafting pictures. Visual storytelling is about using images to communicate a narrative, convey emotions, and engage the viewer on a deeper level. This involves not only the visual arrangement of elements but also the selection of the right subject matter, and the way the picture is presented. Mastering these techniques transforms pictures into powerful communication tools.

    Using Color

    Color plays a vital role in visual storytelling. Different colors evoke different emotions and associations, and the way colors are used can greatly impact the overall message of your picture. Understanding color theory, including the use of complementary, analogous, and monochromatic color schemes, can help you create pictures that are emotionally resonant and visually appealing. Using color strategically can set the mood, highlight important elements, and even guide the viewer’s eye through the picture.

    • Emotion: Colors evoke feelings.
    • Theory: Apply color theory effectively.
    • Examples: Red for passion, blue for calmness.
    • Impact: Shapes how the audience perceives the image.

    For example, using warm colors like red and orange can create a sense of energy and excitement, while cool colors like blue and green can evoke feelings of peace and serenity.

    Lighting Techniques

    Lighting is another important element in the art of crafting pictures, directly affecting the mood and feel of your images. The quality, direction, and intensity of light can drastically change the appearance of a subject and the overall aesthetic. Experimenting with different lighting techniques, such as natural light, artificial light, and various light modifiers, can help you create pictures that are more dramatic, engaging, and evocative. The right lighting can add depth, dimension, and emotion to your pictures.

    • Quality: Soft light vs. hard light.
    • Direction: Front, side, back lighting.
    • Impact: Changes mood and look.
    • Techniques: Practice using shadows.

    Golden hour, the time shortly after sunrise or before sunset, provides soft, warm light that can create beautiful, flattering portraits and landscapes.

    Perspective and Angles

    Perspective and angles greatly influence how a viewer perceives your pictures. The angle from which you take a picture can transform its overall impact. Shooting from a low angle can make a subject appear powerful, while a high angle can make it seem vulnerable. Using different perspectives can add depth, interest, and originality to your work. By varying your camera angle, you can tell a story from a unique viewpoint and capture the viewer’s attention. Changing your perspective is another technique when crafting pictures.

    • Low Angle: Creates power.
    • High Angle: Shows vulnerability.
    • Impact: Adds interest and uniqueness.
    • Creativity: Experiment to find the best angle.

    Try shooting a picture of a building from ground level to make it seem taller and more impressive, or from a bird’s-eye view to show the entire scene and make it look smaller.

    Tools and Resources for Picture Creation

    To begin crafting pictures, you’ll need the right tools and resources. From simple smartphone cameras to advanced digital cameras and editing software, the options can be many. Having the appropriate equipment and resources enables you to capture your creative vision and bring your ideas to life. In this section, we will cover some of the most useful tools for taking, editing and sharing pictures.

    Camera Equipment

    The choice of camera equipment depends on your goals and budget. A smartphone can be an excellent starting point, offering convenience and ease of use. If you want more control over your images and better image quality, a digital single-lens reflex (DSLR) or mirrorless camera is a solid option. These cameras allow you to change lenses and adjust settings. Remember to consider what fits your style and budget.

    • Smartphones: Great for quick snaps.
    • DSLRs/Mirrorless: Better control and quality.
    • Accessories: Tripods, extra lenses, and lighting.
    • Research: Research which camera works for your needs.

    The best camera is the one you have with you, so start with what you have. Over time, you can upgrade your equipment as your skills and needs evolve. Additional lenses can significantly enhance your creative possibilities.

    Editing Software

    Post-processing your pictures can bring a final layer of polish to your work. Editing software lets you adjust exposure, color, and composition. Popular options include Adobe Photoshop, Lightroom, and free alternatives like GIMP and Darktable. These programs provide tools for correcting issues, enhancing the details, and creatively transforming your pictures. Good editing skills can dramatically improve the final product of crafting pictures.

    • Adobe Products: Industry-standard, professional results.
    • Free Alternatives: GIMP, Darktable offer budget-friendly options.
    • Basics: Learn about exposure and color adjustment.
    • Impact: Enhances the quality and appearance of your pictures.

    Learning the fundamentals of image editing can significantly improve your pictures. Using editing software also provides a final opportunity to refine your vision.

    Online Resources and Communities

    A huge variety of online resources is available to support your visual journey. Websites like YouTube and Skillshare provide tutorials on all aspects of picture creation, from composition and lighting to post-processing techniques. Online communities like Flickr, Instagram, and specialized forums offer places to share your work, get feedback, and connect with other creators. Engaging with these resources can help you gain knowledge, stay inspired, and build a network of support.

    • Tutorials: YouTube, Skillshare for learning.
    • Communities: Flickr, Instagram for sharing.
    • Inspiration: Seek out inspiration in others’ images.
    • Feedback: Seek constructive input from other creators.

    Following photographers whose work you admire and studying their techniques can accelerate your learning process. Participate in online discussions to share your experiences and ask questions.

    Enhancing Your Pictures

    The difference between a snapshot and a captivating picture often lies in the details. Enhancing your images involves using different techniques, such as the use of light and color, and how you choose to approach your project. Mastering these techniques can elevate your pictures from ordinary to amazing, making them stand out and engage viewers. Adding these enhancements increases the quality of the project when crafting pictures.

    Using Light and Shadow

    Light and shadow create depth, dimension, and emotion in pictures. Understanding how light interacts with your subject is essential. Soft light, like that found on overcast days, produces even illumination, while harsh light, such as that from direct sunlight, creates strong shadows. Experimenting with different light sources and directions can dramatically change the mood and impact of your pictures. You can use light to highlight key elements, create contrast, and add visual interest.

    • Types: Soft vs. hard light.
    • Direction: Front, back, side lighting effects.
    • Impact: Shapes mood and feel.
    • Examples: Backlighting for silhouettes.

    Using shadows and highlights can create texture and depth, making your pictures more dynamic. Pay attention to how light falls on your subject.

    Working with Color and Tone

    Adjusting color and tone is an important part of enhancing your images. Correcting the white balance can ensure your colors are accurate, while adjusting the overall tone (brightness and contrast) can affect the mood. Experiment with different color palettes and adjust the color intensity to create a specific aesthetic. Color grading, the process of adjusting the colors and tones of an image, can be used to set a mood or create a consistent visual style across multiple pictures. The effective use of color and tone adds visual interest and cohesion when crafting pictures.

    • White Balance: Correct colors.
    • Tone: Brightness and contrast settings.
    • Color Grading: Create consistent styles.
    • Impact: Improves visual appeal.

    When editing, use color grading to create an overall aesthetic or style to your images. Adjusting the white balance helps produce more accurate and natural-looking colors.

    Adding Texture and Details

    Adding texture and details can make your pictures more engaging and immersive. Texture refers to the surface quality of an object. To make the most of texture, pay attention to the lighting and angles to bring out the details. To add details, focus on sharpness and clarity. This can be improved during the shooting and editing processes. Capturing fine details can create a sense of realism and draw the viewer closer. By focusing on the texture and detail in your pictures, you create images that feel tactile and engaging.

    • Texture: Focus on surface qualities.
    • Details: Focus on sharpness and clarity.
    • Impact: Creates a realistic appeal.
    • Techniques: Sharpening tools and filters.

    Using sharpening tools during post-processing can enhance the sharpness and clarity. Capturing the texture of rough surfaces or the fine details of a flower can make your pictures more visually interesting.

    Sharing and Showcasing Your Pictures

    Once you have created your pictures, you will want to share them with the world. Sharing your work and showcasing your pictures allows you to connect with an audience, receive feedback, and potentially gain recognition. There are several different platforms and methods for displaying your pictures. Here are some of the ways that you can share your work after crafting pictures.

    Online Platforms

    Online platforms offer excellent opportunities for sharing your pictures. Social media platforms like Instagram and Facebook provide an easy way to reach a wide audience. Photo-sharing sites like Flickr and 500px cater to photographers and offer tools for sharing, organizing, and getting feedback on your work. Consider how the different platforms fit your style, so you can best display your work.

    • Social Media: Instagram, Facebook for broad reach.
    • Photo Sites: Flickr, 500px for photographers.
    • Engagement: Connect with other artists.
    • Goals: Consider your target audience.

    When sharing, use relevant hashtags to increase visibility and engage with other photographers and viewers. Use your platforms effectively to gain a following.

    Print and Physical Displays

    Transforming your digital images into physical prints can make your pictures all the more meaningful. Printing your pictures allows you to experience them in a tangible format and share them with friends, family, and potential customers. Consider displaying your prints in your home, at local art fairs, or online. Properly printed images can create an aesthetic experience beyond the digital realm. Printing your pictures in high quality and using frames can elevate your display.

    • Print Quality: Quality matters.
    • Display Options: Homes, galleries, art fairs.
    • Tangible Format: Adds a personal touch.
    • Consider: Framing, print sizes, paper types.

    Selling your pictures as prints or displaying them in a gallery can be an excellent way to monetize your work and reach a broader audience.

    Building a Portfolio

    Creating a portfolio is important for showcasing your best work. A portfolio is a curated collection of your best pictures. This collection lets you present your style, skills, and areas of focus in a professional manner. Your portfolio can be used to showcase your work to potential clients, employers, and collaborators, and it is a key element of the process when crafting pictures.

    • Selection: Choose your best pieces.
    • Online: Create a website or use a platform.
    • Professional: Used to get work opportunities.
    • Update: Regularly update your portfolio.

    An online portfolio can include a website. Your portfolio should clearly demonstrate your unique style. Review your portfolio frequently to make sure it includes your best work.

    Common Myths Debunked

    Myth 1: You Need Expensive Equipment

    Many believe that expensive cameras are required to create great pictures. However, the most important thing is your creativity, skill, and how you use the available tools. While professional equipment can offer certain advantages, you can still produce amazing images with a smartphone or entry-level camera. Focus on learning the fundamentals of composition, lighting, and editing.

    Myth 2: Photography Is All About Technical Skills

    Many people believe that pictures rely solely on technical skills, such as knowing aperture, shutter speed, and ISO. While technical knowledge is valuable, the most important element is your artistic vision and ability to express yourself. Technical skills can enhance your vision, but artistic ability is what truly sets your pictures apart.

    Myth 3: Editing Ruins the Authenticity

    There’s a belief that editing makes your images inauthentic. Editing should be seen as another tool in the creative process, just like how a painter uses brushes. Editing enhances images by adjusting exposure, color, and more.

    Myth 4: Perfect Photos Require Perfect Conditions

    Many think that great photos need perfect weather or ideal lighting. While these conditions can certainly make the process easier, it’s possible to create compelling pictures in any situation. Understanding how to work with difficult lighting, and finding unique angles and compositions can lead to great results.

    Myth 5: You Must Have Formal Training to Succeed

    A common belief is that you must have formal training or a degree to be successful in photography. The truth is you don’t need formal training. Many talented photographers are self-taught. Practice, experience, and the drive to learn are more important than formal education.

    Frequently Asked Questions

    Question: What is the best camera for beginners?

    Answer: A smartphone or a beginner-friendly mirrorless camera is a great starting point for those new to photography.

    Question: How can I improve my pictures?

    Answer: Focus on composition, lighting, and practice regularly. Don’t be afraid to experiment.

    Question: How important is photo editing?

    Answer: Photo editing is important. It enhances your work and allows you to refine your vision.

    Question: How do I find inspiration for my pictures?

    Answer: Look at other photographers, explore different locations, and experiment with various techniques.

    Question: How can I showcase my pictures?

    Answer: Use online platforms like Instagram, create a portfolio website, and print your best work.

    Final Thoughts

    From the initial concept to the finished product, crafting pictures is a skill that develops over time with practice and patience. Composition rules, lighting strategies, and post-processing techniques provide the tools to translate your ideas into stunning images. As you learn these methods, the process will evolve. Whether you’re capturing landscapes, portraits, or everyday moments, a deep understanding of these elements will help you produce pictures that tell stories and engage viewers. Embrace the opportunity to refine your skills, experiment with different techniques, and find your unique style. There’s so much potential for artistic expression. So, grab your camera, experiment, and start sharing your unique perspective. Happy creating!