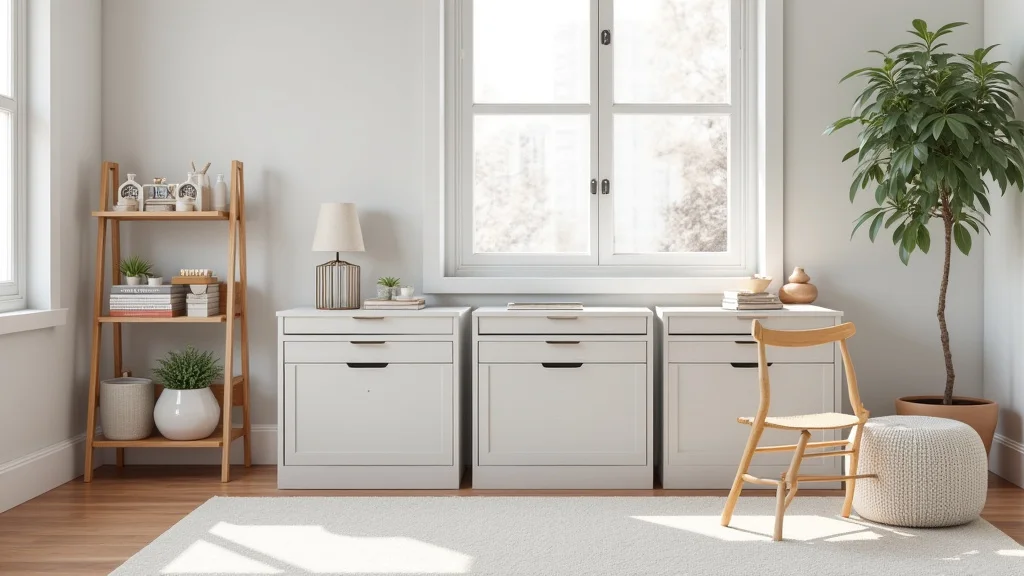
Picture this: You’re ready to start a new project, brimming with inspiration, but your supplies are scattered everywhere. Finding that specific shade of paint, that perfectly sized brush, or the right type of fabric feels like an endless treasure hunt. Sound familiar? We’ve all been there! The solution isn’t just about owning a lot of materials; it’s about having efficient crafting storage that keeps everything organized and accessible. This post will help you transform your creative space, making it a joy to work in. You’ll gain practical tips and ideas for designing the perfect crafting storage, improving your productivity and your love for your hobby.
Key Takeaways
- Discover various crafting storage solutions for different needs and space constraints.
- Learn how to optimize your space to maximize accessibility and efficiency.
- Explore creative storage ideas that blend functionality with aesthetics.
- Understand the importance of organization in enhancing your crafting experience.
- Find strategies for minimizing clutter and streamlining your workflow.
- Gain insight into selecting the right storage for your specific crafting projects.
Planning Your Crafting Storage Space
Before diving into specific storage solutions, it’s crucial to evaluate your needs. What types of crafts do you enjoy? What supplies do you use most frequently? Take inventory of your current materials, categorizing them by type, size, and frequency of use. This assessment will form the foundation of your plan. Consider the amount of space you have available – a dedicated room, a corner of a room, or even a closet – and how you intend to use it. Think about the flow of your crafting process. Do you prefer to work standing up or sitting down? Do you need a large work surface, or is a smaller area sufficient? All these decisions are crucial when designing your space.
Assessing Your Crafting Needs
The first step in planning your crafting storage is a thorough evaluation of your crafting habits and requirements. What do you enjoy creating? Are you into scrapbooking, painting, sewing, jewelry making, or a combination of different crafts? The types of crafts you pursue will determine the kinds of supplies you need and, therefore, the kind of storage you’ll require. Scrapbookers, for instance, often need ample storage for paper, embellishments, and tools. Painters need space for paints, brushes, canvases, and easels. Jewelry makers require storage for beads, wires, and small tools. Take a moment to list all the projects you’re actively working on and those you plan to start soon. This will give you a clear picture of the materials you need to store. Next, make an inventory of your current supplies. Sort them by category – paints, fabrics, tools, embellishments, etc. – and by size and frequency of use. Identify items you use every day, those you use occasionally, and those you seldom use. This will help you prioritize your storage needs, placing frequently used items within easy reach and less frequently used items in less accessible locations. Finally, consider your workspace. Do you have a dedicated room, a corner, or just a small area? Measure your space and think about the natural light, ventilation, and access to electrical outlets. Thinking about these details will ensure your space works effectively for you.
- Identify Craft Types: Determine the types of crafts you enjoy and list the supplies for each one.
- Inventory Supplies: Sort your current supplies by category, size, and frequency of use.
- Assess Workspace: Measure your space and consider factors such as lighting and access to outlets.
Space Optimization and Layout
Once you understand your crafting needs, it’s time to consider space optimization and the layout of your crafting area. Regardless of the size of your space, there are ways to make the most of every inch. The layout should support your work process, ensuring everything is within easy reach. The optimal layout should consider the flow of your crafting projects. Do you typically work on one project at a time or several simultaneously? Place your most frequently used supplies and tools near your primary workspace, making it easier to grab what you need. Consider the height of your work surfaces. You might want to have a standing desk for some projects and a seated workspace for others. Utilize vertical space by installing shelves, pegboards, and wall-mounted organizers. Vertical storage maximizes the available space and keeps items off the floor. Consider modular storage solutions that can be rearranged as your needs change. Think about investing in rolling carts, which are easy to move and provide extra storage and workspace. Create zones for different activities: a cutting station, a painting area, a sewing corner, etc. If possible, keep your supplies close to the tools you need for each craft. Effective space optimization makes crafting more enjoyable and efficient.
- Utilize Vertical Space: Install shelves, pegboards, and wall-mounted organizers to maximize space.
- Create Zones: Designate areas for different crafts, such as painting, sewing, or scrapbooking.
- Choose Modular Solutions: Use storage units and rolling carts that can be rearranged.
Budgeting and Planning
Effective crafting storage doesn’t always require a huge budget. Start by setting a realistic budget based on your financial situation. Research storage options and compare prices before purchasing anything. Consider both new and used furniture. Secondhand stores, online marketplaces, and even garage sales can be treasure troves for affordable storage solutions. You can often find great pieces that just need a little cleaning or a fresh coat of paint. Look for multi-purpose furniture. A desk with drawers can serve as both a work surface and storage space. A storage bench can offer seating and a place to stash supplies. Explore DIY projects. Building your own shelves, organizers, or storage containers can be a cost-effective way to customize your storage. Search online for free plans and tutorials. Look for discounts and sales, especially around major holidays. Create a detailed plan of your space layout and storage needs. Make a list of everything you need, including dimensions and quantities. By planning ahead, you can avoid impulse buys and ensure that your investment aligns with your budget. Remember that it’s okay to start small and gradually add to your storage system as your budget allows. The most important thing is to have a functional and organized space that meets your needs.
- Set a Realistic Budget: Determine how much you are willing to spend.
- Explore Affordable Options: Look into used furniture, multi-purpose items, and DIY projects.
- Plan and Prioritize: Make a detailed plan of your layout and storage needs.
Crafting Storage Solutions
The right storage solutions can significantly boost your creativity. There’s a wide range of options available, from basic shelves and drawers to specialized organizers designed for specific crafts. Choose solutions that match your style, space, and the types of projects you love. Consider the pros and cons of each solution to determine what works best for your needs. The goal is to create a space that’s not only organized but also inspiring and enjoyable to spend time in.
Shelving and Drawers
Shelving and drawers are the cornerstones of any efficient crafting storage system. Shelves offer versatile storage options for various items, from fabric bolts to paint jars and boxes. Consider adjustable shelves to accommodate items of different sizes. Open shelving makes it easy to see your supplies at a glance. You can customize them by adding baskets, bins, or fabric-covered boxes to hold smaller items and create a cohesive look. Drawers are essential for storing smaller items, such as tools, embellishments, and notions. Look for drawers with dividers or adjustable compartments to keep things organized. Consider using clear drawers so you can see the contents without opening them. A good combination of shelves and drawers creates a versatile storage system that meets most crafting needs. Shelves are great for items you use frequently, while drawers are best for smaller items that need to be kept separate. Make sure the shelving is sturdy enough to hold the weight of your supplies, and that drawers slide open smoothly. With a carefully planned combination of shelving and drawers, you can organize a very efficient and beautiful crafting space.
- Choose Adjustable Shelves: Customize the shelf height to fit various items.
- Use Open Shelving: Make supplies easily visible and accessible.
- Incorporate Drawers: Store smaller tools and embellishments.
Specialized Crafting Organizers
Specialized crafting organizers can provide dedicated storage for specific supplies and tools. Pegboards are fantastic for hanging tools, scissors, and other frequently used items within easy reach. They allow you to customize your layout and create a visually appealing display. Consider a rolling cart with drawers and shelves for a mobile storage solution. This is great if you craft in multiple locations or need to move your supplies. Fabric storage boxes or containers protect fabric from dust and keep them neatly folded. They can be stacked or placed on shelves. Sewing enthusiasts can use thread storage boxes that keep threads organized by color or type. Paper storage racks or drawers are perfect for storing paper, cardstock, and other paper-related supplies, keeping them flat and protected. For jewelry makers, consider bead storage organizers with small compartments. These help keep beads sorted by color, size, and type. For painting supplies, consider paint storage racks designed to hold paint bottles upright, preventing spills and making it easy to see your color selection. These organizers can transform a chaotic collection into a well-organized and inspiring crafting space.
- Use Pegboards: Hang tools and frequently used items.
- Employ Rolling Carts: Provide mobile storage for projects.
- Utilize Specialized Boxes: Store fabric, thread, and beads safely.
Innovative Storage Ideas
Sometimes, the most creative storage solutions involve thinking outside the box. Repurpose common household items to create unique storage. An old ladder can become a shelving unit for displaying fabric bolts or tools. Mason jars can be used to store beads, buttons, or pens. Shoe organizers can hold paint bottles, markers, or small craft supplies. Consider the use of wall-mounted storage to maximize vertical space. This might include shelves, pegboards, or magnetic strips for holding scissors and other metal tools. Use clear containers for easy visibility of the contents. Labeling is essential for easy access to your items. Label boxes, drawers, and containers to quickly find what you need. Use color-coded storage to categorize supplies. For example, use blue containers for sewing supplies, green for paper crafting, and red for painting supplies. This not only keeps your space organized but also adds visual interest and inspiration. Don’t be afraid to experiment with these ideas and adjust them to fit your specific needs and style. The goal is to create a functional and visually appealing space that sparks your creativity.
- Repurpose Household Items: Use old ladders, jars, and organizers.
- Maximize Vertical Space: Install wall-mounted shelves, pegboards, and strips.
- Employ Clear Containers: Make it easy to see the contents.
Organizing and Maintaining Your Crafting Space
Once you’ve set up your storage, the next step is organizing your supplies in a way that makes sense for you. Keep frequently used items within easy reach. Create zones for different activities, such as painting, sewing, and scrapbooking. Regular maintenance is vital to avoid clutter and keep your space functional and enjoyable. Schedule regular decluttering sessions to get rid of supplies you no longer use. Establish systems for returning items to their designated locations after each use. A little discipline each day will help maintain the organization. Regularly assess your storage system. As your crafting habits and supplies change, you may need to adjust your storage solutions. This will keep your space working effectively for you and help you get the most out of your crafting experience.
Categorization and Labeling
Effective categorization and labeling are essential for maintaining an organized crafting space. Start by categorizing your supplies by type, such as paint, fabric, paper, or tools. Within each category, you can further subcategorize items by color, size, or purpose. For example, within the fabric category, you could sort by type (cotton, silk, linen), pattern, or color. Use clear containers or bins to store items within each category. Label everything clearly. Use labels with both the category and the subcategories. Clear labeling makes it easy to find what you need and return items to their proper places. Consider color-coding your labels for extra organization. For example, use blue labels for sewing supplies, green for paper crafting, and red for painting supplies. When sorting and storing your supplies, follow a consistent system. This will make it easier to maintain your organization over time. The result is a space that’s not only organized but also easy to navigate.
- Categorize Supplies: Organize by type, color, size, or purpose.
- Utilize Clear Containers: Use bins, boxes, and containers.
- Implement Clear Labeling: Label containers and shelves.
Decluttering and Cleaning Routine
Regular decluttering and cleaning are key to keeping your crafting space organized. Schedule a decluttering session every month or two to get rid of supplies you no longer use or need. Go through your supplies and discard anything damaged, dried out, or that you no longer enjoy. Donate or give away unwanted items to free up space. Establish a habit of returning items to their designated locations after each use. This small step helps prevent clutter from accumulating. Wipe down work surfaces, shelves, and storage containers regularly to remove dust and debris. Sweep or vacuum the floor to keep the space clean and free of loose materials. Consider using a small, portable vacuum cleaner specifically for your crafting space. The best time to clean is right after you finish a project. Create a cleaning schedule, just like you would for any other area of your home. A little maintenance each day helps you keep your space clean and organized. Remember that the goal is to create a space that inspires creativity, and a clean space is much more inspiring than a cluttered one.
- Schedule Regular Decluttering: Eliminate unwanted supplies.
- Establish a Return System: Put items back in their places after use.
- Create a Cleaning Schedule: Regularly clean work surfaces and the floor.
Workflow and Accessibility
Optimizing your workflow and ensuring easy accessibility to your supplies are vital for an enjoyable crafting experience. Arrange your supplies and tools based on the flow of your projects. Place frequently used items within easy reach of your primary workspace. Keep tools for specific projects together in a kit or container. This will save you time and make the crafting process more efficient. Ensure that your work surface is the right height for your projects. Standing desks or adjustable height tables can prevent back pain. Make sure the lighting is sufficient for your crafting tasks. Consider the use of task lighting, such as a desk lamp or a clip-on light, to illuminate your workspace. Think about your seating. Choose a comfortable chair that supports your back and allows you to craft for long periods. Implement a system for managing your projects. Keep track of your progress and the supplies you need. This could involve using project notebooks, spreadsheets, or online tools. By improving your workflow and accessibility, you can make crafting more enjoyable, efficient, and inspiring.
- Arrange Supplies Strategically: Keep frequently used items within easy reach.
- Ensure Proper Lighting: Use task lighting to illuminate your workspace.
- Optimize Seating: Choose a comfortable chair that supports your posture.
Common Myths Debunked
Myth 1: Crafting Storage Needs to Be Expensive
Many people believe that crafting storage requires a large financial investment, but this is far from true. There are countless affordable and even free solutions available. This misconception often stems from seeing beautifully designed crafting spaces in magazines or online, filled with expensive furniture and organizers. The reality is that creative crafting storage can be achieved without breaking the bank. Repurposing old furniture, using inexpensive storage containers from discount stores, and building your own storage solutions are all cost-effective alternatives. With some creativity and planning, you can create a functional and organized crafting space without spending a fortune. The focus should be on functionality and organization rather than expensive aesthetics.
Myth 2: You Need a Dedicated Crafting Room to Stay Organized
A dedicated crafting room is a luxury, but not a necessity. While having an entire room dedicated to crafting is a dream for many, it is not essential for staying organized. Many people craft successfully in a corner of a room, a closet, or even at a dining room table. The key is to optimize the space you have. This may involve using vertical storage to maximize space, implementing modular storage solutions, and establishing a system for storing and accessing your supplies. You can transform even the smallest of spaces into an organized and functional crafting area by utilizing smart storage solutions, maintaining a regular cleaning routine, and adapting to your available area. The goal is to make the most of what you have, and creating a dedicated room is not a requirement.
Myth 3: Organization Stifles Creativity
Some people believe that organization stifles creativity, as it might lead to a rigid or restricted workspace. This is often based on the idea that creative inspiration comes from chaos or a free-flowing environment. However, organized crafting storage actually enhances creativity by reducing stress, making it easier to find materials, and providing a clear, uncluttered workspace. When your supplies are neatly organized, you spend less time searching for items and more time on the creative process. A well-organized space gives you a sense of control and clarity, allowing you to focus on your projects with a clear mind. The ability to quickly locate materials, tools, and supplies frees up mental energy, which can be channeled directly into your creative work. In a well-organized space, you are more likely to find inspiration, experiment, and enjoy your craft to its fullest potential.
Myth 4: Crafting Storage is Only for “Serious” Crafters
There’s a misconception that crafting storage is only for those who dedicate a significant amount of time and effort to their crafts, or consider crafting a business. However, everyone who enjoys crafting, regardless of their skill level or the frequency with which they engage in crafting activities, benefits from an organized workspace. Proper storage makes crafting more accessible and enjoyable for everyone, whether you’re a seasoned professional or a casual hobbyist. Even occasional crafters will find that organizing their supplies eliminates the frustration of searching for materials and enables them to engage in their projects more easily. The benefits of an organized space extend to all, enhancing the overall crafting experience. Whether you create once a week or every day, organization enhances your enjoyment of the creative process.
Myth 5: All Crafting Storage Solutions Need to Look The Same
Many people think that effective crafting storage must conform to a specific aesthetic or a particular brand of storage systems. But there is no one-size-fits-all solution for crafting storage, as it must match your unique style and needs. While it can be tempting to mimic the organizational systems seen in magazines or online, that approach might not necessarily suit your crafting habits or personal preferences. In reality, the best storage solutions are those that are customized to fit your specific needs and tastes. It can include repurposing old furniture, building your own shelves, using unique containers, or incorporating colorful accents that reflect your creativity. The best crafting space is one that is both functional and reflects your personal style. Feel free to mix and match different elements, experiment with various storage options, and personalize your space to make it feel like your own creative haven.
Frequently Asked Questions
Question: How do I start decluttering my crafting space?
Answer: Begin by gathering all your crafting supplies and categorizing them. Discard any items that are damaged, unused, or no longer suit your current crafting interests. Consider donating or selling what you do not use.
Question: What are some space-saving storage options?
Answer: Utilize vertical storage such as shelves, pegboards, and wall-mounted organizers. Employ clear containers to make it easier to see contents, and take advantage of every inch of available space by using multi-purpose furniture.
Question: How can I keep my supplies organized?
Answer: Categorize and label your supplies. Use clear containers, and maintain a system for returning items to their designated locations after each use. A regular cleaning schedule is also essential.
Question: How do I choose the best storage solutions for my needs?
Answer: Assess your crafting habits, and consider the types of crafts you enjoy, your workspace size, and your budget. Evaluate various storage options to find solutions that align with your requirements.
Question: Is it necessary to have a dedicated crafting room?
Answer: It is not necessary. You can craft in a corner of a room, a closet, or at a dining room table. Optimizing the space you have is more crucial than a dedicated room.
Final Thoughts
Crafting storage isn’t just about owning containers or shelves; it’s about building a space that nurtures your creativity. By carefully planning your storage solutions, organizing your supplies, and establishing a regular maintenance routine, you can create a crafting area that is both efficient and inspiring. Remember to tailor your solutions to your specific needs and the space you have available. The right crafting storage makes crafting more accessible, enjoyable, and less stressful. Don’t be afraid to experiment with different ideas and solutions. Embrace the process of organizing, and you will find that a well-organized workspace greatly enhances your enjoyment of your favorite hobbies. Transform your workspace into a place where creativity thrives by following the tips outlined in this guide. Enjoy the journey of transforming your crafting space, and enjoy crafting!
Leave a Reply