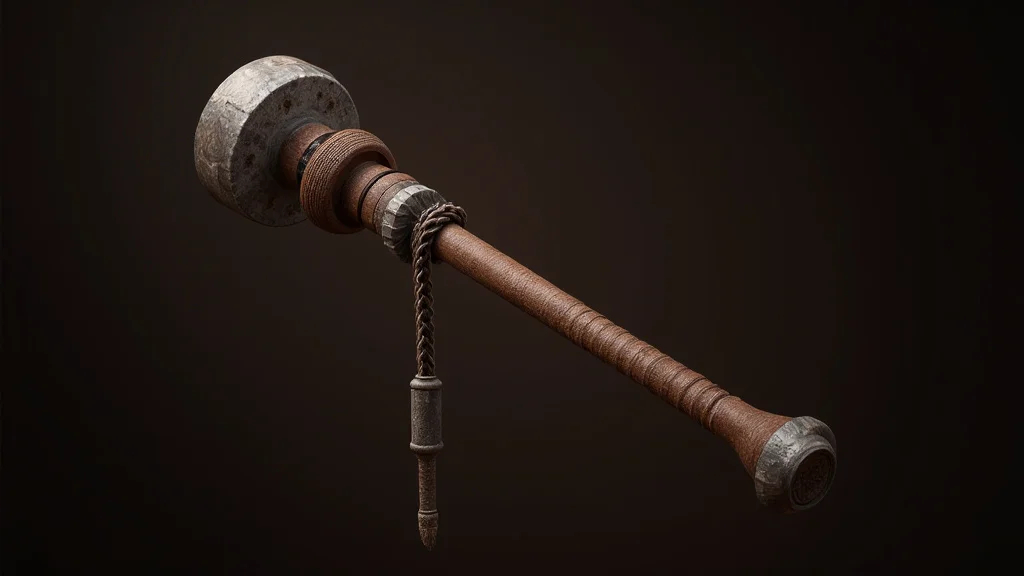
Remember that time you tried to build a fort in the backyard, armed with nothing but sticks and a dream? Well, imagine taking that childhood creativity and applying it to something a little more, shall we say, formidable: a mace! This guide won’t turn you into a medieval knight (unless you really want to!), but it will provide you with the knowledge needed for crafting mace projects, whether for cosplay, historical recreation, or simply a fun hobby. Prepare to explore the different materials, design elements, and techniques involved, gaining practical insights to make your own unique creation. By the end, you’ll be able to create fantastic projects and gain a new skill!
Key Takeaways
- Learn about the fundamental aspects of crafting mace, exploring material choices and design considerations.
- Discover a variety of techniques for assembling and finishing your mace project.
- Explore the different types of maces to inspire your creation.
- Understand the importance of safety when working with tools and materials.
- Gain knowledge about the historical context and purpose of maces.
- Find useful tips and resources to improve your crafting mace projects.
The Anatomy of a Mace: Design and Functionality
Before you start building, it’s good to know the different parts of a mace and how they work together. A mace is a bludgeoning weapon, designed to deliver powerful blows. Unlike swords that cut, a mace relies on sheer force to crush or damage its target. The design of a mace can vary wildly, but several components are usually present. It has a head that delivers the impact, a shaft or handle that the wielder grips, and sometimes, a pommel for balance and additional striking capability. The shape, weight, and material of each part affect the weapon’s effectiveness and usability. Many different styles of maces exist, from simple club-like designs to elaborately decorated war hammers.
The Mace Head: Shape and Purpose
The head is the business end of any mace. The shape greatly influences how it hits and what kind of damage it can inflict. Historically, mace heads have taken many forms. Some are simple, spherical shapes. Others have flanges, spikes, or ridges to concentrate force or pierce armor. The weight distribution within the head is also critical. A head that is too heavy might be difficult to swing quickly, while one that is too light might lack impact. Material choice is also key. Steel is a popular option for its strength, durability, and ability to be shaped and tempered. For replica purposes, you can use other materials, but understand they will not perform the same.
- Spherical Heads: Classic and simple, these heads deliver blunt force trauma.
- Flanged Heads: Designed with projecting flanges to concentrate impact and penetrate armor.
- Spiked Heads: Offer piercing capability in addition to blunt force.
- Ridged Heads: Distribute force more effectively and cause greater damage.
Consider the intended function and the materials available when choosing your head design. For cosplay, you can get creative and make a design that looks good. If you’re going for historical accuracy, research different historical types and use reference images. For a safe, functional mace, focus on a head shape that won’t get caught or snagged during use.
The Mace Shaft: Balance and Grip
The shaft, or handle, is where the wielder holds the mace. It must be strong enough to withstand the force of swinging and impact. The length of the shaft affects the weapon’s reach and the amount of leverage available. The grip is equally important. It has to provide a comfortable and secure hold, even during repeated swings or in wet conditions. The materials used, like wood or metal, will affect both its weight and durability. Good balance is critical. If the head is too heavy for the shaft, the mace will be difficult to control. The ideal is to have the balance point close to the head, but far enough down the handle to allow for a comfortable grip.
- Wood Shafts: Offer a traditional look and are relatively easy to work with.
- Metal Shafts: Provide increased strength and durability.
- Shaft Length: Affects reach and leverage; consider your height and arm length.
- Grip Material: Leather, cord, or rubber improves the grip and adds comfort.
Think about what you want to use the mace for, and what materials you want to work with. Remember that a properly balanced mace is safer and more effective. Experiment with different lengths and grip styles. Be sure to test the grip, swinging it to make sure it is comfortable and won’t slip.
The Pommel: Balance and Additional Function
The pommel is the weight at the end of the shaft. It serves several important functions. Primarily, it acts as a counterbalance to the mace head, helping to improve the balance of the weapon and making it easier to swing. It also provides an additional striking surface. In some designs, the pommel is enlarged or shaped to be used for bludgeoning. Some pommels have decorative elements or are designed to make it easier to grip the mace. The weight and shape of the pommel, like the other components, affect the overall feel and functionality of the weapon. This component is crucial for balance.
- Counterbalance: Improves balance and control.
- Striking Surface: Provides an additional area for impact.
- Grip Enhancement: Can be shaped to improve grip.
- Decoration: Adds a distinctive look.
When designing the pommel, consider the overall weight of the mace and how you want to use it. A heavier pommel can increase the weapon’s power, but it also makes it harder to control. When crafting, make sure the pommel is securely attached to the shaft.
Choosing Your Materials: Strength and Durability for Crafting Mace
The materials you pick will heavily impact the final product. Different materials offer different properties. Some are better for display, while others are suited for more intense use. Consider what you want to achieve with your mace and what resources are available to you. For instance, metal maces can be made by forging or using metal tubing. Wooden maces can be carved or turned on a lathe. Other materials like plastics and composites are also possible.
Metals: Steel, Aluminum, and More
Metal maces are strong and often durable, but they also require more specialized tools. Steel is a top choice for its strength and ability to be heat-treated for even greater hardness. Aluminum is lighter, but still sturdy. It is also easier to work with than steel. Other metals, such as brass or bronze, can also be used, often for decorative elements. Working with metals requires caution. Always wear safety glasses and gloves when cutting, grinding, or welding. If you’re not familiar with metalworking, consider taking a class or consulting with someone who is.
- Steel: Strong, durable, and can be heat-treated for increased hardness.
- Aluminum: Lighter than steel, easier to work with, but less strong.
- Brass/Bronze: Can be used for decorative elements.
- Welding: Essential for joining metal components.
- Grinding/Cutting Tools: Used for shaping metal.
Metal maces will last a long time if properly constructed and maintained. Remember that safety is key when working with metals. Research the properties of the material, and choose the right kind for your design.
Wood: Carving, Turning, and Shaping
Wood is a classic material for mace shafts and heads. It’s relatively easy to work with using common hand tools. Hardwoods like oak, maple, and walnut are excellent choices for their strength and durability. Softer woods like pine are easier to carve, but may not withstand heavy use. You can use chisels, saws, and sandpaper to shape the wood. Woodturning on a lathe is a great method for making uniform shafts and heads. To finish the wood, apply a sealant or varnish to protect it from moisture and wear. This material can be very rewarding.
- Hardwoods: Oak, maple, walnut offer strength and durability.
- Softwoods: Pine is easier to carve.
- Carving Tools: Chisels and knives are necessary for shaping the wood.
- Wood Lathe: Provides a way to make symmetrical parts.
- Finish: Sealants and varnish protect the wood.
When selecting your wood, choose pieces free of knots or cracks. Work in a well-ventilated area when sanding or applying finishes. Always use safety glasses and gloves, and remember to follow all safety guidelines for your tools.
Plastics and Composites: Modern Alternatives
Plastics and composites offer a lighter and sometimes more cost-effective alternative to metal or wood. They are useful for making replica maces or for projects where weight is a factor. High-density plastics can be strong and durable, and they can be easily molded into various shapes. Composites, such as carbon fiber or fiberglass, offer superior strength-to-weight ratios. However, these materials can be difficult to work with. You might need specialized tools like a rotary saw or a heat gun to shape or join them. Consider that these materials will not feel or perform the same as a metal or wood.
- High-Density Plastics: Easily molded.
- Composites: Carbon fiber and fiberglass offer strength-to-weight benefits.
- Molding Techniques: Useful for creating complex shapes.
- Cutting Tools: Rotary saws, heat guns are often needed.
- Strength Considerations: Consider how the mace will be used.
When working with plastics or composites, follow the manufacturer’s safety instructions. Ensure you are working in a well-ventilated area. Consider what you are trying to make, and choose the most appropriate material. Plastics and composites are an ideal option when crafting mace projects meant for cosplay or display.
Techniques for Crafting Mace: Assembly and Finishing
Once you’ve decided on the materials and design, it’s time to assemble your mace. The techniques used will depend on the materials you are using. Metal maces may require welding or brazing, while wooden maces can be assembled with glue and screws. Finishing is equally essential. It protects the mace from the elements, enhances its appearance, and prolongs its life. Whether you’re a beginner or an experienced craftsman, there are techniques that you can use to bring your mace creation to life.
Metalworking Techniques: Welding, Brazing, and More
Metalworking for crafting mace involves joining metal components. Welding is a common technique that involves using heat to fuse the metal. Brazing is similar but uses a filler metal with a lower melting point. Grinding removes excess material. These techniques demand safety. Wear appropriate safety equipment. Ensure you have proper ventilation. Learn the techniques before starting your project. Metalworking can be rewarding, allowing you to create durable and visually striking maces.
- Welding: Fuses metal components using heat.
- Brazing: Uses a filler metal to join metals at a lower temperature.
- Grinding: Removes excess material and shapes the metal.
- Safety Gear: Welding masks, gloves, and protective clothing are essential.
- Practice: Develop your skills before beginning your project.
Take the time to master these metalworking techniques, or consult with someone who has experience. This can make all the difference when it comes to the safety and durability of your mace.
Woodworking Techniques: Carving, Turning, and Gluing
Woodworking is often simpler than metalworking, and it provides an opportunity to be creative. Carving allows you to create unique designs, while wood turning creates uniform shapes. Gluing is necessary to assemble your mace. Proper gluing includes the use of clamps. Wood finishing protects the wood. Applying the correct stain and sealant can make your project shine. Always work in a well-ventilated area, and wear safety glasses when using power tools. Consider using different wood stain colors to make your mace unique.
- Carving: Allows for intricate designs.
- Turning: Used to make shafts and heads on a lathe.
- Gluing: Joins wooden components together securely.
- Finishing: Sealants and varnish protect and enhance the wood.
- Safety: Wear safety glasses and use tools with caution.
With practice and patience, you can master woodworking techniques and build stunning maces. Focus on precision and attention to detail. This makes for a more professional finish.
Finishing and Detailing: Polishing, Painting, and Embellishments
The finishing steps for your crafting mace project are where your creativity will shine. Polishing metal or sanding wood prepares the surface. Painting adds color and visual interest. Embellishments can include adding leather grips, metal studs, or other decorative elements. This final step enhances the look and feel. Take your time with these details. Remember that the way you finish your mace can turn it into a work of art. Quality finishing often requires patience and attention to detail.
- Polishing/Sanding: Smooths surfaces.
- Painting: Adds color and artistic flair.
- Embellishments: Leather grips, studs, and decorative elements.
- Protective Finishes: Sealants protect against wear.
- Creativity: This is where your design comes to life.
The finishing of your mace is just as important as the construction. By investing time and effort in the finishing touches, you can create a unique weapon.
Historical Context: The Mace Through the Ages
The mace has a long history, appearing in various cultures and eras. Its design and function have changed. Originally used in combat, it evolved into a symbol of authority and ceremony. Understanding the history of the mace adds value to your project. This knowledge adds depth. It allows you to create historical maces.
Ancient Origins: Early Forms and Purposes
Early maces were used in ancient cultures, such as Egypt and Mesopotamia. They were simple clubs made of stone or wood. The mace was a very effective weapon. The design and materials evolved. Maces were often used in close-quarters combat. Over time, the mace became a symbol of status. The materials and designs became more complex. In many ancient societies, maces were associated with warriors and leaders. Consider these elements when crafting mace.
- Early Designs: Simple clubs made of stone or wood.
- Combat Use: Effective for close-quarters fighting.
- Symbolism: Became associated with warriors and leaders.
- Materials: Evolved from stone and wood to metal.
- Cultural Significance: Represented power and authority.
Research the ancient uses of the mace when crafting. It will help you develop the best style for your project.
Medieval Warfare: The Mace in Battle
The mace found its peak popularity in the Middle Ages. Its use as a battlefield weapon grew. This was especially true during the Crusades and the Renaissance. As armor became more effective, the mace offered a way to inflict damage. It could crush armor. The mace was effective. It could be used by infantry and cavalry. Different mace designs were developed. These included flanged and spiked heads. Consider these historical adaptations when crafting mace.
- Peak Popularity: Middle Ages, Crusades, and Renaissance.
- Armor Penetration: Effective against plate armor.
- Combat Roles: Used by both infantry and cavalry.
- Design Evolution: Flanged and spiked heads.
- Military Significance: Key weapon of the era.
Research different historical styles when crafting mace. You can make an amazing replica.
Ceremonial Maces: Symbols of Authority
The mace evolved from a weapon to a symbol of power. The mace was a ceremonial object in the later periods. They were used to represent authority. They were used in governments. Ceremonial maces are often elaborately decorated. They are made from precious materials. They are a sign of prestige and respect. They remain in use. In many modern institutions, the mace is used. These include parliaments and universities. Understanding the history of ceremonial maces can provide a deeper appreciation for their significance.
- Transition: From weapon to symbol of authority.
- Elaborate Decoration: Made from precious materials.
- Use in Government: Symbol of power and order.
- Modern Usage: Parliaments and universities.
- Symbolism: Represents power, order, and respect.
Consider the role and the look of the mace if you want to create a realistic one. You will gain a greater appreciation for the symbolism.
Safety First: Guidelines and Precautions
Always prioritize safety. This holds when you are working with tools and materials. Many aspects of crafting mace projects can be dangerous. From cutting metal to working with power tools, risks exist. Proper safety procedures are vital. Make sure you use the necessary protective gear. Also, make sure you are in a safe and organized workspace. Never work in a rush or under the influence of drugs or alcohol. Always know the safety steps before using tools. Follow these guidelines.
Workspace Safety: Organization and Protection
Create a safe workspace. Make sure it is organized. Keep your tools and materials in order. This reduces the risk of accidents. Good lighting is essential. Make sure your area is well-lit. Ventilation is another priority. Ensure the space has proper air circulation. Clean your workspace. Clear the area of any obstructions. Wearing the right protective gear is necessary. Wear eye protection, hearing protection, and appropriate clothing. Have a fire extinguisher and a first-aid kit nearby. Make sure your area is safe before you start.
- Organization: Keep tools and materials in order.
- Lighting: Make sure you have good lighting.
- Ventilation: Ensure good air circulation.
- Protective Gear: Wear eye, ear, and body protection.
- Emergency Preparedness: Have a fire extinguisher and first-aid kit.
Following a safe workspace procedure will prevent accidents and potential injuries. Prioritize safety to avoid dangerous situations.
Tool Safety: Proper Usage and Maintenance
Always learn how to use your tools correctly. Read the manual. Understand all the safety features. Proper use of tools lowers risk. Regular maintenance and inspection are vital. Check tools for damage before you use them. Make sure the tools are in good working order. Always use the right tool for the job. Don’t force tools. Work at a safe pace. Keep your tools sharp and well-maintained. Always unplug power tools when you are not using them. Store tools correctly. Keep them in a safe place. Always follow tool safety procedures.
- Education: Learn how to use your tools.
- Maintenance: Inspect and maintain tools regularly.
- Appropriate Use: Use the right tool for the job.
- Safe Operation: Work at a safe pace and don’t force tools.
- Storage: Store tools in a safe place.
Using tools correctly, and regular maintenance, will lead to better results. This makes your crafting mace projects safer.
Material Handling: Safe Practices and Disposal
Handle your materials safely. Read the instructions and understand them. Some materials can be hazardous. Wear gloves and eye protection. Make sure you work in a well-ventilated area. Properly dispose of waste materials. Learn and follow the guidelines. Recycle when possible. Store materials properly. Keep them out of reach of children. Know the potential risks and always use safety precautions. Proper handling ensures that your crafting mace projects are safe.
- Material Information: Read the instructions and understand them.
- Personal Protective Equipment: Wear gloves and eye protection.
- Ventilation: Work in a well-ventilated area.
- Disposal: Dispose of waste materials properly.
- Storage: Store materials safely and out of reach.
By following safe material handling practices, you can make sure that your crafting mace experience is safe. This makes the entire project a lot more enjoyable.
Resources and Further Exploration
There is a lot to learn in the world of crafting mace projects. Many resources can help you. These include books, online tutorials, and expert craftsmen. Use these resources. Join communities. These resources help improve your skills and knowledge.
Books and Publications: Learning the Fundamentals
Books and publications offer valuable information. They provide a deeper exploration of your crafting mace project. Search for titles that focus on metalworking. These can help with shaping and joining components. Search for books that offer information on woodworking techniques. These can teach you carving and finishing skills. Many publications provide images. You can also view historical examples. This can enhance your design process. Visit libraries, bookstores, and online retailers. Research authors and their credentials. This can provide a detailed and organized way to learn the fundamentals of crafting mace.
- Metalworking Guides: Information on metal shaping and joining.
- Woodworking Manuals: For carving, turning, and finishing.
- Historical References: Design inspiration and background.
- Online Retailers: Search for options.
- Expert Authors: Learn from those who have experience.
Reading books and publications can deepen your skills and knowledge. This can help with improving your results.
Online Tutorials and Communities: Learning from Others
The internet offers tutorials. Use websites and social media to find how-to videos and articles. Join online communities. Connect with other craftspeople. Share your work. Ask for advice. Many platforms such as YouTube offer numerous guides. Find crafting mace projects that are useful. Seek answers to your questions. Get inspiration from others. Online communities offer support and encouragement. You can learn from others’ experiences. This improves your techniques. This helps improve your skills. They are great resources for crafting mace.
- How-to Videos: Visual guides.
- Articles: Step-by-step instructions.
- Online Forums: Ask questions and share work.
- Social Media: Connect with craftspeople.
- Inspiration: Get inspired and learn from others.
Take advantage of online resources. You can improve your skills and techniques. You will meet other enthusiasts.
Local Workshops and Expert Guidance: Hands-on Learning
Hands-on experience can be very valuable. Search for workshops near you. Many schools, community centers, and craft studios offer classes. Seek the guidance of experienced craftspeople. Ask for tips and techniques. Learn from their expertise. This hands-on experience allows you to get direct feedback. You can refine your skills. It gives you an opportunity to ask specific questions. It also helps you meet others who share your interests. This will improve your crafting mace project and skills.
- Local Classes: Hands-on experience.
- Community Centers: Find local workshops.
- Expert Instructors: Get guidance.
- Feedback: Refine your techniques.
- Networking: Connect with others.
Workshops and expert guidance offer you opportunities to get more direct experience. This is one of the best ways to improve your skills.
Common Myths Debunked
Myth 1: Crafting a Mace Is Too Difficult for Beginners
The reality is that crafting mace projects can be as simple or as complicated as you choose. While intricate designs and advanced techniques require skill, you can begin with a simple project using basic tools and materials. Many tutorials and guides cater to beginners, providing step-by-step instructions. Start with a basic design and gradually work your way up. Focus on the fundamental processes such as measuring, cutting, and shaping to develop your skills gradually. Embrace the learning process, and don’t be afraid to make mistakes. Each project is a learning opportunity.
Myth 2: Maces Are Only for Historical Recreations and Cosplay
While maces are popular in historical settings and for costumes, they also provide an excellent avenue for creative expression and skill development. Crafting mace can be a satisfying hobby that combines design, engineering, and craftsmanship. Experiment with different materials, finishes, and artistic styles. It can lead to unique and personalized creations. The skills you learn in this process, such as metalworking or woodworking, are transferable to other projects. The hobby allows you to explore creativity and learn new skills.
Myth 3: Maces Are Dangerous and Should Not Be Made
The safety of a mace depends on its design and how it is used. When crafted responsibly, maces can be made safe, especially if they are designed for display or light use. The design and intended use dictate the safety level of the project. Prioritize using the appropriate materials, making sure that it’s correctly assembled, and using proper protective equipment. Always follow safety guidelines for the materials and tools you are using. Remember that the potential risk can be lowered by making the project for display purposes.
Myth 4: You Need Expensive Tools to Craft a Mace
You don’t need expensive equipment to get started with crafting mace projects. You can start with basic hand tools such as saws, files, and hammers. As you become more skilled, you can invest in more specialized tools, such as power drills or welders. You can find many affordable tools. Many projects can be accomplished with simple tools. This allows you to develop your skills. Over time, you can grow your workshop.
Myth 5: It’s Impossible to Craft a Mace That Looks Professional
Crafting a mace that looks professional is possible with a focus on skill development. With practice and attention to detail, anyone can make a high-quality product. The key to the final results is skill, technique, and patience. Start by mastering basic techniques, such as measuring accurately, cutting precisely, and finishing your work. Research and learn from others. Quality materials are also important. The ability to work on your project and take the time to learn the craft helps the final product.
Frequently Asked Questions
Question: What materials are best for a beginner?
Answer: For beginners, wood is often a good place to start. It’s easy to work with and requires basic hand tools. You can also use materials like PVC pipe for a cost-effective, lightweight alternative.
Question: What tools are required to start a project?
Answer: Essential tools include a saw (hand saw or coping saw), a measuring tape, a file, sandpaper, and clamps. A drill and a variety of hand tools are useful as well.
Question: What safety precautions should I follow?
Answer: Wear safety glasses, gloves, and a mask to protect yourself. Ensure your workspace is well-ventilated, and follow all safety guidelines for the tools and materials you are using.
Question: Where can I find mace designs or patterns?
Answer: You can find designs and patterns online, in books, or by researching historical examples. Websites dedicated to historical weaponry are also great for inspiration.
Question: What are some tips for finishing a mace project?
Answer: Sand your surfaces thoroughly. Apply a sealant, varnish, or paint. Add a leather grip to improve the grip and add a touch of authenticity. Consider embellishments such as metal studs or decorative carvings.
Final Thoughts
The world of crafting mace projects offers a rewarding experience. It provides opportunities for creativity, skill building, and a deeper appreciation for history. By picking the right materials, exploring design options, and following the proper safety procedures, you can create your own mace. Whether for cosplay, display, or simply for the enjoyment of crafting, the possibilities are endless. Remember to start with a project that matches your skill level. Don’t be afraid to experiment. Take the time to practice. Embrace the challenges. You can create a one-of-a-kind product that you can be proud of! With each project, your skills improve. This means you gain more confidence. Get started today, and enjoy the art of crafting a mace!
Leave a Reply