Category: Crafting Ideas

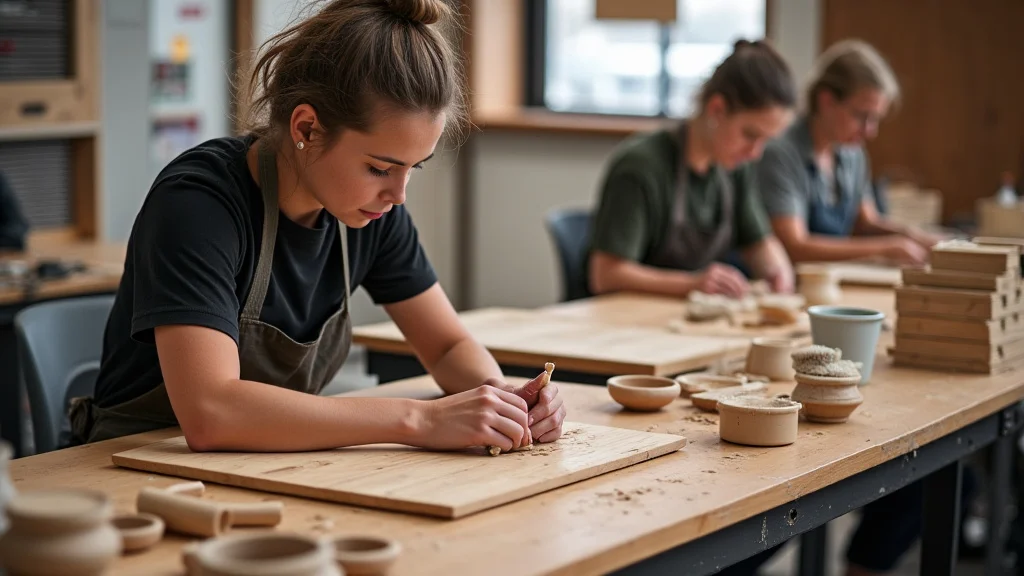
  • Crafting House: Your Guide to Building a Creative Haven

    Crafting House: Your Guide to Building a Creative Haven

    Remember that feeling of walking into a space that just felt right? Maybe it was your childhood bedroom, a cozy coffee shop, or even a friend’s studio. Creating a place where you love to spend time can be transformative. This post explores the world of a crafting house, showing you how to design and build your own creative studio. You’ll learn about the essential elements, from planning to setup, so you can turn your crafting dreams into reality. Get ready to transform your space and unleash your creativity! This guide will help you visualize and implement your ideas, giving you the tools to optimize your crafting area. The goal is to maximize your time and creativity. Prepare to build a fantastic crafting house!

    Key Takeaways

    • Learn how to plan and design a functional crafting space.
    • Discover the best storage solutions for different crafting supplies.
    • Explore lighting, ventilation, and other essential elements of a crafting house.
    • Find inspiration for decorating and personalizing your creative haven.
    • Gain tips for organizing and maintaining your crafting house.
    • Understand how to create a crafting space that promotes productivity and inspiration.

    Planning Your Ideal Crafting House

    Before you start moving furniture or buying supplies, a solid plan is essential. Consider the size of your space, the type of crafts you enjoy, and the amount of storage you’ll need. Think about how you’ll move around within the space. Will you need a large table for quilting, or smaller workstations for jewelry making? These initial considerations will shape your design.

    Assessing Your Space and Needs

    Start by evaluating the available space. Measure the room (or area) carefully. Note the locations of windows, doors, electrical outlets, and any existing features like built-in shelves. Consider the lighting conditions. Natural light is great, but you’ll also need good artificial lighting. Write a list of your preferred crafting activities and the equipment or supplies they involve. This list helps you determine the amount of workspace, storage space, and other specific requirements, such as ventilation for paint fumes.

    A crafting area should cater to your specific hobbies. If you love painting, you’ll need a large easel and a surface to clean brushes. If you’re a knitter or crocheter, you’ll need a comfortable chair and plenty of space for yarn storage. Tailor the space to your needs.

    • Space Measurement: Accurately measure the available area, taking note of walls, doors, windows, and electrical outlets.
    • Crafting Inventory: List every craft you enjoy and the corresponding tools, supplies, and equipment needed.
    • Workflow Mapping: Visualize the process of each craft to plan your workspace layout.
    • Storage Assessment: Evaluate the types and amounts of storage needed for various items like fabric, paints, tools, and materials.

    Designing Your Workspace Layout

    The layout of your crafting area should promote efficient workflow and comfortable movement. Think about traffic flow. Place larger work surfaces near natural light sources. Group similar activities together. For example, your sewing machine and ironing board can be in the same area. Ergonomics are key. Ensure that all your work surfaces are at a comfortable height to avoid back pain and other physical strains. Create zones for different activities: a cutting area, a sewing area, a storage area, etc.

    A well-designed layout can improve your enjoyment of crafting. This can help you focus on the creative process. It can also help reduce distractions. It’s best to plan this before you buy your supplies. Get a good understanding of what you need and what you do not.

    • Ergonomic Considerations: Position furniture and equipment to minimize physical strain during extended crafting sessions.
    • Zone Creation: Establish specific zones for different activities, such as cutting, sewing, or painting, to improve organization.
    • Traffic Flow: Ensure clear pathways to move around the crafting house.
    • Lighting: Make sure adequate lighting is present to avoid eye strain.

    Essential Elements of a Crafting House

    Once you have a layout, consider the critical aspects that will make your space functional and enjoyable. These include lighting, ventilation, storage, and seating. Good lighting is essential for preventing eye strain and ensuring accuracy. Ventilation is important for removing fumes from paints, glues, and other materials. Adequate storage keeps your supplies organized and accessible. Comfortable seating allows you to craft for long periods without discomfort.

    Lighting and Ventilation in a Crafting Area

    Good lighting and ventilation are often overlooked. Natural light is ideal, but supplement with artificial lighting. A combination of overhead lighting, task lighting, and accent lighting can create a well-lit and comfortable space. Consider the placement of your work surfaces to maximize natural light. Ventilation is also critical, especially if you use paints, glues, or other materials that emit fumes. Make sure you have adequate ventilation to prevent the build-up of harmful fumes.

    Proper lighting enhances visibility and reduces eye strain. Adequate ventilation ensures a healthy crafting environment. This also prevents the accumulation of odors and fumes. A well-lit and well-ventilated space is more enjoyable and can promote better crafting.

    • Task Lighting: Provide focused lighting directly over work surfaces for detailed crafts.
    • Natural Light: Place your crafting area near windows to take advantage of natural sunlight.
    • Ventilation System: Install an air purifier or ensure adequate ventilation.
    • Air Quality: Ensure clean air for a safe and healthy crafting environment.

    Storage Solutions for Crafting Supplies

    Storage is essential for keeping your crafting supplies organized and accessible. Consider different types of storage, such as shelves, drawers, cabinets, and bins. Think about what you need to store. Store small items in clear containers. This makes it easy to find what you need. Label everything. This helps maintain organization. Choose storage solutions that match your personal style and the overall aesthetic of your space. Consider space-saving storage to maximize the area.

    There are many storage solutions for crafts. This helps keep everything in order. A well-organized space saves time and reduces stress. It also allows you to find your supplies quickly. This improves your crafting experience.

    • Open Shelving: Ideal for displaying and easily accessing frequently used supplies.
    • Closed Cabinets: Suitable for storing items that need protection from dust and light.
    • Clear Containers: Use clear bins or boxes to see contents at a glance.
    • Labeling: Label all containers, drawers, and shelves for easy identification.

    Furniture and Seating

    The right furniture can make your crafting experience far better. The work surface should be at a comfortable height. Make sure you have enough space to work. Choose a chair that provides good support. You’ll likely spend hours sitting while you craft. Select furniture that fits the size of your space and your individual needs. Consider multi-functional furniture, like a desk with built-in storage. Comfortable, well-designed furniture will create a more enjoyable and productive crafting environment.

    Ergonomic furniture can reduce discomfort and allow for longer crafting sessions. Invest in a chair with good lumbar support. This will help you avoid back pain. A well-designed workspace supports your physical well-being. This will allow you to focus on your creative work.

    • Ergonomic Chair: Choose a chair with good lumbar support to reduce strain during extended sessions.
    • Adjustable Work Surfaces: Ensure work surfaces are at a comfortable height for the type of craft you engage in.
    • Storage Integrated Furniture: Opt for desks or tables with built-in storage to maximize space.
    • Comfort: Make sure your furniture is comfortable.

    Personalizing and Decorating Your Crafting House

    Now that you have the basic elements in place, it’s time to add personal touches. Your crafting area should be an inspiring space. Choose colors, art, and decor that reflect your personality and style. Display your finished projects. This will add character to the space. You can add things that make you feel good.

    Color and Decor

    Color has a powerful effect on mood and creativity. Choose colors that inspire and motivate you. Consider using a neutral base color and adding pops of color through your decor. Display your own artwork or the artwork of others. This can add personality. Bring in plants. Plants can improve the overall atmosphere. Add decorative items that reflect your crafting interests and your personal style. Create a space that you love to be in.

    Personalized decor inspires creativity. It enhances the enjoyment of your space. Choosing the right colors and decorating can transform your crafting area. This will make it a more enjoyable space.

    • Color Palette: Select colors that inspire creativity and reflect your personal style.
    • Artwork: Decorate the area with art to give it character.
    • Personal Items: Display items like collectibles or photographs.
    • Plants: Add plants to enhance the atmosphere of the room.

    Organizing and Maintaining a Functional Space

    A well-organized space helps you stay focused. Implement a system to keep your supplies in order. Regularly declutter your area. Return items to their storage locations after each use. Schedule time for cleaning and organizing. A tidy space will help you stay creative. It will also reduce the time you spend looking for items.

    Regular maintenance will help to keep your crafting house a pleasant space. A regular cleaning schedule will keep things tidy. Organizing your supplies will prevent clutter. A well-organized space is key for a productive environment.

    • Regular Decluttering: Regularly get rid of items you no longer need.
    • Supply Placement: Ensure that frequently used supplies are easily accessible.
    • Cleaning Schedule: Set aside time each week for cleaning and organizing your space.
    • Supply Inventory: Know what you have, so you don’t overbuy or run out.

    Crafting House Inspiration

    Finding inspiration is vital for creating a space that promotes creativity. Explore different ideas online, in magazines, and in other creative spaces. Gather ideas from different sources and tailor them to your personal style. Remember that the crafting house is for you. Make it a reflection of your own interests.

    Exploring Interior Design

    Interior design offers a wealth of ideas for crafting spaces. Look at different styles of design to get some ideas. Consider how the different designs meet your needs. Research different design schemes. Look at pictures and consider their functionality. Pay attention to the use of space. You can get ideas by looking at different areas.

    You can find inspiration in a variety of places. You can develop your own space by taking elements that you like. By collecting ideas, you can build the crafting house you always wanted.

    • Online Platforms: Explore sites like Pinterest, Houzz, and Instagram for ideas.
    • Home Design Publications: Browse home design magazines to discover layouts and decor ideas.
    • Visits to Craft Stores: Find out what works and what does not work.
    • Color Palettes: Get ideas to use in your space.

    Case Studies: Successful Crafting House Designs

    The following are examples of well-designed crafting houses. The first is a multi-purpose room that doubles as a guest bedroom. This shows how you can use limited space. The second is an expansive studio. It includes custom storage solutions and large work surfaces. Both houses provide functionality and beauty.

    1. The Convertible Craft Room: A crafter transformed a spare bedroom into a versatile space. This involved modular furniture and plenty of storage. The room can transition from a guest room to a crafting space. Key features include a fold-down desk that serves as a sewing station and a bed that can be hidden away. This flexible design maximizes space.
    2. The Dedicated Studio: This crafter turned a separate room into a fully dedicated crafting studio. This involved custom-built cabinets. The studio offers a large cutting table. It also provides a dedicated area for painting. The design emphasizes natural light and a calming color scheme. It promotes focus and inspiration.

    Common Myths Debunked

    Myth 1: You need a big space for a crafting house.

    You don’t need a huge room for a crafting house. A small corner or spare room can be sufficient. You can organize your space. You can use vertical storage solutions. You can also use foldable tables.

    Myth 2: Crafting is expensive.

    Crafting doesn’t have to be expensive. You can find materials and supplies at lower costs. You can buy used items. You can also use materials you already have.

    Myth 3: You need to be naturally creative.

    Creativity is something that can be developed. You can experiment. You can practice. You can learn new skills. You can use your creativity to build a crafting house.

    Myth 4: Crafting is just for girls.

    Crafting is for everyone. Men and women alike can enjoy crafting. Crafting offers many opportunities for creativity and self-expression. There’s a wide range of crafts for all.

    Myth 5: It’s too late to start a new craft.

    It’s never too late to try something new. You can start crafting at any age. Learning a new skill is fun and enriching. This allows you to explore your creative interests.

    Frequently Asked Questions

    Question: How much space do I need for a crafting house?

    Answer: The space you need depends on your crafting hobbies. You can still create an effective space with a small area. Plan it well.

    Question: What are the must-have supplies?

    Answer: The essentials depend on your crafts. Generally, include adequate lighting, storage, and a comfortable work surface.

    Question: Can I craft on a budget?

    Answer: Yes. Look for sales, use coupons, and buy used items to save money.

    Question: How do I store my supplies?

    Answer: Use a mix of shelves, drawers, and clear containers. Label everything.

    Question: What kind of lighting should I use?

    Answer: Aim for a mix of natural and artificial lighting. Use task lighting for detailed work.

    Final Thoughts

    Crafting is an amazing way to express yourself, and building a crafting house is a fantastic way to support your creativity. The most important thing is to make your space functional, inspiring, and unique. Consider how your crafting space will look and function. Start with a plan, consider your space, and select the right furniture. Then add your own personal touches. By creating a space that you enjoy, you can enjoy all the benefits of crafting. Don’t worry about being perfect. Focus on making your space your own. This will allow you to work on your creative projects more effectively. Set up your crafting house and get started today!

  • Crafting Hacks: Creative Tips and Techniques for Projects

    Crafting Hacks: Creative Tips and Techniques for Projects

    Ever feel like your craft projects always take longer than expected, or maybe you’re stuck on a tricky step? You’re not alone! Many crafters, from beginners to experienced makers, face similar challenges. This article explores useful crafting hacks, providing practical tips and techniques to streamline your creative process. You’ll gain valuable knowledge that will boost your project efficiency and save you time. This guide will provide you with easy ways to improve your skills and get better results, thereby improving your skills, and reducing potential frustration. Read on to discover ways to improve your crafting hacks.

    Key Takeaways

    • Discover clever methods to enhance your crafting skills and improve outcomes.
    • Learn time-saving tips for preparing materials and starting your projects quickly.
    • Uncover organizational methods that keep your workspace neat and your supplies accessible.
    • Explore ways to avoid common mistakes and perfect your projects, saving time and materials.
    • Find creative techniques to elevate your crafting process and give your projects a professional look.
    • Improve your skills, speed and save money in your crafting experience

    Effective Time Management for Craft Projects

    One of the biggest challenges for crafters is managing time. Projects often take longer than expected, and it’s easy to get sidetracked. This section focuses on tips to make the most of your crafting time, from planning ahead to setting realistic goals.

    Planning and Preparation

    Proper preparation is key. Before starting any project, take the time to plan your steps. It’s similar to setting the stage before a play. Consider gathering all necessary supplies, materials, and tools. This upfront effort prevents interruptions later and helps you stay focused on the task at hand.

    • Create a Detailed Project Plan: Before you begin, list every step needed, from start to finish. This detailed guide acts like a roadmap. If you’re sewing, it could mean marking fabric, measuring, and cutting. If you’re painting, this could include sketching ideas and color mixing. This helps you track progress.
    • A clear plan helps break down large projects into manageable steps. This reduces feeling overwhelmed and helps build momentum.

    • Gather All Supplies in Advance: Gather everything you will need before starting. This saves time and stops the need to interrupt the process. Place all supplies within reach to reduce distractions.

      Having all materials on hand prevents interruptions and improves workflow. Nothing slows down a project more than a missing item!

    • Set Realistic Time Goals: Estimate the amount of time needed for each step, and set deadlines. Avoid unrealistic expectations. If a project seems complex, break it into smaller, more manageable parts.

      Break down big projects into smaller steps to make them more manageable and less daunting.

    • Prepare Your Workspace: Keep your work area tidy. Clutter can distract and lead to time wasted searching for items. Organize supplies in accessible containers or drawers.

      A tidy workspace makes it easier to work efficiently and reduces the likelihood of losing items or making mistakes.

    • Batch Similar Tasks: Group similar tasks together to streamline the process. For example, when sewing, cut all the fabric pieces at once.

      Batching similar tasks saves time and minimizes setup and takedown time between steps.

    Crafting Hacks for Efficiency

    Once you are ready to begin, implement these crafting hacks to streamline your workflow and avoid common pitfalls.

    • Use Pre-Cut Materials: Use pre-cut fabric squares or pre-made embellishments. This is a game changer. This eliminates the tedious process of cutting and measuring, leaving you more time to focus on assembly.
    • Pre-cut materials are great for beginners.

    • Utilize Templates and Stencils: Use templates for shapes. If you are doing a project that has repeating designs, use stencils or templates to cut and create quickly. This saves time and ensures uniformity.
    • Templates and stencils work well for projects needing precision, making the work faster.

    • Employ Smart Tools: Employing specific tools can drastically cut down on project time. For instance, using a rotary cutter instead of scissors for fabric can expedite cutting.

      Using smart tools can reduce project time.

    • Streamline Gluing and Adhesion: For projects that involve glue or adhesive, use a glue gun. It sets very quickly, allowing for immediate assembly.
    • Glue guns are more efficient in projects that require rapid bonding.

    • Document Everything: Take photos or make notes. Document everything.

      Documenting project progress and results helps with future projects.

    Creative Solutions for Crafting Materials

    Working with supplies is an important skill when crafting hacks. One of the main challenges for a crafter is managing these things. Whether you’re working with paper, fabric, or paints, understanding how to use and prepare your materials can make a huge difference in your project’s success and enjoyment.

    Storage Solutions

    Organizing your supplies makes them easier to find and keeps your workspace tidy. This section will look at different ways you can store your crafting materials. We will cover a range of options.

    • Use Clear Containers: Clear containers make it easy to see what you have without opening them. This saves time when you are searching for a particular color of paint or type of bead. Label your containers to indicate the contents.
    • Clear storage boxes can speed up project prep by making supplies easy to find.

    • Utilize Wall Storage: Installing pegboards or shelves on your walls can maximize your vertical space. This is very helpful if your work area is small. Hang tools, store paints, and even display finished items.
    • Wall storage makes good use of space and keeps your most used tools close at hand.

    • Employ Drawer Organizers: Drawer organizers are great for keeping small items like beads, buttons, and threads in order.
    • Drawer organizers are a great way to improve workspace efficiency.

    • Upcycle and Repurpose: Use old jars, cans, and containers for storage. Not only is it budget-friendly, but it also gives your space a unique look. Label everything.
    • Repurposing containers reduces waste and can add character to your workspace.

    • Create a Dedicated Crafting Area: If possible, designate a specific area for your craft projects. This will make it easier to stay organized.
    • A dedicated space prevents clutter from spreading and helps maintain focus.

    Material Preparation Hacks

    Preparing materials correctly can streamline your work and improve results. Preparing materials is a crucial step when you are working on crafting hacks.

    • Fabric Pre-Washing: If you are working with fabric, wash it before cutting and sewing to avoid shrinking later.
    • Washing fabric removes any finishes that may affect how it works.

    • Pre-Cutting Materials: Cut fabric, paper, or other materials into the required shapes before you start your project.

      Pre-cutting can save a lot of time by eliminating repetitive cutting during your project.

    • Prime Surfaces: If painting on surfaces like wood or canvas, prime them first. This ensures better paint adhesion and a smooth finish.
    • Priming reduces the amount of paint needed and improves your work’s look.

    • Prepare Adhesive Tape: Cut pieces of tape to length and stick them to the edge of the table. You are ready to start gluing!
    • This will save you time and it will make the project easier.

    • Use Heat Tools to Prep: When working with shrinkable materials, use a heat gun to quickly mold and shape your projects.

      Heat tools are very useful.

    Ways to Fix Common Crafting Mistakes

    Mistakes are part of crafting, and learning how to fix them efficiently is a valuable skill. Here, we’ll cover how to quickly address common errors. Knowing how to fix mistakes is a helpful part of any crafting hacks journey.

    Addressing Errors and Issues

    No matter how experienced you are, errors will happen. Knowing how to fix them can save time and resources.

    • Seam Ripping: Don’t get discouraged. Use a seam ripper to remove stitching mistakes without damaging the fabric.
    • Seam ripping is part of the process.

    • Correcting Glue Spills: If glue gets on surfaces, use a cotton swab to remove it.
    • Cotton swabs will let you remove glue without causing problems.

    • Fixing Paint Errors: If you make a painting mistake, let the paint dry. Then, sand the area and repaint.
    • Sanding and repainting are good ways to fix paint problems.

    • Fabric Stains: Treat fabric stains immediately. Read the care label and use the right cleaning solution.
    • Treating fabric stains fast is crucial.

    • Handle Paper Tears: For tears, use tape on the back. For larger tears, use paper or more of the same material.
    • Fixing paper tears is easy and helps you save paper.

    Avoiding Future Mistakes

    Preventative measures are essential. You can avoid many mistakes by implementing these strategies.

    • Read Instructions Carefully: Always read instructions multiple times before starting a project. If there are any steps that are unclear, look for tutorials or contact the manufacturer.
    • Reading instructions carefully can prevent confusion.

    • Test on Scrap Material: Always test any new techniques or materials on scrap pieces before starting. This helps you understand how things work.
    • Testing can save money.

    • Use Removable Tape: Use removable tape to hold pieces together.

      Removable tape will let you fix problems easily.

    • Measure Twice, Cut Once: Measure everything twice to ensure accuracy. If you’re working on something complex, it’s wise to measure three times.
    • Careful measuring can save materials and time.

    • Take Breaks: Step away from a project to refresh your mind. When you return, you will see it with new eyes, which can help find mistakes.
    • Breaks are important.

    Incorporating Smart Tools and Techniques

    Smart tools and innovative techniques can transform your approach to crafting hacks. These tools can improve your work and save time.

    Essential Tools

    The right tools can significantly improve your crafting experience. Here are a few must-have tools for every crafter.

    • Rotary Cutters: For fabric, rotary cutters are better than scissors.

      Rotary cutters make cutting fabric quick and accurate.

    • Cutting Mats: Use cutting mats to protect your work surface.

      These mats protect work surfaces.

    • Craft Knives: Craft knives work best on paper and other thin materials.

      Craft knives are great for precision cuts.

    • Glue Guns: Glue guns set quickly.

      Glue guns are useful for different crafting projects.

    • Heat Guns: Heat guns are useful for different crafts.

      Heat guns are effective for molding.

    Crafting Techniques to Master

    Learn these techniques to enhance your projects.

    • Layering Techniques: Layer different colors or materials to add depth and interest.
    • Layering creates interesting looks.

    • Embossing: Use embossing to create raised designs on paper or other materials.

      Embossing creates beautiful textures.

    • Decoupage: Apply paper cutouts or designs to surfaces using glue.

      Decoupage is great for decorating.

    • Fusing: For fabric crafts, fusing involves using heat to join fabrics.

      Fusing saves time.

    • Using Sewing Machines: Sewing machines can help with any project.

      Sewing machines will add a lot of value.

    Creative Ways to Enhance Your Craft Projects

    Elevating your craft projects means adding that extra touch. These are the final crafting hacks.

    Adding Finishing Touches

    Finishing touches create polished results.

    • Add Embellishments: Use buttons, beads, and ribbons.

      Embellishments add style.

    • Professional Edges: Use edging.

      Neat edges show care.

    • Color Coordination: Pick colors that look good together.

      Good color choice improves a project.

    • Personalized Designs: Personal touches make projects unique.

      Personal designs are very special.

    • Careful Ironing: Use iron to remove wrinkles.

      Ironing makes any fabric project look better.

    Displaying Your Work

    How you display your work is important.

    • Frame Your Work: Framing adds value.

      Framing protects and showcases art.

    • Display On Shelves: Use shelves.

      Shelves will allow you to show off your work.

    • Gallery Walls: Gallery walls create a great look.

      A gallery wall adds to the space.

    • Use Decorative Stands: Stands display your work well.

      Decorative stands can showcase projects.

    • Share Online: If you are comfortable, share your projects online!

      Showcase your work!

    Common Myths Debunked

    Myth 1: Crafting is Expensive

    Many think crafting requires a lot of money. However, this isn’t always true. Crafting can be very budget-friendly! You can find inexpensive supplies at thrift stores or use recycled materials. Many projects will not require expensive materials.

    Myth 2: You Need to Be Highly Skilled

    A common myth is that you need a lot of skill to start. The reality is that anyone can start crafting. Many crafts are easy to learn, and there are many online resources. Start with simple projects to develop your skills gradually.

    Myth 3: Crafting Takes a Long Time

    Some people think all projects are time-consuming. However, many projects are quick and easy. By using efficient techniques, you can complete projects in a reasonable amount of time. You don’t have to work on large, detailed projects all the time.

    Myth 4: You Need a Dedicated Craft Room

    Having a special craft room is not a requirement for crafting. You can create in a small corner or at a table. Organized storage solutions and easy-to-move equipment will make crafting easier in any space.

    Myth 5: All Crafts are Messy

    Crafting can be neat. By following the tips, you can keep your space tidy and the project clean. Organize as you go. Clean up as you are finishing the project.

    Frequently Asked Questions

    Question: What’s the best way to store my crafting supplies?

    Answer: Use clear containers, wall storage, drawer organizers, and repurposed items. Label everything clearly to help you find supplies fast.

    Question: How can I save money when crafting?

    Answer: Buy supplies from thrift stores, use recycled materials, and look for sales and discounts at craft stores. Making supplies will save money.

    Question: How do I avoid making mistakes?

    Answer: Read instructions carefully, test techniques on scrap materials, measure twice, and take breaks to refresh your perspective.

    Question: What if I don’t have a lot of space?

    Answer: Craft in a small space! Use vertical storage like shelves, and keep your supplies organized to maximize space. This can work at home!

    Question: How do I get better at crafting?

    Answer: Start with easy projects, practice regularly, and seek advice from online tutorials. Practice makes perfect, and trying new things will help you learn.

    Final Thoughts

    Using crafting hacks will change the way you approach your projects. It’s about combining preparation with the right tools and techniques. By implementing these tips, you’ll find that crafting is more fun and less stressful. Embracing these strategies makes a real difference in the success of any craft project. With practice, you can get the best results. Take what you have learned and start today. Get organized and start using these tools. Remember to start with a plan, gather your supplies, and create! Experiment with new techniques and tools! You will find that your projects become more efficient and enjoyable. Get started and have fun.

  • Crafting Guild Guide: Build, Manage, and Thrive in a Community

    Crafting Guild Guide: Build, Manage, and Thrive in a Community

    Ever feel like you have a mountain of creative energy and nowhere to put it? Maybe you’re a budding artisan with a passion for woodworking, leatherworking, or even digital art. You probably dream of connecting with others who share your creative spark. Well, a crafting guild might be your answer! This post is your roadmap to building and participating in a thriving crafting guild. You’ll learn the steps to create, maintain, and truly flourish within a creative community. You’ll discover how to get the most out of your experience and what to anticipate. Get ready to turn your passion into something collaborative and rewarding.

    Key Takeaways

    • Learn how to form your own crafting guild or join an existing one.
    • Understand the different types of crafting guilds and their focus.
    • Discover strategies for effective communication and collaboration.
    • Explore methods for promoting your guild and attracting new members.
    • Examine the benefits of participating in a crafting guild.
    • Grasp tips for resolving conflicts and maintaining a positive environment.

    What Is a Crafting Guild? A Definition

    A crafting guild is essentially a community of individuals who share a common interest in creating things. These groups can vary significantly in their focus and structure, from small groups of friends gathering in person to massive online communities spanning the globe. At its core, a crafting guild provides a space for crafters to share their skills, learn from each other, offer support, and collaborate on projects. The beauty of a crafting guild lies in its flexibility. It can be whatever its members want it to be.

    Guilds are often centered around specific crafts such as woodworking, knitting, blacksmithing, sewing, or digital art. Others are focused on general crafting or a broader range of artistic endeavors. Guilds are often based on a shared value. These shared values might encompass a specific style, the use of certain materials, or even a particular ethical approach to crafting, like sustainable practices.

    Types of Crafting Guilds

    The variety of crafting guilds is vast and reflects the diversity of the crafting world itself. Some guilds are dedicated to a single craft, offering a focused learning environment. Others are more general, encompassing various crafts to foster a broader community of creative individuals. The different types of guilds cater to diverse preferences and skill levels.

    • Specialty Guilds: These guilds concentrate on a single craft, such as pottery, jewelry making, or weaving. This focus allows members to delve deeply into a specific skill, share advanced techniques, and refine their expertise. These guilds typically attract individuals with an established interest in the craft, seeking to elevate their abilities or connect with others who share their passion.
    • For example, a guild centered around stained glass might hold workshops focusing on advanced glass-cutting techniques, lead work, or the use of specific types of glass. This allows members to share expertise and develop their skills further.

    • Multi-Craft Guilds: These guilds encompass a range of crafts, from painting and sculpting to knitting and digital design. They provide a more diverse environment, encouraging cross-pollination of ideas and skills. These guilds are perfect for individuals with varied creative interests or those looking to explore different crafts.
    • A multi-craft guild might host events where a painter teaches basic color theory, while a knitter demonstrates different stitch patterns. This cross-training benefits members and leads to new creative combinations.

    • Online Guilds: With the rise of the internet, online crafting guilds have become extremely popular. They offer convenience, allowing members to connect from any location. These guilds often utilize forums, social media groups, and video conferencing to share tutorials, critique projects, and offer support.
    • An online knitting guild could host a weekly “knit-along” where members work on the same pattern together. Members could also share progress photos and ask for help from other members in real time.

    • In-Person Guilds: Many guilds still thrive through face-to-face interaction, meeting in community centers, craft studios, or private homes. These guilds foster stronger bonds through shared physical space, hands-on workshops, and in-person critiques.
    • An in-person woodworking guild may meet weekly to use shop tools, learn from each other, and complete projects collaboratively. This creates a vibrant social environment that encourages creative output.

    • Themed Guilds: These guilds are based on a shared theme or interest. This might range from a specific historical period or a particular genre. These provide a focused group for projects and learning related to their interests.
    • A guild dedicated to historical costuming may organize events that recreate historical clothing or host workshops teaching different tailoring techniques. This themed structure enhances the sense of community.

    Benefits of Joining a Crafting Community

    The rewards of joining a crafting guild extend far beyond merely honing your skills. Participating in a creative group nurtures your skills, provides support, and fosters a sense of belonging. The chance to share your passion and connect with others who feel the same way is a powerful draw for many crafters. It’s a supportive environment. It is an amazing way to boost your confidence.

    • Skill Development: Crafting guilds provide opportunities to learn new techniques and improve your current skills. Members often share their expertise through workshops, tutorials, and informal teaching sessions. They offer feedback, helpful suggestions, and new inspiration.
    • Members can learn to refine their skills. They can experiment with new techniques. They also can build confidence through shared projects.

    • Community and Support: Crafting guilds provide a supportive environment for creative work. Crafters in these groups can share challenges, offer encouragement, and celebrate each other’s achievements. This sense of belonging is a powerful antidote to the isolation that can sometimes accompany creative pursuits.
    • A supportive environment is one of the most crucial elements of a good guild. This can greatly impact your ability to maintain a creative lifestyle.

    • Inspiration and Creativity: Exposure to different styles, techniques, and perspectives from other members can fuel your creativity. Sharing projects and participating in collaborative efforts help inspire fresh ideas and encourage creative thinking.
    • For example, participating in a guild project can inspire a crafter to try a new project. This could expose you to new ideas or techniques.

    • Networking and Collaboration: Crafting guilds provide opportunities to connect with other craft enthusiasts. They offer a great chance to collaborate on projects. You may find new friends, business partners, or collaborators.
    • Many guilds participate in local fairs and shows. This is an easy way to show off your work.

    • Resource Sharing: Guilds provide access to tools, materials, and specialized equipment that members might not otherwise have. They are an excellent way to connect with suppliers.
    • Some guilds have shared workshops. This will make expensive equipment accessible.

    How to Start Your Own Crafting Guild

    Starting a crafting guild can be a rewarding experience. It gives you the chance to cultivate a community based on your craft. You can set the tone for the group, determine its goals, and ensure it aligns with your vision. Here’s a helpful guide.

    Define Your Vision

    Decide what kind of guild you want to create and what its goals should be. Do you want to focus on a particular craft, or are you hoping to create a broader crafting group? Consider the type of crafters you want to attract and what activities you want to host. Having a clear vision from the beginning sets the stage for success and helps you attract like-minded individuals. This helps focus your activities and maintain consistency.

    • Choose Your Focus: Decide if your guild will be centered around a specific craft (e.g., knitting, woodworking) or a wider range of crafts. Your focus determines the members you attract and the resources you need.
    • For example, if you love woodworking, focus your guild on that. If you’re passionate about mixed media, then open your doors to various mediums.

    • Set Goals and Objectives: Determine the aims of your guild. This may involve learning, skill-sharing, collaboration, community projects, or simply creating a supportive atmosphere.
    • Consider whether you want to offer classes, host skill-sharing sessions, or exhibit at local events.

    • Determine the Guild’s Values: Establish the ethical guidelines that will govern the guild’s operation. Examples include mutual respect, inclusivity, and a shared commitment to creative expression.
    • A commitment to using sustainable materials or supporting local craftspeople will help set you apart.

    Recruit Members

    Finding the right people is key to building a thriving guild. Focus on reaching individuals who share your passion. Use multiple channels to get the word out, and be clear about what the guild has to offer. Building a strong membership base starts with a proactive and welcoming approach. Keep in mind the importance of making everyone feel welcome.

    • Spread the Word: Use social media, local community groups, and craft stores to spread the word about your guild. You might post flyers at local craft shops or libraries.
    • Consider creating a website or social media page to highlight the guild’s activities. This is a very valuable step for attracting new members.

    • Hold Introductory Meetings or Workshops: Host events to introduce potential members to your guild and create a fun experience. This gives them a preview.
    • Conduct a workshop to teach beginners a simple craft and showcase the supportive atmosphere of the guild.

    • Define Membership Criteria: Consider whether to establish guidelines for participation, such as skill level or a commitment to regular attendance.
    • Clarify your expectations for member participation to maintain a consistent atmosphere.

    Establish Structure and Guidelines

    Well-defined procedures and guidelines will provide a smooth and supportive environment. This ensures fair practices, manages conflicts effectively, and supports the overall long-term health of your guild. Clarity will also foster transparency.

    • Create a Code of Conduct: Write clear guidelines for member behavior, emphasizing respect, kindness, and collaboration. This protects against conflict.
    • Include details about handling disagreements, resolving issues, and establishing a safe space for everyone.

    • Decide on Communication Methods: Create effective channels of communication. Use email lists, social media groups, or dedicated online forums for sharing information.
    • Establish a regular meeting schedule to discuss project updates. Be transparent about new developments.

    • Define Leadership Roles and Responsibilities: Determine the roles needed to run your guild effectively. Decide who will handle administrative tasks, organize workshops, and coordinate events.
    • Decide whether to elect leaders or work collaboratively. Ensure that you have a smooth process.

    Effective Communication and Collaboration in a Crafting Guild

    Effective communication and collaboration are the backbone of a thriving crafting guild. It doesn’t matter if your guild is online or in person. Creating a strong foundation of communication fosters a sense of belonging. It also creates a dynamic and supportive environment where members can freely share ideas, and work together. These elements are key to success.

    Choosing Communication Methods

    The right communication tools depend on your guild’s size, the type of crafts involved, and the preferences of your members. Select tools that encourage interaction and help you share information seamlessly. The goal is to provide options.

    • Forums and Online Platforms: Dedicated forums or platforms like Discord or dedicated forums are great for sharing resources. They can also provide a place for announcements and discussions.
    • These platforms let you store discussions and materials in organized locations.

    • Email Lists: These are useful for sending regular updates, newsletters, and announcements. It’s an easy way to keep everyone informed and engaged.
    • Use email lists for sharing important announcements.

    • Social Media Groups: Facebook groups, Instagram pages, or other social media channels are great for sharing images. Use them to show off projects and get quick feedback.
    • Social media can create a more interactive environment.

    Techniques for Successful Collaboration

    Successful collaboration depends on clear guidelines, open communication, and the willingness to respect the input of others. Establish a culture where everyone feels heard. This helps ensure that all members are valued and included.

    • Establish Clear Project Guidelines: Make sure project goals, roles, and deadlines are defined before starting. This sets everyone up for success.
    • For example, you could clarify expectations. You might designate who is responsible for specific tasks.

    • Regular Check-ins and Feedback: Plan regular meetings or check-ins to monitor progress. Give each other constructive feedback.
    • This allows members to give each other a boost and provide opportunities for improvement.

    • Embrace Diversity of Ideas and Perspectives: Encourage members to share different perspectives and skills. Appreciate each person’s unique contributions.
    • Try to create a welcoming, open environment.

    Using Technology to Enhance Communication

    Technology can improve communication within a crafting guild. It can create a feeling of connection and provide useful resources. There are many options.

    • Video Conferencing Tools: Use tools like Zoom or Google Meet for meetings, workshops, and virtual crafting sessions. These platforms allow for interaction and help build community.
    • This is especially useful for members who are physically separated.

    • Project Management Tools: Explore project management tools to oversee collaborative projects. They help organize tasks and keep track of deadlines.
    • This helps in managing larger collaborative efforts.

    • Cloud Storage for Resource Sharing: Use cloud services to store files. This will make it easier to share tutorials, patterns, and other resources.
    • This makes the sharing process more efficient.

    Promoting Your Crafting Guild: Attracting New Members

    Promoting your crafting guild effectively requires a mix of online and offline strategies. Reaching out to potential members will encourage your guild to thrive. With a structured approach, you can grow your membership. You’ll gain new perspectives and skills along the way.

    Online Promotion Strategies

    In the digital age, a strong online presence is essential. A great presence will help you connect with crafters everywhere. From social media to crafting blogs, there are many avenues to get the word out. The goal is to maximize your reach and attract interest from potential members.

    • Social Media Marketing: Use platforms like Instagram and Facebook to showcase your projects. Share photos, videos, and updates. Engage with your audience and encourage interaction.
    • Use relevant hashtags to increase visibility. Run contests to build engagement.

    • Website or Blog: Create a website or blog dedicated to your guild. Post about events, showcase member projects, and provide information.
    • A website can create a hub for information. It will help prospective members learn about your guild.

    • Online Forums and Crafting Communities: Participate in relevant online forums and communities to connect with potential members. Offer information.
    • Engage in discussions. Post about your guild’s activities. Build relationships with other crafters.

    Offline Promotion Strategies

    In-person strategies provide personal interactions and can be extremely effective. These techniques can create buzz about your guild and attract new members. They offer a great way to showcase projects and meet crafters face to face.

    • Local Craft Fairs and Events: Set up a booth at local craft fairs and other events. Show off your members’ work, demonstrate crafts, and share information.
    • Participate in workshops. Create excitement by participating in shows and events.

    • Collaborate with Local Businesses: Partner with craft stores, community centers, and libraries. Host workshops or demonstrations and display your members’ creations.
    • This expands your reach and increases community participation.

    • Community Flyers and Posters: Place flyers and posters in community centers and libraries. This will help you engage with residents and find new members.
    • Include details about your guild, contact information, and meeting schedules.

    Attracting and Retaining Members

    Attracting new members is only part of the battle. Keeping members engaged and feeling valued is critical to the long-term success of your crafting guild. Focus on creating an inviting environment that fosters creativity and collaboration.

    • Offer a Variety of Activities: Provide a range of activities. This will cater to different interests and skill levels.
    • Host workshops, project collaborations, and social events.

    • Seek Member Feedback: Ask for feedback on guild activities, meeting schedules, and communication methods. Use this feedback to improve the guild experience.
    • Your members’ input is invaluable.

    • Recognize Member Achievements: Recognize member successes and showcase their projects. This helps members feel valued and encourages involvement.
    • Applaud achievements and celebrate creativity.

    Common Myths Debunked

    Myth 1: Crafting Guilds Are Only for Experienced Crafters

    Many people believe that crafting guilds are only for seasoned artisans. The reality is that most crafting guilds welcome crafters of all skill levels, from beginners to experts. The goal is to provide a supportive and learning-focused environment. Many guilds offer workshops, tutorials, and guidance to help members develop their abilities. The more skilled members are often eager to share their knowledge and mentor newcomers.

    Myth 2: Crafting Guilds Are Expensive to Join

    A widespread misconception is that joining a crafting guild requires a significant financial commitment. While some guilds may charge membership fees to cover expenses, such as materials and venue rentals, many guilds have options. You might find a fee structure that caters to a wide range of budgets. Many guilds offer opportunities for members to contribute in other ways. Examples include volunteering for events or helping with administrative tasks.

    Myth 3: Crafting Guilds Are Too Time-Consuming

    Many believe that participating in a crafting guild requires a huge time commitment. Guilds provide several participation levels to suit the availability of each member. You can choose to be fully involved or simply participate in occasional meetings. Many guilds offer a range of activities. Examples include online forums and workshops to accommodate various schedules. You can participate in collaborative projects at your own pace. There are many ways to fit the guild into your lifestyle.

    Myth 4: Crafting Guilds Are Only for People Who Want to Sell Their Crafts

    Some people assume that crafting guilds are primarily for those who want to sell their work. While some members may seek to monetize their craft, the core purpose of a crafting guild is often the shared love of creating. Members come together for the joy of crafting, learning new skills, and developing a sense of community. Not all members are interested in selling their creations. Many are happy to simply enjoy the process of creating and sharing their passions.

    Myth 5: Crafting Guilds Are Only for Specific Types of Crafts

    It’s a common belief that crafting guilds focus on a single craft or niche. The reality is that there is a wide range of guilds. These cover diverse crafting interests. Guilds focused on a specific craft, such as quilting or woodworking. Others are more general and include various creative disciplines. The diversity reflects the wide range of creative interests and skill levels in the crafting world. You can find a group based on your specific craft or even explore several creative interests.

    Frequently Asked Questions

    Question: How do I find a crafting guild near me?

    Answer: You can find crafting guilds through local craft stores, community centers, libraries, and online searches. Many guilds have a social media presence or websites that will connect you.

    Question: What if I don’t know how to craft?

    Answer: Many guilds welcome beginners and provide learning opportunities through workshops, tutorials, and peer-to-peer instruction. Your desire to learn is more important than your existing skill level.

    Question: Can I join multiple crafting guilds?

    Answer: Yes, you can join multiple guilds if you have the time and interest. Participating in various guilds can expose you to a diverse range of crafts, skills, and perspectives.

    Question: How do I handle conflicts within a crafting guild?

    Answer: Most guilds have codes of conduct or dispute resolution processes. Communicate concerns respectfully and seek solutions collaboratively. It is helpful to involve a leader or facilitator.

    Question: What are the main benefits of joining a crafting guild?

    Answer: Benefits include skill development, community support, creative inspiration, networking opportunities, and access to tools and resources. A crafting guild enhances your creative journey.

    Final Thoughts

    A crafting guild offers something special for crafters of all backgrounds and skill levels. These communities offer a unique blend of learning, sharing, and creative collaboration. Remember to define your goals. Communicate effectively. Build a welcoming atmosphere. By understanding what a crafting guild is and the numerous benefits it offers, you can explore this avenue. You can use this guide to navigate, find, or build a thriving crafting community. It’s more than just a place to practice a hobby. It’s a place to form relationships and broaden your creative horizons. You have the power to create a positive environment. You have the opportunity to make connections. Are you ready to join a guild or start your own?

  • Crafting for Good North Chili NY: A Community’s Creative Spirit

    Crafting for Good North Chili NY: A Community’s Creative Spirit

    Remember that old wooden bench in your grandma’s backyard? It had character, right? That feeling of history, of something made with care. that’s the heart of crafting for good north chili ny. Imagine a community where creativity blooms, where handmade treasures brighten lives, and where everyone feels a sense of belonging. In this guide, we’ll explore the joys of crafting and how it brings people together. You’ll learn how to participate, find resources, and maybe even start your own creative endeavor. This article will help you become part of the artistic tapestry of North Chili, improving your knowledge and appreciation of local projects.

    Key Takeaways

    • Learn about the vibrant crafting scene in North Chili, New York.
    • Discover how local crafting initiatives positively impact the community.
    • Find resources and opportunities for crafters of all skill levels.
    • Explore the benefits of crafting for personal well-being and social connection.
    • Gain insights into successful crafting projects and events in the area.
    • Understand how to support and contribute to the local crafting community.

    The Heart of Crafting for Good North Chili NY

    Crafting in North Chili, NY, isn’t just about creating beautiful objects; it’s about building connections, fostering creativity, and making a positive impact. Think about the joy of giving a handcrafted gift, knowing the care and effort that went into it. That sentiment is the core of what makes crafting for good so special. It’s about bringing people together to share their skills, learn from each other, and contribute to the well-being of the community. From knitting circles to woodworking workshops, there is always an opportunity to create and give back in North Chili. It celebrates the talent and generosity found within this vibrant area.

    What Makes North Chili’s Crafting Unique?

    North Chili’s crafting scene stands out because of its supportive atmosphere and focus on community. Unlike some areas, where crafting can feel competitive, North Chili embraces collaboration. Whether you’re a seasoned artisan or a beginner, you’ll find a welcoming environment. The local events and groups encourage people to share their creations and learn new skills. This supportive environment extends beyond the crafting itself, often leading to lasting friendships and a stronger sense of belonging. The accessibility of classes, workshops, and communal crafting spaces makes it easy for everyone to participate, fostering a culture where creativity thrives. The town’s size contributes to a close-knit feel, where people genuinely support each other’s artistic endeavors.

    • Emphasis on community involvement and charitable projects.
    • Diverse range of crafting disciplines, from traditional to contemporary.
    • Availability of local workshops, classes, and shared workspaces.
    • Supportive network of experienced crafters and mentors.
    • Strong ties between crafting and local businesses, markets, and events.

    Did you know that community crafting programs can significantly improve mental well-being? A study by the Craft Yarn Council found that over 80% of knitters reported feeling calmer and more relaxed while crafting. In North Chili, this benefit is amplified by the social aspect. People come together, share experiences, and support each other, further enhancing the positive effects.

    Finding Your Place in the Crafting Community

    Whether you’re a seasoned crafter or just starting out, North Chili welcomes everyone with open arms. Begin by exploring local craft groups and organizations. Many have open events. Consider attending a workshop to try a new craft or refresh your skills. Libraries and community centers often offer free or low-cost crafting classes. Join online forums and social media groups dedicated to crafting in North Chili; this is a great way to stay up-to-date on events. Don’t hesitate to reach out to experienced crafters; the community is always happy to share their knowledge and passion. Find opportunities to volunteer your time and skills. This could involve helping at a craft fair, teaching a class, or contributing to a community project. The beauty of the crafting community in North Chili is its inclusivity; there’s a place for everyone to learn, create, and connect.

    • Research local crafting groups, clubs, and organizations.
    • Check community centers, libraries, and schools for classes.
    • Use social media and online forums to connect with fellow crafters.
    • Look for opportunities to volunteer or participate in events.
    • Attend local craft fairs, markets, and exhibitions.

    The rise of crafting has brought about a need for specialized spaces. More than 45% of crafters seek collaborative workspaces. North Chili offers a variety of venues to meet this need. Local organizations are adapting to create more inclusive crafting experiences. This includes providing adaptive tools and creating environments that accommodate various needs.

    The Benefits of Crafting for Good

    Crafting offers far more than just a creative outlet; it offers mental and physical benefits. It can reduce stress, enhance focus, and improve overall well-being. Plus, when you craft for good, you’re not just helping yourself, but also contributing to something greater. The sense of accomplishment that comes from finishing a project, the joy of sharing your creations, and the satisfaction of knowing you’ve made a difference are all incredibly rewarding aspects of crafting. Think about the impact of handmade items donated to local charities or the joy of a hand-knitted blanket given to someone in need. These acts of kindness have a ripple effect, strengthening community bonds and creating a more compassionate world.

    Personal Well-Being Through Creative Expression

    Crafting can be a powerful tool for stress reduction and mindfulness. The repetitive motions of knitting, crocheting, or painting can be soothing, helping to calm the mind and reduce anxiety. The focus required in crafting helps people block out worries and distractions, allowing them to be fully present in the moment. Crafting provides a sense of accomplishment and self-esteem as people create something tangible. Seeing a finished project can boost confidence and encourage them to try new things. Moreover, crafting encourages lifelong learning. People often explore new techniques, materials, and designs, keeping their minds sharp and engaged. This continuous learning can enhance overall mental agility and creativity.

    • Reduced stress and anxiety through repetitive motions.
    • Enhanced focus and mindfulness during the creative process.
    • Increased sense of accomplishment and self-esteem.
    • Opportunity for lifelong learning and skill development.
    • Improved cognitive function and mental well-being.

    Studies have shown that regular crafting can have a significant positive impact on mental health. For instance, a study published in the Journal of Public Mental Health found that crafting can reduce symptoms of depression and anxiety. Crafting’s ability to promote relaxation and focus supports this statistic.

    Community Impact and Charitable Initiatives

    Crafting is a great way to give back and help others. Consider the impact of handmade gifts to those in need. Many crafting groups dedicate their time and talent to creating items for local charities, hospitals, and shelters. These gifts provide comfort, warmth, and a sense of care to those who are struggling. Crafting events also raise money and awareness for important causes. Craft fairs, workshops, and auctions provide a way for crafters to showcase their creations. Many events have raised funds for local charities. Crafting brings people together, fostering a stronger sense of community. Volunteering on crafting projects creates opportunities for people to connect, share their skills, and support each other. It strengthens bonds and builds a more compassionate and connected community.

    • Creating handmade items for local charities and organizations.
    • Organizing crafting events to raise money for good causes.
    • Supporting local businesses and artisans.
    • Sharing crafting skills and knowledge with others.
    • Building connections and fostering a sense of community.

    Crafting can be an act of social responsibility. In recent years, there has been a significant increase in the use of crafting for social good, with over 60% of crafters participating in charitable projects. This statistic underscores the power of crafting.

    Getting Started with Crafting for Good North Chili NY

    Ready to try crafting for good? It’s easier than you might think! Start by exploring different crafts and finding something that interests you. Think about what you enjoy doing, whether it’s working with yarn, fabric, wood, or paper. Research local crafting groups and organizations to connect with fellow crafters and discover opportunities to volunteer or participate in events. Start small, by trying a simple project or attending a beginner’s workshop. Don’t be afraid to experiment, make mistakes, and learn from them. The most important thing is to enjoy the process and have fun. As you gain confidence and skill, you can begin to tackle more ambitious projects and share your creations with others. Start by finding a welcoming group where you can begin your crafting journey.

    Beginner-Friendly Crafting Projects

    Starting with simple projects builds confidence and allows you to practice essential skills. For beginners, knitting or crocheting simple scarves or dishcloths are excellent choices. They are easy to learn, requiring only basic stitches. Sewing small items like tote bags or pillowcases can be another idea. These projects offer opportunities to learn basic sewing techniques. Making handmade cards or paper crafts is another easy way to get started. These crafts require readily available materials like paper, glue, and markers. These projects are accessible, require minimal supplies, and provide immediate gratification. Consider creating handmade gifts for friends and family. This will allow you to share your creations and make a positive impact.

    • Knitting or crocheting scarves or dishcloths.
    • Sewing simple items like tote bags or pillowcases.
    • Making handmade cards or paper crafts.
    • Creating personalized gifts for friends and family.
    • Participating in a community crafting project.

    Easy-to-complete projects are crucial for beginner crafters. According to recent surveys, about 70% of people who try crafting abandon it early because the projects are too difficult. This illustrates the importance of starting with straightforward tasks. This encourages you to practice and build skills.

    Finding Inspiration and Resources in North Chili

    North Chili offers a wealth of resources to fuel your creativity. Visit the local library. Many libraries offer crafting classes, workshops, and access to books, magazines, and online resources. Explore local craft stores and art supply shops. These shops carry a wide variety of materials, tools, and supplies. They often host classes, demonstrations, and expert advice. Check for local community centers. These centers often host crafting programs and offer space for workshops and events. Attend local craft fairs and markets. These events showcase the work of local artisans and provide inspiration and opportunities to purchase supplies. Join online communities and social media groups. They provide support, inspiration, and opportunities to connect with fellow crafters. Seek guidance from experienced crafters and mentors who can share their knowledge and skills.

    • Visiting local libraries for classes and resources.
    • Exploring local craft stores and art supply shops.
    • Checking for programs at community centers.
    • Attending local craft fairs and markets.
    • Joining online crafting communities.

    The accessibility of resources is essential for crafting, as it directly affects participation rates. Around 85% of crafters say that easy access to supplies and information increases their creative output. These opportunities are vital for fostering the crafting community.

    Common Myths Debunked

    Myth 1: Crafting is Only for Experienced People

    Many believe that crafting requires advanced skills and years of experience. The reality is that crafting is accessible to everyone, regardless of their skill level. There are countless beginner-friendly projects and resources. Workshops and classes teach the basics and help people develop their skills. The local community in North Chili offers numerous opportunities for new crafters to get started. Many groups welcome beginners and offer a supportive environment. The key is to start with simple projects and gradually work your way up. Embracing a growth mindset is important; learning from mistakes and enjoying the process.

    Myth 2: Crafting is an Expensive Hobby

    It’s a common misconception that crafting is an expensive hobby. However, there are ways to craft without breaking the bank. There are many affordable materials. You can find inexpensive supplies at thrift stores, discount stores, and online retailers. Free resources such as tutorials, patterns, and inspiration are available online. Many local libraries and community centers offer free or low-cost workshops and classes. In North Chili, groups often share materials and collaborate on projects. You can start with simple projects that require minimal supplies. There are many low-cost ways to make things.

    Myth 3: Crafting Takes Too Much Time

    Some people believe that crafting requires a significant time commitment. Crafting can be easily integrated into a busy schedule. Start with small, manageable projects that can be completed in short periods. Crafting can be a relaxing activity, allowing you to take breaks from the day. You can craft in short bursts, such as during your lunch break or while watching television. Look for quick and easy projects. Many crafting projects can be completed in a few hours or less. Crafting offers an opportunity to practice mindfulness and de-stress. Taking time for crafting can enhance productivity and overall well-being. Crafting provides a great method for relaxation.

    Myth 4: You Need a Dedicated Craft Room

    Many people assume that you need a craft room to pursue crafting. While a dedicated space is nice, it’s not essential to get started. Crafting can be done in a variety of spaces. You can craft on a dining room table, a spare corner of a room, or even in your lap. A well-organized storage system can maximize your crafting space. Consider using storage containers, shelves, and drawers to keep your supplies tidy. You can set up and take down your crafting area as needed. This flexibility allows you to craft at your convenience. Make sure your space is well-lit and comfortable. A comfortable and organized space can make crafting more enjoyable.

    Myth 5: Crafting is Not a Practical Skill

    Some people view crafting as a purely recreational activity. The truth is that crafting is a practical skill with many real-world applications. Crafting can be used to make gifts, decorate homes, and personalize items. It also provides opportunities for personal expression and creativity. Crafting fosters problem-solving skills and creativity. These skills translate into other areas of your life. Crafting can be a source of income. Consider selling your creations at craft fairs or online. Crafting fosters resourcefulness and adaptability. It allows you to create useful and beautiful things.

    Frequently Asked Questions

    Question: Where can I find local crafting events and workshops in North Chili?

    Answer: Check local community centers, libraries, and the town’s website for listings of events and workshops. Also, follow local crafting groups on social media for updates.

    Question: What types of crafts are popular in North Chili?

    Answer: A variety of crafts are popular, including knitting, crocheting, painting, woodworking, and jewelry making. There are classes in various art forms.

    Question: How do I join a crafting group in North Chili?

    Answer: Search online for local crafting groups or visit the community center or library to inquire about groups. Many groups welcome new members.

    Question: Are there opportunities to sell my crafts in North Chili?

    Answer: Yes, there are opportunities to sell your crafts at local craft fairs, markets, and online through platforms.

    Question: What are the benefits of crafting for mental health?

    Answer: Crafting reduces stress, enhances focus, boosts self-esteem, and provides a sense of accomplishment.

    Final Thoughts

    Exploring crafting for good north chili ny reveals a community spirit built on creativity and generosity. We’ve seen how crafting brings people together, providing joy, mental well-being, and a way to contribute to something greater. The skills and the sense of connection are important. Whether you’re a seasoned artisan or a beginner, North Chili offers numerous opportunities to participate, learn, and grow. Embrace the chance to explore a new craft, join a local group, or simply share your creations with others. The potential for creative expression and community impact is endless. By embracing the spirit of crafting, you can cultivate your creativity while contributing to the beauty and connection of North Chili. Take the first step; discover the joy of crafting and the positive impact it can have on your life and the community around you.

  • Crafting Elden Ring: A Guide to Building Powerful Items

    Crafting Elden Ring: A Guide to Building Powerful Items

    Ever feel lost in a sprawling fantasy epic, wishing you knew how to gear up properly? Perhaps you’ve spent hours gathering resources, only to discover you’re still not sure how to get the best items. It can be a frustrating experience, like starting a grand adventure without a map. This guide will provide you with a comprehensive look at crafting Elden Ring, focusing on the mechanics and strategies needed to create powerful equipment. You’ll gain valuable knowledge that transforms your gameplay. Learn how to transform raw materials into weapons, tools, and consumables. That will improve your skills to beat the bosses. Get ready to enhance your character and conquer the Lands Between.

    Key Takeaways

    • Learn the fundamental components of crafting Elden Ring, including necessary resources and tools.
    • Discover how to gather materials efficiently and optimize your farming methods.
    • Explore various recipes for creating useful items like weapons, armor, and consumables.
    • Gain an advantage by understanding the significance of crafting tools.
    • Maximize your character’s potential by using crafting to enhance your build.
    • Master strategies for gathering resources in different environments.

    Fundamental Components of Crafting Elden Ring

    Embarking on the adventure of crafting Elden Ring is like learning a new language. You have to first understand the alphabet. In this instance, the alphabet is made up of key components. This is what you need to create useful items and build your character. These elements are not just essential; they form the very foundation upon which your success in the Lands Between is built. Acquiring these components is the initial step toward becoming a proficient craftsman.

    Necessary Resources for Item Creation

    Every crafted item begins with gathering the right resources. These resources are the raw materials. They vary widely, from common plants like flowers and herbs to more rare items like animal parts. Knowing where to find these materials is key. Some items are easily found in specific areas, while others require exploration. Certain enemies might drop specific resources as well. The quantity you gather will decide the number of items you can create. Resource management is a core element of your character’s development.

    • Plants and Herbs: These are typically found throughout the Lands Between. They are vital for creating potions and other consumables. Finding these is a must for survival.
    • For example, Grave Glovewort is a crafting material found in areas with cemeteries and is used to create weapon upgrades.

    • Animal Parts: Skins, bones, and other parts from animals are valuable resources. They are crucial for creating certain equipment upgrades.
    • Hunting animals is a rewarding way to obtain these essential components. Finding the right animals will change the flow of your game.

    • Minerals and Ores: Mining is required to gather specific ores used for weapon upgrades. These minerals can be located in areas with caves or mines.
    • Mining often means having to take on challenges, but it’s essential for getting certain components. You need to keep your stamina up for combat.

    • Rare Items: Some items are not easily found and are extremely rare. These may be dropped by powerful enemies or found in specific locations.
    • Rare items allow you to craft very powerful weapons and upgrades. Finding these is essential for building a strong character.

    Essential Crafting Tools

    Crafting tools are the gear you must have to create items. They serve as your personal workbenches in the Lands Between. Having the right tools makes the process smoother and faster. These tools determine the variety of items you can create. Not all tools are available at the beginning. Certain tools must be found or purchased from merchants. Each tool unlocks a specific set of crafting recipes. You will improve your efficiency. You will need to upgrade to more advanced tools.

    • Crafting Kit: This is your basic crafting tool. You will be able to create many beginner items. It is found early in the game.
    • The crafting kit allows you to start your journey. It provides access to recipes for essential items.

    • Whetblades: Whetblades are essential for weapon customization. They unlock the ability to apply Ashes of War to your weapons.
    • Finding these will change how you play, giving you more build options. They are useful for adapting your strategy.

    • Cookbooks: Cookbooks are essentially recipe books. They unlock new recipes for crafting items. They are often found throughout the Lands Between.
    • Cookbooks are valuable assets to have for gaining new recipes. You will be able to create more items and enhance your character.

    • Upgrade Materials: While not tools, materials like Smithing Stones are essential for improving your equipment. These boost the power of your weapons.
    • Upgrade materials allow you to strengthen your weapons and armor. Improving your gear is key to success.

    Location of Crafting Materials

    Knowing where to find crafting materials is essential to crafting Elden Ring. Finding materials is not just about exploring. It’s about recognizing patterns and knowing where each material is found. Some areas are known to have plants. Others are filled with specific creatures. Understanding these patterns allows you to optimize your gathering routes. Resource management also involves knowing the best spots for each material. Being aware of the resources in an area will improve your gameplay.

    • Limgrave: This starting area has many basic crafting materials. It’s an excellent place to start learning. Here, you’ll find plants and low-level animal parts.
    • Limgrave is ideal for players beginning to learn the crafting system. The region is designed to introduce the basics without overwhelming the player.

    • Liurnia of the Lakes: This area is more dangerous but also has more advanced materials. It’s a great place to find crafting plants.
    • The variety of materials here offers opportunities for experimenting with different builds. You will encounter new enemies, too.

    • Caelid: Caelid is a challenging area, but it offers important resources. You will find higher-level animal parts and minerals.
    • The high-level materials and enemies allow for more powerful equipment. This is where you can develop advanced crafting skills.

    • Underground Areas: The underground locations are good sources for specific materials. These include ore and other valuable resources.
    • These areas are often filled with secrets, allowing you to discover new crafting possibilities. You need to be prepared for difficult challenges.

    Crafting Recipes and Item Creation

    Understanding the recipes and crafting process is vital for the crafting Elden Ring experience. Recipes are the backbone of item creation. Each recipe requires specific components and provides you with particular results. Mastering the recipes means you will master your game. Being aware of the variety of recipes helps optimize your approach. Experimentation with recipes allows for deeper insights into the crafting system.

    Consumable Item Recipes

    Consumables are items you can use to give yourself an advantage. The most common consumable is the health potion. Others provide buffs and special effects. Knowing which consumables to use at the right time can change the flow of a battle. These are a key part of your survival.

    • Potions: The Crimson Tear flasks heal your health. You can find them and upgrade them throughout the game.
    • Having a flask always ready can save your life. You can also customize your flasks for specific advantages.

    • Boluses: These items cure status effects, such as poison or scarlet rot. They are essential to surviving in dangerous areas.
    • Boluses are a must-have for areas filled with traps and dangerous environmental effects. Knowing the effects of the enemies is key to crafting the right boluses.

    • Buffs: You can create items that provide temporary boosts to your stats. These are often used before difficult fights.
    • Buffs can give you the edge you need to defeat powerful enemies. Knowing what stat you need to improve is critical.

    Weapon and Armor Enhancement

    Crafting is more than just making consumables. You can also craft and enhance weapons and armor. This is where you truly develop your character. The upgrades you make have lasting effects on your battles. The strength of your equipment directly impacts your success.

    • Upgrading Weapons: Weapon upgrades require smithing stones and other materials. These will increase your weapon’s damage and abilities.
    • Weapon upgrades directly influence the outcome of battles. Prioritize the weapons you use the most for greater efficiency.

    • Applying Ashes of War: Whetblades allow you to add Ashes of War to your weapons. These skills provide new attacks.
    • Ashes of War provide a wide range of strategic options. This allows for diverse combat styles.

    • Crafting Armor Enhancements: You can upgrade your armor to increase your defense. This will allow you to take more hits.
    • Enhancements can be a game changer for armor. You should balance armor weight and defense for optimal results.

    Recipe Optimization and Experimentation

    You can optimize your crafting for better results by experimenting. Don’t be afraid to try different combinations of materials. Trial and error helps you discover new items. Try different approaches. Pay attention to how the ingredients work together. Finding the perfect combination is part of the fun.

    • Experiment with Ingredients: Try substituting different ingredients to see what results you get. You may accidentally find a great item.
    • Experimenting with ingredients is where you can find great items. This adds a unique depth to your playthrough.

    • Analyze Item Effects: Know what items do and how they affect your character. This can change how you play.
    • Understanding the effects of items is important. You can plan your approach and strategy.

    • Consult Online Resources: Use guides and resources to see what recipes other players have discovered. Get inspiration and ideas.
    • Guides and online resources can help you understand the crafting system. This helps you get creative.

    Gathering Resources Efficiently

    The secret of effective crafting Elden Ring is efficiently gathering resources. Knowing where to get materials is just the start. You need to gather resources quickly and repeat the process. This takes a balanced approach to exploration and preparation. You will learn to prioritize what resources to collect. You can also optimize your farming methods.

    Optimizing Farming Routes

    Farming routes will allow you to collect resources in a structured way. This maximizes your gathering time. This involves finding the best locations. It also involves learning the fastest routes. Try to set a clear path through each area. This will help you collect the maximum amount of resources.

    • Identify Material Hotspots: Find areas where specific materials are found most often. These are the locations where you will spend the most time.
    • Material hotspots are essential locations for gathering resources. These locations are the key to the farming process.

    • Create Efficient Routes: Plan routes that hit multiple resource spots in one pass. This will minimize your travel time.
    • Efficient routes will let you collect many resources, boosting your efficiency. You can focus on the gameplay.

    • Track Resource Respawn Times: Keep track of when materials respawn. Plan your farming around the game’s clock.
    • Knowing respawn times helps you know when to return. This maximizes your farming efforts.

    Enemy Drops and Material Acquisition

    Enemies will drop resources. Certain enemies will give you specific components. Recognizing these drops helps create a list of enemies you should defeat. Farming enemies for resources often includes specific actions. Pay attention to the game mechanics. It can improve your efficiency.

    • Farm Specific Enemies: Identify enemies with high drop rates for the materials you need. Focus on defeating these.
    • Farming these specific enemies is key to material acquisition. You need to focus on collecting the items.

    • Use Item Discovery Boosts: Equip items that increase item discovery. These improve your chances of getting rare drops.
    • These boosts are extremely valuable for obtaining rare resources. It will help you in your crafting process.

    • Understand Enemy Behaviors: Get to know how enemies move and attack. This will make farming much easier.
    • This awareness makes the process faster. You can plan how to win.

    Environmental Exploitation in Resource Gathering

    The environment offers many opportunities for gathering. You can gather resources in different settings. Understanding each environment is important. Environmental factors can influence the availability of resources. They can also affect how you gather those resources. Exploiting the environment will improve your efficiency.

    • Explore Diverse Environments: Explore the different areas to find various materials. Every region offers unique resources.
    • Diversity will add depth to your crafting. It also allows you to make different items.

    • Use the Environment to Your Advantage: You can use terrain and weather conditions. These will improve your farming methods.
    • Utilizing the environment is key to efficient gathering. You can improve your output and build your character.

    • Adapt to Changing Conditions: You must be ready to change your approach. Be flexible with your gathering plans.
    • Adaptability is key in resource gathering. It will improve your character and help you survive.

    Advanced Strategies for Crafting Elden Ring

    Moving beyond basic crafting requires advanced approaches. This is where you can truly master the system. This involves finding rare materials and perfecting your approach. This includes understanding advanced crafting techniques. This will allow you to develop a complete understanding of how to make great items.

    Mastering Rare Material Acquisition

    Rare materials are difficult to find, but essential. They are used to create unique and powerful items. The search for these components is a challenge. Many players fail in this task. Getting these materials takes dedication and patience. This is where the truly skilled craftsmen rise.

    • Targeting Specific Bosses: Defeating certain bosses will give you rare materials. Know which bosses to defeat.
    • Specific bosses provide rare materials. Focus on defeating these bosses to get these resources.

    • Exploring Secret Areas: Explore hidden locations for rare materials. Hidden areas are known to have these components.
    • Hidden areas offer greater rewards. You should always be open to exploration.

    • Trading with Merchants: Certain merchants sell rare materials. Consider trading with them for the resources you need.
    • You can exchange your extra items for rare materials. Merchants can be valuable allies.

    Exploiting Crafting Mechanics for Efficiency

    Understanding crafting mechanics helps you become efficient. It helps you get the most out of your materials. Some mechanics help you craft more items. Learning these will help you master the game. You should always aim to optimize your approach.

    • Using Multiple Crafting Stations: You can use multiple stations to create items. Use different crafting stations for different things.
    • Different stations will help you multitask your approach. This boosts your efficiency.

    • Prioritizing Crafting Tasks: Focus on the items that are most important. This way you’ll improve your gameplay.
    • Know the recipes you’ll use and the items you need. You’ll focus on your priorities.

    • Experimenting with Buffs: Use buffs for improved crafting efficiency. Buffs can boost your abilities.
    • Knowing what to use will improve the effectiveness of your gear. Planning is key.

    Building a Crafting-Focused Character

    You can create a character designed for crafting. This involves choosing a class, stats, and skills. Building your character requires an understanding of the game’s mechanics. You can change your character’s stats. This allows for specialized crafting.

    • Choosing the Right Class: Select a class that is suitable for your crafting style. Different classes will have advantages.
    • Choose a class that fits your gameplay. This will boost the skills of your character.

    • Prioritizing Stats for Crafting: Allocate stats to improve your crafting abilities. Maximize your effectiveness.
    • Stats will allow you to improve your stats for crafting. This will make your gameplay easier.

    • Using Skills to Enhance Crafting: Certain skills give you an advantage. Select skills that boost your efficiency.
    • Skills will change the way you play. This will also give you an advantage in the game.

    Common Myths Debunked

    Myth 1: Crafting is Only for Beginners.

    The reality is that crafting is a complex system. It provides benefits for players of all levels. While beginners may use basic recipes, advanced players depend on crafting for upgrades. Crafting also gives you a wide range of options. Crafting Elden Ring isn’t just a starting mechanic; it is a core feature that enhances and broadens your gaming experience throughout your adventure in the Lands Between.

    Myth 2: It is too time-consuming.

    Many people think that crafting is time-consuming. They are wrong. It is possible to streamline the process. The time spent is often less than the benefits you will get. Planning ahead and optimizing your farming routes significantly reduces the time. It is a worthwhile activity that yields great rewards. The time spent is an investment, not a waste.

    Myth 3: High-level gear cannot be crafted.

    The assumption that all high-level gear can only be found is wrong. Crafting plays a key role in obtaining advanced equipment. Crafting allows you to create unique weapons. You can also craft upgrade materials. Some of the most potent gear in the game is made through crafting. If you want a top-tier character, then crafting is a must.

    Myth 4: Crafting Recipes Are Simple.

    While some basic recipes are easy, many are not. As you progress, the recipes become more complex. You have to combine multiple materials. This can be time-consuming. Researching and experimenting is a must. The complexity allows for a lot of customization. Mastering complex recipes is a mark of skill.

    Myth 5: Crafting is Random.

    It might seem that crafting is random, but that is not correct. Recipes are determined by a set of rules. The materials determine the output. There are no surprise results. You can repeat them exactly. By following recipes precisely, you can guarantee a specific item. This allows you to plan.

    Frequently Asked Questions

    Question: How do I unlock new recipes?

    Answer: You unlock new recipes by finding cookbooks. These cookbooks are found in various locations.

    Question: Can I craft weapons?

    Answer: Yes, you can craft a wide variety of weapons. They also improve your character.

    Question: What is the crafting kit?

    Answer: It’s your basic tool. It allows you to create basic items early in the game.

    Question: How do I improve my weapon’s power?

    Answer: Use smithing stones. These will improve the power of your weapons.

    Question: What’s an “Ashes of War”?

    Answer: These are skills for your weapons. You can find them and apply them to enhance your play.

    Final Thoughts

    Crafting Elden Ring is not just a side activity; it is an essential part of the game. You can improve your experience by developing your crafting skills. It’s about more than just gathering items. It’s about exploration, strategy, and adaptation. You can transform raw materials into powerful equipment. You will improve your character. Now that you have this knowledge, you can begin crafting today. Start by exploring different regions and gathering resources. Experiment with different recipes and build your character. The Lands Between await. The challenges are difficult. But with crafting, you are ready to be a powerful adventurer.

  • Crafting Definition: A Step-by-Step Guide for Clear Communication

    Crafting Definition: A Step-by-Step Guide for Clear Communication

    Imagine you’re trying to explain a complex video game to your friend. You start with the basics, but quickly get lost in jargon, leaving them confused. Sound familiar? We’ve all been there. The ability to articulate something with clarity is a valuable skill – and that’s where crafting definition becomes essential. This post is your guide to mastering this skill, helping you express your ideas clearly, concisely, and effectively. You’ll learn how to break down complex concepts, and build a solid foundation for better communication. By the end, you’ll be able to create definitions that stick, improve your conversations, and write with more confidence.

    Key Takeaways

    • Learn the core components of a strong definition.
    • Understand how to use different definition types for various scenarios.
    • Discover techniques to clarify complex terms and concepts.
    • Explore examples of effective definitions across different fields.
    • Improve your ability to communicate clearly and concisely.
    • Gain the tools to avoid common definition pitfalls.

    The Foundation of Crafting Definition

    Defining something might seem simple, but a good definition goes beyond just stating what something is. It provides a complete picture, ensuring that anyone reading or listening can accurately grasp the meaning. It acts as a bridge, connecting the unknown with the known. When someone asks you, “What is that?” your response creates that bridge. The fundamental elements are key to a definition. Let’s explore these elements and see how to create useful definitions.

    Core Elements of a Definition

    • Term or Concept: The subject you are defining; the word or phrase. Think of it as the thing you want to clarify. You must first identify this. It’s the central idea around which your definition is built. In this guide, it is crafting definition. For example, if you were to define “cat,” that would be the term.

      A clear term or concept is essential for any definition. Before you start, be sure the term or concept is well-defined itself. Otherwise, the clarity will be lost, and the definition will not be effective. The term should be the star of the show, presented clearly and unambiguously.

    • Category/Class: The broad group or class to which the term belongs. This sets the stage, providing a general understanding. For instance, if the term is “bicycle,” the category might be “a mode of transportation” or “a vehicle.”

      Identifying the category is like giving the term its family. It helps the reader understand the type of thing you are defining. This placement helps the audience organize and understand how the new term fits in with what they already know. Category can be simple, or it can be a series of nested categories. The more detailed your category, the greater the clarity.

    • Distinguishing Features: The specific characteristics that set the term apart from others within its category. These details are what truly separate the subject from everything else. Using “bicycle” again, the distinguishing features include “two wheels,” “pedals,” and “a frame.”

      This is where the magic happens. The distinguishing features are the essence of your definition. What makes this thing unique? Does it move a certain way? Is it made from specific materials? Does it have a particular purpose? Without distinguishing features, your definition will be vague and unhelpful. The more well-defined the features, the clearer your definition will be.

    Different Types of Definitions

    Not all definitions are created equal. The most effective type of definition depends on the context and purpose. A dictionary definition, a persuasive definition, and a definition used to persuade are all different. By knowing the different types, you can choose the best approach for different situations. Learning the styles of definition helps you reach your audience more effectively.

    Dictionary Definitions

    • Standard and Concise: These are the go-to definitions, found in dictionaries. They provide a quick, general understanding of a term. They focus on the core meaning, and they’re useful for looking up unfamiliar words. For instance, a dictionary might define “computer” as “an electronic device for storing and processing data.”

      Dictionary definitions are perfect when you need a quick, no-frills explanation. They’re great for understanding the basic meaning of a word, and they provide a starting point for more exploration. The definition should be clear, and should contain no jargon. The goal is to provide a solid base level understanding that is easily accessible. They’re often the first place to start when learning something new.

    • Focus on Core Meaning: Dictionary definitions usually zero in on the essential aspects of a word, making it easy to grasp the core meaning. They typically avoid lengthy explanations and focus on accuracy. For instance, the dictionary definition of “happiness” might be “a state of well-being and contentment.”

      Dictionary definitions usually provide a general understanding of a word or phrase. Because these definitions are universal, they are useful when you want to make sure your audience is all on the same page. These definitions are useful because of their widespread use. When starting your definition, using a dictionary definition can provide a solid foundation.

    Extended Definitions

    • More in-Depth: Extended definitions go beyond the basics, offering a more complete exploration of a concept. They’re used when a simple explanation isn’t enough. They can include examples, historical background, and specific uses, providing a more detailed picture.

      Extended definitions are like a deep dive. They are most helpful when you are working with a complex term or concept. They’re also used to explain something new to a specific audience. These types of definitions often use examples, so the audience has a clear image of the information. They help build a deeper understanding.

    • Useful in Specific Fields: Extended definitions are particularly useful in technical fields. They are also useful when the subject has layers of meaning. They are very useful when clarity is essential.

      For example, if you are working with the term “algorithm” in computer science, a basic dictionary definition might not cut it. An extended definition would explore the algorithm’s purpose, different types, and how they function. Extended definitions provide a more complete perspective, helping your audience to learn something new in detail.

    Persuasive Definitions

    • Influence the Audience: These definitions are crafted to influence an audience’s perspective on a topic. They often include subjective language. Persuasive definitions focus on emotions and values to sway the audience to a specific point of view. For instance, a persuasive definition of “freedom” might emphasize the ability to make one’s own choices, highlighting the importance of personal autonomy.

      Persuasive definitions are like an art form. The goal is not just to define, but to connect with the audience’s feelings. The idea is to make the audience feel the importance of the concept. These definitions typically incorporate strong emotional language. They make a powerful tool to convince someone.

    • Emphasize Specific Aspects: They selectively highlight certain aspects of a term to support a particular argument or viewpoint. They tend to be more subjective and less neutral than other definition types.

      For example, defining “capitalism” in a persuasive way could focus on the benefits for the wealthy, or the opportunities for innovation, depending on the argument. The goal is to make the audience see the subject in a way that aligns with the desired outcome. Persuasive definitions are often used in advertising. They are all about framing the subject in a particular light.

    Methods and Techniques for Crafting Definition

    Knowing the elements and types of definitions is a start. But to truly excel at crafting definition, you need to master techniques that clarify and improve clarity. These methods help break down complex topics into easily understandable terms, ensuring your audience is never lost.

    Using Examples and Illustrations

    • Making the Abstract Concrete: Examples breathe life into definitions. They help people relate to the abstract. Instead of just stating that a “protagonist” is the main character in a story, give examples like “Harry Potter” or “Luke Skywalker.”

      When you use examples, you transform a potentially confusing concept into something tangible. They offer the audience a frame of reference that is much easier to grasp. Examples make complex ideas easier to imagine and understand. By linking ideas to real-life situations, you increase engagement and understanding.

    • Illustrative Examples: Illustrations, like diagrams or visuals, can also explain ideas. Use illustrations to demonstrate how something works, or clarify its structure.

      Visual elements are powerful. Illustrations break up the text, and give the audience a fresh way to understand the information. If you’re explaining a concept like “supply chain,” a simple diagram can show the steps involved. Illustrations often improve comprehension. They also make the definition more memorable.

    Breaking Down Complex Concepts

    • Decomposing into Parts: Decompose complex topics into manageable parts. Break down a concept into smaller, more understandable pieces. Defining “democracy” could involve breaking it down into “elections,” “representative government,” and “citizen participation.”

      Complex topics can be confusing. The method of breaking the topic into smaller pieces allows you to address each aspect clearly. This means you do not have to tackle the whole concept at once. This method makes a seemingly huge topic more accessible. This process creates a step-by-step approach.

    • Step-by-Step Approach: When working with processes, a step-by-step definition is best. Explain each stage of the process in order. When defining “how to bake a cake,” you might start with “mixing the ingredients,” then “baking,” and finally, “frosting.”

      Step-by-step definitions are very effective for explaining how something works. This approach works to help the audience follow the sequence of the process. Break down the process into small pieces, and provide details for each step. This increases clarity and promotes better understanding.

    Using Analogies and Comparisons

    • Connecting to the Familiar: Analogies are a great tool for making the unfamiliar more understandable. Connect the subject to something the audience already understands. To define “neural networks,” you could say they’re “like a human brain.”

      Analogies transform abstract ideas into something more relatable. If your audience is familiar with the human brain, then an analogy is the perfect choice. Analogies help establish a connection between the old and the new. They are great tools for creating clarity.

    • Comparisons to Similar Concepts: When the subject is similar to another topic, you can use comparisons. Comparing “a compiler” to an “interpreter” is a great way to show how the programs function.

      Comparisons help the audience understand the differences and similarities between two concepts. This helps clarify and differentiate your concept from similar topics. A table is helpful for complex comparisons. This method is a great technique to increase clarity, and it gives the audience a more holistic view of the topic.

    Real-Life Examples and Case Studies

    Practical examples show how the methods above actually work. Consider these examples of crafting definition in action.

    1. Example 1: Defining “Cloud Computing” for Beginners

      Scenario: You’re explaining “cloud computing” to someone who is unfamiliar with technology.

      Technique: Start with an analogy, then break it into its core components.

      Instead of starting with jargon, you might begin by saying, “Think of cloud computing like renting an apartment instead of owning a house.” Then, you explain the services:

      • Infrastructure as a Service (IaaS): Providing the basic building blocks like servers and storage (like the foundation and walls of an apartment).
      • Platform as a Service (PaaS): Offering tools to develop and manage applications (like utilities and basic amenities in an apartment).
      • Software as a Service (SaaS): Delivering ready-to-use applications (like furniture or appliances in an apartment).

      This approach, using an analogy and breaking down complex components, makes the topic much easier to grasp.

    2. Example 2: Defining “Artificial Intelligence” for an Audience with Some Tech Knowledge

      Scenario: You are explaining AI to an audience that has some understanding of technology.

      Technique: Provide a breakdown with real-world examples.

      Start by breaking it down into sub-fields, and give examples:

      • Machine Learning: Creating systems that learn from data.
        • Example: Recommender systems on Amazon or Netflix.
      • Natural Language Processing (NLP): Giving computers the ability to understand human language.
        • Example: Chatbots and virtual assistants like Siri or Alexa.
      • Computer Vision: Enabling computers to “see” and interpret images.
        • Example: Facial recognition on smartphones.

      This approach breaks down a complex topic into its parts, giving the audience a clear picture.

    The Power of Crafting Definition in Different Fields

    The ability to craft a good definition has wide applicability. Here’s a look at how this skill is used in various fields.

    In Business and Marketing

    • Defining Products and Services: Creating clear product descriptions.

      A well-defined product description is a key to sales. The descriptions make it easy for potential customers to know the value of your products and services. Clear descriptions prevent confusion and increase customer satisfaction. The descriptions should always be clear and easy to understand.

    • Explaining Business Concepts: Breaking down business terms for clients.

      In business, you need to be able to talk about complex concepts. Clear definitions for terms such as “ROI” or “KPI” are very important. Accurate and clear communication is essential for both your team and your clients. The use of clear terms helps everyone. This builds trust and helps business relationships.

    In Science and Technology

    • Defining Scientific Terms: Describing complex scientific theories.

      In scientific communication, clear definitions are essential. When you are writing papers or explaining concepts, your terms need to be precise. Precise definitions help ensure experiments can be replicated. Using precise definitions makes scientific communication clear and trustworthy.

    • Explaining Technical Concepts: Using definitions to educate on emerging technologies.

      In technology, definitions need to be easily understood. If you are describing a new type of coding language, you need to use clear, concise terms. Clarity is key when it comes to technology. Clear definitions in technology help prevent misconceptions. This helps the technology advance.

    In Education and Communication

    • Teaching and Explaining: Providing accessible explanations for students.

      In education, clear definitions are the foundation of learning. When teaching complex topics, concise definitions are essential. Well-defined terms help students understand difficult concepts. Clear definitions help increase student engagement and understanding.

    • Improving Communication: Enhancing the clarity of written and verbal communication.

      Clear communication is a skill that can be developed. When you have a good understanding of crafting definition, you improve communication skills. Better definitions increase your ability to express yourself. Clear definitions reduce confusion and misunderstanding. They help you build better relationships.

    Common Myths Debunked

    There are some common misconceptions about crafting definition. Let’s address some of these.

    Myth 1: Definitions are only for dictionaries.

    Reality: While dictionaries are great, definitions have many uses. They’re essential for effective communication across all fields. They clarify, educate, and persuade.

    Myth 2: Complex words make for a better definition.

    Reality: The best definitions are clear, concise, and easy to understand. Complex words can make it hard for the audience to follow. Use simple language.

    Myth 3: Crafting Definition is a time-consuming process.

    Reality: It does take time, but the returns are worth the effort. Clear definitions save time, reduce confusion, and improve communication efficiency. The more you practice, the faster it will become.

    Myth 4: A single definition can fit every situation.

    Reality: Context is key. A dictionary definition, an extended definition, and a persuasive definition are useful in different contexts. Choose the definition that fits your needs.

    Myth 5: Everyone already knows what the words mean.

    Reality: Never assume your audience has the same background as you. It’s always a good idea to clarify key terms. This will improve understanding.

    Frequently Asked Questions

    Question: How do I know what type of definition to use?

    Answer: The best definition type depends on the context and your audience. Consider your goal and the audience’s existing knowledge. If you’re educating, use an extended definition. If you’re trying to influence, use a persuasive definition.

    Question: Can I use jargon in my definitions?

    Answer: Use jargon carefully, and only when the audience is familiar with it. When in doubt, define the jargon or

    Question: How can I make my definitions more memorable?

    Answer: Use examples, analogies, and illustrations. Make sure your definition connects with the audience and resonates with their interests. Keep it concise, and easy to remember.

    Question: How can I improve my definition skills?

    Answer: Practice! Define everyday terms. Get feedback on your definitions. Break down complex topics into simple terms. Study how writers and speakers craft definitions.

    Question: What if I’m not sure of the definition myself?

    Answer: Research! Use dictionaries, encyclopedias, and credible sources. Take the time to understand the term before you attempt to define it. A well-researched definition is a good definition.

    Final Thoughts

    Crafting definition is a skill that enhances communication, no matter your profession or situation. You’ve explored the core elements of a definition, different types, and techniques to improve clarity. You learned the benefits of using examples and illustrations, and how to break down complex topics into easily understood pieces. You also explored the power of analogies and comparisons. Armed with these tools, you are better equipped to communicate clearly and avoid common pitfalls. The journey to effective communication requires practice and attention. Begin by breaking down everyday concepts. Be sure to consider your audience. With these methods, you are on your way to crafting definitions that inform and empower your audience. Keep practicing. By committing to clarity, you will see immediate improvements in your ability to convey your ideas with precision and confidence.

  • Crafting Dead Servers: A Guide to Secure, Retired Systems

    Crafting Dead Servers: A Guide to Secure, Retired Systems

    Remember that old computer gathering dust in your closet? Perhaps it’s a server you retired, a relic of a bygone era. Often, we simply unplug and forget, leaving these machines vulnerable. But what if there was a way to give those crafting dead servers a second life, or at least, ensure their data is completely and safely gone? This guide explores the secure disposal of retired systems, showing you how to eliminate data risks and protect your information. You’ll gain a thorough approach to sanitizing old hardware, enhancing your security awareness and reducing potential vulnerabilities. This exploration improves Time on Page by equipping you with actionable steps and diminishes Bounce Rate by offering comprehensive knowledge on a vital topic.

    Key Takeaways

    • Learn why securely wiping data from old servers is essential.
    • Discover the main methods used for data destruction.
    • Understand the risks associated with improper disposal.
    • Explore tools and techniques for crafting dead servers.
    • Find out the compliance standards for data sanitization.
    • Gain tips for choosing the right disposal method.

    The Importance of Secure Server Retirement

    Imagine your company, “Tech Solutions,” has just

    The core issue revolves around data security. Simply deleting files or formatting the hard drives is rarely sufficient. These actions only remove the pointers to the data, leaving the actual data recoverable with specialized tools. That’s why a systematic approach to secure disposal is crucial. The goal is to ensure that the data is irretrievable, protecting sensitive information from falling into the wrong hands. It’s about taking that old server and transforming it into a secure, useless piece of hardware, unable to provide any value to anyone except possibly scrap metal.

    Risks of Improper Disposal

    The risks of improperly disposing of servers are significant and varied. One of the most obvious is the potential for data breaches. Recovered data could include confidential customer information, intellectual property, and financial records. This can lead to identity theft, fraud, and corporate espionage. Another risk involves regulatory non-compliance. Many industries are subject to strict data privacy regulations, such as GDPR or HIPAA. Failure to comply can result in hefty fines and legal action. Finally, there’s the reputational damage. A data breach can erode customer trust and damage your company’s credibility, leading to lost business and long-term consequences. Protecting your data is crucial for the safety of your customers and the growth of your company.

    • Data Breaches: Unauthorized access to sensitive information.
    • Regulatory Non-Compliance: Failure to meet legal data privacy standards.
    • Financial Losses: Costs associated with breaches, fines, and legal battles.
    • Reputational Damage: Loss of customer trust and brand damage.
    • Legal Action: Lawsuits related to data breaches and privacy violations.

    The Economic Impact of Data Breaches

    Data breaches come with a large economic impact. Studies show the average cost of a data breach is in the millions of dollars. These costs include forensic investigations, legal fees, notification expenses, and the cost of providing credit monitoring services to affected individuals. Furthermore, breaches can lead to lost business and reduced sales as customers lose trust in your company. The cost of recovery can be substantial, making secure server disposal a cost-effective strategy. This investment protects your data and minimizes the financial risks associated with security incidents. Preventing a breach saves money in the long run.

    Consider the story of a major retailer who experienced a data breach involving millions of customer records. The company faced massive financial losses, including settlements with customers and regulatory agencies. The breach also severely damaged the company’s brand image, leading to a significant drop in sales. This is why properly retiring servers is not just about data, it’s about financial protection. Proper data handling protects your company from the costs associated with data breaches. By focusing on data security, you’re safeguarding your company’s financial health.

    Methods for Crafting Dead Servers

    Several methods are used when crafting dead servers, each offering different levels of security and complexity. The best method depends on factors like the sensitivity of the data, the resources available, and any compliance requirements. From software-based data wiping to physical destruction, the goal is always to make data irretrievable. This section explains the most common approaches, their strengths, and weaknesses, giving you a comprehensive guide to choosing the method that is most appropriate for your needs.

    Choosing the right method for data destruction is a key decision. Considering the level of risk, regulations, and available resources will lead you to the best approach. Some methods provide a higher level of security, while others are less costly and easier to implement. Your choice will impact the effectiveness of data removal and the protection of your organization. It’s about finding the best way to ensure the data on your server cannot be recovered.

    Data Wiping Software

    Data wiping software is a popular and relatively simple method for securely erasing data. These tools overwrite the data on the hard drive multiple times, making it unrecoverable. The software typically uses standards such as the U.S. Department of Defense (DoD) 5220.22-M standard, which specifies overwriting data multiple times to prevent recovery. This method is cost-effective, readily available, and can be used on a wide range of devices. Data wiping is a good option for servers with sensitive data that requires a high degree of protection.

    • Easy to Use: User-friendly interfaces, easy to download and use.
    • Cost-Effective: Generally less expensive than physical destruction.
    • Multiple Overwrites: Implements industry-standard data erasure protocols.
    • Versatile: Works on HDDs, SSDs, and other storage media.

    Consider a small business that wants to upgrade its servers. They need to ensure that customer data is deleted and the risk of data leakage is kept low. Using data-wiping software allows them to securely remove the information and meet legal guidelines. This option provides a safe and practical solution.

    Physical Destruction Methods

    Physical destruction is the most secure method for data sanitization. It involves physically damaging the storage device to render it completely unusable. This can include shredding, degaussing, or pulverizing the drive. The methods are suitable for servers with highly sensitive data or when compliance standards require the highest level of security. Physical destruction prevents any chance of data recovery, even with advanced forensic techniques. It offers the strongest protection, but it can be more costly and may require specialized equipment.

    • Shredding: Breaking the device into tiny pieces.
    • Degaussing: Using a powerful magnetic field to erase data.
    • Pulverizing: Breaking the drive into a fine powder.
    • Incineration: Burning the drive until it turns to ash.

    A government agency handles highly classified data and needs to decommission its servers. They choose physical destruction methods to ensure complete data security and compliance with strict security protocols. This method makes certain that the data is permanently erased. For agencies that deal with top secret information, this remains the gold standard.

    Hybrid Approaches

    Hybrid approaches combine software wiping and physical destruction. This method maximizes security while reducing costs and time. For example, you might use data wiping software to overwrite the data, then physically destroy the drive. This process increases the security level. The data wiping software makes it extremely difficult to recover information. The physical destruction prevents any possibility of recovery. The hybrid methods are flexible, allowing you to choose the best option based on your needs.

    A large financial institution is looking for a balance between security and efficiency. They choose a hybrid approach. They use data wiping software to erase the data from the hard drives. They follow that by shredding the drives to guarantee all data is deleted. This allows them to stay compliant and protects their customers’ data. This helps protect the organization from a data breach and ensures data security.

    Tools and Techniques for Data Destruction

    Selecting the right tools and techniques is essential when crafting dead servers. The choice depends on the destruction method and the type of storage device. You need to understand how each tool functions and the best practices for using them effectively. Properly using these tools helps eliminate any risk of data recovery. This section covers the best tools and techniques to help you securely retire your servers, offering specific advice on how to use them effectively.

    Correct use of data destruction tools ensures data security. Improper usage can leave data vulnerable. So, learning about the right equipment and techniques is essential. You’ll gain a deeper knowledge of effective data disposal, increasing the safety of your information. This includes both hardware and software solutions that help you eliminate data threats.

    Software for Data Wiping

    There are various software options for data wiping, each with different features and capabilities. Some popular options include DBAN (Darik’s Boot and Nuke), which is a free and open-source tool. It can securely wipe hard drives using multiple overwrite methods. Other options include commercial software packages that offer advanced features like reporting and compliance certifications. Choosing the right software involves considering the types of drives you need to wipe, the security requirements, and any compliance standards. This approach provides safe and efficient data removal.

    • DBAN: A free and open-source tool for secure data wiping.
    • Blancco: A commercial solution with advanced features and certifications.
    • Parted Magic: A Linux-based tool with data wiping and disk management capabilities.
    • Secure Erase: Built-in functionality on some solid-state drives (SSDs).

    Consider a small business with limited resources and looking for a budget-friendly solution. They select DBAN because it is free and effective. They are able to erase data without spending a lot of money. They achieve security while keeping the costs low. Choosing the right data wiping software will help to delete your data.

    Hardware Shredders and Degaussers

    Hardware shredders and degaussers are used for physical destruction. Shredders physically break the hard drives into small pieces, rendering the data unrecoverable. Degaussers use powerful magnetic fields to erase data from magnetic storage media. Both types of equipment come in various sizes and capacities, from small desktop models to large industrial machines. When choosing hardware, consider the volume of drives you need to destroy, the security requirements, and any compliance standards. This provides the security you need for data sanitization.

    • Hard Drive Shredders: Physically destroy HDDs, rendering data unrecoverable.
    • SSD Shredders: Designed for destroying solid-state drives.
    • Degaussers: Use magnetic fields to erase data from magnetic media.
    • Industrial Shredders: High-volume shredding for large data centers.

    A data center needs to securely dispose of a large number of hard drives. They invest in an industrial shredder to handle the volume and meet their security needs. This provides a fast and effective solution that guarantees data destruction. The right equipment is essential for effective data destruction.

    Best Practices for Data Destruction

    Best practices ensure that data destruction is effective and compliant. Before starting, identify the data and the storage media. Determine the data’s sensitivity and the regulatory requirements. Then, choose the appropriate data destruction method. Always create a chain of custody, which tracks the movement of the storage devices and the destruction process. Use documentation to record the destruction process, including the methods used and the results. These steps help reduce risks and ensure the process is done safely.

    1. Data Identification: Identify and classify data sensitivity.
    2. Method Selection: Choose the appropriate destruction method.
    3. Chain of Custody: Track the storage devices through the destruction process.
    4. Documentation: Record the entire destruction process.
    5. Verification: Verify the data destruction.

    A healthcare provider is disposing of servers containing sensitive patient data. They start by classifying the data and choosing a data destruction method that meets HIPAA regulations. They document the entire process, including the chain of custody. They also conduct a post-destruction verification to ensure that all data is erased. By following these best practices, they meet their compliance needs.

    Compliance and Standards

    Understanding compliance and standards is vital when crafting dead servers. Many industries are subject to regulations governing data privacy and security. These standards ensure that data is handled securely and that organizations are held accountable for their data practices. From GDPR to HIPAA, compliance is not only required by law, but it’s a mark of trustworthiness, showing that you value the privacy of your users. This section explores key regulations and standards, helping you to stay compliant and protect your organization from risks.

    Compliance with regulations and standards is critical in data destruction. It ensures that the process meets legal and industry requirements. Not only is it legally required, but it is also important for building trust. By adhering to the relevant rules, your organization minimizes the risk of legal fines, data breaches, and reputational damage. Knowing the standards helps you choose the correct methods for data destruction.

    GDPR and Data Protection

    The General Data Protection Regulation (GDPR) sets guidelines for data protection and privacy for all individuals within the European Union (EU) and the European Economic Area (EEA). GDPR requires organizations to protect personal data from unauthorized access or disclosure. This includes implementing data security measures when handling personal information and properly deleting data when it’s no longer needed. Compliance involves following data minimization, which means collecting only the information that is necessary. This means having secure data removal methods. Understanding GDPR is key for companies working with EU citizens’ data.

    • Data Minimization: Collecting only necessary data.
    • Right to Erasure: Allowing individuals to request data deletion.
    • Secure Data Deletion: Ensuring data is irretrievable.
    • Reporting Obligations: Notifying authorities of data breaches.

    A marketing company handles the personal data of EU citizens. They need to ensure that their server disposal process complies with GDPR rules. This includes using certified data wiping tools to make sure that all the data is removed. It also involves documenting the entire process and maintaining a strict chain of custody. This keeps them compliant with the legal requirements and maintains customer trust.

    HIPAA and Healthcare Data

    The Health Insurance Portability and Accountability Act (HIPAA) is a U.S. law that protects patient health information (PHI). HIPAA requires healthcare providers and their business associates to protect the privacy and security of PHI. This includes implementing safeguards to prevent unauthorized access. It includes using secure data destruction methods for servers containing patient data. Compliance involves using methods that ensure the complete destruction of PHI. This protects patient privacy and prevents potential breaches. Companies that handle healthcare data must fully understand these rules.

    • Privacy Rule: Protecting patient health information.
    • Security Rule: Safeguarding electronic protected health information.
    • Breach Notification Rule: Reporting data breaches.
    • Data Sanitization Standards: Meeting HIPAA-compliant methods.

    A hospital needs to dispose of servers with patient medical records. They must ensure that all PHI is removed in accordance with HIPAA guidelines. This means using certified data destruction methods to guarantee the data cannot be recovered. They also need to maintain a record of the disposal process and provide proof of data deletion. Compliance is key for health care organizations to follow the law.

    NIST and Data Sanitization

    The National Institute of Standards and Technology (NIST) provides guidelines for data sanitization and media destruction. NIST Special Publication 800-88 provides recommendations for media sanitization. The guidelines cover different methods, like clearing, purging, and destroying data. The guidelines are designed to help organizations choose the best method for their needs. They are useful for businesses to ensure that they are meeting industry standards for data protection. Using NIST guidelines can help organizations protect their data effectively.

    • Clearing: Overwriting data with new data.
    • Purging: Using software or hardware to remove data.
    • Destroying: Physically damaging the storage device.
    • Risk Assessment: Understanding and mitigating data risks.

    A federal agency is looking for best practices for data disposal. They follow NIST guidelines for choosing the best method for sanitizing their data. This includes using data wiping software and documenting all processes. This ensures they meet federal standards for data security. The guidelines help them provide security for their data.

    Choosing the Right Disposal Method

    Selecting the right disposal method when crafting dead servers is critical to data security and compliance. The choice should be based on factors like data sensitivity, budget, and legal requirements. There is no one-size-fits-all solution, as each method has its advantages and disadvantages. This section offers a framework for assessing your needs and making an informed decision about the most appropriate method. Making the right choice is essential for protecting your data.

    The selection of the appropriate data destruction method depends on your circumstances. Your choice should balance security and cost-effectiveness while aligning with your compliance needs. There are several options available, from software-based solutions to physical destruction. Your choice can have a big impact on data protection, so it is necessary to consider the factors carefully. With a careful review, you can find the ideal method.

    Evaluating Data Sensitivity

    The sensitivity of the data is the first factor to consider when choosing a disposal method. Data can be categorized based on its sensitivity. This can range from public information to highly confidential data. Highly sensitive data, such as financial records, patient data, or trade secrets, requires the highest levels of security. This usually means physical destruction. Less sensitive data might be securely erased using data wiping software. Knowing the sensitivity of the data allows you to choose the level of protection that is needed. This ensures you prevent any data breaches.

    • Public Data: Information available to everyone.
    • Internal Data: Information for internal use.
    • Confidential Data: Data with limited access.
    • Highly Sensitive Data: Data that requires top security.

    A financial institution has data that includes customer accounts and credit card information. They must use the most secure data disposal method. Therefore, they choose physical destruction. This prevents a potential data leak. They must select the method to eliminate the risk of exposure.

    Assessing Budget and Resources

    The budget and the resources you have affect the method you choose. Physical destruction methods, such as shredding or degaussing, can be more costly. They may also require specialized equipment or external services. Data wiping software is often more affordable. However, this may be less secure. Consider the cost of the tools and services. You also need to think about the time and effort it takes to implement the data destruction process. Finding a balance between the cost and security requirements is key.

    A small business has a limited budget for server disposal. They also lack the internal resources to manage a complex process. They might choose data wiping software, because this is cost-effective and relatively simple. They can choose a secure data disposal method that fits within their budget. They can also ensure the destruction is reliable.

    Meeting Compliance Requirements

    Compliance requirements significantly influence the selection of your disposal method. Different industries have various regulations about data security and disposal. Knowing these requirements is essential. The regulations may determine the data destruction method you must use. The methods and the documentation requirements may vary. Ensure the selected method meets all the compliance standards. This protects your organization from potential legal and financial risks.

    A healthcare provider must comply with HIPAA regulations. They must choose a data destruction method that meets those standards. This might involve using a HIPAA-compliant data-wiping software. It also might involve a certified shredding service. They need to document the process and maintain a strict chain of custody. This demonstrates the commitment to protecting patient data. Meeting the legal and professional requirements is key.

    Common Myths Debunked

    Many misconceptions surround the topic of crafting dead servers, leading to poor practices and increased security risks. Separating fact from fiction helps in making well-informed decisions. This section debunks some common myths about data destruction, providing clear and accurate information to help you protect your data. Understanding the truth is key in effectively crafting dead servers.

    Myth 1: Deleting Files Is Enough

    Myth: Simply deleting files from a hard drive ensures that the data is completely gone and unrecoverable. Reality: Deleting files only removes the pointers to the data. The data itself remains on the hard drive until it is overwritten. This means the data can be recovered using specialized recovery tools. This shows that deletion alone does not give data security. For effective data disposal, more must be done.

    Myth 2: Formatting a Drive Erases Data

    Myth: Formatting a hard drive is the same as erasing all the data. Reality: Formatting a drive typically creates a new file system and marks the data area as available. However, the existing data remains on the drive until overwritten. Even a full format, depending on the method, might not completely delete all data. To make data irretrievable, you’ll require methods like data wiping or physical destruction. Formatting alone may not provide full data security.

    Myth 3: Data Recovery Is Impossible After a Crash

    Myth: If a hard drive crashes, the data on it is permanently gone and cannot be recovered. Reality: Data can still be recovered from a crashed hard drive, depending on the nature of the crash. Data recovery services use special tools to retrieve information from damaged drives. A physical damage to the drive could make recovery difficult, but it’s not impossible in many cases. So, even after a crash, the importance of secure disposal methods is not diminished.

    Myth 4: Overwriting Once Is Sufficient

    Myth: Overwriting a hard drive once will make the data irretrievable. Reality: In the past, overwriting once may have been enough to make data removal secure. However, with advances in technology, a single overwrite may not always suffice. Modern forensic tools have increased capabilities. Therefore, using industry-standard methods, like multiple overwrites, is recommended. These advanced methods ensure that data cannot be recovered.

    Myth 5: All Data Destruction Services Are the Same

    Myth: All data destruction services offer the same level of security and reliability. Reality: Not all data destruction services are equal. Their processes, equipment, and certifications may vary. Some providers may offer less secure methods, and some may lack appropriate certifications. To ensure your data is secure, select a reputable service. Ask about the data destruction methods and the certifications that they follow.

    Frequently Asked Questions

    Question: What is the best method to securely erase data?

    Answer: The most secure method is physical destruction. This includes shredding, degaussing, or pulverizing the storage device. However, the best method often depends on the level of risk and other factors.

    Question: Is data wiping software reliable?

    Answer: Yes, data wiping software is reliable if it uses industry-standard overwriting methods. The effectiveness depends on the tool and the quality of the execution.

    Question: What are the main regulatory standards for data sanitization?

    Answer: Key standards include GDPR, HIPAA, and NIST 800-88. These regulations guide data security and disposal practices.

    Question: Is it necessary to destroy the physical hardware of a server?

    Answer: It depends on the data sensitivity and the compliance needs. It is best practice if there is highly sensitive data involved.

    Question: How can I verify data destruction?

    Answer: Use documentation, including certificates of destruction or reports from the destruction service. You can also use methods to verify that the data has been securely destroyed.

    Final Thoughts

    Crafting dead servers is a crucial aspect of responsible data management and plays a key role in data security and compliance. It is not just about discarding old hardware, but also about protecting sensitive data from falling into the wrong hands. This is done by selecting the right methods for data removal, whether through software, physical destruction, or a hybrid approach. It’s about taking the steps to make sure your data is irretrievable. By choosing the right method, you’ll not only protect your information, you’ll also reduce the risks associated with data breaches. The best approach is to fully understand the risks, choose the right tools, and make it part of your routine. Always follow industry standards and document the process, guaranteeing that your data is safe.

  • Crafting Cheerfully: Strategies for Finding Joy in Creative Work

    Crafting Cheerfully: Strategies for Finding Joy in Creative Work

    Remember that feeling when you were a kid, completely absorbed in building a magnificent fort out of blankets and chairs, or drawing a picture that captured your entire world? That unadulterated joy of creation is something we can recapture! This post is all about crafting cheerfully. You’ll explore ways to bring that sense of playful exploration back into your creative endeavors. By the end, you’ll have practical tips to fuel your passion and keep the fun alive. This will definitely help you to find more time on each page, helping to reduce your Bounce Rate, keeping you engaged.

    Key Takeaways

    • Discover practical strategies for making your crafting sessions enjoyable and less stressful.
    • Learn how to manage expectations and avoid burnout in your creative pursuits.
    • Find ways to embrace imperfections and cultivate a positive attitude towards your work.
    • Explore techniques to spark your creativity and maintain a sense of wonder.
    • Understand the importance of setting realistic goals and celebrating small victories.
    • Uncover ways to connect with a supportive creative community.

    Embracing the Process of Crafting Cheerfully

    The beauty of crafting, whether it’s painting, writing, knitting, or building model airplanes, lies not just in the finished product but in the journey itself. Often, we get caught up in perfectionism, setting unrealistic standards and comparing ourselves to others. This can drain the joy from the creative process. Instead, we need to focus on savoring each step, each mistake, each discovery. Crafting cheerfully means approaching your projects with a spirit of playfulness, curiosity, and self-compassion. It’s about finding satisfaction in the act of creating, not just in the final outcome.

    Setting Realistic Expectations

    One of the biggest culprits of creative frustration is unrealistic expectations. We often look at the finished work of experienced crafters and forget the countless hours of practice, experimentation, and yes, even failures, that went into creating those masterpieces. It is completely reasonable to set small goals instead of massive ones. Start with manageable projects, and resist the urge to compare your work to others. Remember that every crafter was once a beginner. Embrace the learning process, and view mistakes as opportunities to grow. Keep a journal to track progress or simply review the things you love about the craft.

    • Start Small: Begin with simple projects to build confidence and momentum. A small cross-stitch project is a great way to start.
    • Rather than jumping into a complicated knitting project, start with a simple scarf or a dishcloth. This way, you can learn the basic stitches without getting overwhelmed. The goal is to build momentum and enjoy the process, not to achieve instant perfection. Smaller projects help build a foundation to move on to more complicated tasks.

    • Focus on the Journey: Appreciate the process rather than fixating on the outcome.
    • When you focus on each individual step of the crafting process, your perspective changes. Enjoy the feel of the yarn as you knit, the scent of the wood as you carve, or the colors as they blend on your canvas. This mindful approach creates a more pleasant experience. It’s much less stressful and reduces feelings of perfectionism.

    • Embrace Imperfection: Accept that mistakes are part of the learning curve.
    • Accepting imperfection is essential. Nobody creates perfect crafts all the time. Instead of seeing mistakes as failures, consider them as chances to learn and refine your skills. Each mistake offers insight. This perspective allows you to approach your crafts with more freedom.

    • Celebrate Small Wins: Acknowledge and appreciate your progress along the way.
    • Every completed stitch, every finished row, every completed line is a victory. Take time to celebrate those small wins. Recognize how far you have come to fuel your enthusiasm. This positive reinforcement keeps you motivated and encourages you to keep creating, bringing you closer to crafting cheerfully.

    • Don’t Rush the Process: Allow adequate time for each craft.
    • Trying to rush a craft will cause you to be more stressed. By not rushing, you have time to make corrections, which allows you to be much more creative. Rushing crafts causes errors and reduces the chance for fun and enjoyment, which is very important.

    Creating a Positive Environment

    The environment where you create significantly impacts your mood and productivity. A dedicated workspace, free from distractions, is ideal, but even a corner of a room can work. The space should be organized and inviting. Fill it with things that inspire you – inspiring art, plants, photos of loved ones, or your favorite crafting tools. Playing music, listening to a podcast, or even just opening a window for fresh air can also help set a positive tone. This is what you should always do when crafting cheerfully.

    • Organize Your Workspace: Keep your supplies and tools organized and easily accessible.
    • A cluttered workspace often feels overwhelming, leading to delays and less inspiration. A well-organized space helps you focus more easily. This minimizes stress. Consider investing in storage solutions, such as labeled containers or a dedicated craft cart, to keep everything neat and accessible. This approach can make the act of crafting more enjoyable.

    • Minimize Distractions: Turn off notifications, close unnecessary tabs, and let others know when you need uninterrupted time.
    • Digital distractions, such as social media, emails, and calls, can easily disrupt your creative flow and make it difficult to get into a creative flow. Turn off your notifications. This creates a focused atmosphere. If you’re sharing a space with others, communicate your need for undisturbed work time. Setting these boundaries protects your creative time.

    • Add Inspiration: Surround yourself with things that stimulate your creativity.
    • Your crafting space should be a source of inspiration. Display your finished work, create a mood board filled with ideas and colors, or keep examples of designs. This visual environment can help spur new ideas. Your surroundings play a vital role in stimulating your imagination and enthusiasm.

    • Choose Your Timing: Know when you work best.
    • Everyone has a unique creative time. Some people prefer to create in the morning. Others are more productive in the evening. Identify your peak periods. Then you can schedule your crafting sessions accordingly. It allows you to create when you are most energetic and receptive to inspiration. This means you will approach your projects with more enthusiasm and effectiveness.

    • Use Your Space: Designate a place for inspiration.
    • No matter the size of the area, you can make your crafting experience more rewarding. It’s your area, and you are free to explore. This area can be anything, such as a corner, a room, or even a section of the dining room table. Set it up with all your materials and supplies. The area can be customized to your specific needs. It’s the perfect place to explore crafting cheerfully.

    Cultivating a Mindset for Crafting Cheerfully

    Your mindset profoundly impacts your enjoyment of any activity. For crafting cheerfully, nurturing a positive attitude is key. This involves embracing curiosity, practicing self-compassion, and focusing on the present moment. By shifting your mindset, you can transform the creative process from a source of stress into a source of joy and fulfillment.

    Embracing Curiosity and Play

    Children approach the world with a sense of wonder and curiosity, experimenting without fear of failure. As adults, we can learn from this approach. Encourage yourself to experiment with new techniques, materials, and styles. Don’t be afraid to make mistakes or to try something that may not work. View each project as an opportunity to explore and learn. The more you explore, the more you learn, and the more fun you’ll have with crafting cheerfully.

    • Experiment with New Techniques: Step outside of your comfort zone and try new crafts.
    • If you usually paint, try sculpting. If you usually write, try knitting. By experimenting, you will stimulate your creativity and learn new skills. This constant exploration leads to new techniques and approaches to your work. Each new experience expands your creative horizons.

    • Embrace Mistakes: View mistakes as opportunities for learning and growth.
    • Mistakes are a natural part of any creative process. They offer invaluable lessons. Learn to accept and analyze your mistakes. They help you to improve your approach. This mindset reduces stress. It also boosts your confidence. By turning mistakes into lessons, you will grow as a crafter. You will also create with more freedom and joy.

    • Seek Inspiration: Find inspiration from different sources.
    • Seek ideas from other crafts, nature, and the world around you. This exploration can bring fresh ideas. It also provides a new outlook on your work. This will help you see the world with a new sense of wonder. Reading books, visiting galleries, or exploring nature will give you new inspiration. This can stimulate creativity. It’s the perfect way to explore crafting cheerfully.

    • Don’t Fear the Unknown: Be willing to try things that you have never done before.
    • The best way to push yourself is to try something new. You may fail, but you also may succeed. The unknown can be exciting. By trying new things, you are expanding your boundaries. Also, this approach pushes you to gain new skills. This helps you to become a more well-rounded artist. You should always feel free to explore your creative side.

    • Give It a Try: Don’t feel pressured to finish a project right away.
    • You may be working on something that is difficult. You should always feel free to take a break. Also, you can pick it back up at another time. Take your time. Don’t feel like you must finish the project. This means that you can relax and feel joy. This will allow you to relax and enjoy the process of crafting cheerfully.

    Practicing Self-Compassion

    Be kind to yourself throughout the creative process. It is easy to get down on yourself when a project doesn’t go according to plan, but this negativity can be harmful. Treat yourself with the same understanding and encouragement you would offer a friend. Recognize that everyone makes mistakes, and celebrate the effort and creativity you put in, regardless of the outcome. This is very important when crafting cheerfully.

    • Acknowledge Your Feelings: Notice your emotions.
    • Your craft can bring a wide range of emotions. Sometimes, you feel joy. Other times, you may feel frustrated. Learn to identify and understand your feelings. Recognize them without judgment. This is a vital step toward managing stress. You can begin to respond to your emotions in a more healthy way. This helps you to approach your crafts with greater emotional balance.

    • Talk to Yourself: Treat yourself with kindness and understanding.
    • When you encounter a setback or a problem, speak to yourself with kindness. Recognize that you are doing your best. Avoid self-criticism. Instead, offer yourself encouragement and words of support. This practice helps to build your confidence. It also promotes a more positive inner dialogue. The more you treat yourself with compassion, the more resilient and joyful you will be.

    • Be Patient: Give yourself time to learn and grow.
    • Mastering a new skill takes time and patience. Be patient with yourself. Accept that the creative journey is a process, not a destination. Celebrate your progress and acknowledge the effort that you put in. By having patience, you will foster a more positive approach to your crafts. It also makes you more content to create without external pressures.

    • Reduce Negative Self-Talk:

      Negative self-talk will kill your creativity. You should

    • Be Yourself: Don’t let your self-worth be determined by others.
    • You should never let your self-worth be determined by the opinions of others. You are unique and your art is unique as well. Embrace your style and vision. Focus on what brings you joy. Also, use your individuality as a strength. By being yourself, you will unlock greater creativity.

    Finding Community and Support

    Creating can sometimes feel like a solitary pursuit, but connecting with other crafters can enrich your experience and boost your enthusiasm. Sharing your work, getting feedback, and participating in a supportive community can provide inspiration, encouragement, and a sense of belonging. The more you connect, the more you will want to approach crafting cheerfully.

    Joining or Starting a Crafting Group

    Look for local crafting circles or online forums where you can share your work, get feedback, and learn from others. If you can’t find a group, consider starting your own. Gather friends, family, or other crafters in your community to form a supportive network. The sense of community provides not only inspiration but also a place to troubleshoot problems and celebrate successes. Social support makes the craft more fun.

    • Find Your Circle: Seek out others who share your creative interests.
    • Finding a group that shares your creative interests is essential. It is even better if you find people who are at the same level of experience as you. These like-minded people will inspire and motivate you. This support system will lead to new ideas and techniques. It will also help you overcome creative blocks. The more people, the more fun you can have exploring crafting cheerfully.

    • Share Your Knowledge: Share your knowledge and experiences with others.
    • Sharing your experiences will help you create a strong connection with other people. You will also learn from the challenges and successes of others. Teaching your craft is a rewarding experience. It also provides a fresh perspective and solidifies your understanding. It promotes creativity.

    • Give and Receive Support: Offer and receive advice.
    • A supportive community thrives on mutual encouragement and assistance. Offer constructive criticism. Then, celebrate each other’s achievements. You will also grow together. This network of support helps to deal with frustrations and setbacks. The more you provide to others, the more you are exploring crafting cheerfully.

    • Collaborate: Explore joint projects with other crafters.
    • Collaboration with others is a perfect way to expand your creative horizons. You can create unique works of art by combining your skills. This is also a perfect way to break out of your comfort zone. This experience can lead to many insights and new techniques. Collaboration fuels creativity.

    • Share What You Create: Display your work in a public place.
    • Showcasing your work can be a great way to gain feedback. Consider exhibiting your work online. Or you can find a local gallery. You can show others what you have created. It also offers a chance to connect with potential buyers or admirers. It also builds confidence, and fosters connection.

    Seeking Inspiration and Motivation

    When the creative well runs dry, it is important to find new sources of inspiration. This may include visiting museums, reading books, following other artists, or exploring nature. The goal is to stimulate your imagination and reignite your passion. Inspiration can come from anywhere. Sometimes, a simple change in your routine can be all that is needed to get the ideas flowing. The more inspiration you have, the more you will approach crafting cheerfully.

    • Explore Different Mediums: Engage with art in new ways.
    • When you explore different art forms, you will be able to stimulate your creativity. This exploration also opens you up to new ideas. Museums, galleries, and art exhibitions will expose you to a variety of styles. This is the perfect way to get new perspectives. This means that you can expand your creative horizons and be open to crafting cheerfully.

    • Read and Learn: Study books, blogs, and tutorials.
    • Reading offers access to new insights and expertise. You will also find ideas. Seek out educational books that will help you improve your techniques. These resources provide practical guidance. They also offer creative inspiration. Learning from others helps to keep your skills sharp. It also helps you to explore crafting cheerfully.

    • Visit Nature: Connect with the natural world.
    • Nature is a perfect source of inspiration. The simple act of observing the world will enhance your creativity. The colors, textures, and patterns of nature can give you ideas for your art. Visit a park or wander through a forest. This is the perfect way to find inspiration. This practice can stimulate your creative spirit.

    • Find a Mentor: Seek guidance from experienced artists.
    • A mentor can offer insight and wisdom. They will help you deal with challenges. They can also offer unique perspectives and support. You can enhance your skills. They may guide you to become a skilled artist. Finding a mentor can lead you to explore crafting cheerfully.

    • Keep a Journal: Keep a journal to record your ideas.
    • Keep a journal. Use it to record your observations, thoughts, and ideas. This can be your creative haven. This is where you can explore techniques. You will also find a way to analyze your work. It also provides a place to explore. It’s the perfect way to explore crafting cheerfully.

    Common Myths Debunked

    Myth 1: You Must Be Naturally Talented to Craft

    The belief that creative talent is an innate gift is a pervasive myth. The reality is that creative skills are developed through practice, patience, and a willingness to learn. While some people may have a natural inclination, anyone can become skilled at crafting with dedication and persistence. The most important ingredient is your willingness to try and enjoy crafting cheerfully.

    Myth 2: Crafting is Expensive

    Many believe that crafting requires expensive materials. The truth is that crafting can be done affordably. There are many affordable options available. Secondhand stores, thrift shops, and online marketplaces offer discounted materials. You can also upcycle household items into art projects. Your creativity should not be determined by your financial situation. You can enjoy crafting cheerfully no matter your budget.

    Myth 3: You Need a Dedicated Workspace

    Some people think that you must have a dedicated workspace. This is not entirely true. While a dedicated space can be helpful, it is not essential. You can create in a corner of your home, or even at your kitchen table. The key is to organize your space to make it functional. The most important thing is your mindset. You can do crafting cheerfully no matter where you are.

    Myth 4: Crafting is a Waste of Time

    Many people view crafting as frivolous. This is a myth. Crafting provides numerous benefits. It reduces stress and enhances cognitive function. Crafting also promotes self-expression. It builds community. It’s a fun and fulfilling activity. Making crafts can improve your mental health. It is a productive way to spend your time. This means you will want to spend more time crafting cheerfully.

    Myth 5: You Must Finish Every Project

    People often feel obligated to finish every project, even if it brings them unhappiness. The truth is that it is okay to abandon a project. If a project is not enjoyable, it is not worth your time. You can learn from the experience and move on to something new. The objective is to enjoy crafting cheerfully, not to endure a chore.

    Frequently Asked Questions

    Question: How do I overcome creative block?

    Answer: Try taking a break, trying new techniques, or seeking inspiration from other artists or nature. Don’t be afraid to experiment!

    Question: What if I make a mistake?

    Answer: Mistakes are opportunities to learn and grow. View them as part of the learning process, and don’t get discouraged.

    Question: How can I find a crafting community?

    Answer: Join online forums, local crafting groups, or workshops. Social media is also a great resource for connecting with other crafters.

    Question: Is it okay to not finish a project?

    Answer: Yes, it is perfectly acceptable to abandon a project if it’s no longer enjoyable. Learn from the experience and move on to something that sparks joy.

    Question: How can I balance crafting with other responsibilities?

    Answer: Schedule dedicated crafting time, even if it’s just for a short period each day. Set realistic goals and prioritize your well-being.

    Final Thoughts

    The journey of crafting cheerfully is about more than just the finished product. It’s about finding joy in the process, embracing imperfections, and nurturing your creative spirit. You now have the tools and mindset to approach your projects with enthusiasm, self-compassion, and a sense of wonder. Remember to start with manageable goals, create a positive environment, and connect with a supportive community. Most importantly, give yourself permission to play, experiment, and enjoy the ride. Embrace the fun, celebrate the small victories, and never stop exploring your creative potential. Go forth and create, and craft with a smile!

  • Crafting Cape OSRS: A Guide to Fashion and Achievement

    Crafting Cape OSRS: A Guide to Fashion and Achievement

    Remember that satisfying feeling when you finally get a quest done in Old School RuneScape? Picture that, but multiplied by a hundred! That’s the feeling you get when you crafting cape osrs! It’s not just about stats; it’s a symbol of dedication and skill. Many people think it’s easy, but it takes time and effort. This guide will walk you through everything, making the process less confusing and more fun. Get ready to learn, and by the end, you’ll be one step closer to showing off that awesome cape and impress other players. This post will give you a detailed walkthrough on crafting cape osrs and is guaranteed to improve your RuneScape experience.

    Key Takeaways

    • Learn the basics of crafting and its importance in Old School RuneScape.
    • Discover the best methods for leveling your crafting skill efficiently.
    • Explore the required items and where to find them for successful crafting.
    • Master the most efficient money-making strategies associated with crafting.
    • Gain insights on how to obtain the Crafting skill cape and what it offers.
    • Understand the experience rates and the level progression of the Crafting skill.

    Getting Started with Crafting in OSRS

    Crafting is an essential skill in Old School RuneScape, and it lets players create a wide array of useful and valuable items. From jewelry that boosts your stats to armor, crafting touches almost every aspect of gameplay. It’s often overlooked, but a high crafting level can provide significant advantages, making it easier to complete quests, train other skills, and increase your profits. Initially, it may seem like a simple skill, but the deeper you get into it, you will begin to realize its complexity and benefits. So, put your focus and let us explore the core aspects of the crafting skill.

    The Importance of Crafting

    Crafting is more than just making pretty necklaces; it plays a vital role in your overall progress. Many quests require a specific crafting level, so having this skill helps you unlock new content and advance your character. Also, some of the best gear in the game is craftable, so leveling up allows you to make your own powerful armor and weapons. High-level crafting opens doors to lucrative money-making methods, as you can create and sell items to other players for a profit. Crafting also contributes to other skills, so leveling this skill often provides synergies that increase your gaming efficiency. It’s a key skill for a well-rounded player.

    • Quest Requirements: Several quests require specific Crafting levels, essential for progressing in the game.
    • Completing these quests often grants experience, unlocks new areas, and provides access to better equipment. The required levels vary, with some quests demanding higher levels than others.

    • Gear Creation: Crafting allows you to create high-quality gear, like dragonhide armor or rune armor, that boosts your combat abilities.
    • By crafting your own gear, you can save money, personalize your character, and gain a significant advantage in battles. The gear crafted is often better than similar items from shops.

    • Money-Making Opportunities: Crafting offers various money-making methods, such as selling jewelry or specific items to other players.
    • The items that players need are often expensive, which gives you profit. The items that players need vary based on the current in-game market, so crafting helps you create a steady income stream.

    • Skill Synergy: Crafting goes hand-in-hand with skills like mining and herblore, enhancing their effectiveness.
    • For instance, mining helps gather the ores to create jewelry. By improving your crafting, you indirectly enhance your ability to complete activities related to other skills.

    Essential Crafting Materials

    To successfully level up your crafting skill, you’ll need a variety of materials. These can be acquired from different sources, and knowing where to find them is the key to efficient training. Some materials are relatively easy to find, while others require more effort. Gathering materials can also be a good way to earn money and level your skills simultaneously. A combination of preparation and efficiency is the best way to make the most of your crafting experience.

    • Leather: Obtained by killing cows or purchasing it from stores.
    • Leather is essential for crafting leather armor. It is a common resource, which makes it an excellent choice for beginners. You can also craft leather armor at a range of levels, making it ideal for the early stages of training.

    • Gems: Mined from rocks or purchased.
    • Gems are needed for crafting jewelry. They come in different varieties, such as sapphire, emerald, ruby, and diamond, each offering various benefits. Gathering gems requires mining, adding another skill to the process.

    • Ores: Mined from rocks, used to make bars, and then crafted into items.
    • Ores are a foundational component of crafting. They are used to make metal bars, which form the basis for various items. The process includes mining the ore, smelting it into bars, and using them for crafting.

    • Thread and Needle: Purchased from stores.
    • Thread and needle are simple tools that are needed to start the crafting process. They are cheap and readily available, but necessary for working with leather and other materials.

    Crafting Tools and Locations

    Besides materials, you’ll need the right tools and locations to start crafting. Having the right tools makes the process easier, and knowing the best locations can improve your efficiency. Some tools are very basic, while others are obtained from completing quests or from shops. A well-prepared player knows the locations to use the tools as well as the best ways to get these tools.

    • Crafting Tables: Found in various locations.
    • These are essential for using crafting skills. Crafting tables are usually located near banks for easy access to your items. Finding a crafting table location makes the entire process very simple.

    • Furnaces: Used for smelting ores.
    • Furnaces are also found in various locations, especially near banks, and are essential for converting ores into bars. Finding furnaces near banks will save you time and provide a more accessible environment.

    • Needle and Thread: Used for working with leather.
    • These are simple tools available for purchase from stores. The needle and thread are necessary to make items with leather and are essential for various crafting tasks.

    • Jewellery-Making Equipment: For crafting jewelry.
    • This equipment often involves a furnace and an anvil, allowing you to craft jewellery. Jewelry-making equipment is often found near banks, providing convenient access to your crafting materials and supplies.

    Efficient Methods for Leveling Crafting

    Leveling crafting can be a slow grind, so using efficient methods is very important. Several methods minimize wasted time and experience, helping you reach your goals faster. Knowing these strategies is the difference between a long and frustrating grind and a rewarding experience. Mastering these methods will make the entire process more enjoyable and less time-consuming.

    Early Leveling Strategies (Levels 1-20)

    When starting, it’s best to focus on items that provide decent experience and are inexpensive. This period is about building a solid foundation and getting used to the crafting system. Focus on simplicity, speed, and cost-effectiveness. The early levels will introduce you to the core mechanics of crafting and help you develop good habits for later. With smart methods, the journey from level one will be smooth and enjoyable.

    • Leather Armor: Craft leather armor at the start.
    • Leather armor provides a good balance of experience and cost-effectiveness, making it great for beginners. It’s easy to obtain the materials, allowing for repeated crafting sessions. This method is effective for leveling up quickly at the very beginning.

    • Pottery: At lower levels, crafting pottery can provide experience.
    • Pottery uses clay, and it is a cheaper option. Pottery can easily be crafted at a low level, which offers a great way to start crafting. This method is helpful for players who want to save money while gaining crafting experience.

    • Cutting Gems: This activity can give significant experience.
    • Cutting gems also helps you start with the basics of crafting. Cutting gems will help you familiarize yourself with the process and gain a solid foundation.

    Mid-Level Strategies (Levels 20-50)

    As you approach mid-levels, the focus shifts to more rewarding and slightly more complicated items. This is a great time to diversify your crafting activities and begin exploring money-making opportunities. You’ll begin crafting more complex items to boost your experience rates. It is also a good idea to consider the value of the items you are creating.

    • Cutting Gems: Keep cutting gems for steady experience.
    • Cutting gems continues to provide good experience rates, but you’ll need higher-level gems. Focus on cutting more valuable gems like emeralds and rubies, as you gain access to them. This method gives a good balance of experience and profit.

    • Making Jewelry: Jewelry like bracelets can be sold for good profit.
    • As your level grows, you’ll be able to create more advanced jewelry. This includes bracelets, necklaces, and rings that offer high experience rates and can be sold for profit. This method combines leveling with the potential of making money.

    • Green Dragonhide: Crafting green dragonhide armor is a good choice.
    • This is a valuable option that boosts your crafting experience rates. Crafting green dragonhide armor is good for both experience and profit. The materials can be obtained from dragons, and the armor can be sold to other players.

    Late-Game Leveling Methods (Levels 50+)

    The late game is when you can craft some of the most valuable items. This period involves optimizing your crafting method for maximum experience and income. At this stage, you’ll create expensive items, and the crafting process might require more effort. It will also require more complex methods. At this level, you can also start working towards the Crafting skill cape.

    • Making Jewelry: Crafting jewelry is still viable.
    • Continue making jewelry, but focus on the most profitable items, such as diamond jewelry. This method offers high experience and considerable profits. The most expensive jewelry often requires the highest crafting levels.

    • Dragonhide Armor: Making dragonhide armor remains an excellent method.
    • Crafting blue, and even black, dragonhide armor gives significant experience. Dragonhide armor sells for a good amount on the market, which can contribute to your bank balance.

    • Crafting Skill Cape: Aiming to get the skill cape should be your goal.
    • Once you’ve reached 99 crafting, obtaining the skill cape is a great accomplishment. It signifies your dedication and mastery of the skill. The process involves crafting various high-level items.

    Materials, Locations, and Best Practices

    Efficiency in crafting depends on knowing where to find your materials, which location is best, and the best practices. This includes knowing where to find your materials. Efficiency comes down to choosing the right locations and understanding the best ways to craft. Mastering these elements will help you improve your crafting speed.

    Sourcing Raw Materials

    The first step in crafting is gathering materials. The process can be time-consuming, but there are methods to speed things up. Many players often overlook the gathering process, but efficient gathering is key to maximizing your profit. Planning your gathering routine can save time. By gathering the materials and keeping track of them, you can increase your crafting speed.

    • Leather Sources: Killing cows and buying from stores.
    • Cows can be found near various towns, such as Lumbridge, making it easy to gather leather. You can also buy leather from general stores, providing a quick way to get the materials. Buying from the store can be faster than hunting cows, but may not be as cost-effective.

    • Gem Sources: Mining gems in specific locations.
    • You can mine gems at various mining sites. These sites are often found in the wilderness. When mining gems, you need to use a pickaxe, which is another requirement.

    • Ore Sources: Mining ore from rocks.
    • Ores are a foundational material. You can mine them at various locations around Gielinor. It requires the use of a pickaxe, which can be acquired from shops.

    • Thread and Needle Sources: Buying from general stores.
    • Thread and needles are readily available at general stores. The shops will be near a bank. They are inexpensive.

    Optimal Crafting Locations

    Finding the correct locations can save time and improve efficiency. There are specific locations that are especially effective for certain tasks. A well-chosen location will include a bank, a crafting table, and other relevant facilities. Choosing the right spot can significantly improve your crafting experience.

    • Varrock: Offers access to a bank, furnace, and crafting table.
    • Varrock is a central location with all the essential facilities needed for crafting. This location provides access to a bank, furnace, and crafting table, making it a great option. Being a central location also makes it a great choice for various activities.

    • Edgeville: Near a bank and furnace.
    • Edgeville is another convenient location to craft. It is near a bank and a furnace, which means you have quick access to your resources. It is useful, especially when focusing on smelting or jewelry-making.

    • Crafting Guild: Contains a bank, furnace, and crafting table.
    • The Crafting Guild is specifically for crafting-related activities. It has a bank, furnace, and crafting table. This location is designed to improve the crafting experience.

    • Port Phasmatys: Includes a bank and crafting table.
    • Port Phasmatys is also a good location for crafting. It features a bank and a crafting table. This offers players a way to level crafting efficiently.

    Best Crafting Practices

    Using the best methods is essential for maximizing your results. This includes using hotkeys, optimizing your inventory, and knowing how to handle your materials. Adopting the right habits is essential for making crafting enjoyable and rewarding.

    • Use Hotkeys: Using hotkeys is a great way to improve your speed.
    • Hotkeys can speed up the crafting process, especially when repeatedly performing the same actions. Make sure to bind keys for the commonly used actions to reduce the time spent clicking. This is a great way to save time and improve efficiency.

    • Inventory Management: It’s important to optimize your inventory.
    • Organizing your inventory is crucial for efficiency. Make sure you have enough space for all the materials you need. It prevents unnecessary trips to the bank. It helps you stay focused on your activity.

    • Use the Grand Exchange: Consider buying and selling materials at the Grand Exchange.
    • The Grand Exchange is a key aspect of OSRS economics, allowing you to buy and sell items with other players. Using this helps acquire the materials needed and it is also good for selling crafted items. It can save you time and provide a consistent supply of materials.

    • Plan Ahead: Make sure to plan your crafting sessions.
    • Planning can significantly reduce wasted time. Plan your sessions by checking how much material you need and prepare your inventory. Knowing what you want to craft and preparing beforehand can increase your productivity.

    Money-Making with Crafting

    Crafting isn’t just about leveling up; it also offers a variety of ways to make money. You can sell crafted items for profit. Some methods are consistently profitable, while others depend on the current market. By mastering these methods, you can add another income stream to your character. Efficiently earning gold through crafting will require more skill.

    High-Value Jewelry

    Jewelry is one of the most reliable money-making avenues in crafting. Some pieces sell for a higher price than the materials. A key element of success is knowing which items are popular and in demand. It involves creating items with high value and targeting customers with these items. The jewelry that you make should be worth the resources. As with any strategy, market conditions change, so you should keep your information up to date.

    • Diamond Rings and Amulets: These items often provide a good profit margin.
    • Diamond rings and amulets are frequently in demand due to their high stats. Knowing the crafting process for these pieces, along with their value, ensures that you can take advantage of the market. They are also often required for quests.

    • Sapphire Jewelry: An effective entry-level method for profit.
    • Sapphire jewelry is a great starting point for making money. Sapphires are inexpensive to purchase and craft into useful items, providing a steady stream of income. The value of sapphire jewelry can fluctuate, so stay up to date.

    • Opal Jewelry: A more basic alternative for money-making.
    • Opal jewelry is another option. Opal jewelry requires fewer levels to create and can be very useful for beginners. It’s a method that is simple to learn and requires fewer resources than the more advanced jewellery options.

    Dragonhide Armor

    Dragonhide armor can be a lucrative venture. The process might require some investment, but the potential profit can be worth it. By learning to create and sell these items, you can enhance your income. Successfully creating and selling this armor will bring in a lot of money and increase your bank balance.

    • Green Dragonhide: Crafting green dragonhide armor is a good choice.
    • This is a valuable option that boosts your crafting experience rates. Crafting green dragonhide armor is good for both experience and profit. The materials can be obtained from dragons, and the armor can be sold to other players.

    • Blue Dragonhide: Blue dragonhide armor provides good returns.
    • Blue dragonhide armor sells for a substantial price on the Grand Exchange, making it a viable money-making option. This is especially true when players need items with increased stats.

    • Black Dragonhide: Higher-level dragonhide armor is more profitable.
    • Black dragonhide armor can be quite profitable. This armor requires a higher level, but can be sold for a high price. You will require higher levels to craft this armor.

    Market Fluctuations and Strategy

    The Grand Exchange market is always changing. Keeping up with market trends will affect your profitability. It’s important to keep your approach flexible and adapt to the current trends. Being up to date with the market allows you to make informed decisions and stay ahead of the game. Successfully navigating these fluctuations will allow you to maintain a steady income.

    • Monitor Prices: Pay attention to item prices on the Grand Exchange.
    • Regularly check the Grand Exchange to keep track of prices. Understanding the market prices of the items helps determine the best items to make. Also, keeping track of prices helps identify profitable crafting opportunities.

    • Specialize: Focus on items that have high demand.
    • Focusing on high-demand items means specializing in creating items that are highly desired by players. Understanding the market, you can focus on items with strong demand. This can help improve your returns.

    • Buy Low, Sell High: Make use of the fluctuations in market prices.
    • Learn when to buy materials and when to sell your crafted items. This strategy is essential for maximizing profits. This method makes the most out of market swings.

    The Crafting Skill Cape

    The Crafting skill cape is a symbol of achievement. It demonstrates your commitment and hard work. The cape not only looks great, but it also has beneficial effects. Knowing how to obtain this item and its benefits can be very useful.

    Obtaining the Crafting Skill Cape

    Getting the Crafting skill cape requires reaching level 99. The final part involves a bit of grinding and preparation. Reaching level 99 shows true dedication and allows you to enjoy the rewards. Obtaining this cape can be a challenge. With the right amount of effort, it will provide a sense of accomplishment.

    • Reach Level 99: The first step is getting to level 99.
    • This process involves crafting various items, accumulating a lot of experience. The type of items that you craft can influence the overall experience. Planning your leveling method is essential to reach level 99.

    • Purchase from a Skill Master: Once you reach 99, you can buy the cape.
    • After reaching level 99, visit a skill master to purchase the Crafting skill cape. The skill master is found near the Crafting Guild. Buying the cape from the skill master is a simple process.

    • Skill Cape Perks: The cape offers perks related to the skill.
    • The main advantage of the skill cape is the ability to show off your achievement. It also provides a few extra perks, like saving on crafting materials.

    Benefits of the Crafting Skill Cape

    The Crafting skill cape offers several advantages. The main benefit is the ability to show off your achievement to others. It can also save you money and has various other uses. The cape is more than just a cosmetic item. The perks and the satisfaction of earning the cape can enrich the gaming experience.

    • Prestige: Demonstrates mastery and dedication to the skill.
    • Wearing the cape allows you to show off your achievement. It is a symbol of hard work. When you’re wearing the cape, others will see the time and effort you’ve put in.

    • Style: Provides a unique look and enhances your character’s appearance.
    • The skill cape is visually distinctive, enhancing the appearance of your character. It’s an awesome accessory that can be combined with other gear. The style enhances your experience in the game.

    • Additional Benefits: Provides benefits like saving crafting materials.
    • The skill cape also provides benefits like saving crafting materials. The cape’s passive bonus provides savings. It enhances the economic efficiency of crafting.

    Crafting Experience and Leveling Progression

    Understanding the experience rates and leveling progression is essential for efficient training. This will help you know what to expect and plan your training. Mastering these principles will maximize the efficiency of your crafting training.

    Experience Rates and Training Guides

    Knowing the experience rates is essential for planning your leveling. The most efficient methods for different levels can make a huge difference in the amount of time required. Knowing the experience rates, along with other guides, allows you to determine your path to reach your goals.

    • Experience per Hour: Focus on experience per hour (XP/hour).
    • Using the best methods improves the XP/hour. Knowing the XP/hour will allow you to determine how quickly you can level. The focus on XP/hour can help players optimize the process.

    • Training Guides: Use guides to determine efficient methods.
    • Training guides will provide a path for the most efficient levels. They often describe the best methods for each level range. Using the guides can maximize your XP rates.

    • Item Value: Combine experience gain with profit.
    • Some training methods provide experience, and also have good profit margins. Combining XP with profitable crafting makes your journey more enjoyable. Knowing the market value of items allows you to focus on the high-value items.

    Crafting Level Progression

    Understanding the levels is crucial for a smooth leveling process. Knowing which items to create for each level is a key aspect of progression. The entire process requires a planned approach, which keeps you focused on your goal. Planning the process carefully allows you to progress efficiently.

    • Early Levels (1-20): Focus on leather armor and basic items.
    • In the early levels, you should focus on crafting leather armor and other basic items. You will get used to the crafting mechanics and the experience required. Focusing on low-level items will help you build a solid foundation.

    • Mid-Levels (20-50): Start crafting jewelry and dragonhide armor.
    • At mid-levels, you should focus on jewelry and dragonhide armor. It requires a higher level, and allows you to experience the market’s value. The mid-levels offer an excellent mix of experience and income opportunities.

    • High Levels (50+): Make high-level jewelry and dragonhide armor.
    • In the high levels, you should focus on the most profitable activities. The method of crafting at this level is the key to earning money. Making high-level jewelry or dragonhide armor will help make your goals more achievable.

    Common Myths Debunked

    Frequently Asked Questions

    Question: Is crafting worth the time?

    Answer: Yes! Crafting is worth the time. It is important for quest completion, gear creation, and money-making.

    Question: What’s the fastest way to level crafting?

    Answer: The fastest methods change. Some options include crafting dragonhide armor, cutting gems, or making jewelry.

    Question: Where can I get leather?

    Answer: You can get leather by killing cows or by buying it from stores. The best source is dependent on your budget.

    Question: What’s the best location for crafting?

    Answer: It depends on what you’re crafting, but Varrock and Edgeville are great choices.

    Question: Can crafting make me money?

    Answer: Yes, you can make money. Crafting certain items like jewelry and dragonhide armor sells for a profit.

    Final Thoughts

    Now that you’ve explored the ins and outs of crafting cape osrs, you’re well-equipped to start your journey! Remember, the key to success is a mix of knowing the best methods, preparing materials, and smart choices in the market. Focus on building your levels, from leather armor to dragonhide armor. Don’t hesitate to explore and experiment to find what works for you. Keep an eye on market prices, and adjust your plans as needed. Crafting is a rewarding skill that brings both satisfaction and rewards. So, get out there, start crafting, and enjoy the adventure. With dedication and effort, you’ll be wearing that skill cape in no time!

  • Crafting Calculator Demystified: Boost Your Creative Projects

    Crafting Calculator Demystified: Boost Your Creative Projects

    Ever started a creative project, only to realize you’re short on supplies halfway through? Or maybe you’ve spent too much and blown your budget? I certainly have! That’s where a crafting calculator comes to the rescue. This handy tool helps you estimate the materials you need, the costs involved, and even the time commitment. This post will show you how a crafting calculator works and why it’s an essential tool for any creative enthusiast. By the time you’re done reading, you’ll have a clear grasp on using these calculators to plan and manage your projects effectively. This will improve your Time on Page and reduce your Bounce Rate.

    Key Takeaways

    • Learn the core functions of crafting calculators and how they estimate material needs.
    • Discover how these tools help accurately calculate the cost of crafting projects.
    • Understand the time-saving benefits of planning your projects with a crafting calculator.
    • Get insight into using calculators for effective budgeting and project management.
    • Find out how to choose the right crafting calculator for your specific needs.
    • Explore some of the best crafting calculators available.

    Unlocking the Power of a Crafting Calculator

    A crafting calculator isn’t just about crunching numbers; it’s a project management buddy for creators. It gives you a clear roadmap from the initial idea to the finished product. These tools help eliminate the guesswork, offering accurate estimates on what materials you’ll require and the associated costs. They can even predict how long a project will take, helping you stick to deadlines. For crafters of all levels, using a crafting calculator means more creativity and less financial stress.

    Essential Functions of Crafting Calculators

    Crafting calculators have several core functions. These tools are designed to take the chaos out of planning creative projects. They help you stay organized and within budget. Understanding the key features of these calculators is the first step toward efficient and enjoyable crafting.

    • Material Estimation: A main function of crafting calculators is calculating the amount of materials needed for a project. This helps you avoid shortages or overspending.
    • To determine the amount of materials, input details such as the size and shape of the item you want to make, and the calculator will tell you how much fabric, yarn, or other supplies you will need. This function can significantly cut down on waste and help you make the best use of your resources.

    • Cost Calculation: Determine how much your project will cost. You can calculate the cost of materials, labor (if applicable), and any other expenses involved.
    • The cost calculation feature takes the price of each material and the quantity needed, then it adds up all of the costs. Some calculators also let you add overhead costs, like the cost of your work space or tools. This can help you get a real picture of your project expenses.

    • Time Estimation: Estimate the time it will take to complete a project. Some calculators consider things like the complexity of the project, your skill level, and any breaks you might take.
    • Time estimation is a useful feature, helping you plan your time more effectively. Many calculators allow you to input how fast you work, giving you a good idea of how long the project will take. This can help you set realistic deadlines and manage your schedule.

    • Budget Tracking: Track your expenses to ensure you stay within your budget. This can include entering the planned costs and your actual spending.
    • Budget tracking helps you stay financially responsible. Some calculators let you set a budget and track your spending against it. They can then notify you if you are going over budget, which prevents surprises and helps you make good decisions about where to spend and where to cut costs.

    Planning and Preparation with a Crafting Calculator

    Planning is key to any successful crafting project. A crafting calculator can be your best friend when it comes to planning and preparation. With the right tools and information, you can reduce waste, stick to your budget, and complete projects successfully. It can turn creative ideas into well-executed creations.

    Material Calculation: Getting the Right Amount

    Estimating materials is the foundation of any crafting project. Whether you’re knitting a sweater or building a birdhouse, knowing how much material you need keeps costs down and avoids the annoyance of running out of supplies. Calculators are essential for estimating accurately.

    • Understanding Measurements: Learn the basics of measurements for your project. This includes dimensions, surface area, and volume, depending on what you’re crafting.
    • Consider the project’s size, shape, and design. A quilt, for instance, requires measuring its length and width to find the area, then adding extra for seam allowances and borders. Understanding how to measure will help you get accurate material estimates.

    • Material Consumption Rates: Get a good feel for how much material you’ll use. Material consumption rates are expressed as material needed per unit of measurement (e.g., fabric per square inch or yarn per stitch).
    • For example, if you’re making a knitted scarf, the calculator will ask for information, like the stitch count and desired length. You also must consider the yarn’s thickness and pattern. This allows the calculator to provide you with an accurate estimate of the amount of yarn you need.

    • Accounting for Waste and Errors: Always add a buffer to your material estimates to account for waste. You must allow for mistakes, or any unexpected changes in the project.
    • For example, when cutting fabric for a quilt, add a few extra inches to account for seam allowances, pattern matching, and potential errors. For yarn projects, order a little more yarn than you think you need. A buffer helps you avoid running out of materials at the last minute and having to interrupt your work.

    Project Cost Calculation: Staying within Budget

    Knowing the actual cost of your project is key to smart crafting. Cost calculation involves adding up the costs of materials, tools, and, in some cases, labor. Crafting calculator allows you to keep track of every expense, helping you manage your budget better and make better decisions about your projects.

    • Listing Materials and Prices: Begin by creating a detailed list of all materials. Include the price per unit for each item.
    • Include all the materials you require, from fabric and yarn to beads and glue. Then, make a note of the price for each item. You can often find this information by checking receipts, online listings, or in-store pricing. This listing is essential for accurate calculations.

    • Adding Labor Costs: If you plan to sell your crafted items, factor in the cost of your time. This involves setting an hourly rate for your labor.
    • If you’re crafting for profit, consider adding a labor cost to your project’s expenses. Setting a fair hourly rate is critical. Many crafters calculate labor costs by including the time they spend on a project.

    • Adding Overhead Costs: The cost of rent, utilities, and marketing. Be sure to consider other expenses such as studio fees, software subscriptions, or the cost of advertising and marketing.
    • Overhead costs often go unconsidered. Include costs that are not directly tied to the materials or labor, but that are still necessary for running your business. Doing so will help you determine how much to charge to make a profit. Include these costs to get a complete picture of your project expenses.

    Exploring Types of Crafting Calculators

    The world of crafting calculators is as varied as the projects you can create. There are many different types available, each designed to meet specific needs. Whether you prefer a physical tool or a digital app, the right crafting calculator can significantly improve your creative workflow.

    Types of Calculators: Apps, Software, and Physical Tools

    Crafting calculators come in a variety of forms. They have been created to suit different preferences and project needs. They can range from simple, hand-held devices to detailed software programs. Each type of calculator has its strengths and weaknesses.

    • Dedicated Apps: These are mobile apps designed for crafting, offering features like material estimation, cost calculations, and project tracking.
    • Dedicated apps are user-friendly, and you can take them with you anywhere. Most crafting apps allow you to save your projects, compare prices from different suppliers, and set up notifications to help you stay on track with your budget and schedule.

    • Spreadsheets: Many crafters use spreadsheet software, such as Google Sheets or Microsoft Excel. They build customized calculators for their specific projects.
    • Spreadsheets offer great flexibility, allowing you to tailor your calculations and budget tracking precisely. They often offer more advanced features, such as the ability to create formulas and automate calculations. This also allows you to analyze your crafting expenses, track your sales, and manage your inventory more efficiently.

    • Online Calculators: Many websites offer free, simple calculators. They are useful for quick estimations and calculations, and you do not have to download any software.
    • Online calculators are easily accessible. You can access them on any device with an internet connection. Most offer straightforward tools for material estimation, cost analysis, and basic project planning. You don’t have to download anything, and they provide quick, efficient solutions for basic needs.

    Choosing the Right Calculator for Your Needs

    When selecting a crafting calculator, consider your needs. Think about the types of projects you typically work on and how much detail you want in your calculations. If you work on different projects, you will need a more adaptable calculator.

    • Project Complexity: Consider the complexity of your projects. Simple calculators will do if you tend to make simple crafts.
    • If your projects are more complex, and if you work on things such as intricate quilts or complex garments, you will need tools that can handle multiple materials, measurements, and steps. This helps provide accurate cost, material, and time estimates.

    • Budget and Features: Decide how much you are willing to spend. Some apps are free or low-cost, while others may require a subscription or one-time purchase.
    • Choose features that match your needs. For example, some calculators track labor costs, overhead expenses, or even offer inventory management. Consider the user interface. Make sure the interface is easy to understand and use. A good interface will save you time and decrease frustration.

    • Integration and Accessibility: Choose a calculator that works seamlessly with your devices. A mobile app will offer convenience, allowing you to plan on the go.
    • If you prefer using a desktop, make sure the software is compatible with your operating system. Consider whether you need features that allow you to import or export data. This makes it easier to share your plans with others.

    Advanced Uses for Your Crafting Calculator

    A crafting calculator does more than just figure out material needs and costs. You can use it in a variety of ways to boost your creativity and business. You can use it to predict profit margins and manage your inventory.

    Inventory Management and Supply Tracking

    Effective inventory management is critical for those who craft professionally. Tracking your supplies will prevent overspending and make sure you always have what you need.

    • Tracking Inventory: A calculator helps you track the materials you have on hand. It allows you to monitor stock levels and avoid buying extra materials.
    • You can create a spreadsheet or use an app to keep track of the amount of yarn, fabric, or other supplies you own. This gives you a clear view of your inventory and helps you know when to order more materials. Many calculators also offer tools to track the purchase dates and costs.

    • Supply Purchases: Use your calculator to track supply purchases. It helps monitor spending and keeps you on budget.
    • Input all of your supply purchases into the calculator. This includes the quantity bought, the price, and the date of purchase. You can then use this data to see how much you are spending on specific items, track your expenses, and make informed choices about future purchases.

    • Preventing Overspending: Track your materials to avoid overspending. When you know how much you have, you can buy supplies as needed.
    • By monitoring the quantity and cost of your materials, you can easily avoid overspending. If your calculator alerts you that you are running low on a particular item, you can quickly reorder to avoid slowing down your projects.

    Profit Margin and Sales Price Calculations

    Calculating profit margins and setting prices are critical for crafters who sell their products. A crafting calculator gives you the data you need to ensure profitability.

    • Cost Analysis: Assess all project costs, including materials, labor, and overhead. This will help you know the total cost of each item you make.
    • A cost analysis reveals what each project truly costs to make. This helps you calculate a fair price that covers all expenses. Include everything in your analysis, from the cost of raw materials to the cost of your time and space.

    • Setting Sales Prices: The calculator helps you set your prices. This will increase your profitability.
    • Use your cost analysis to figure out the minimum you need to charge. You can then set your prices. You can also research similar items to make sure your prices are competitive. Consider factors like material quality and design when setting your prices.

    • Calculating Profit Margins: Compute your profit margins. This reveals how profitable each sale is.
    • Profit margin tells you what percentage of your revenue is profit. To figure out the profit margin, subtract the total cost of each product from the sales price. Then divide by the sales price, and you’ll find your profit margin. Keeping an eye on your profit margins will help you ensure your business is successful.

    Common Myths Debunked

    Frequently Asked Questions

    Question: Is a crafting calculator only for experienced crafters?

    Answer: Not at all. It’s useful for crafters of any level, from beginners to experts, helping everyone plan and manage projects better.

    Question: Can I use a regular calculator for crafting projects?

    Answer: A regular calculator can help with basic math. However, a dedicated crafting calculator offers features specifically designed to help with material estimations, cost calculations, and project tracking.

    Question: Are all crafting calculators digital?

    Answer: Not necessarily. While many are digital apps or software, you can also use spreadsheets or even physical tools like measurement conversion charts as a kind of calculator.

    Question: How do I decide which crafting calculator to choose?

    Answer: Base your decision on your project type, the features you need, and your budget. Consider user reviews and look for calculators that offer the functions you need.

    Question: Are there free crafting calculators?

    Answer: Yes, many online and app-based crafting calculators are free or offer free versions. These may have fewer features than paid options.

    Final Thoughts

    Whether you’re a hobbyist or an entrepreneur, a crafting calculator can significantly change the way you approach your creative work. It removes the uncertainty, allowing you to plan with accuracy, manage your budget efficiently, and free up time. You can make better decisions regarding your materials, costs, and time management. Embracing this tool empowers you to be more creative. Now, go forth, explore, and let your crafting dreams take shape!