Category: Crafting Ideas

  • Crafting PNGs: Your Guide to Transparent Image Mastery

    Crafting PNGs: Your Guide to Transparent Image Mastery

    Ever tried to copy and paste a logo into a presentation, only to find a big white box ruining the look? Frustrating, right? That’s where crafting PNGs comes in. This guide will help you create images with transparent backgrounds, perfect for web design, presentations, and everything in between. You’ll learn the ins and outs of crafting PNGs, ensuring your images look professional and polished. Get ready to gain the skills you need to produce visually appealing content, boosting both your site’s appearance and the time people spend enjoying it.

    Key Takeaways

    • Learn the benefits of using the PNG image format over other formats.
    • Discover the process of creating images with transparent backgrounds.
    • Explore different software options for crafting PNGs.
    • Understand how to optimize your PNG images for web use.
    • Gain the ability to solve common problems that may come up.
    • Enhance your designs with high-quality, professional-looking images.

    Understanding PNGs and Their Advantages

    PNG stands for Portable Network Graphics. It’s an image file format known for its lossless compression, meaning the image quality is preserved during saving and editing. Unlike formats like JPEG, which often lose some image data, PNGs maintain every detail. This makes them ideal for graphics with sharp lines, text, and logos. The ability to handle transparency is one of the most significant advantages of PNGs. They can store areas with transparency, which is key for website design and other applications where the image needs to blend seamlessly with its background.

    Why Choose PNG Over Other Formats?

    When selecting an image format, consider your project’s needs. JPEGs are good for photos due to their small file size, but they don’t support transparency and can degrade image quality with each save. GIFs are appropriate for simple animated graphics and can support transparency, but they have limited colors. PNGs offer the best of both worlds. They handle transparency beautifully and keep high quality, which makes them perfect for various applications. It is often the best choice for images that require clarity and sharpness.

    • Lossless Compression: PNGs use lossless compression, which preserves the original image quality. This is crucial for retaining fine details. After editing and saving, the image will not show any quality loss. This contrasts with JPEG, which uses lossy compression that can cause blurring.

      This is especially important when crafting PNGs for logos or graphics where crispness is vital. For example, a logo design used on multiple backgrounds must keep its sharp edges. With PNG, you are ensuring the final result is as good as the original.

    • Transparency Support: A key feature of PNGs is the ability to include transparency. This allows parts of the image to be see-through. This feature allows the graphic to blend in with various backgrounds, enhancing the visual appeal.

      This is essential when crafting PNGs for web graphics, where the image should not have any unnecessary white or colored backgrounds. Transparency is essential for logos, icons, and any visual element that requires a smooth integration with the design layout. This avoids the boxy appearance around images.

    • Wide Color Range: PNGs support a broad color range, including millions of colors. This is crucial for rendering images with complex color gradients or photographs. This is important for high-resolution graphics.

      This is beneficial for images like digital artwork. The wide color range ensures that images maintain the integrity of the original design. Color accuracy is another reason to opt for the PNG format.

    PNG vs. JPEG: Which to Use When?

    Knowing when to choose a PNG over a JPEG is essential for optimizing your images. Consider the image type and its intended use. JPEGs are suitable for photos, as they can handle a broad color palette and create smaller file sizes. However, they lack transparency. PNGs are the preferred choice for images requiring transparency, such as logos, icons, and graphics, because the quality is kept intact. Choosing the right format ensures that your images are visually appealing and efficient. This aids in a website’s speed and user experience.

    Feature PNG JPEG
    Compression Type Lossless Lossy
    Transparency Support Yes No
    Best For Logos, graphics, icons, images with text Photos, complex images with many colors
    File Size Generally larger Generally smaller

    Creating Transparent Backgrounds: A Step-by-Step Guide

    Creating transparent backgrounds is essential for crafting PNGs that blend seamlessly with any background. This process involves using image editing software to remove the existing background. It often involves selecting the area to be removed and designating it as transparent. The specific steps depend on the software, but the basic principle remains the same. Once you save the image as a PNG, the designated transparent areas will show whatever is behind the image.

    Choosing Your Image Editing Software

    Selecting the right image editing software can affect your workflow and the results you get when crafting PNGs. Several choices exist, ranging from free online tools to professional-grade desktop applications. The choice depends on your needs and skill level. For basic tasks, free online tools might suffice. For more advanced editing, tools such as Adobe Photoshop or GIMP provide better features and control. Consider the features available, your comfort with the interface, and the cost when choosing your software.

    • Adobe Photoshop: Photoshop is an industry-standard image editing software. It offers a wide range of tools for complex editing, including advanced selection tools and layer management. It is ideal for professional users who need high-precision edits.

      It’s great for intricate work, allowing you to remove backgrounds with great accuracy. The downside is that Photoshop requires a subscription and might not be suitable for beginners. Many tutorials are available to guide the user through the process.

    • GIMP: GIMP is a free, open-source image editing program that provides many features similar to Photoshop. It’s an excellent option for users on a budget who want a powerful tool. It allows you to create images with transparent backgrounds.

      GIMP has a steep learning curve but is excellent for free. It is a good choice for those starting. Its capabilities can fulfill the editing needs of most users.

    • Online Tools (e.g., remove.bg, Canva): Online tools are a quick solution for simple tasks. These tools often use automated processes to remove backgrounds. They may not offer the precision of desktop software, but they are great for simple projects.

      These tools are great for fast background removal, requiring no software installation. However, they may not handle complex images well or offer advanced editing features. This is a quick fix to remove backgrounds on the go.

    Removing the Background

    The method for removing a background depends on the image and the software you use. For images with a solid background color, the “magic wand” or “selection” tool can efficiently select and remove the background. For images with complex backgrounds, using a “lasso” or “pen” tool provides greater precision. The key is to carefully select the parts of the background and delete them, leaving the main image intact. This requires some practice, but the result is a clean image with a transparent background.

    • Using Selection Tools: Most image editing software provides selection tools to choose specific parts of an image. The “magic wand” tool, for example, is great for selecting areas of similar color.

      Click on the background, then delete. For more complex selections, the “lasso” or “pen” tools provide more control. These tools let you draw precise outlines around the subject, which is often preferable for intricate designs.

    • Refining Edges: After selecting the background, refining the edges is essential for a professional look. This involves smoothing the edges and removing any unwanted remnants of the background.

      Using the “refine edge” tool, which is available in advanced software, helps smooth the transition between the subject and the transparent background. This step will guarantee a seamless finish. This minimizes jagged edges.

    • Saving as PNG: Once you remove the background, it is essential to save your image as a PNG file. Most editing software will have an option to save the file as a PNG.

      This format supports transparency. Ensure that you choose the “PNG” option when saving. Otherwise, the transparency will be lost, and the image will have a solid background.

    Optimizing PNGs for the Web

    Optimizing your PNGs for the web is essential for maintaining image quality while reducing file size. Larger file sizes can slow down your website. This impacts user experience and can affect your search engine rankings. By optimizing your images, you can strike a balance between image quality and performance. This improves your site’s load times and overall user experience. This involves various techniques, including using compression tools and choosing the best settings when saving your images.

    Compression Techniques

    Compression is the process of reducing an image’s file size. This technique helps to improve your website’s performance. Two types of compression are relevant: lossless and lossy. PNGs primarily use lossless compression. This retains the original image quality. However, there are settings within the PNG format that allow for further optimization. Several tools and techniques help to minimize file size. This helps keep your website’s pages running smoothly.

    • Lossless Compression: Lossless compression reduces file size without any loss of image quality. This is ideal for crafting PNGs, as it preserves image details.

      Tools like TinyPNG or ImageOptim use lossless compression techniques to minimize file size while retaining quality. The key is to start with a high-quality source image and let the compression tools do their work.

    • Online Compression Tools: Numerous online tools are designed to compress PNG images. They offer the ease of use. They often provide several optimization options.

      Tools like TinyPNG and ImageOptim can automatically reduce the file size of PNGs. They are very user-friendly, offering a quick method to optimize your images. Using these can make a big difference in load times.

    • Choosing the Right Color Depth: PNGs support varying color depths, affecting both image quality and file size. Lowering the color depth can reduce the file size.

      If your image does not require a full spectrum of colors, reducing the color depth can significantly reduce file size. For example, a logo might only need 256 colors. Setting the proper depth keeps the image looking good while saving space.

    File Size Considerations and Best Practices

    The size of your PNGs will affect the loading time of your webpages. Smaller file sizes ensure faster loading. This improves your user’s experience. Best practices for optimizing image size include selecting the correct image dimensions, compressing your images effectively, and evaluating your images often. Remember that every kilobyte matters when optimizing a website. By paying attention to these aspects, you can ensure that your images look great and contribute positively to your site’s performance.

    1. Right Image Dimensions: Ensure that your PNGs are the exact size they need to be displayed. Avoid using oversized images. They require the user’s device to render them. Resize your images to the proper dimensions before uploading them. This reduces the need for the browser to resize them.
    2. Compress Effectively: Employ lossless compression tools like TinyPNG to minimize file size without degrading image quality. For each file you add to your site, there is a cumulative impact on loading speeds. Smaller file sizes equal faster loading times.
    3. Test Image Performance: Use tools to test your website’s performance, like Google PageSpeed Insights. These will provide insights into which images are slowing down your site. Evaluate your site often to identify and resolve issues.

    Practical Applications and Examples

    Crafting PNGs is useful in many real-world applications. They excel when you need visual elements to integrate seamlessly with various backgrounds. Their ability to handle transparency makes them perfect for web design, graphic design, and other applications. Using PNGs correctly provides a professional appearance and enhances the aesthetic quality of your projects. Several examples show how PNGs make designs look cleaner and more effective.

    Logos and Branding

    Logos are prime candidates for PNGs. A logo is often added to multiple backgrounds. A transparent background makes your logo look great on any background. This flexibility is essential for branding. Using a PNG ensures that the logo maintains its quality, whether on a website, a document, or printed materials. This gives your brand the professional image it needs.

    • Websites: Logos with transparent backgrounds make it easy to place the logo on a website. This seamlessly integrates with the website’s design. This ensures that the logo does not appear as a square.

      A transparent logo allows the website’s background to show through, creating a better look. This creates a clean, professional aesthetic. Using PNGs means the logo can be placed anywhere on the website.

    • Presentations: Presentations benefit from PNG logos. You can add them on top of slides. A PNG logo ensures the logo does not appear as a box.

      This allows your logo to be positioned over any background. The quality is maintained. This maintains the consistency of your brand across all presentations.

    • Marketing Materials: PNG logos work well on business cards, brochures, and other marketing materials. PNG helps your logo appear crisp.

      With a transparent background, your logo can be placed in any location. Your logo will be eye-catching. This adds polish to your marketing materials.

    Graphic Design and Web Design

    In graphic and web design, PNGs are the foundation of many visual elements. The ability to use transparency is a key benefit. This lets designers create complex layouts. Using a PNG allows for creativity. The image will not be obscured by a background. It can be easily integrated into any design. This versatility makes PNG a go-to format for professional design projects.

    1. Icons and Buttons: Transparent background icons can be put on any background. The result is seamless integration. This is important for web interfaces, where buttons and icons are constantly used.
    2. Overlay Graphics: Designers use PNGs to overlay images to make complex designs. This allows for complex visual effects without the need for a white background.
    3. Custom Illustrations: Creating custom illustrations with a transparent background enables them to be placed on any background. This maintains artistic freedom. It is essential for web design.

    Common Myths Debunked

    Myth 1: PNGs are only for logos.

    While PNGs are great for logos, their use extends beyond that. They are excellent for icons, illustrations, and any image that requires transparency. They are a good option for images that benefit from lossless compression. This also makes them ideal for other applications where image quality matters.

    Myth 2: All online image converters produce the same quality.

    The quality of online image converters can vary. Some tools use more advanced compression techniques, which result in better-looking images. Always check the output quality before using it in your projects. If you want the best results, use a high-quality editor, like Adobe Photoshop.

    Myth 3: Transparency always increases file size.

    This is not always true. While transparency can slightly increase file size, the lossless compression of PNGs often keeps the file size reasonable. By using the right optimization techniques, you can balance image quality and file size effectively. You can use tools to optimize the file size without any quality loss.

    Myth 4: JPEGs are always better for photos.

    JPEGs are great for photos where you’re comfortable with a bit of quality loss for smaller file sizes. But if you need sharp images without compression artifacts, or if transparency is needed, PNGs can be a better option. Consider the needs of your project. If you are doing editing, consider the type of file. The right choice is what matters.

    Myth 5: It’s too difficult to craft PNGs.

    Creating PNGs is not as hard as it appears. Plenty of user-friendly software options exist. The basics involve selecting the background and saving the image as a PNG. With a little practice, you can produce great images.

    Frequently Asked Questions

    Question: What’s the best software for creating PNGs?

    Answer: Adobe Photoshop and GIMP are great for detailed editing. Online tools such as Canva and Remove.bg are good for easy tasks.

    Question: How do I make the background transparent in an image?

    Answer: Use the selection tools. Remove the background. Save the file in a PNG format.

    Question: How can I reduce the file size of my PNG?

    Answer: Use compression tools. Reduce the color depth. These will reduce the file size.

    Question: Why does my PNG look blurry?

    Answer: Make sure the original image is high resolution. Use a compression method. The image should be of good quality.

    Question: Can I convert a JPEG to a PNG and get transparency?

    Answer: No. JPEGs do not have transparency. You will need to remove the background in an image editing program and then save the file in PNG format.

    Final Thoughts

    Crafting PNGs is a useful skill. This opens doors to better visual communication. This format allows you to create high-quality images. It also lets you control how these images appear in various settings. By understanding the advantages of PNGs and how to create them, you can improve your designs. Remember to consider your needs and use the right tools. Take the time to master the steps. Keep practicing, and you will achieve great results. With a bit of practice, you will be producing professional-looking graphics with ease. Your designs will be more impactful than ever before!
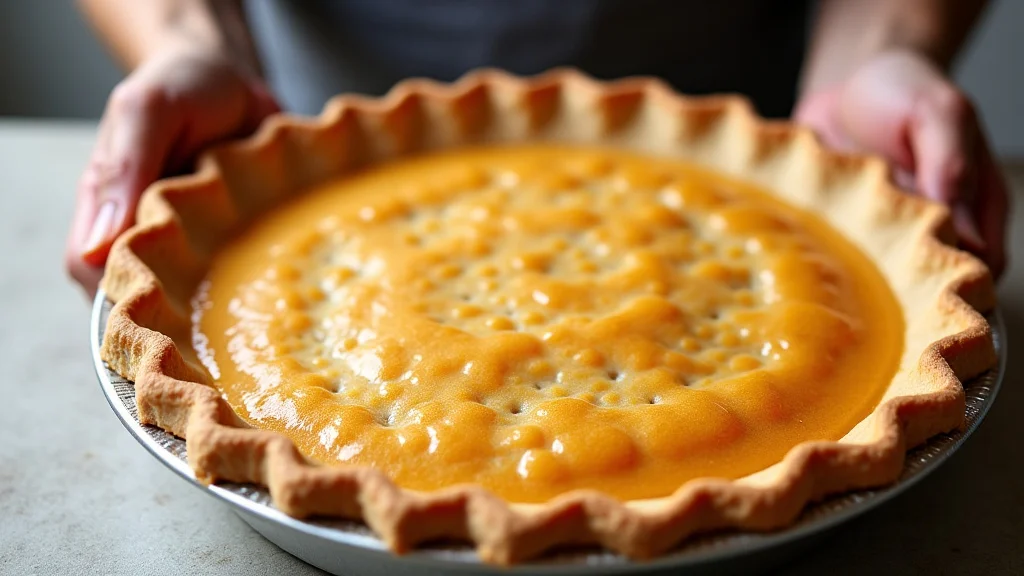

  • Crafting Pie OSrs: A Guide to Delicious and Effective Baking

    Crafting Pie OSrs: A Guide to Delicious and Effective Baking

    Remember that time you spent hours gathering ingredients, only to burn your pie in the oven? Well, thankfully, in Old School RuneScape, the stakes are a bit lower! But the satisfaction of crafting pie OSrs that gives a boost is just as rewarding. This guide is your recipe for success, helping you bake the best pies for maximum benefits. You’ll explore the ingredients, the process, and the rewards, learning how to quickly and efficiently craft perfect pies every time. Get ready to level up your culinary skills and achieve success in the kitchen with this exploration of crafting pie OSrs.

    Key Takeaways

    • Learn the necessary ingredients for crafting various pies in OSrs.
    • Discover the best methods to obtain pie ingredients efficiently.
    • Understand the skill levels required for each type of pie.
    • Explore the benefits of eating different pies in the game.
    • Find out how to maximize your experience gains through pie-making.
    • Become a master pie crafter and boost your gaming experience.

    Getting Started with Crafting Pie OSrs

    The culinary side of Old School RuneScape offers more than just a break from combat; it provides crucial boosts for various skills and activities. Baking pies, in particular, is a fundamental skill, offering benefits from restoring health to increasing stats. This guide provides a detailed look at the basics: ingredients, required levels, and the various pie types. Whether you’re a seasoned player or a newcomer to the skill, this section will prepare you for the sweet and savory rewards of crafting pie OSrs.

    Essential Ingredients and Their Acquisition

    The foundation of any pie is its ingredients. Acquiring these components forms the base of your crafting experience. Each pie requires specific items, from simple flour and water to more exotic items like various types of fruits. Knowing where to source these ingredients is the first step toward becoming a successful pie crafter. This knowledge will save time and improve your efficiency. This section will walk you through each key ingredient and the best places to find them.

    • Flour: This is a cornerstone ingredient. It can be bought from various general stores in the game. A significant hub for flour is the Grand Exchange, where bulk purchases can be made. Flour is a quick purchase making it easier to start baking pies.
    • Water: Adding water to flour creates dough. Filling a pot with water is achieved at any water source like a well or fountain. Empty jugs can also be filled to create water.
    • Pie Shells: These are pre-made containers for baking. You get them by combining flour and water. Skill level is not required to create them.
    • Specific Fruit Ingredients: From apples to lemons, different fruit ingredients are necessary for creating various pie types. These can be gathered from trees or bought from stores. You should consider getting your fruit from places like Catherby.

    Acquiring ingredients is more than just about gathering; it’s about efficiency. The time you spend collecting resources directly impacts how quickly you can level up your cooking. For example, knowing the fastest routes to purchase flour and filling jugs can greatly reduce preparation time. Furthermore, understanding the respawn rates of specific ingredients, like fruit, will allow you to plan your gathering sessions effectively. With proper preparation, you can keep your inventory stocked with the necessary resources and optimize your pie-making process.

    Skill Requirements for Crafting Pie OSrs

    While gathering ingredients is a necessary first step, your ability to bake pies depends on your cooking level. Different pies need varying cooking levels, so having the right skill is critical to success. This section will review the skill level requirements for each type of pie. The better you become, the more advanced pies you can make, each offering greater benefits.

    • Cooking Level: The skill level required is a key factor. All pies are dependent on your cooking level, a skill trained by using raw food. As you level up, you can make more complex pies.
    • Pie Selection: As your cooking level increases, so does your ability to bake different types of pies. Start with easy pies and move on to more advanced recipes.
    • Experience Gains: Baking pies is an efficient way to gain experience. Knowing what gives you the best experience per item will influence your choice.

    Understanding the skill level requirements is critical for planning. Consider your current cooking level and the experience needed to progress to the next level. Plan your pie-making accordingly, focusing on pies that you have the skill to make. By consistently making pies within your ability level, you can rapidly advance your cooking and unlock more recipes. This structured progression helps in efficient skill development and makes your crafting of pie OSrs experience more efficient.

    The Different Pie Types and Their Benefits

    Pie-making in Old School RuneScape is about more than just cooking; it’s about strategically selecting the right pie for the task at hand. Various pies offer unique benefits, from healing to boosting your stats. This section provides an overview of each type of pie. This information will help you to select the correct pie for any situation, enhancing your gameplay.

    Apple Pie

    This is a foundational pie, often one of the first that players master. It is easy to create and consumes a low amount of resources. Beyond its role as a basic cooking option, apple pie restores a moderate amount of hitpoints. This makes it an ideal choice for players who are new to the game or those in need of a quick source of healing. Furthermore, it serves as a stepping stone. Apple pie allows you to familiarize yourself with the cooking process.

    • Ingredients: Apple pie requires a pie shell, an apple, and water.
    • Cooking Level: Level 10 Cooking is needed.
    • Benefits: Apple pie heals a moderate amount of hitpoints.

    Apple pie is a cost-effective option for healing, but it is not intended for advanced healing. Its simplicity makes it an excellent choice for a beginner. However, once you advance and get the skills, you should consider other options. The advantages of the apple pie are its ease of preparation and the quick restoration it offers. Its availability also makes it a reliable option.

    Meat Pie

    Meat pies offer a substantial increase in health. They are a good option for players looking to heal while training their skills or going on adventures. The meat pie is a step up in complexity from apple pie, requiring slightly more effort to prepare. They also require more ingredients which will have to be sourced. This section explains the ingredients needed and where to find them.

    • Ingredients: Requires a pie shell, raw meat, and cooking.
    • Cooking Level: Level 20 is required.
    • Benefits: Provides a moderate amount of hitpoint restoration.

    When selecting the type of pie, consider the situation at hand. For general combat or skill training, the meat pie is effective. The significant health boost allows you to sustain longer periods of activity without needing to rest. Its ability to restore health helps to reduce downtime. In comparison to other more expensive or complex pies, the meat pie is the better option for general use.

    Redberry Pie

    Redberry pie has a similar function to apple pie, but its ingredients are more diverse. This pie offers a unique choice for players. Redberry pie is a good option when you are looking for alternatives to standard healing. The ingredients are acquired from specific locations. This section covers the ingredients and the process.

    • Ingredients: Requires a pie shell, redberries, and cooking.
    • Cooking Level: Level 30 is required.
    • Benefits: Provides a moderate amount of hitpoint restoration.

    Consider the access to ingredients when choosing which pie to make. Redberries may be slightly more difficult to acquire compared to apples. If you are near a source of redberries, this pie can be a good choice. Its health restoration is helpful when you are training. Redberry pie shows the impact of ingredients on the utility of food in the game. It encourages players to consider multiple recipes.

    Other Pie Varieties

    The culinary side of Old School RuneScape also includes other pies. Each of these pies offers unique benefits and requires different ingredients and cooking levels. The variety of pies makes it possible for players to get boosts for the skills they want to train. Exploring different pies means different gaming experiences.

    • Mud Pie: Provides a small amount of hitpoints.
    • Garden Pie: Boosts your combat levels.
    • Summer Pie: Boosts your agility.
    • Wild Pie: A more difficult pie to bake, offering higher boosts.

    The choice of pie often depends on your specific needs. Understanding the benefits of each pie helps you make the most of your resources and time. Consider what the game requires from you when selecting the right pie. For example, if you are planning to level up your combat stats, you can make garden pie. Similarly, summer pie is a smart choice to train agility. This variety allows players to tailor their game strategies based on their goals.

    Maximizing Efficiency When Crafting Pie OSrs

    Achieving efficiency in pie-making means minimizing wasted time and resources. This section will show you how to streamline the entire process, from gathering ingredients to the cooking itself. You’ll also learn the key strategies used to optimize your experience per hour. By adopting these methods, you’ll be able to create pies faster and more efficiently. Your goal is to maximize your time in game.

    Ingredient Gathering Strategies

    The time spent gathering ingredients is crucial to maximizing efficiency. Your ability to quickly and easily acquire the ingredients will determine your success. The following tips will help to reduce downtime. From buying ingredients from stores to gathering fruit, proper preparation helps.

    • Strategic Shopping: The Grand Exchange is your main source for purchasing flour. Stores, like those in Port Sarim, sell apples and other ingredients.
    • Optimal Routes: Always plan your gathering routes. Knowing the most efficient path between ingredient locations reduces time wasted.
    • Inventory Management: Carry only the necessary items. Consider using inventory-clearing features like bank chests to manage your inventory space.

    To implement these strategies, first, set up your personal routine. Start by checking the Grand Exchange for the latest prices. Then, gather your fruits and other ingredients. Minimize time by pre-planning. Using shortcuts and optimizing your routes will speed up gathering. Finally, organize your inventory to prevent any unnecessary trips back to the bank. These practices collectively improve efficiency. These simple habits lead to greater speed.

    Fast Cooking Methods

    Cooking is a straightforward process, but applying the correct methods will speed things up. Using these tips will help you in your cooking. This means you can create more pies. Efficiency in cooking directly impacts your leveling. Use the strategies below to improve your pie-making process.

    • Use a Cooking Range: Using a cooking range offers a faster cooking rate compared to a campfire. The cooking range can be found in various locations.
    • Banking Strategies: Keep your ingredients close to a bank. This allows you to quickly restock your inventory after cooking a batch of pies.
    • Optimal Locations: Choose locations with a bank and cooking range to minimize travel time.

    By implementing these techniques, you significantly reduce the amount of time. Start by making sure you have all your ingredients. Then, use a cooking range to quicken the cooking time. During the cooking session, you should be located near a bank. This will make it easier to restock. These practices transform your crafting of pie OSrs experience. You will become more efficient and you will save time.

    Experience Per Hour Optimization

    Optimizing your experience per hour (XP/h) is vital if you aim to level up your cooking. Several factors influence how quickly you gain experience. By carefully considering these points, you can significantly boost your XP rates. Consider the ingredients, the method, and the target.

    • Ingredient Selection: Choose recipes that offer a high experience rate per item made.
    • Cooking Speed: Utilize ranges and banking strategies to cook as quickly as possible.
    • Focus on Efficiency: Eliminate all unnecessary steps. This includes choosing a proper area to cook.

    First, determine which pies offer the greatest experience. Then, locate them near a bank and a cooking range. This approach streamlines the cooking process. As you advance, consider adjusting your strategy based on the current market prices. This helps you balance efficiency with cost-effectiveness. In the end, a balanced approach ensures steady skill development.

    Common Myths Debunked

    Frequently Asked Questions

    Question: What is the best pie for healing in OSrs?

    Answer: Meat pie generally provides the highest health restoration for the resources needed.

    Question: At what level can I start making apple pies?

    Answer: You can start making apple pies at level 10 Cooking.

    Question: Where can I get flour in Old School RuneScape?

    Answer: Flour can be bought from general stores or the Grand Exchange.

    Question: Are there any pies that give me a stat boost?

    Answer: Yes, certain pies such as Garden Pie provide stat boosts.

    Question: Can I use pie shells on every pie?

    Answer: Yes, pie shells are a base ingredient for all pie types.

    Final Thoughts

    Crafting pie OSrs is more than just a means to restore health; it’s a fundamental aspect of gameplay that improves your experience. By understanding the ingredients, the process, and the benefits of each pie type, you can maximize your efficiency. Remember, strategic ingredient gathering, efficient cooking techniques, and careful planning are key to mastering pie making. Start with the basics, experiment with different recipes, and constantly refine your methods. With each pie you bake, you’ll improve your culinary skills and gain the benefits that will enhance your gaming success. Get cooking, and enjoy the rewards of the perfect pie!

  • Crafting Pet Osrs: A Guide for Beginners and Experienced Players

    Crafting Pet Osrs: A Guide for Beginners and Experienced Players

    Remember that exhilarating feeling when you finally got your first pet in Old School RuneScape? The sheer joy of seeing your little companion following you around is a huge reward for dedication. Maybe you’ve been working on getting a specific pet, and the grind is real. This post is for you. We’ll explore the process of crafting pet osrs, giving you tips and tricks to improve your chances. You’ll gain valuable knowledge that boosts your chances of securing that coveted pet. This guide aims to improve your gameplay experience, which will lead to a better time on the page and reduced bounce rate.

    Key Takeaways

    • Learn the fundamental mechanics of pet acquisition in Old School RuneScape.
    • Discover effective strategies to boost your chances of getting a pet.
    • Explore the various activities that offer pet drops.
    • Find out which pets are easiest to get and which ones are most difficult.
    • Get to know some of the popular methods used for acquiring pets.
    • Understand the importance of patience and perseverance during the pet grind.

    Understanding Pet Mechanics in Crafting Pet Osrs

    Getting a pet in Old School RuneScape is a rewarding experience. It shows your dedication and skill in the game. But what is the basic setup? Pets aren’t just for show; they’re a status symbol. They follow you around, showing off your accomplishments. The odds of getting a pet aren’t always in your favor, and it’s essential to grasp how the mechanics work before you start your hunt for a specific companion. Let’s explore what makes the pet system tick.

    The Basis of Pet Drops

    Every pet has a specific activity tied to it, like a boss fight or skill training. When you take part in that activity, you have a chance of getting the pet. The chances of getting a pet are usually based on your level, your progress within the activity, and the number of times you’ve done it. For instance, the chance of getting a pet might increase with each kill of a boss or with the amount of experience you gain while skilling. This makes it more likely that you’ll eventually receive the pet the more you participate. The randomness of the pet drop means you might get lucky, receiving it quickly, or it might take a lot of tries. Patience and persistence are key.

    • Skill-Based Pets: These pets are rewards for skilling activities, like Fishing or Mining. The rate is usually tied to experience gained.
    • Boss Pets: These pets come from defeating bosses. The drop rate is often based on the number of kills you have and the boss’s difficulty.
    • Event Pets: These pets appear during special events, and the chances of getting them can vary.

    Factors Influencing Drop Rates

    Several factors can affect how likely you are to get a pet. Your skill level, the activity’s difficulty, and any special items or bonuses you use all play a part. Certain boosts, like a higher skill level or special items that help with the activity, can increase your odds. For example, wearing a specific piece of equipment during a boss fight could increase the likelihood of getting its pet. The game doesn’t reveal the exact drop rates, but the community often helps figure it out over time. This way, you can get a good idea of what works best.

    • Level: Higher levels in skills often improve pet drop chances.
    • Item Perks: Certain items, such as the Dragon Pickaxe, can give you a boost in your chance of getting a Mining pet.
    • Activity Difficulty: Harder activities like high-level boss fights typically give a better chance of pet drops.
    • Kill Count or Experience: As you repeat an activity, your chances often increase.

    Drop Rate Mechanics

    The system for getting pets uses a system of probabilities, which can feel unfair at times. Imagine a dice roll, with each try giving you a chance to succeed. The chances might be small, so it could take a long time before you win. Every time you participate in an activity linked to a pet, the game does a hidden roll. If the roll is good, you get the pet! If not, you try again. This hidden system means that the drops are random, making it both exciting and sometimes frustrating. Remember that every attempt is an opportunity to succeed, and persistence is key.

    1. Pseudo-Random Number Generator (PRNG): The game uses a PRNG to decide when you get a pet. The PRNG makes it seem random, but it’s not truly random.
    2. Drop Tables: Each activity has a drop table, which lists the items you can get. The pet has a spot on this table with a specific chance of appearing.
    3. “Dry Streaks”: You may encounter long periods without getting a pet, which is normal. It’s just how probabilities work.

    Crafting Pet Osrs: Strategies to Increase Your Chances

    While luck plays a big role in getting a pet, there are steps you can take to give yourself the best chances. Choosing the right activity, making the most of your skills, and using useful items can make a big difference. This section will go over strategies that players can use to increase their chances of success, making the hunt for pets more effective.

    Selecting the Right Activity

    The first step in your pet-gathering adventure is choosing the right activity. Your chances of success change depending on what you choose. For skills, the type of activity and your skill level will impact your chances. For boss pets, the boss’s difficulty and how fast you can beat it matter. Research what other players have done to get the pet you want. Look at the best methods and see if you can do them. This gives you a plan to follow and helps you get the pet you want.

    • Skill Choice: Determine which skill-based activity you want to train. Consider which skill you enjoy and the efficiency of the activity.
    • Boss Choice: Research the boss’s difficulty and drop rates. Consider whether you can consistently defeat the boss.
    • Efficiency: Aim to maximize your experience per hour and boss kills per hour to increase your pet chances.

    Optimizing Your Skills

    Your skill levels influence your pet chances. Higher skills make you more efficient at the activity. For example, a higher level in Mining means you can mine more efficiently, which potentially increases your chance of getting a pet. Think about training skills with the highest experience rates for more attempts at getting the pet. Use methods that work best for your skill level. Keep trying and you will eventually get the pet!

    • Skill Level: Aim for the recommended skill levels for the activity you are doing to maximize your chances.
    • Experience: Skill-based pets are often linked to experience gained, so choose activities that provide high experience rates.
    • Efficiency: Use the most effective training methods for your skills.

    Using Helpful Items and Boosts

    Several items and boosts can help you get pets more easily. For skill-based pets, things like the Dragon Pickaxe can give you a better chance. For boss pets, using specific combat gear or potions might give you an edge. Check what items are recommended for the activity you chose. Using these items can improve your performance and might increase your chances of getting a pet. Make sure you have the right gear for the job.

    • Boosts: Use stat-boosting potions and prayer to increase your combat effectiveness.
    • Gear: Use the best gear recommended for the activity to improve your chances of getting a pet.
    • Special Items: Some activities have special items to help. For example, a Ring of Wealth might increase your luck during some activities.

    Activities That Offer Pet Drops in Crafting Pet Osrs

    Old School RuneScape has several activities where you can get pets, from killing bosses to skilling. Knowing where to get pets is a key step in getting your own. Different activities have different drop rates, so pick the right one. Some are easy, while others are difficult. Here is a look at some of the best places to look for pets.

    Skilling-Based Activities

    Several skills in Old School RuneScape have pets linked to them, rewarding players for training their skills. Mining, Fishing, and Woodcutting are some of the skills that have pets. The chance of getting a pet is often based on the experience you gain. So, training your skills with good methods increases your chances. Remember that you may not get a pet quickly. Keep training, and you will eventually get one.

    • Mining: The Rocky pet comes from Mining. The higher your level and the more ores you mine, the better your chances.
    • Fishing: The Tangleroot pet comes from Fishing. Training at places with high experience rates increases your chances.
    • Woodcutting: The Beaver pet comes from Woodcutting. Cutting more trees and at higher levels will increase your chance.
    • Farming: The Rift Guardian pet is related to the Farming skill. The experience you earn while farming increases your chance of getting a pet.

    Boss-Based Activities

    Boss fights are a way to get many pets. The drop chances for these pets depend on the boss’s difficulty and how often you fight it. Bosses like General Graardor and Zulrah have pets that many players want. Fighting these bosses takes time and skill. Your persistence is the most important thing. Keep trying, and you will succeed.

    • General Graardor: The pet called Lil’ Zik comes from killing General Graardor.
    • Zulrah: The pet called Snakeling comes from defeating Zulrah.
    • Kalphite Queen: The pet Kalphite Princess comes from defeating the Kalphite Queen.
    • Vorkath: The pet called Vorki comes from defeating Vorkath.

    Event-Based Activities

    Special events in the game sometimes have limited-time pets. These events give players a chance to get unique pets. The methods for getting these pets can vary, so make sure to take advantage of any opportunities that may pop up. Take part in the events and try your luck. These pets are often unique, so don’t miss out.

    • Seasonal Events: Events like the Halloween event may have exclusive pets available through certain activities.
    • Limited-Time Activities: Some activities are only available for a short time, offering a chance to get special pets.
    • Community Events: Keep an eye out for events from Jagex, such as giveaways or community challenges, where pets may be offered as rewards.

    Identifying the Best Methods for Crafting Pet Osrs

    Every pet has a specific method that offers the best chances. These methods depend on factors like your skill level, the type of pet you want, and your gaming style. Some methods concentrate on getting the most experience in an hour, while others focus on efficiency. The goal is to choose the method that works best for you. Let’s look at some popular methods for getting pets.

    Skill-Based Method Exploration

    If you’re seeking skill-based pets, knowing the best training methods is essential. For instance, in Mining, the method with the best experience per hour might also have a higher chance of a pet. For Fishing, finding a spot that maximizes experience is also good for your chances. Look at guides and videos to find which method works best for you and your skills. The right method helps you make the most of your time and increases your chances.

    • Mining: Use the fastest methods, like Power Mining with the Dragon Pickaxe.
    • Fishing: Go for the best experience methods like Barbarian Fishing.
    • Woodcutting: Practice the best Woodcutting activities, such as Teak trees.

    Boss-Based Method Exploration

    If you aim to get boss pets, you need an efficient setup for the boss fight. This includes having the right gear, a good strategy, and knowledge of the boss’s attacks. For example, when fighting Zulrah, knowing how to switch your gear quickly and dodging the attacks improves your kills per hour. Practice, and improve to get more kills and increase your chances. The more you fight the boss, the better your chances are.

    • Bossing Efficiency: Look at kill times and kills per hour to increase your pet chances.
    • Gear Setup: Have the best equipment and potions to maximize your damage and survivability.
    • Attack Strategy: Learn the boss’s attacks and mechanics to fight it more effectively.

    Combining Methods and Adjusting Play

    Sometimes, combining different methods or adjusting your play style can increase your chances. For example, you could alternate between different activities if you are getting bored. This keeps things interesting and might make the grind more fun. Adjusting your game to how you play is essential. Keep track of what is working best for you, and improve your approach over time. Remember that the process can be slow, but it’s more rewarding with consistency.

    • Mix It Up: Don’t limit yourself to one single activity.
    • Track Your Progress: Keep track of your kills and experience.
    • Adapt: Change your methods based on your progress and results.

    The Importance of Patience and Perseverance

    Trying to get pets in Old School RuneScape often takes time, and you might get frustrated. The drop rates are random. You may not get a pet quickly. The key to success is patience and perseverance. Embrace the process, and stay motivated. Let’s explore how to stay positive during the hunt.

    Staying Positive During the Grind

    The grind for pets can take time, so it’s essential to stay positive. Remember that you will eventually get the pet you’re after. Set small goals to keep yourself motivated. Celebrate any progress, such as leveling up or improving your skills. Remember that everyone experiences dry streaks. Try not to focus too much on when you will get the pet, and enjoy the gameplay. Make the most of your time playing the game. Keep in mind that you’re aiming for a goal, and the reward will come.

    • Set Goals: Set small goals.
    • Celebrate Progress: Acknowledge your progress.
    • Manage Expectations: Remember that drop rates are random.

    Dealing With Dry Streaks

    Dry streaks, or periods without a pet drop, are a normal part of the process. It’s easy to get discouraged during this period. Try to change your approach. Take breaks or switch to different activities to refresh your interest. Remember that your chances will eventually reset with each attempt. Keep a positive attitude. The pet will eventually drop, and it will be worth it. Don’t give up!

    • Take Breaks: Step away.
    • Change Activities: Mix things up.
    • Stay Persistent: Keep going, and do not give up.

    Celebrating Success

    When you get the pet, take time to celebrate. It is a sign of your effort and dedication. Share your success with friends or the community. Enjoy having your new companion following you around. Take pride in your accomplishment, as this shows your skill and patience. Cherish the moment, and enjoy your pet!

    • Share Your Achievement: Show off your new pet.
    • Enjoy Your Pet: Enjoy your new companion.
    • Reflect: Take pride in your efforts.

    Common Myths Debunked

    Myth 1: Higher Levels Guarantee Pets

    Many players believe that leveling up guarantees a pet. The reality is that having a higher level in a skill or defeating a boss more often improves your odds, but it does not guarantee a pet. The drop rates are random. While higher levels provide a better chance, you will still need to try. This emphasizes the role of luck in getting a pet.

    Myth 2: Drop Rates Increase Over Time

    Some people think drop rates improve the longer you try. The drop rates remain constant for each attempt. Although you may feel like your chances go up, the game does not give any increase. So, it’s just as likely to get a pet on your first try as on your thousandth. It’s a matter of persistence and luck.

    Myth 3: Using Specific Gear Guarantees Pets

    Many players think that specific items will always give you a better chance. While certain items may boost your odds, none of them guarantee you a pet. These items can increase your chances, but you are not guaranteed to get a pet just by using them. Drop rates are random, so success depends on your luck and persistence.

    Myth 4: You Must Do Activity X Times to Get a Pet

    A common misconception is that you must do an activity a certain number of times to get a pet. There is no set number of attempts. The chances of getting a pet remain the same with each try. Persistence is key, but success is random.

    Myth 5: All Pets Are Equally Difficult to Get

    It is often thought that all pets have the same drop rates. This isn’t true. Some pets are easier to get than others. The difficulty depends on the activity linked to it. Skill-based pets are often easier to get than boss pets, which require more skill and time.

    Frequently Asked Questions

    Question: Can I increase my pet chances?

    Answer: Yes, you can. You can increase your chances by choosing activities with a higher drop chance, using items or boosts, and improving your skill level.

    Question: Are pet drops guaranteed?

    Answer: No, pet drops are not guaranteed. The pet drop system is based on random chances. So, your pet could drop on your first try or after many attempts.

    Question: How can I stay motivated?

    Answer: To stay motivated, set achievable goals. Celebrate any progress. Remember that dry streaks are common and try not to get discouraged. Enjoy the process.

    Question: What’s the best way to choose an activity?

    Answer: To choose an activity, consider the drop rates, your skill levels, and which activity you enjoy most. Also consider the efficiency of the activity.

    Question: What do pets do?

    Answer: Pets are cosmetic companions that follow you around. They do not offer gameplay advantages. They are a sign of status and a celebration of your in-game achievements.

    Final Thoughts

    Exploring the world of crafting pet osrs requires both skill and patience. Getting a pet is all about persistence. The process includes picking the right activities, optimizing your skills, and using items or boosts to increase your odds. Remember that drop rates are random, which means you may have long periods without a drop, but don’t give up! Embrace the journey, set reasonable goals, and try to enjoy the process of leveling up and the boss fights. When that pet finally drops, the feeling of accomplishment will be worth it. Keep going, and enjoy the adventure!

  • Crafting Parkour Reborn: A Guide to Fresh Freerunning

    Crafting Parkour Reborn: A Guide to Fresh Freerunning

    Remember that feeling when you first saw parkour, the amazing movement through obstacles? Maybe you tried a jump, and it didn’t quite work out. It’s frustrating, right? This article is for anyone wanting to build a fresh, new approach to parkour – crafting parkour reborn. We’ll explore how to train, what to focus on, and how to stay safe while having fun. You’ll gain a better grasp of the techniques, avoid common mistakes, and learn how to create your own unique style. By the end, you’ll be ready to take your freerunning skills to the next level. Let’s get started!

    Key Takeaways

    • Learn fundamental parkour techniques for safe and effective movement.
    • Discover how to create personalized training plans.
    • Find out about injury prevention and safe training practices.
    • Understand how to explore different movement styles and integrate creativity.
    • Gain insights into the culture and history of parkour.
    • Build a community and connect with other freerunners.

    The Fundamentals of Crafting Parkour Reborn

    Before leaping into advanced moves, it’s essential to build a solid foundation. This section covers the basics, focusing on techniques and the mindset needed to craft parkour reborn. We’ll explore core movements, the importance of body awareness, and how to gradually increase your skill level. Think of it like building a house – a strong foundation makes everything that comes after it more secure and allows you to build a better structure. This approach is more about consistency and gradual progression than quick wins.

    Essential Techniques

    Mastering these basic techniques is where your freerunning adventure begins. Learning these essential movements provides the necessary skills for moving in a practical and efficient manner. It is like the ABCs for a writer or the fundamental steps for a dancer. Practicing these techniques frequently will help you build your strength, coordination, and confidence. Here are some of the most basic actions that are essential for any beginner.

    • The Precision Jump: This is all about accuracy. Your goal is to land on a specific spot with both feet. Start with small jumps and increase the distance gradually. This helps in building a mindset where planning is key. The better your plan, the better the execution.

      This skill is like hitting a target. It’s about precision. Find a small ledge or object. Start with a short distance, then slowly increase it. Focus on your landing. Bend your knees to absorb the impact. This helps you balance and control your movements.

    • The Roll: This is your friend when things don’t go as planned. It helps you safely absorb impact and keep moving. Learn to roll over your shoulder. Avoid rolling on your back or neck. Mastering this technique protects your body.

      The roll is the emergency escape plan. It’s how you turn a potentially bad fall into a graceful recovery. Practice rolling over your shoulder, like you’re trying to touch your ear to your knee. This motion spreads the impact across your body, saving you from any harm. Practice makes perfect here.

    • The Vault: There are many types of vaults. They all involve getting over an object. The basic vault lets you quickly move over a barrier. The most important lesson is not to rush. Take the time to master each vault.

      Vaulting lets you get over walls, fences, and other obstacles. Start with something low, like a bench. Use your hands to push off, and swing your legs over. Practice each step slowly to build up confidence. Remember: coordination is better than speed, especially at the start.

    • The Cat Leap: This is a way to scale walls. It involves using your hands and feet to climb. This movement is a key for crafting parkour reborn with vertical elements. It is how you can move up and down on the terrain.

      Cat leaps make you into an expert climber. Find a low wall. Place your hands on top, and use your feet to push up. This is a very practical and effective move for getting over things. It also improves your grip and upper body strength. Keep your core tight for stability.

    Developing Body Awareness

    Body awareness is a key aspect of safer freerunning. It involves knowing where your body is in space and how it moves. This understanding is crucial for controlling your movements and preventing injuries. Start by focusing on your posture, balance, and how your muscles feel during each movement. As you become more aware of your body, you’ll be able to adjust your actions in real time, making you more adaptable in any situation.

    • Mind-Body Connection: Concentrate on what your body is doing. Feel the tension in your muscles. Know how far you can jump. Close your eyes, and then try to imagine where each part of your body is in space.

      Imagine your body as a sophisticated machine. The mind-body connection strengthens your control. Before trying a new move, visualize it first. Break it down into small steps. This builds a mental roadmap, guiding your physical actions. The better you can visualize, the better you perform.

    • Balance and Coordination: Practice balancing on different surfaces. Use balance boards or just a line on the ground. Try simple exercises, like standing on one leg. Focus on your core strength. The stronger your core, the better your balance.

      Balance is a skill that takes time to develop. It is a key tool in crafting parkour reborn. Practicing regularly improves your coordination. Incorporate exercises like the plank and side planks. These are excellent for building core stability. This also provides you with great muscle control.

    • Flexibility and Mobility: Stretch regularly. Hold each stretch for at least 30 seconds. Incorporate yoga or Pilates. These activities improve your range of motion. Increased flexibility reduces the risk of injury.

      Flexibility lets you move more freely. It is essential in parkour. Stretching keeps your muscles relaxed and ready. Yoga and Pilates are excellent choices. They improve balance, flexibility, and strength. A well-rounded approach ensures you become a much better free runner.

    • Understanding Your Limits: Do not try to do moves that you are not ready for. Know your limits and your body. The goal is to always be safe. When in doubt, it is best to err on the side of caution.

      It’s important to be honest with yourself about your capabilities. Trying moves beyond your skill level is a quick way to get hurt. Gradually increase the difficulty. Listen to your body and recognize when it needs rest. It is okay to take breaks. It’s much better to improve gradually and safely.

    Planning Your Training: Crafting Parkour Reborn Through Structure

    Having a well-structured training plan is as important as the movements themselves. Whether you’re training in a park, a gym, or your own backyard, a clear plan keeps you focused and helps you track your progress. This section explores how to set goals, design workouts, and ensure you’re training effectively. It’s all about creating a system that works for you, helping you improve consistently and safely.

    Setting Goals and Objectives

    Your goals are the map that directs your training. Whether your goal is to land a specific jump, improve your speed, or to master a new vault, setting clear, measurable goals is the first step toward achieving success. Having a roadmap helps you stay motivated and focused, even when progress feels slow. When you set objectives and make a plan, the crafting parkour reborn process starts in earnest.

    • Short-Term Goals: These are your daily or weekly goals. They are easy to accomplish. An example would be, “Land 5 precision jumps today.” This is your stepping stone. Each step helps you climb to higher levels.

      Think of these as the small victories that fuel your progress. These short-term wins keep you motivated and give you a sense of accomplishment. They help break down big goals into manageable tasks. Achieving short-term goals also builds confidence. This also helps you focus on what is needed to advance.

    • Long-Term Goals: These are the things that you want to achieve over several months. This might involve setting goals such as: “Be able to do a backflip” or “Perform a complete parkour routine.” These are the big aspirations, your destination.

      These big goals give you a reason to keep training. This provides an overall view. It is essential to break down your long-term goals into smaller steps. This makes the achievement more manageable. The process should keep you on track. It is crucial to have something to aim for.

    • Realistic Goals: Do not try to become an expert overnight. Set goals that are challenging, but achievable. The goal should be attainable. You have to be able to hit the target. It is important to avoid getting hurt.

      Setting realistic goals means that you are aware of your current skill level. It also means knowing your body’s limits. Setting impossible goals often leads to frustration or injury. Gradually improve. That way, you’ll be able to stay motivated. Realistic goals lead to long-term progress.

    • Tracking Your Progress: Keep track of your progress. Use a notebook or app. Write down what you have learned and accomplished. This shows how far you’ve come.

      Keeping a log of your progress is like having a diary for your training. It is excellent for tracking. It shows how much you have improved. You will notice your strengths and weaknesses. It will show you where you need to work harder. Review your progress from time to time.

    Designing Your Workouts

    Designing effective workouts is about creating balance. This includes warm-ups, skill-specific practice, and cool-downs. The way you prepare affects your performance and helps in injury prevention. It’s about designing a program that helps you improve all the key areas of your free running skills. This includes strength, mobility, and skill practice. It takes time, but it allows for continuous improvement.

    • Warm-Up: Prepare your body for the workout. Include dynamic stretching and light cardio. This prepares your body for the task ahead. This helps you reduce the chance of hurting yourself.

      The warm-up prepares your body for more intense activities. This increases blood flow to your muscles. It also increases the flexibility of your joints. Dynamic stretching like arm circles and leg swings is perfect. A proper warm-up will make your workout much more effective.

    • Skill Training: Practice essential techniques like vaults, rolls, and jumps. Work on building your core strength and improving your endurance. Focus on areas where you are weak.

      Dedicate time to improving specific techniques. Set aside time for your favorite skills. Practice your weak spots to make improvements. Remember: practice makes permanent. It will help you perform. Skill training keeps you sharp and helps build consistency.

    • Strength and Conditioning: Include exercises like push-ups, pull-ups, and squats. These exercises will help improve your physical ability. The stronger your body is, the more likely you are to improve.

      The strength and conditioning phase is where you build the foundation. These exercises build strength and endurance. Strengthening your body is very important. Strong muscles support your body. The better you train, the easier the techniques will become. This also helps prevent injuries.

    • Cool-Down: End your workout with static stretching. Hold each stretch for about 30 seconds. This phase helps reduce muscle soreness. It also helps improve your flexibility.

      The cool-down phase is when your body starts to recover. Stretching helps prevent injuries. This is a very important part of your routine. This lets your body recover so you can train again. It gets you ready for your next session. Cool-downs are a very important thing to include when crafting parkour reborn.

    Safety First: Training Smart and Crafting Parkour Reborn

    Safety is the most important part of any sport. This is especially true of parkour. Injuries can happen. This section will guide you through how to avoid injury. It’s about knowing your limits, being aware of your surroundings, and taking the right precautions to stay safe. Safe training is essential if you want to be able to enjoy the sport for a long time.

    Injury Prevention

    Preventing injuries is about taking steps to safeguard your health. This involves many things such as proper training, conditioning, and listening to your body. Being aware of potential risks and taking precautions can help you avoid pain. You should also be able to recover quickly from any pain. Staying safe also means training for the long haul.

    • Proper Warm-Up and Cool-Down: Always warm up before training. This reduces the chance of muscle strains and other injuries. This phase prepares your muscles. Make sure to cool down after each session to help your body recover.

      Warming up and cooling down are essential parts of your workout routine. This prepares your muscles for activity. Cooling down lets your muscles recover. This routine can significantly reduce your chances of getting hurt. Always take the time to do them correctly.

    • Listen to Your Body: If you feel pain, stop training. Rest is important. Pushing yourself too hard can lead to injury. Knowing when to take a break helps you keep safe.

      Your body sends signals. Pay attention to them. Pain is an indicator that something is not right. It’s better to rest and recover than to push through pain and risk serious injury. Rest is also essential for muscle recovery and growth. Listen to your body and adapt your training accordingly.

    • Progression: Gradually increase the intensity of your workouts. Do not rush to do advanced moves. Increase the difficulty of your training sessions over time. This lets your body adapt to the increased stress.

      Gradual progression lets your body adjust to the increasing demands of training. Progressing too quickly can lead to injuries. This involves increasing the difficulty. It also involves the time and the frequency of your workouts. Listen to your body and adjust as needed.

    • Protective Gear: Always use appropriate protective gear. This includes wrist supports, knee pads, and good shoes. Using equipment helps reduce the risk of injury. It also helps you feel safer.

      Wearing protective gear is essential to staying safe. This provides extra protection to vulnerable areas. It reduces the impact of falls and protects against abrasions. Choosing the correct gear is vital. It also ensures you train safely and confidently. Safety should always come first.

    Training in a Safe Environment

    The environment you train in is important. You should pick places that are safe and free from hazards. Proper preparation ensures that the experience is good and that your training is effective. Safety is not a one-time thing. It’s a continuous process that involves evaluating the area and making sure that the training area is perfect.

    • Scout the Area: Before training, inspect the area. Look for any obstacles that may be dangerous. Look for any debris. Make sure the landing is safe. Always examine the training spot.

      A good starting point is to inspect the training area. This involves finding any hazards. Make sure that there are no loose objects. A good area makes sure you stay safe. It allows you to train freely. Look for things that may not be obvious. This includes loose gravel, glass, or uneven surfaces.

    • Choose the Right Surfaces: Always train on appropriate surfaces. This includes grass and soft surfaces. Avoid hard surfaces like concrete. Choose surfaces that provide good grip.

      The surface you train on can have a great effect on your safety. Softer surfaces are better. They can absorb the impact. This reduces the risk of injury. Grass, rubber mats, and sand are good options. Hard surfaces increase the risk. Be aware of the risks.

    • Train With Others: Train with a friend or a group. This gives you extra safety. It is a good way to stay safe. They can help spot you and provide assistance.

      Training with others offers several benefits. Spotters can help prevent accidents. They also offer a boost of confidence. They can provide encouragement and motivation. Training with others makes the sport much more social. It provides feedback and support.

    • Emergency Plan: Know what to do if an accident occurs. Have a plan in place. Know what to do in case of injury. Know where to find help.

      It’s important to be prepared for the unexpected. Have a plan for injuries. Know where to get help. Know what to do in case of an accident. Always have a first-aid kit nearby. Make sure you can contact emergency services quickly. Being prepared gives you peace of mind.

    Expanding Your Skills: Exploring Creativity and Style

    Once you’ve mastered the fundamentals, it’s time to add your own personal flair. This means exploring different movements and letting your creativity flow. It is how you can set yourself apart. This section will guide you through ways to develop your unique style. It will inspire you to be creative and express yourself. This is what truly makes crafting parkour reborn such a compelling sport.

    Developing Your Own Style

    Parkour is all about self-expression. There is no “right” way. You can make it your own. You can experiment with different moves and approaches to create a style that reflects your personality. It is about discovering what makes you unique and using your body in new ways. You need to explore, and don’t be afraid to try different things.

    • Experiment With Movement: Do not just stick to the basics. Try different movements. Look for new and creative ways to move. This lets you find your own style.

      The best way to develop your style is to experiment. Try new movements. Do not be afraid to mix and match them. This helps you discover what works best. It also helps you find what you enjoy. This is a very creative process. It allows you to express yourself in a unique way.

    • Find Inspiration: Watch videos of other free runners. You can find inspiration online. This helps you get new ideas. It is all about seeing how others express themselves.

      Watching videos is a great way to discover new techniques and ideas. Look for styles that appeal to you. This includes seeing how they approach training. You can learn from others. This is also how you can find what inspires you. Learn from everyone. Find new concepts.

    • Practice Regularly: Train consistently. The more you practice, the more your style will grow. Focus on refining your techniques. This helps improve your skills.

      Practice is where the magic happens. The more you train, the more your style will develop. Practice makes perfect. Dedicate time to refine your techniques. Focus on the areas you wish to improve. Make sure you train consistently.

    • Embrace Your Uniqueness: Do not copy others. Do what feels natural to you. Let your personality show through your movements. The more authentic you are, the more genuine your style will be.

      The core of style is authenticity. This means that you need to be yourself. Do not try to copy anyone else. Do what is natural for you. Let your personality shine through your movements. The more genuine you are, the more your style will stand out.

    Integrating Creativity

    Creativity is key to taking your freerunning skills to the next level. Try to think outside of the box. You should be willing to improvise and adapt. This will help you find new and interesting ways to move through your surroundings. This is the fun part of crafting parkour reborn. Be free to express yourself and explore your creativity.

    • Improvisation: Use the environment around you. Create your own lines and sequences. Be creative with your movements. This lets you express yourself.

      The environment around you is your playground. Use improvisation to find new routes. This helps make the most of what you have. This also helps develop your creativity. The more you improvise, the more you will improve. Improvisation is key to making you a better free runner.

    • Flow and Sequencing: Connect your movements. Create routines that flow. Develop a sense of rhythm and timing. This improves your overall performance.

      The goal is to create routines. These routines should be seamless. They should flow from one move to the next. Develop your sense of rhythm. Pay attention to the timing. Well-sequenced routines are both visually impressive and enjoyable.

    • Overcoming Challenges: Approach obstacles in new ways. Try alternative routes. Do not be afraid to make mistakes. This is a key part of your learning.

      Part of the fun is finding new solutions. Do not be afraid to challenge yourself. Push yourself to try new things. Make mistakes. Learning from mistakes is part of the process. This increases your understanding. This helps you improve.

    • Community Inspiration: Collaborate with other free runners. Learn from each other. Share ideas. The community inspires everyone.

      The parkour community is a source of inspiration. Collaborate with others. Share ideas. Learn from one another. Community lets you get new perspectives. This also improves your creativity. Working with others makes the sport even more fun.

    The Culture of Parkour: Crafting Parkour Reborn Through History

    Parkour is more than just a sport; it’s a culture and a community. This section explores the history, the values, and the people that shape the world of freerunning. To truly experience parkour and achieve a level of expertise, you need to understand its origins and embrace its values. This section aims to help you understand the history and embrace the freerunning community.

    The History of Parkour

    The roots of parkour go deep. Its origin lies in military obstacle training and the concept of natural movement. The key is to move through any environment using only the body. Crafting parkour reborn is a story of evolution. From its beginnings to what it is today, the story is still very fascinating. It’s a mix of skill, discipline, and creativity.

    • Origins in Military Training: Trace the roots of the sport to military obstacle courses. The goal was to develop fitness. This included strength, agility, and problem-solving skills. This is the start of the sport.

      The origins of parkour are in military training. The goal was to train soldiers. It was about developing strength and agility. These exercises helped prepare soldiers. These courses were the original inspiration. This is where it all started.

    • David Belle’s Contribution: Discover David Belle’s role in developing parkour. Explore his vision of efficient and effective movement. This is what you need to remember.

      David Belle is considered the founder of parkour. He developed the training. His vision was to move quickly and efficiently. His philosophy and methods are at the core of the sport. He is the person who made the sport. He is very important.

    • The Development of the Discipline: Learn about the spread of parkour around the world. Examine its transformation from a training method to a worldwide phenomenon. The change is incredible.

      As the sport became more popular, it was adapted. Training techniques changed. It evolved into a worldwide phenomenon. The cultural aspects have spread, and it is practiced all around the world. Freerunning today is practiced and loved by many.

    • Key Principles and Values: Understand the core principles of parkour. Explore concepts such as efficiency, safety, and self-improvement. They are at the heart of the sport.

      The heart of parkour is the principles and values. These include efficiency, safety, and self-improvement. The goal is to move quickly and safely. The values are the basis of the sport. It’s not just about doing tricks. It is also about the mindset.

    The Parkour Community

    The community is a very important part of the sport. It is a group of people. These people support each other and share a common passion. The culture is built on respect, support, and mutual learning. This sense of belonging, and the drive to craft parkour reborn, is part of the sport’s appeal. Everyone is able to support one another.

    • Support and Encouragement: This community provides help. Everyone pushes each other. The sense of belonging is key. The community helps people learn and grow.

      The heart of the parkour community is support and encouragement. Members help each other. They push each other. It is a place where you can learn and improve. You will feel encouraged. This community is a very important part of the sport.

    • Sharing Knowledge: The community shares information. It provides training tips. Everyone helps everyone else to get better. This is how the sport has spread.

      Sharing knowledge is a key value of the community. Everyone shares training tips. Members provide advice. This is the way that the sport has spread. This has enabled rapid progress. It shows how the community works.

    • Respect and Discipline: Respect is very important. Discipline is also a very important component of the sport. The culture fosters a sense of respect and self-control. It is all about personal growth.

      Respect is very important in this community. Discipline is another key aspect. Members need to respect others. Everyone is expected to follow the rules. It is about self-control. It helps with personal growth. This is the way it is.

    • Community Events: Attend workshops. Attend jams. Take part in local gatherings. These events help bring everyone together. This builds a sense of belonging.

      The parkour community organizes events. This brings people together. This enhances friendships. Events include workshops. Events also include jams. This strengthens the sense of belonging. Events will help you get involved.

    Common Myths Debunked

    Myth 1: Parkour Is Only For Young, Extremely Athletic People

    Not true! Parkour is for everyone. It can be modified to suit any fitness level. You can start slowly. It can be a very safe sport. The only requirement is to have a willingness to try. Age should not be a deterrent. Parkour can be made to be fun for all ages.

    Myth 2: Parkour Is Just a Series of Dangerous Tricks

    That is not the whole picture! Parkour involves learning to move efficiently and safely through your surroundings. This includes the building of a solid foundation and the ability to control your body. It is often about avoiding risks. It is not just about doing impressive stunts, but about building skills.

    Myth 3: You Need Special Equipment to Do Parkour

    This is not quite right. While there are some items that can assist you, you do not need much equipment. You can start with just your body, a good pair of shoes, and an open space. As you progress, you might wish to add some equipment. This might include safety gear. Most of the focus is on the body.

    Myth 4: Parkour Damages Public Property

    It is not the intent of parkour. The goal is to move in a way that respects the environment. Responsible practitioners avoid causing damage. They train with respect for the places they train. The community often seeks permission. It is a sport of respect, not of damage.

    Myth 5: It’s Just Showing Off

    Parkour is not always about showing off. The goal is to improve yourself. It is about facing your fears, building confidence, and finding creative solutions. It is a personal journey. The joy comes from self-improvement and the challenge.

    Frequently Asked Questions

    Question: How do I get started with parkour?

    Answer: Start with the basics. Find a safe area to practice in. Learn fundamental techniques. Watch videos. Join a local group. Gradually increase the difficulty. Focus on building your foundation.

    Question: Is parkour dangerous?

    Answer: Yes, it can be. However, you can make it much safer. Learn the proper techniques. Always practice in a safe environment. Start slowly. Listen to your body. Always be aware of the surroundings. Protective gear is key.

    Question: What should I wear for parkour?

    Answer: Wear comfortable clothing. Wear athletic shoes. The shoes should have good grip. Avoid anything that will restrict movement. Consider wearing protective gear such as wrist supports and knee pads.

    Question: How can I prevent injuries in parkour?

    Answer: Always warm up. Cool down after each workout. Listen to your body. Progress gradually. Wear protective gear. Train in a safe environment. Learn proper techniques from qualified instructors.

    Question: Where can I find a parkour group or class?

    Answer: Search online. Look for local parkour groups. Check community centers. Fitness studios sometimes offer classes. Social media is a great way to locate communities. Ask other practitioners for suggestions.

    Final Thoughts

    Crafting parkour reborn is about more than just physical feats; it’s a journey of self-discovery, creativity, and community. We have covered the foundations of the sport, including the essential techniques, setting goals, and the importance of safety. We have explored the value of creativity, how to find your own style, and how to stay safe while practicing. Remember that parkour is an ever-evolving practice. Stay dedicated and keep training regularly. Embrace the process, be patient with yourself, and enjoy every step. Whether you are learning a new skill, facing a challenge, or building a community, parkour offers something for everyone. Keep exploring and keep moving. The path to mastery is long, but the reward is more than just skills. It is your confidence.

  • Crafting Outfits RS3: A Guide to Fashion and Skill

    Crafting Outfits RS3: A Guide to Fashion and Skill

    Ever feel like your RuneScape character’s fashion sense is stuck in the Stone Age? You’re not alone! Many players want to look good while adventuring in Gielinor. This guide will walk you through the exciting world of crafting outfit rs3, showing you how to express yourself and snag those sweet cosmetic rewards. You’ll learn the ins and outs of customizing your look, from the basics of skilling to the intricacies of the Grand Exchange. Get ready to transform your character from drab to fab! By reading this, you’ll not only improve your character’s appearance but also gain insights into the various skills and activities that contribute to your fashion goals, keeping you engaged and informed.

    Key Takeaways

    • Discover the skills needed to create your own unique outfits in RS3.
    • Learn how to obtain rare and valuable cosmetic items.
    • Find out the best methods for earning the resources needed.
    • Explore the various ways to customize your character’s appearance.
    • Understand the trading system to acquire items.
    • Master the art of combining skills and activities for a complete look.

    Getting Started with Crafting Outfits RS3

    Before you begin your fashion quest, it’s important to understand the foundation: the skills. Several skills contribute directly to your ability to create and customize outfits. These skills allow players to gather, process, and combine various materials to produce items for their character. You will need to level up these skills to gain access to a larger selection of items. The higher your skill level, the more options you’ll have for crafting outfits. This means more styles, colors, and unique looks.

    Essential Skills for Outfit Creation

    Several skills are critical for players to crafting outfit rs3 items. Each skill presents unique challenges and opportunities, offering a diverse gameplay experience for those passionate about fashion.

    • Fletching: Primarily deals with crafting ranged weapons and ammunition, but it also allows the creation of certain cosmetic items, particularly those related to archery. This skill will help you customize quivers and other related appearance items.
    • Smithing: Crucial for making armor and weapons, Smithing also impacts the availability of various cosmetic items, such as ornamental armor pieces. Increasing your Smithing skill will broaden the range of appearance customizations.
    • Crafting: This skill is central to creating a wide array of cosmetic items, including jewelry, capes, and decorative armor components. Crafting requires gathering various materials, such as gems and hides. A higher Crafting level enables access to more exclusive and complex designs, allowing for greater creative freedom.
    • Runecrafting: Although primarily focused on creating runes, Runecrafting also opens avenues for cosmetic items. Players can use Runecrafting to create items that enhance their appearance.
    • Construction: This skill allows players to build and customize their player-owned houses. With enough experience, you can create a space tailored to your fashion needs, complete with wardrobes.

    By leveling these skills, you’ll unlock a variety of options that let you shape your character’s appearance. Each level gained represents an opportunity to improve. Think of these skills as your toolkit for expressing your unique style.

    Gathering Resources

    Resources are the building blocks of crafting outfit rs3. You’ll need to mine ores, cut trees, hunt animals, and more to gather the necessary materials. Proper gathering is important for efficiency and acquiring the right resources. Your gathering method will dictate how quickly you can acquire resources.

    • Mining: Provides ores needed for Smithing and Crafting. Ores are used to create metal bars, which are then used to make various items. Finding efficient mining spots can accelerate your progress.
    • Woodcutting: Collects wood for Fletching and Construction. Wood is essential for arrows, bows, and the creation of certain cosmetic items. High-level trees can offer rare resources and faster experience gains.
    • Hunting: This skill involves trapping and capturing animals. The hides and pelts gained are useful for Crafting. Efficient hunting methods are key.
    • Fishing: Provides fish and other resources, which may be needed for specific items. Fishing also yields materials that can be used for Crafting.

    Remember that resources are often needed for multiple skills. For instance, mining and woodcutting are important in the process of creating many cosmetic items. Plan your resource gathering to maximize your efficiency and your ability to create the looks you want.

    Obtaining Items and Customization

    Once you’ve gathered your resources, the real fun begins: creating and obtaining the items that will define your character’s look. There are several ways to expand your wardrobe. It’s a mix of activities, from making your own items to finding rare pieces.

    Crafting Your Own Attire

    The core of crafting outfit rs3 lies in creating items from scratch. Using your gathered resources and leveled skills, you can bring your design ideas to life. You’ll use Crafting, Smithing, Fletching, and other skills. This hands-on process allows for creativity and the satisfaction of seeing your vision become reality. It is a rewarding aspect of the game.

    • Crafting Components: Using Crafting, players can make capes, jewelry, and more. Crafting often involves combining different materials.
    • Smithing Armor: Smithing enables the creation of protective and ornamental armor. Smithing offers a wide range of styles to choose from.
    • Fletching Weaponry and Accessories: Fletching allows you to create bows, arrows, and other archery-related items.

    Crafting lets you personalize your character. Experimenting with different combinations allows you to develop your unique style. It also provides a satisfying sense of accomplishment.

    Exploring the Grand Exchange

    The Grand Exchange is the marketplace where players buy and sell items. The Grand Exchange is important for acquiring items you can’t or don’t want to craft yourself. It’s essential for completing sets or finding unique pieces.

    • Buying and Selling: Learn the basics of buying and selling items, from setting prices to understanding market trends.
    • Identifying Bargains: Finding great deals on the Grand Exchange is crucial.
    • Trading Rare Items: Some items are only available through trading. Rare items can command high prices.

    The Grand Exchange can be a great place to start your fashion journey. It gives access to items that would take a long time to craft or find. Use it to fill gaps in your collection and acquire unique pieces.

    Completing Quests and Activities

    Completing quests and participating in various activities in RuneScape often reward players with cosmetic items. These rewards can be anything from unique armor sets to decorative items. Quests and activities help you grow your collection while progressing in the game.

    • Quest Rewards: Many quests offer cosmetic rewards. Always check the quest reward list.
    • Mini-Games: Participating in mini-games provides rewards. Certain mini-games have shops where you can purchase unique items.
    • Boss Drops: Defeating bosses can award special items. Boss drops are usually rare and highly sought after.

    By engaging in these activities, you’ll add many items to your wardrobe. The variety of options ensures that you can find looks that match your style. Quests and activities add depth to your fashion journey.

    Advanced Techniques in Crafting Outfits RS3

    Once you’ve mastered the basics, there are advanced techniques to take your crafting outfit rs3 abilities to the next level. These include learning advanced skills, gathering hard-to-find materials, and using new technologies.

    Advanced Skilling Techniques

    Advanced skilling methods will allow you to get the most out of each skill. These can include optimizing your training methods. These methods also include acquiring the right equipment for your tasks.

    • Efficient Training Methods: Learn the best ways to train each skill to maximize experience gain. Efficient methods allow players to quickly level up their skills.
    • Using Boosts: Certain items and abilities provide boosts to your skills. Boosts can offer a temporary increase in skill levels.
    • Specialized Equipment: Acquire equipment designed to enhance your skilling. Specialized equipment can provide various benefits.

    Improving your skilling techniques can lead to faster progress and the ability to craft more complex items. By mastering these techniques, players unlock new possibilities for creating and obtaining items.

    Sourcing Rare Materials

    Rare materials are often needed for creating the most unique outfits. These materials are obtained through a variety of methods. Obtaining these materials can be difficult but can be worth it.

    • Elite Dungeons: Some rare materials can only be found in elite dungeons. Elite Dungeons are a more difficult activity that offers increased rewards.
    • Boss Farming: Certain bosses drop rare materials needed for crafting. Boss farming can be time-consuming but offers high-value rewards.
    • Rare Resource Spots: Some resource spots have rare materials. Resource spots are often protected by monsters.

    Knowing where and how to find rare materials is key to creating a truly unique style. The rewards often justify the effort required to obtain them. Gathering rare materials can offer a satisfying sense of accomplishment.

    Exploring New Customization Options

    The developers are always adding new ways to customize your character. These updates expand the range of available items. These updates increase the possibilities for self-expression.

    • Updates and Events: New items are released during updates and events. Following updates and events can help players expand their collection.
    • Cosmetic Overrides: Cosmetic overrides allow you to change the appearance of your armor and weapons. Cosmetic overrides let players customize their items to suit their style.
    • Dyes and Colors: Experimenting with dyes and colors can enhance your outfit. Dyes and colors are an essential part of customization.

    Keeping up with the latest customization options is important to maintain a fresh look. Exploring these options enables players to adapt and refine their style. The continuous expansion of customization options keeps the fashion scene lively.

    Common Myths Debunked

    Myth 1: Crafting is Only for High-Level Players.

    The idea that crafting outfit rs3 is just for high-level players is false. While some high-level content offers more complex options, the basics are accessible to players of all skill levels. You can start crafting early in the game. You’ll always be able to make items, even if it is a simple one, and that’s a good starting point for learning the skill.

    Myth 2: You Need to Spend Real Money to Have Good Outfits.

    You can create stylish looks without spending real money. A wide array of items can be crafted, earned through quests, and purchased with in-game currency. These methods allow you to create amazing outfits without any purchases.

    Myth 3: You Have to Be a Master of Every Skill.

    While having multiple skills is helpful, you don’t need to be a master of every skill. You can focus on the skills that interest you most. You can often trade or buy items crafted by others to complement your style.

    Myth 4: Fashion Matters Less Than Combat Stats.

    While combat stats are important, fashion is a significant part of the game experience for many players. You don’t have to sacrifice combat effectiveness to have a good look. Crafting outfit rs3 is a way of expressing your personality. A well-designed outfit is a form of self-expression.

    Myth 5: It’s All About Expensive Items.

    While expensive items can be impressive, creating a stylish outfit doesn’t require you to spend all your in-game wealth. Creativity and resourcefulness allow you to create stunning looks on a budget. Combining different items can produce eye-catching results.

    Frequently Asked Questions

    Question: Where do I start if I’m new to crafting?

    Answer: Start with the skills needed for crafting, such as Crafting or Smithing. Gather some basic resources and start experimenting with simple recipes.

    Question: How can I make money from crafting outfits?

    Answer: You can sell crafted items on the Grand Exchange. Research the market to identify popular and valuable items that are in demand.

    Question: How do I get rare cosmetic items?

    Answer: Complete quests, participate in events, defeat bosses, and trade with other players to acquire rare items.

    Question: What’s the best way to find good deals on the Grand Exchange?

    Answer: Set up alerts for items you are seeking. Watch price trends and look for opportunities to buy low and sell high.

    Question: What are cosmetic overrides?

    Answer: Cosmetic overrides allow you to change the appearance of your armor and weapons. They are purely visual and do not affect stats.

    Final Thoughts

    Crafting outfit rs3 offers an amazing outlet for self-expression. By learning skills, gathering resources, trading in the Grand Exchange, and experimenting with customization, you can craft the perfect look. The skills, quests, and activities are a fantastic way to acquire unique items. Remember to gather resources to maximize your skill levels. Be adventurous! This game offers an amazing place to develop and refine your unique style. Don’t hesitate to explore new options. With time, practice, and creativity, your character will be the best-dressed adventurer in Gielinor! Now, go out there and show off your personal style.

  • Crafting OSRS Training: Skills, Methods, and Optimization

    Crafting OSRS Training: Skills, Methods, and Optimization

    Ever feel lost in RuneScape, staring at your skills and wondering where to start? Maybe you just hit level 50 and want to take the next step towards your goals. It can be overwhelming when you’re first getting started with crafting osrs training. You’ll learn the best methods and understand how to become efficient. This guide will provide you with the tools to level up, choose the best methods, and optimize your experience. Get ready to boost your skills and achieve your goals.

    Key Takeaways

    • Learn the optimal methods for leveling up the crafting skill in OSRS.
    • Discover the best resources and materials to use for crafting experience.
    • Explore how to make money while training crafting.
    • Understand experience rates and how to increase them.
    • Find out about useful tools and items to help during training.
    • Examine ways to reduce the cost of crafting osrs training.

    Getting Started With Crafting in Old School RuneScape

    Crafting is a vital skill in Old School RuneScape, allowing players to create a wide variety of items. It opens up doors to other skills and provides you with the gear to make money. It allows for the creation of jewelry, armor, and other useful equipment. Many items created through crafting are required for quests, making it an essential skill for those seeking to complete all content. This guide will take you through the basics and help you build a solid foundation.

    The Basics of Crafting

    Before you begin, you should know that crafting requires the use of raw materials, which are then processed to make items. The main material used in crafting is usually different types of gems or hides. To use these, you need to have a needle and thread in your inventory. These items are often purchased from general stores or obtained as drops from monsters. Once you have these, it’s time to start creating!

    • Gathering Resources: The process usually begins with acquiring the necessary resources. For example, to make leather armor, you’ll need animal hides. These can be obtained by killing creatures such as cows or green dragons. Each hide yields a specific amount of experience, and it’s up to you how you want to do it.

      Resource gathering methods vary, but you can always buy them from other players. This can save time for those who would rather focus on the crafting itself. You can find trading locations at the Grand Exchange or through online forums and communities.

    • Using Crafting Stations: You must often interact with specific crafting stations to create certain items. The primary station is a crafting table, used to make jewelry. You will also use the furnace for glassblowing and other methods.

      Access to these stations is found in various locations, with each providing unique opportunities for different crafts. Consider the location and convenience of each station when planning your training.

    • Experience and Levels: Gaining experience by crafting items will level up your skill. Your level determines the range of items you can create. This will also determine what kind of items you can equip.

      The amount of experience gained is dependent on the type of item you craft. More complex items, which require higher levels, offer greater rewards. Plan your activities to maximize your experience gains.

    Essential Items and Tools

    You’ll need several tools and items to make crafting osrs training simpler and more efficient. These items help in gathering materials and making crafting easier. Being prepared allows you to focus on the task and reach higher levels more quickly.

    • Needle and Thread: These are the foundational tools for crafting. They are necessary to work with leather and other textiles. Without them, you cannot use your hides or craft leather armor.

      Purchase these from the general store or acquire them as drops from monsters. Always make sure to have them to avoid any interruptions to your crafting process.

    • Chisel: The chisel is used to cut gems. It’s used in making jewelry, such as rings and necklaces. This item can be bought or obtained as a reward from specific quests.

      The chisel is vital for creating many high-value items, so keeping one readily available is a good idea. Consider the amount of gems you need and find where to replenish them.

    • Glassblowing Pipe: If you want to craft molten glass, you will need a glassblowing pipe. It lets you create items like vials, which are vital for potions. It’s available at the Grand Exchange or craft it yourself.

      The glassblowing pipe is especially useful if you are planning to become a potion maker. Make sure to buy sand and soda ash to create glass at the furnace.

    Best Training Methods for Crafting in OSRS

    The best training method depends on your level, resources, and goals. Each method offers advantages and disadvantages, and finding the right fit is crucial for efficient skill progression. You can focus on the fastest experience gains or prioritize profit. It can also depend on your resources and patience.

    Leather Crafting

    Leather crafting is one of the earliest methods. You’ll create armor and other items from animal hides. This method provides decent experience and can be combined with other skills. This method is effective for players of all levels.

    • Tanning Leather: This is the first step in making leather armor. It requires taking hides to a tanner and paying a small fee. Once tanned, the leather can be crafted into various armor pieces.

      Tanning is a simple process, but requires running to a tanner. This method offers a steady experience rate and can be started at low levels. Many tanneries are found in cities for convenience.

    • Crafting Armor: You will use the tanned leather with a needle and thread to create armor pieces. Making armor will increase your crafting level. Start with simpler items like leather gloves and work your way up to more complex items.

      Armor crafting provides a good experience rate, especially for low-level players. It’s also fairly cheap to get started. Be careful of buying items that have too high of a cost.

    • Collecting and Crafting: You can collect the hides yourself or purchase them. Gathering your own hides requires combat or skilling to get them. Buy your hides from the Grand Exchange or from other players.

      Gathering your own hides can be a fun activity. But it can be more time-consuming. Buying the hides makes your training faster, but it also costs money. So consider what you want to focus on.

    Glassblowing

    Glassblowing provides a fast and profitable way to train crafting. You’ll create molten glass using sand and soda ash. This is a very popular method. You must have a glassblowing pipe to start making molten glass. You can buy these materials from the Grand Exchange or vendors.

    • Gathering Resources: You will need to gather sand and soda ash. Both of these items are readily available. You can obtain them at the Grand Exchange or from vendors.

      You can also mine the sand yourself, though it is usually faster to buy it. Soda ash is often sold in bulk quantities. You can buy both in any quantity you prefer.

    • Creating Molten Glass: Use the sand and soda ash at a furnace to make molten glass. Using the glassblowing pipe will let you create items from molten glass.

      Molten glass is the foundation for creating items like vials. It’s used in potions. This method offers good experience and can be profitable depending on the price of the items.

    • Crafting Vials and Other Items: With the molten glass, you can create vials and other glass items. This is a fast and effective way to level up your crafting skill.

      Crafting vials for potions is one of the most common glassblowing activities. Other glass items are often needed for quests or other skill requirements. Consider what you are going for.

    Jewelry Crafting

    Jewelry crafting is a fast and profitable way to train your skill. You’ll create rings, necklaces, and other valuable items from gems. This requires a chisel and access to a crafting table. You can buy these from the Grand Exchange or vendors.

    • Cutting Gems: Before creating jewelry, you must cut the gems to prepare them for crafting. Cutting gems is quick and provides a moderate amount of experience. This will get you started with crafting.

      Using a chisel, you can cut gems like sapphire, emerald, ruby, and diamond. This process is very fast, letting you cut many gems in a short time. Different gems yield different amounts of experience.

    • Crafting Jewelry: Using a gold bar and the gems, you will be able to make jewelry. You will have to use a crafting table to turn them into valuable items. Make sure you have enough bars and gems.

      Crafting jewelry offers a great combination of experience and profit potential. Rings, necklaces, and amulets can be made with various gems, providing different levels of experience. The price of jewelry can vary based on the gem and the item.

    • Using the Grand Exchange: You can always choose to buy your supplies. Many players sell these items and save time. This is especially useful for those who want to focus solely on crafting.

      Use the Grand Exchange to buy your gems and gold bars. You can easily find the items you need at competitive prices. Keep an eye on prices to make sure you’re getting a good deal.

    Making Money While Crafting

    You can make money with crafting. Certain items sell for more than their material cost. This creates opportunities for profit while you level up your skills. The goal is to choose items with a high-profit margin and craft them in bulk.

    Identifying Profitable Items

    Certain crafted items have higher values than their raw materials. Research the current market prices to determine which items are most profitable. This can vary over time. The Grand Exchange is your main source for this kind of information.

    • Use the Grand Exchange: The Grand Exchange is your primary resource for identifying profitable items. View real-time pricing data for all materials and crafted goods.

      Check the price of materials against the price of crafted items. Items that sell for more than their component parts can offer a profit. Take your time comparing to find the right items.

    • Monitor Market Trends: The prices of items can fluctuate based on supply, demand, and game updates. Regularly check market trends.

      Monitor the prices to identify which items are currently in demand. During special events, specific items can have increased prices. Understanding these trends will help you maximize your profits.

    • Consider Crafting Volume: Think about how many items you want to craft. Consider what resources you have and how fast you can craft the items.

      Crafting items in bulk can increase your profit margins. Buying materials in large quantities can also give you a lower average cost. It is crucial to determine the quantity that suits your training plan.

    Efficient Crafting for Profit

    Once you identify profitable items, focus on optimizing your crafting. Time is money, so look for ways to streamline your process. Always choose the fastest and most cost-effective methods.

    • Bankstanding and Bank Skills: Reduce time spent traveling. You should always craft in locations with easy access to banks. This minimizes downtime.

      Choose locations close to crafting stations and banks. Equip jewelry with teleportation abilities to reduce travel time. The faster you can bank, the more items you can craft per hour.

    • Maximize Experience Per Hour (EPH): Speed is key, especially if you want to make money. Prioritize high-experience methods.

      Choose crafting methods that maximize your experience per hour. Doing this helps you level up faster and creates more items per time spent. Focus on the best experience gains.

    • Manage Inventory and Resources: Plan your inventory. Carry only what you need. Buy materials in bulk to reduce the time spent restocking.

      Use bank tabs to quickly access your materials and speed up your crafting process. Organize your inventory to minimize the number of clicks and save time. Prepare for crafting sessions ahead of time.

    Optimizing Experience Gains

    You can use different strategies to increase your experience gains. These strategies will help you level up faster. Being efficient makes crafting osrs training much easier.

    Using Boosts

    Several methods can provide experience boosts, helping you reach higher levels quicker. Some boosts are easy to obtain, while others need more effort. It pays to use any advantage possible.

    • Bonus Experience from Quests: Many quests offer experience rewards. You can use these to gain levels without crafting.

      Complete quests that provide crafting experience to boost your early levels. Doing this will save you a lot of time and effort. Check the RuneScape wiki for quests that reward crafting experience.

    • Experience-Boosting Items: Some items can give you extra experience. These are rare or require certain levels to use. They still provide an advantage.

      Explore items that boost experience gains, like the Skillcape of Crafting. Always check the wiki for items that can help. Even small boosts can make a big difference.

    • Skill Training Events: Special events may occur that provide extra experience. Keep an eye out for these. They often only last for a limited time.

      During these events, the crafting experience will increase. Check the official RuneScape website for updates. Take advantage of any boosts that may be offered.

    Choosing the Right Crafting Location

    The location you choose can affect your efficiency. It helps to choose locations that are close to banks and crafting stations. The goal is to minimize travel time.

    • Bank Proximity: Accessing a bank quickly is essential for stocking up on materials and selling your crafts. Consider a bank close to a crafting station.

      Some locations provide both a bank and a crafting station. This means you do not have to travel far. Check the RuneScape wiki to discover the best locations.

    • Teleportation Options: Teleportation methods can save a lot of time. The more teleports you have, the better. Consider what jewelry or items can help.

      Rings, necklaces, and other teleports can bring you close to crafting stations. Use these to reduce the time spent moving around.

    • Crowd and Player Activity: Popular locations can sometimes be crowded. If so, choose locations with fewer players to avoid interruptions.

      If you’re crafting at a popular location, try to use off-peak hours. Find areas that are less populated. This will increase your productivity.

    Reducing Costs of Training

    Crafting osrs training can be expensive. You can find ways to reduce the cost. The best methods involve efficient resource management and wise buying.

    Buying Materials Smartly

    The cost of materials will impact your profitability. Buying in bulk can help, but you must know how to do it. You can save money and still get what you need.

    • Use the Grand Exchange: Always use the Grand Exchange. Compare prices to ensure you get the best deal. This will give you access to a massive market.

      Set up buy offers to purchase materials at lower prices. This saves you time and money. Always do research before buying anything.

    • Buy in Bulk: Purchasing large quantities can reduce your cost per item. This can be more cost-effective.

      Stock up on materials to avoid frequent trips to the Grand Exchange. Always check how much space you have. If you can store them, it’s often more cost-effective.

    • Watch Price Fluctuations: The market price of materials changes. Pay attention to those price changes, which can help you save money.

      Monitor the prices of materials on the Grand Exchange. Buy when prices are lower. You can also sell when the prices are higher. Using your knowledge will help you reduce the costs.

    Gathering Resources Yourself

    You can reduce costs by gathering some of your resources. This may not always be the fastest way. It is a good option when resources are cheaper to obtain yourself.

    • Mining Gems: Mining gems yourself can save a lot of money. It requires mining and crafting levels. This gives you extra resources.

      Head to gem rocks and use your pickaxe to mine. You can also gather gems at the Shilo Village gem mine. Always choose the mine that matches your level.

    • Slaying Monsters: Some monsters drop crafting materials. Hunting monsters can get you some free materials. This will save money.

      Kill monsters that drop hides or other materials. Always check the drop tables. Decide if this is the fastest way or the best for saving money.

    • Farming: Some crafting supplies can be obtained through farming. You must have the required level to do it. This provides you with extra supplies.

      Use your farming skills to grow crops. You can use these for crafting or sell them for profit. It can save you money.

    Common Myths Debunked

    Myth 1: Crafting Is Too Slow and Expensive

    The reality is that crafting can be slow if you do not choose the right methods. It can also seem expensive if you don’t take the time to figure out the best techniques. It is true that it requires an investment, but it’s an investment in your account.

    Myth 2: You Need High-Level Skills to Craft Profitably

    While high-level crafting lets you make more valuable items, you can profit at lower levels. The key is to find items that have good profit margins. Start small and work your way up.

    Myth 3: Crafting Is Only Good for Making Money

    Crafting is also useful for training and completing quests. Completing many quests requires specific crafting levels. Training this skill also unlocks access to other skills, like construction.

    Myth 4: You Must Always Use the Fastest Methods

    The fastest methods are not always the best. It depends on your goals and resources. Consider the cost, profit potential, and personal preference. The best thing is to do what you like.

    Myth 5: You Can’t Craft Without a Premium Account

    A premium account has many benefits. But you do not need it to begin crafting osrs training. You can do almost everything without it. Most crafting methods are accessible to free-to-play players.

    Frequently Asked Questions

    Question: What’s the best way to train crafting?

    Answer: It depends on your level and resources. Leather crafting is good early on, and glassblowing and jewelry crafting are strong methods for higher levels.

    Question: How can I make money with crafting?

    Answer: Identify items with high-profit margins. Craft in bulk and utilize bankstanding to maximize efficiency.

    Question: Is crafting worth the time?

    Answer: Yes, crafting is very helpful for training other skills and completing quests. It can also be very profitable.

    Question: What tools do I need for crafting?

    Answer: The basic tools are a needle and thread. Different crafts require a chisel, glassblowing pipe, and other tools.

    Question: Where should I train crafting?

    Answer: Choose locations close to banks and crafting stations. Also, consider the crowd levels and teleportation options.

    Final Thoughts

    Crafting in Old School RuneScape is much more than just a skill. You can create various items with this skill that you need to be successful in the game. By choosing the right methods, you can level up efficiently. To have a good experience, you will need to learn the basic information in this guide. You’ll need to know what items to gather and what you need to create. You should also be aware of the best training methods. You should also find ways to reduce costs, or even make money. With a little effort, you can turn a slow skill into a profitable venture. Start today, explore the methods, and watch your crafting skills grow. Have fun, and good luck!

  • Crafting OSRS F2P: A Guide for Beginners and Beyond

    Crafting OSRS F2P: A Guide for Beginners and Beyond

    Remember that time you spent hours gathering materials, only to mess up your first attempt at crafting OSRS F2P? We’ve all been there! Starting out in Old School Runescape as a free-to-play player can feel overwhelming, but don’t worry. This guide is built to help you master the skills and strategies needed to succeed. You will discover the easiest methods for training your crafting, maximizing your gains, and making the most of your time in Gielinor. This will help you level up faster and become a better crafter. You will also learn about money-making opportunities and how to efficiently crafting osrs f2p items. Get ready to turn those raw materials into profit and experience!

    Key Takeaways

    • Learn the fundamentals of the crafting skill in Old School Runescape.
    • Discover the best methods to train crafting as a free-to-play player.
    • Explore which items offer the highest experience and profit margins.
    • Understand the optimal locations and strategies for gathering resources.
    • Find out how to manage your inventory and bank efficiently.
    • Optimize your gameplay to make the most of your time and resources.

    Getting Started with Crafting OSRS F2P

    Crafting is a vital skill in Old School Runescape, allowing you to create various items, from jewelry to armor. This skill is accessible to both free-to-play and members, but the options are limited for free-to-play players. It involves using raw materials to create finished goods. To begin, you’ll need the necessary raw materials and the required level to craft a specific item. You also need the appropriate tools, such as needles, thread, and molds. A higher crafting level unlocks more valuable and complex items that can be made. This adds extra depth to the game and offers opportunities for money-making.

    Gathering the Raw Materials

    The first step in crafting is gathering the necessary materials. Free-to-play players have access to several resources, and knowing where to find them is important for efficient training. Most of these resources can be obtained through skills like mining and woodcutting. Make sure you have a plan to maximize your efficiency. For example, by mining at the same time you woodcut, you are being more efficient.

    • Clay: Clay is the base material for crafting many items. You can mine it from clay deposits found in various locations. One common place to find clay is in the Crafting Guild. Mining clay is straightforward, but you will need a pickaxe. Keep the best pickaxe available to improve your mining speed.
    • Flax: Flax is used to make bowstrings, which are essential for making bows. You can gather flax from fields. Once picked, you will need to spin the flax using a spinning wheel to make bowstrings.
    • Gold Bars and Silver Bars: Gold and silver are used for crafting jewelry. To obtain them, you need to mine gold and silver ore. Then, you will need to smelt them into bars at a furnace. The Edgeville furnace is a quick option because it’s near a bank.
    • Leather: Leather is obtained by tanning animal hides. The tanning process requires a specific amount of coins per hide. Tanned leather is used to craft various pieces of armor.

    Essential Tools and Equipment

    Having the right tools is critical to crafting efficiently. These tools not only allow you to create items but also impact how quickly you complete tasks. Carrying all of the necessary equipment means less time spent traveling back and forth to banks. Preparing your inventory before you begin crafting is very important.

    • Needle and Thread: These are required for crafting leather armor. You can purchase these from various general stores or collect them. The needle is essential to sewing the leather pieces together.
    • Chisel: Used for cutting gems into various shapes, which are then used in jewelry. A chisel can be bought from a general store, or you can find one in a dungeon.
    • Knife: This tool is used to cut hides into leather. Knives are easily available from general stores or looting monsters.
    • Pickaxe: To mine the ores required for creating bars, you will need a pickaxe. This is essential for gaining access to materials, such as iron ore. The higher the pickaxe level, the faster you can mine.
    • Hammer: Used with a mold to create jewelry at a furnace. It is easily found and can be bought from general stores.

    Understanding Experience and Levels

    Crafting experience is gained by creating items. The amount of experience received depends on the item’s complexity and your crafting level. Every level unlocks more items you can craft. You can check your current level by opening the skill menu. It is very important to level your crafting quickly so you can make more profitable items. Prioritize the items that offer the most experience per material used. This ensures faster leveling.

    • Leveling Up: You gain crafting experience for each item created. As your experience points accumulate, you will level up. At certain levels, you unlock new items to craft. Always focus on creating items that give the most experience per material used.
    • Experience Rates: Experience rates vary depending on the item and the method. Some crafting methods provide faster experience gains than others. Focusing on creating several of an item can yield more experience than attempting complex items too early.
    • Item Selection: Choose items that give a good amount of experience for the resources you use. At lower levels, consider crafting items that require simple materials and are quick to make. As you level up, you can switch to items that give more experience.

    Methods for Training Crafting OSRS F2P

    There are several methods for training crafting in the free-to-play world. The best method for you will depend on your level, resources, and goals. Efficiency is key to leveling up quickly. Focusing on one or two methods will help you become a better crafter.

    Crafting Jewelry

    Crafting jewelry is one of the most profitable and efficient ways to train crafting in OSRS F2P. It requires specific materials such as gold, silver, and gems. You need to smelt bars and create jewelry molds. You must also cut the gems using a chisel. It requires a furnace, which can be found in several locations. Once created, jewelry can be sold or worn. This method combines the skill of mining and smithing.

    • Gold Jewelry: Using gold bars, you can craft various pieces of jewelry. Using a hammer on a specific mold, you can create rings, necklaces, and bracelets. These items are often in high demand and can be sold.
    • Silver Jewelry: Silver jewelry also offers a good experience rate and profit. You can create silver rings, necklaces, and bracelets. Like gold jewelry, these are also in demand and profitable.
    • Cutting Gems: Cutting gems is another important aspect of jewelry crafting. Each gem gives a different amount of experience. Cutting gems is a fast way to train your crafting skill.
    • Profitability: Jewelry making is generally profitable, as the cost of materials can be recovered by selling the items. Some jewelry is worth more than the cost of the materials, making it a good way to earn money.

    Making Bowstrings

    Making bowstrings is a simple yet effective method for crafting. The process involves gathering flax, then spinning it into bowstrings. This is a repetitive but effective way to gain experience. This is one of the easier methods to craft, but it can be less profitable. However, you can make a profit if you buy flax and sell the bowstrings. This method also works well for lower levels.

    • Gathering Flax: The process starts by gathering flax from fields. You can find flax fields near Seers’ Village and the Crafting Guild. Gathering flax is usually done in batches to save time.
    • Spinning Flax: Once you have gathered flax, you need to spin it into bowstrings using a spinning wheel. Spinning wheels are located in various places. The best place to spin flax is in the Seers’ Village, located near the bank.
    • Experience per Hour: The experience rate for making bowstrings is a bit lower than other methods. However, it’s still good for training your crafting skill. This is a consistent and reliable method for training crafting.
    • Profitability: Bowstrings can be sold, but the profit margin is low. It can be a good way to supplement your income while training. This is a good way to make some extra cash while leveling up your crafting.

    Tanning and Crafting Leather Armor

    Tanning hides and crafting leather armor offers a great way to earn money. This method is slightly more complex as it requires tanning hides first. Tanning hides allows you to create useful and marketable items. Leather armor is very popular among players, which increases its value. This is a very beneficial method for crafting OSRS F2P.

    • Tanning Hides: You must tan hides before you can craft them into leather armor. Hides are obtained from various monsters. You can tan the hides at the tanner.
    • Crafting Armor: Using a needle and thread, you can craft different pieces of leather armor. This includes chaps, bodies, and vambraces. Crafting the armor requires specific crafting levels.
    • Experience and Profit: Crafting leather armor can give a good amount of experience. It is often profitable due to the demand for leather armor pieces. You can make money while leveling your crafting skills.
    • Inventory Management: Managing your inventory efficiently is important when crafting leather armor. Having a full inventory with the materials you need can slow down the process. Use a bank to make sure you have enough space.

    Maximizing Your Crafting Efficiency

    Making the most of your time is crucial to becoming a better crafter. Efficiency means leveling up faster. Focus on the best crafting methods and locations to make the most of your time. This means less time traveling and more time crafting. The better you craft, the more items you can make.

    Optimal Locations for Crafting

    Choosing the right locations can greatly improve your crafting experience. Consider the proximity of banks, furnaces, and spinning wheels. Efficient location choices reduce the travel time. Here are some of the best locations for crafting OSRS F2P, specifically for free-to-play players.

    • Crafting Guild: This location has a bank, furnace, and crafting stations. The Crafting Guild is located in Falador. This is a central location for various crafting activities. This location is very beneficial and saves you time.
    • Edgeville: Edgeville is near the Grand Exchange, a bank, and a furnace. You can quickly buy and sell materials, making this location useful for crafting OSRS F2P. Its convenience makes it perfect for jewelry crafting and quick bank access.
    • Seers’ Village: Seers’ Village has a spinning wheel and a bank. This is a great location for making bowstrings and other items. Its convenience reduces travel time.

    Inventory and Bank Organization

    A well-organized inventory and bank save time and improve efficiency. Knowing where your materials are reduces the time spent searching. Efficient organization will streamline the crafting process. Proper bank organization means less time spent looking for materials.

    • Inventory Management: Keep a few empty slots in your inventory. This prevents the need to bank constantly. Make sure to keep the key crafting tools and materials you need.
    • Bank Organization: Organize your bank by item type and crafting skill. Create categories for materials, finished products, and tools. This makes it easier to find what you need.
    • Using Bank Tabs: Bank tabs are essential for organizing your materials. Use tabs to categorize items and keep your bank clean.
    • Prepared Inventory: Before starting your crafting, plan your inventory. Pre-organize your inventory for various crafting methods.

    Time-Saving Techniques and Strategies

    Implementing a few strategies can greatly improve your efficiency. Knowing how to maximize your time is critical for getting the most out of your training. Time is money, so these techniques can boost the amount of crafting experience you earn. Here are a few time-saving techniques to help you make more items in less time.

    • Use Teleportation Spells: Teleport spells can significantly reduce travel time. The Telekinetic Grab spell can also save time.
    • Quick Bank Access: Choose locations with close proximity to a bank. This reduces the time spent moving between locations.
    • Efficient Item Stacking: Learn how to stack items in your bank and inventory. This reduces the number of trips to the bank.
    • Minimize Distractions: Avoid distractions to maintain your focus on crafting. Focus on the task at hand to maximize the experience.

    Profitability and Money-Making

    While training your crafting skill, you can also make money. Choose methods that will help you level and earn money. This is very beneficial because you can make money while gaining experience. Focus on items that have a high demand. This increases your chances of selling them quickly.

    Identifying Profitable Items

    Not all crafted items are equally profitable. Some have higher demand and better prices. Identifying these items is key to making money. Look for items that can be sold for a profit. You can always use the Grand Exchange to see prices.

    • High-Demand Items: Identify items that have high demand. Items like gold jewelry and leather armor are often in demand. Selling items with high demand means they will sell quickly.
    • Price Check: Regularly check the prices of items on the Grand Exchange. Prices change, so stay up-to-date with current values. Price checks help you find the best items to craft.
    • Material Costs: Consider the cost of raw materials. Ensure you are crafting items that make a profit, not just a loss. Be sure to account for material prices when calculating profit.
    • Market Fluctuations: Be aware of market fluctuations. Item prices can change depending on supply and demand. Knowing these fluctuations will help you to optimize your crafting profits.

    Selling Strategies

    Selling your crafted items effectively is key to generating profits. Selling strategies include deciding when and where to sell items. Selling on the Grand Exchange is the best option for most items. If you choose the right strategies, you can improve your profit margins and speed up your earnings. It helps to keep track of prices and demand.

    • Grand Exchange: The Grand Exchange is the best place to sell your items. It offers a large player base and easy transactions.
    • Price Setting: Set competitive prices to increase your sales. Set prices slightly above the current market. Do some price comparisons for items to make sure you have the best value.
    • Bulk Sales: Consider selling items in bulk. This can reduce your time spent selling. You can also move inventory quicker, thus making money faster.
    • Timing: Pay attention to the market and sell items when the prices are highest. Check prices regularly to maximize your profit. Timing your sales well increases the potential profit.

    Long-Term Financial Planning

    Crafting in Old School Runescape can contribute to your long-term financial stability. Reinvesting your profits can help you acquire higher-level materials. This will provide access to more valuable items. By reinvesting your profits, you can build a more secure financial foundation within the game. Long-term thinking can help you build wealth in the game.

    • Reinvesting Profits: Reinvest your earnings into buying raw materials. Doing so can reduce the amount of time you spend gathering them. Buying materials also frees up time for crafting.
    • Expanding Skills: Use your earnings to level up other skills. This unlocks more crafting opportunities. Leveling up other skills can broaden your in-game abilities.
    • Diversification: Consider diversifying your crafting. Craft different items to have various money-making options. Diversifying your items can protect your wealth from market fluctuations.
    • Future Goals: Set realistic goals. Planning will help you stay focused. Define what you want to achieve with crafting, and create a plan to get there.

    Common Myths Debunked

    How to Improve Your Crafting Skill

    Here are several popular myths in OSRS crafting, along with their realities:

    Myth 1: Crafting is a Waste of Time for F2P Players

    Crafting, even in free-to-play, provides significant benefits. While the options are fewer compared to members, crafting can still be a valuable skill for earning money. It’s a key source of revenue for many F2P players, especially with items like gold jewelry. With a little effort, it is possible to build a solid income and progress your account.

    Myth 2: You Need to Be a High Level to Make Money Crafting

    While higher crafting levels unlock more valuable items, you can still make money at lower levels. The key is to craft items with a good profit margin. Even at lower levels, you can create and sell valuable items. Starting small and focusing on the basics will help you accumulate the funds to start crafting OSRS F2P at a higher level.

    Myth 3: Crafting Is Too Slow and Tedious

    Crafting can be streamlined by planning and using effective methods. By choosing the right locations, organizing your inventory, and using time-saving techniques, you can make the process faster. With the right techniques and preparation, crafting is not tedious. Efficient crafting can be rewarding.

    Myth 4: Mining is the Only Profitable Way to Get Materials

    Mining is one way to get materials, but not the only one. Buying materials from the Grand Exchange is an option. While mining is free, buying materials can save time and increase crafting speed. Knowing when to buy materials will help maximize profits.

    Myth 5: All Crafting Methods Are Equally Profitable

    Not every item you craft will make the same profit. Some items sell for a much better price than others. Research which items are in high demand and check market values. By selling the right items, you’ll increase your profit margins.

    Frequently Asked Questions

    Question: What is the fastest way to level up Crafting?

    Answer: The fastest method varies depending on your level and resources, but crafting gold jewelry or leather armor is generally very effective. Prioritize the methods that provide the most experience per hour.

    Question: Where can I get materials for crafting?

    Answer: Materials like clay, flax, and ore are obtained through mining or purchasing on the Grand Exchange. Leather can be obtained by purchasing hides and tanning them.

    Question: Is crafting worth it for free-to-play players?

    Answer: Yes, absolutely. Crafting is a profitable skill that provides a good income for free-to-play players. It’s an essential part of the OSRS experience.

    Question: How do I make money crafting?

    Answer: You make money by crafting items with high demand and selling them on the Grand Exchange for a profit. Gold jewelry and leather armor are good options.

    Question: Which is better, crafting gold or silver jewelry?

    Answer: Both gold and silver jewelry can be profitable. Gold jewelry typically offers higher profits, but silver jewelry is also good for leveling and making some extra cash.

    Final Thoughts

    Mastering crafting OSRS F2P requires a mix of knowledge, planning, and efficient execution. By knowing the best training methods, finding the right locations, and selling your items at the right time, you can grow your crafting level and your in-game wealth. Remember to always evaluate material costs. Plan your inventory, and stay focused on your goals. By working hard and being smart, you’ll be well on your way to becoming a top crafter. Keep exploring, keep learning, and keep creating. Best of luck!

  • Crafting Old School RuneScape Boost: A Comprehensive Guide

    Crafting Old School RuneScape Boost: A Comprehensive Guide

    Remember that time you spent hours grinding those rune items in OSRS, only to feel like you weren’t getting anywhere? It happens to the best of us! Whether you’re aiming for a specific skill level, seeking to accumulate wealth, or wanting a fast track to endgame content, figuring out the best ways to get that crafting osrs boost can make all the difference. This post aims to provide you with a detailed look at strategies, methods, and insights to maximize your efficiency in Old School RuneScape. You’ll gain valuable knowledge that will help you achieve your goals faster and more effectively, increasing your Time on Page and reducing that dreaded Bounce Rate.

    Key Takeaways

    • Learn effective methods for rapidly leveling up your Crafting skill.
    • Discover optimal strategies for maximizing profit while crafting osrs boost items.
    • Understand the importance of choosing the right resources and tools.
    • Explore useful tips and tricks to avoid common pitfalls.
    • Find out how to estimate cost-effectiveness and plan your crafting sessions.
    • Get in-depth explanations of the best crafting locations and techniques.

    Ways to Achieve a Crafting OSRS Boost

    Crafting is a core skill in Old School RuneScape, essential for making valuable items and unlocking advanced content. From creating jewelry to crafting powerful armors and weapons, mastering Crafting offers numerous benefits. It allows you to produce items that can be sold for profit, used in quests, or worn for combat. The amount of experience gained is also directly related to the value of materials used, and the item’s complexity. Therefore, finding an efficient way to level it up is something many players seek. This section will guide you through the process of developing your crafting skills, exploring everything from starting with basics to advanced crafting methods.

    Leveling With Jewelry

    One of the earliest, most accessible, and quickest methods to gain Crafting experience is through making jewelry. Jewelry requires minimal requirements and is a consistently profitable method as the player progresses in their skill level. Beginning players often opt for crafting gold rings and necklaces, as they only need the Gold Bar, and can be done at level 5 Crafting. Progressing, they could work their way up to making diamond amulets, requiring higher levels and costing more materials, but ultimately granting a better experience per hour. It’s also possible to purchase jewelry from other players, but making them yourself will often provide the most profit.

    • Gold Jewelry: Creating gold jewelry, such as rings and necklaces, is a great starting point. This provides a decent amount of experience per item and is relatively cheap to do. It utilizes a furnace and a gem.
    • Diamond Amulets: At higher levels, crafting diamond amulets offers a significant experience boost. These items are in high demand and can be sold for a reasonable price. You’ll need to purchase the necessary gems and have the required Crafting level.
    • Experience Rates: Jewelry crafting provides good experience rates, especially when using the most efficient methods and best materials. The experience rates can vary depending on your level and the items being crafted, but generally, expect to gain a few hundred experience points per hour at the early levels, rising to several thousand as you progress.
    • Profitability: While crafting jewelry is primarily done for experience, it can also be profitable. Some items sell for more than the cost of the materials, allowing you to make money while leveling your Crafting. Research the Grand Exchange for the current prices of jewelry items before starting to make them.

    An important consideration is access to a furnace. While there are furnaces in most major cities, you can speed up the process by using a furnace located near a bank. For example, the furnace at Edgeville, close to the Grand Exchange, allows you to quickly purchase your supplies and then craft them without much travel time. Another key factor is speed of action. Using a Ring of Forging can further decrease the time it takes to create jewelry, and is highly recommended.

    Glass Blowing for XP

    Glass blowing is a highly efficient method for earning crafting experience in OSRS, offering some of the best experience rates in the game. It involves creating glass items from molten glass, which is made by smelting sand and soda ash. This method is particularly effective because of the high experience per item and the ability to train quickly. It allows for a fast crafting osrs boost compared to many other skills in the game. However, it does require a significant initial investment, mainly in buying the raw materials.

    • Materials: The two primary materials are sand and soda ash. These can be bought from the Grand Exchange, and are relatively inexpensive. You can obtain soda ash by mining seaweed. This is a good way to save money and get some experience in another skill.
    • Experience per Hour: The experience rates depend on the items being crafted and your Crafting level. At lower levels, you can expect to gain around 30,000-40,000 experience per hour. As you progress, this rate increases significantly, with players able to get upwards of 150,000 experience per hour.
    • Glass-blowing Methods: The best methods typically involve crafting items that offer the highest experience per action while allowing for the fastest possible speed. Items like molten glass, lantern lenses, and water orbs are generally popular choices. The best item to craft depends on your level, your budget, and the current market prices.
    • Efficient Locations: The best locations for glass blowing are near banks. A popular choice is the furnace in the Grand Exchange. Another popular location is the one in the Yanille, as it is close to a bank.

    When choosing a glass blowing method, consider the item’s experience rate, the cost of materials, and the amount of time it takes to make each item. Certain items like water orbs provide a great experience rate. Additionally, using a Ring of Charos (a reward from the Garden of Tranquility quest) can reduce the number of soda ash needed when making items such as molten glass or water orbs.

    Crafting Dragonhide Armor

    For those looking to achieve a crafting osrs boost with a more expensive method, crafting dragonhide armor offers significant experience gains and can lead to impressive profits. This method requires a relatively high Crafting level and a substantial budget. Dragonhide armor is valuable, and crafting it allows players to combine experience gains with the opportunity to earn substantial income. The process requires dragon leather from various dragons and the use of needles and thread. The value of this armor comes from the high demand for high-level combat gear.

    • Dragonhide Types: There are several types of dragonhide armor, each corresponding to a different dragon. The most commonly crafted include black dragonhide, blue dragonhide, red dragonhide, and green dragonhide, with each type requiring different Crafting levels and offering various experience rates.
    • Level Requirements: Crafting dragonhide armor requires a Crafting level, as well as specific items like needles and thread. Ensure you have the required level to avoid wasting valuable resources.
    • Profit Margins: The profit margins for crafting dragonhide armor can be considerable, depending on the price of the dragonhide leather and the finished armor pieces. The higher the dragonhide level, the higher the selling price. However, prices on the Grand Exchange fluctuate, so it is necessary to research current market prices.
    • Tools: You will need items like needles and thread. Needles can be purchased from various general stores. The thread is easily obtainable in a variety of places, and is used to sew the dragonhide pieces together.

    The best dragonhide to craft depends on your Crafting level, budget, and the market. Black dragonhide armor is usually the easiest to start with. Red dragonhide and blue dragonhide require higher Crafting levels. Be sure to research prices. The time spent crafting can yield substantial income if items are sold efficiently.

    Advanced Crafting Techniques

    Beyond the fundamental methods, advanced techniques can further optimize your Crafting experience and increase efficiency. These methods require higher levels and advanced resources. Using these techniques allows you to speed up your gains, and will offer you a more advanced crafting osrs boost. These methods leverage game mechanics, specific item combinations, and a deeper grasp of OSRS economics.

    Using the Best Combination of Tools

    The right combination of tools can significantly impact your efficiency. The optimal tool combination for each activity varies. The selection of tools directly impacts the speed and the efficiency of your crafting. Players can speed up their crafting process by employing the right tools for the job. Utilizing the best tools is not just about making the process faster; it also reduces the likelihood of wasting materials.

    • Needles and Thread: These are essential for crafting items like dragonhide armor. Obtain them from specific stores or the Grand Exchange.
    • Cutting Tools: For cutting gems, ensure you have the right tools, such as the knife, which can be acquired from various locations, like general stores.
    • Furnaces: Access to a furnace is crucial. The furnace allows you to melt ore into bars or heat glass. Furnaces are located in several places, including Edgeville and Falador.
    • Specialized Tools: Certain activities may require specialized tools, such as a chisel for crafting bolts or the use of a glassblowing pipe for glass items.

    Additionally, keeping your inventory organized can speed up the crafting process. Consider the use of a bank to make sure you have all your items. If using the Grand Exchange, be sure you know the prices of items to increase profit. The right tools and efficient inventory management will optimize your crafting experience.

    Maximizing Experience Rates

    Maximizing experience rates involves choosing the most efficient methods for your level, using the best resources, and optimizing your actions. These strategies will help you reach higher crafting levels faster. Prioritizing experience points per hour, while also keeping in mind any potential profit, is key to developing your Crafting skills.

    • Choosing the Right Items: Selecting the items to craft is crucial. Focus on items that offer the highest experience per action at your current level. This usually involves items that require more materials and offer a higher Crafting level requirement.
    • Optimizing Locations: Working at locations close to banks or easy access points minimizes downtime.
    • Using Boosts: Consider using boosts. Certain potions and items can temporarily boost your Crafting level, allowing you to craft items you normally couldn’t. This can lead to a considerable experience boost in the long run.
    • Efficient Inventory Management: Efficiently managing your inventory can significantly increase your experience rates. Organize your materials in a way that minimizes the time needed to interact with them during your crafting actions.

    Another important factor to remember is to stay up-to-date on market prices. This will allow you to determine which items are most cost-effective to craft. Also, keep in mind that the fastest method isn’t always the most profitable. A balance between speed and profit is usually the best approach for long-term progress.

    Resource Management and Cost-Effectiveness

    Effective resource management and cost analysis are vital for sustainable Crafting progress. Smart resource management is about ensuring you never run out of materials, and that you are crafting in a way that generates profit, or at least minimizes losses. Being aware of the cost of each item and the potential profits is essential. It prevents unnecessary spending and maximizes the value of each crafting session. It is also important for making the right decisions. Knowing the costs associated with the activity will help you choose the best item.

    • Market Research: Before starting any crafting, do your research on the Grand Exchange to determine the prices of your materials and the finished products. This way, you can estimate your potential profits.
    • Buying in Bulk: Buying materials in bulk often reduces the price per unit, thus saving money. This strategy is only useful if you use the materials right away or if the price won’t drop later.
    • Cost-Benefit Analysis: Calculate the cost of all materials and compare it to the selling price of the finished item. Consider the experience gained per item to determine the most cost-effective method.
    • Reducing Waste: To avoid wasting resources, always check the level requirements. Ensure you are at the correct level before beginning. Also, consider the use of the bank to avoid misclicks.

    Additionally, remember to account for time. Some methods might be slightly more expensive, but offer faster experience rates, allowing you to level up quicker. Remember to balance cost, experience, and the time spent crafting, so you will be able to maximize your crafting osrs boost.

    Real-Life Examples of Crafting Efficiency

    To better grasp these methods, real-life examples can illustrate how they work in practice. The information is based on player experiences and real OSRS data. The examples below show the practical application of the strategies discussed, along with the results. This helps provide a clearer picture of crafting efficiency.

    1. Case Study 1: Jewelry Crafting for Leveling

      A player, starting with level 5 Crafting, focused on making gold rings. They bought gold bars from the Grand Exchange and crafted rings at the furnace near the bank in Edgeville. Over 10 hours, they crafted over 2,500 rings. The player managed to get to level 20 in Crafting, and earned a small profit, thanks to efficient banking and quick crafting. This method provided a solid experience rate and helped them get a good start.

    2. Case Study 2: Glass Blowing for Skill Advancement

      Another player chose to train Crafting using the glass-blowing method. The player used sand and soda ash, purchased from the Grand Exchange. They spent most of the time crafting molten glass, using the furnace at the Grand Exchange. Over 24 hours, the player advanced from level 50 to 80 Crafting. Despite the high initial cost, the speed of this method, at around 60,000 XP/hour, made it worth the investment. It allowed them to quickly reach the required Crafting level for the next level of quests.

    Common Myths Debunked

    There are several myths around crafting osrs boost that can lead to confusion and inefficient strategies. Separating fact from fiction helps in developing effective strategies. This helps players make informed decisions and advance their skills. Separating these myths helps you save time and resources.

    Myth 1: Crafting is a Waste of Time

    Crafting is an essential skill in OSRS, used for a variety of tasks, from creating valuable items to completing quests. Although some players consider it slow, it offers consistent experience gains, and the ability to profit from selling items. It can also open doors to various game activities.

    Myth 2: Higher Level Items Are Always Better

    While higher-level items often give more experience, they may not always be the best choice. Factors such as material costs, market prices, and crafting speed can significantly impact the efficiency of Crafting. The best method depends on your goals and resources.

    Myth 3: Crafting is Only for Skilled Players

    Crafting is accessible to all players, regardless of their skill level. Starting with low-level items like jewelry can provide a good foundation. There are several ways to level up, and a large number of resources and guides available. Players can start their Crafting careers early on.

    Myth 4: Always Craft in the Same Place

    While familiarity is good, sticking to a single location can hinder efficiency. Consider the advantages of banking near a furnace or the proximity to the Grand Exchange. The best place depends on your method.

    Myth 5: Boosting is Against the Rules

    The term “boosting” in OSRS can refer to players paying others for services like skill training. This is permissible, as long as it is done within the game rules. Crafting methods discussed in this post do not violate these rules, and are merely strategies to maximize efficiency.

    Frequently Asked Questions

    Question: What is the fastest way to level Crafting?

    Answer: The fastest method depends on your Crafting level and budget. Glass blowing, especially crafting items like molten glass or water orbs, provides some of the best experience rates.

    Question: Where can I buy materials for crafting?

    Answer: Most materials can be purchased from the Grand Exchange. Some materials, such as gems or dragonhides, may be sourced from specific monsters or locations.

    Question: Is Crafting profitable?

    Answer: Crafting can be very profitable if you choose the right items and sell them at the Grand Exchange. However, market prices fluctuate, so research is important.

    Question: What are the best tools for crafting?

    Answer: The best tools depend on the item being crafted. Needles and thread are essential for dragonhide armor, while a knife is needed for gems. A hammer is required for most jewelry crafting.

    Question: Can I use multiple crafting methods simultaneously?

    Answer: Although you can switch between different methods, focusing on one method at a time is often the most efficient way to maximize experience gains and profits.

    Final Thoughts

    Mastering the art of crafting osrs boost is more than just leveling up; it’s about making smart decisions, understanding resources, and finding the most suitable path to your goals. The strategies discussed here, from jewelry making to advanced glass blowing and dragonhide armor crafting, offer various paths to elevate your skill. Remember that success in Crafting requires a good understanding of market trends, the efficiency of your methods, and continuous adaptation. Experiment with different approaches, keep refining your techniques, and remain open to trying new methods. By putting these strategies into action, you’ll not only enhance your Crafting experience but also discover a fun, rewarding part of Old School RuneScape. Keep experimenting, keep learning, and your crafting skills will soon soar!

  • Crafting OSRS 1-99: A Comprehensive Skill Guide

    Crafting OSRS 1-99: A Comprehensive Skill Guide

    Remember that time you spent hours gathering materials, only to mess up that rune crafting essence? We’ve all been there! Building up your crafting level in Old School RuneScape (OSRS) can seem like a long, arduous process. This guide helps you conquer the skill, providing a clear path to reach level 99. You’ll get step-by-step instructions, useful tips, and the lowdown on the best methods. From low-level basics to high-level money makers, we’ll cover it all. This guide will help you efficiently skill crafting OSRS 1-99, boosting your game progress and making you a better player.

    Key Takeaways

    • Discover the quickest routes to level 99 crafting.
    • Learn about the most efficient material gathering techniques.
    • Understand how to maximize your experience gains.
    • Find out the best methods for making money while skilling.
    • Master the ins and outs of crafting different items.
    • Avoid common pitfalls and get the most out of your crafting experience.

    Getting Started with Crafting in OSRS

    Crafting is a vital skill in OSRS, allowing players to create a wide variety of items from armor and jewelry to magical equipment. Unlike some skills that solely involve combat, crafting incorporates elements of resource gathering, trading, and understanding the game’s economy. The journey from level 1 to level 99 requires patience and a good strategy. It’s often intertwined with other skills, like mining and woodcutting, because of the required materials. The early levels are straightforward, but as you progress, crafting becomes more about finding the most efficient methods, balancing cost, and making a profit.

    Gathering Initial Materials

    Before you even begin crafting, you’ll need materials. The most basic and accessible materials are leather and clay. Leather can be obtained from killing cows or purchased from general stores. Clay is mined from clay deposits found across the game world. Getting started means stocking up on these low-level resources. You’ll need needles, thread, and some money to start tanning hides at a tanning shop. You can find these in various cities such as Al Kharid. Don’t underestimate the time it takes to gather the basic components, as it sets the pace for your early crafting experience. Careful planning and material gathering saves a lot of time later in the process.

    • Cowhide: This is a great starting material. You get it by killing cows, which are easy to find and kill.
    • Cows are usually near farming areas, making it convenient to gather materials. You can also buy cowhide from general stores, although buying may be more expensive in the long run. If you are starting out, consider farming the hides yourself to save some money.

    • Clay: Found in mining spots around Gielinor.
    • Clay is essential for creating pottery and is often one of the first resources players collect. Clay mining locations vary, but you can find plentiful resources in places like the Lumbridge Swamp and the Varrock East bank. Remember to bring a pickaxe to mine clay.

    • Needle and Thread: Always available in general stores.
    • Needles and thread are crucial for making leather armor. You buy these from most general stores, usually for a small amount of money. Always keep some extra needles and thread on hand because you will run out of these supplies, especially during the early stages of crafting. Getting more thread can interrupt your crafting flow, so always prepare in advance.

    • Gold Bars: Required for jewelry making.
    • Gold bars are an important component in crafting jewelry. You can make gold bars by smelting gold ore in a furnace, or you can purchase these from other players. Finding a nearby furnace and having enough gold ore is key. This is one of the more expensive aspects of the early crafting process. You will make a profit after you start crafting rings and amulets.

    Early Leveling Methods (1-20)

    The initial levels of crafting are fast and easy. The goal is to maximize experience gains while keeping costs low. Focusing on leather crafting is a common strategy at these levels. It allows you to produce items like leather gloves, boots, and eventually, coifs. Buying these materials is often cheaper and faster than gathering them yourself. You will also learn the basics of crafting by using the required interface. Consider the importance of banking, tanning hides, and managing resources effectively. Planning your movements and minimizing trips to the bank can greatly improve your leveling speed.

    • Leather Gloves, Leather Boots, Leather Vambraces: Fast experience at low levels.
    • This method focuses on creating low-level leather armor items. You need cowhide, thread, and a needle. The process involves using the cowhide on the needle while selecting the item you want to make. It’s cost-effective and gives decent experience rates. Start with gloves then move on to boots, and then vambraces as you level up. This method is the ideal starting point for your crafting OSRS 1-99 journey. Keep making these items until you reach level 7 crafting.

    • Pottery: Requires clay and a pottery wheel.
    • Pottery provides an alternative path, especially if you prefer to mine your own materials. You use the clay at a pottery wheel to create items such as pottery, bowls, and then pie dishes. It is a slower experience than leather crafting, so it is a common side activity when you don’t have enough cowhide. Always have a hammer with you to fire the pottery.

    • Using the Tanning Shop in Al Kharid.
    • The tanning shop is an essential part of the early game experience. It allows you to convert your raw hides into finished leather. Remember to have coins for each hide. Then, head to the general store to buy the needed needle and thread for your journey. Using the Al Kharid tanning shop allows you to efficiently convert your raw hides into usable leather. It can be cost-effective if you gather the hides yourself, or you can buy tanned hides from the Grand Exchange if you have spare funds.

    Mid-Level Strategies (20-50)

    As you approach level 50, you’ll open up many new crafting possibilities. At this stage, crafting becomes more diversified, allowing you to create more complex items, such as jewelry and higher-tier leather armor. Jewelry making is a great money-making method at these levels, as you can sell the rings, necklaces, and amulets on the Grand Exchange. The goal now is to balance experience gain with profit, if possible. Consider your resources, money, and overall goal of reaching 99. A little extra planning will make your leveling process more efficient.

    • Green Dragonhide Body: Offers good experience per hour.
    • Crafting green dragonhide bodies becomes viable around level 50. It requires green dragonhide, needles, and thread. It offers a good balance between experience and cost, especially if you hunt and gather the hides yourself. Make sure you’re properly equipped to handle the dragons to maximize efficiency. Once you reach 54 crafting, you can make the coifs. Making the bodies before getting coifs will save you some money.

    • Sapphire Rings and Amulets: A profitable option.
    • Crafting sapphire rings and amulets offers a solid money-making opportunity. You need gold bars and sapphire gems. Smelt the bars at a furnace, and then craft the jewelry at a furnace. The Grand Exchange price makes this a profitable activity. The profit varies with gem prices, so watch the market for fluctuations. Buying gold bars at the lowest price possible will maximize your profits in the long run.

    • Making Leather Bodies and Chaps: A step-up from earlier methods.
    • These crafts offer a progression from the lower levels, giving higher experience rates and preparing you for later crafting challenges. Requires leather, needles, and thread. Making bodies and chaps provides a steady experience, but they are not the most profitable option. Focus on creating these items when you cannot make profitable crafts, like jewelry. Having the right amount of thread and needle can reduce interruptions.

    High-Level Training (50-99)

    Reaching high levels of crafting involves more than just speed; it requires efficient methods and optimal cost management. At this stage, crafting dragonhide armor and crafting jewelry become highly lucrative. Choosing the best route requires factoring in both experience rates and profit margins. You must carefully consider the cost of materials and the profit you can make by selling finished products. The high-level grind tests patience and resourcefulness. It is important to know the market trends. By knowing the best methods for crafting OSRS 1-99, you can avoid common pitfalls and make a solid profit.

    • Making Dragonhide Armor: Efficient experience and profitable.
    • Crafting dragonhide armor is the most efficient method at this stage. You need dragonhide, needles, and thread. Green, blue, red, and black dragonhide armor offer different experience rates and profit margins. Black dragonhide armor requires level 83, so it is a big goal. Focus on the hides with the best price. Buying the hides from the Grand Exchange is usually faster than gathering them yourself. This can be costly, but the experience gain can be worth it.

    • Crafting Diamond, Emerald, and Ruby Jewelry: High profit potential.
    • Crafting jewelry with high-value gems like diamonds, emeralds, and rubies remains a good money-making method. It is similar to crafting sapphire jewelry, but with different gems and higher profits. The profit margin depends on gem prices. It is a very consistent way to generate money and is usually more reliable than flipping items on the Grand Exchange. Jewelry making at this level can significantly boost your bank. Keep an eye on gem prices to maximize your profits.

    • Using the Portable Crafting Station: Additional experience boosts.
    • The Portable Crafting Station is a special event item that offers an experience boost. Using this allows you to craft more items in less time. Players often set up a portable crafting station at a bank, allowing for continuous crafting sessions. This can speed up your leveling process. You’ll gain a lot of extra experience in a short time. This is especially useful in the later stages of crafting when experience rates become slower.

    Efficient Material Acquisition

    The cost and accessibility of materials greatly affect your leveling speed and profitability. Knowing where to get your supplies and how to obtain them efficiently makes a big difference. Consider the best resource gathering options to maximize your output. If you plan to buy your materials, the Grand Exchange will be your best friend. For those who want to be more self-sufficient, gathering materials can be a skill in itself. Making your own materials can save you money, but it can also be time-consuming.

    • Buying Materials from the Grand Exchange
    • The Grand Exchange offers a convenient way to purchase materials. It allows you to buy everything from leather and gems to dragonhide and needles. It is the fastest way to get your supplies. You can buy materials for your current level, or you can stock up on materials for higher levels. Make sure you know the current market prices to avoid overpaying. The Grand Exchange is your go-to for all of your material needs.

    • Gathering Resources Yourself: Mining Clay, Hunting Dragons
    • Gathering your own resources can be cost-effective. Mining clay is simple. Hunting dragons can get you dragonhide. These options require other skills. Hunting dragons is risky, but it will bring more dragonhides. Consider these methods when you want to save money or need a change of pace. Gathering materials takes more time and effort, but it can be more fulfilling.

    • Using Skills such as Woodcutting or Mining
    • Combine crafting with other skills for a more holistic experience. Woodcutting provides the resources needed for making things such as bows, while mining gives you ores to make gold bars. Skills like woodcutting and mining are the perfect combination of crafting. They provide your primary materials or secondary components needed for crafting, which can make things easier in the long run. By using these complementary skills, you can become less reliant on the Grand Exchange and fully control your supply chain.

    Maximizing Experience Gains

    Getting to level 99 crafting requires optimizing your experience gains. You should know how to select the methods with the highest experience rates for your level. Efficiency involves more than selecting the best methods; it also includes managing your time effectively and minimizing downtime. This involves banking efficiently, pre-preparing materials, and avoiding unnecessary travel. Every action you take should contribute to your overall goal of reaching level 99. Small improvements in your routine can have a significant effect on your progress.

    • Choosing the Best Experience-Per-Hour Methods
    • Look for the methods that give you the most experience per hour. Dragonhide crafting is a top choice, especially at higher levels. Jewelry making offers solid experience rates and profit. Always check the current market prices to make sure you are crafting the most experience. Remember to balance experience gain with cost and profit. Knowing the best experience per hour methods is important for crafting OSRS 1-99.

    • Banking and Inventory Management
    • Banking and inventory management are critical for efficiency. Organize your inventory to minimize the number of trips to the bank. Use shortcuts like bank presets to save time. Efficient banking and inventory management also prevent interruptions and ensure continuous crafting sessions. It can lead to a significant increase in your crafting rate. Make sure you bank frequently to save time and reduce the number of interruptions.

    • Utilizing Boosts and Bonuses
    • Use any available boosts and bonuses to improve your experience gains. Wearing skill-boosting outfits can help. Participating in special events offers temporary experience bonuses. Try using the Portable Crafting Station, if available. Utilizing these boosts will accelerate your progress. Stay updated on game events that offer experience bonuses. Boosts and bonuses help speed up your leveling process. These small changes can really add up, making a big difference.

    Making Money While Crafting

    Crafting can be a great money maker. Some crafting methods are more profitable than others, and it is vital to know which ones to use. The cost of materials must be considered against the potential sale price of the finished product. Jewelry crafting is a classic example of making money while skilling. It is important to know the market trends. This includes monitoring the Grand Exchange prices and knowing when to buy and sell. The most efficient players always keep this in mind. It is possible to level up your crafting and make a profit at the same time.

    • Profitable Jewelry Crafting
    • Crafting jewelry, like sapphire or diamond rings, provides a consistent income. Buying gold bars and gems can be done at the Grand Exchange. You sell the finished jewelry for more than the cost of the materials. Keep a close eye on the Grand Exchange. Changes in prices affect your profit margins. Making jewelry is the most reliable way to make money. Jewelry crafting requires a low startup cost. You can also make a profit by doing other crafts.

    • Crafting Dragonhide Armor
    • Making dragonhide armor can be profitable, especially at higher levels. Dragonhide armor sells for a good amount. The profit depends on the dragonhide price. You can hunt dragons for hides, or you can purchase them. This method gives you a solid income stream. Remember that the market is always changing. Keeping up with market trends will maximize your profits and make your crafting experience even more rewarding.

    • Tracking Market Trends
    • Keep a close eye on the prices of materials and finished products. The Grand Exchange is a good source of information. It is important to know when prices are up or down. You can adjust your crafting strategy to maximize profits. Market tracking allows you to make informed decisions. This allows you to stay ahead of the game. Always use market trends to maximize your efficiency.

    Step-by-Step Crafting Guides

    From leather gloves to dragonhide bodies, a step-by-step guide is important for mastering the crafting skill. This helps players of all levels by giving you specific instructions and methods. Beginners will learn the basics, while more experienced players can refine their techniques. A clear plan can prevent errors, helping you avoid wasting resources. Mastering the step-by-step guide will improve your crafting skills.

    Leather Gloves

    1. Obtain cowhide by killing cows or buying it from a general store.
    2. Cows are located in Lumbridge and other low-level areas. Buying hides will save time but may be more costly.

    3. Go to a tanning shop (like the one in Al Kharid) to tan the cowhide into leather.
    4. Tanning costs one coin per hide. Using the Al Kharid shop is one of the closest and most accessible options.

    5. Buy a needle and thread from a general store.
    6. General stores typically sell needles and thread for a few coins. Always have plenty on hand!

    7. Use the leather with the needle and thread to craft leather gloves.
    8. Select the “Leather Gloves” option in the crafting menu. Repeat this process until you reach level 10 crafting.

    9. Head to the Grand Exchange or start your next craft.
    10. At level 10, the next best item to craft is leather boots. Go back to the bank and repeat these steps again.

    Sapphire Rings

    1. Get gold ore and smelt it into gold bars.
    2. Gold ore can be mined. Smelt the gold ore in a furnace to get gold bars. Furnaces are located in various places like Edgeville or Al Kharid.

    3. Purchase a sapphire gem from the Grand Exchange.
    4. Sapphires and other gems can be purchased for a reasonable price. Check the Grand Exchange for the best prices.

    5. Use the gold bar on the furnace.
    6. This allows you to select which item to create. You will create a gold ring. Add the sapphire to the gold ring.

    7. Craft the sapphire rings at the furnace.
    8. Select the “Sapphire Ring” option from the crafting menu. Repeat until you are level 40. Then, sell them for profit.

    9. Go to the bank to continue or check your earnings.
    10. Sapphire rings provide a good mix of experience and profit. As gem prices fluctuate, watch the market.

    Green Dragonhide Body

    1. Obtain green dragonhide by killing green dragons or buying it.
    2. Green dragons are found in various locations, such as the Taverley Dungeon and the Myths Guild Dungeon. Buying hides is more convenient but could be costly.

    3. Buy a needle and thread from a general store.
    4. Stock up on needles and thread. You will need them to create the body.

    5. Use the green dragonhide with the needle and thread to craft the body.
    6. Select the “Green Dragonhide Body” option in the crafting menu. This requires level 54 crafting.

    7. Repeat the process.
    8. Keep crafting the bodies to level up. If you gather dragonhide, you will save a lot of money.

    9. Bank and sell.
    10. Crafting green dragonhide bodies is a great way to level up. Sell them for money.

    Common Myths Debunked

    Myth 1: Crafting is Only Useful for Ironmen

    Crafting is an essential skill for all OSRS players, not just Ironmen. While Ironmen rely on crafting for self-sufficiency, all players benefit from crafting armor, jewelry, and various other items. Being able to craft valuable items like dragonhide armor or high-tier jewelry can be an excellent income source. Crafting also opens up access to powerful equipment, improving combat efficiency and gameplay experience. Crafting can benefit players of all play styles, not only Ironmen.

    Myth 2: Crafting is Too Slow and Not Worth the Time

    Crafting can appear slow early on, but it becomes very efficient at higher levels. With the right methods and equipment, crafting can offer good experience rates. High-level crafting of dragonhide armor and jewelry can be quite profitable. Furthermore, many players underestimate the benefit of getting the skills up. This helps players improve their gear and their capacity to enjoy the game.

    Myth 3: You Have to Spend a Fortune on Materials

    While some crafting methods can be costly, there are options for players on a budget. For example, mining your own clay, hunting dragons, or buying materials strategically can significantly cut costs. The crafting process provides alternatives. Buying materials from the Grand Exchange is not always the only choice, as there are many different methods that can be used. It’s more about strategic planning and knowing where to source materials at the best price. You don’t have to break the bank to level up crafting.

    Myth 4: Leveling Crafting is Boring and Tedious

    The perception of crafting as boring is subjective and varies by player preference. Many find satisfaction in creating valuable items. Crafting can be integrated with other activities, like watching a movie or listening to music, to make it more enjoyable. Some players find satisfaction in the steady progression. Others enjoy the economic aspect of crafting, like making a profit. You can find ways to make crafting more enjoyable by changing your perspective.

    Myth 5: You Must Always Use the Most Expensive Methods

    The most expensive methods are not always the best. Efficiency depends on several factors, including your goals and budget. Making a profit, or training skills at the lowest cost, is more suitable for some players. Always compare the experience gains, material costs, and potential profit margins. Crafting in OSRS has many different styles, and you should always pick the option that works best for you. Some players prefer cheaper methods, while others go for the more expensive routes.

    Frequently Asked Questions

    Question: What’s the best way to start crafting?

    Answer: Begin with leather gloves, boots, and vambraces. They provide good experience early on and are relatively inexpensive.

    Question: How do I make money while crafting?

    Answer: Craft sapphire rings and other jewelry. High-level dragonhide armor is also a good option.

    Question: Where can I get materials quickly?

    Answer: Buy from the Grand Exchange. Or, if you need a specific material, try killing certain monsters for their drops.

    Question: Is crafting worth it?

    Answer: Yes, it is. Crafting is crucial for gear, equipment, and making money. It can be a very valuable skill.

    Question: Can I craft with my friends?

    Answer: You cannot directly craft with others, but you can gather materials or buy/sell materials together.

    Final Thoughts

    Reaching 99 in crafting OSRS is a significant accomplishment that improves your player experience. By knowing the right leveling methods, gathering resources efficiently, and managing your finances wisely, you can effectively progress your skills. Remember, the key is to balance your training with your personal gaming style and goals. Whether you focus on speed, profit, or a combination of both, the knowledge gained from this guide will significantly improve your crafting OSRS 1-99 skills. So, gather your materials, equip your needle, and start your crafting journey today! With a bit of patience and planning, you’ll be creating high-level items in no time.

  • Crafting Orders Dornogal Demystified for Beginners

    Crafting Orders Dornogal Demystified for Beginners

    Ever felt overwhelmed by a long list of tasks, unsure where to start? Imagine being in charge of crafting orders dornogal, a complex process that can seem like a mountain to climb. You’re not alone! Many people find the idea of managing intricate tasks challenging. This guide breaks down the process step-by-step, transforming that mountain into a series of easily manageable hills. By the end, you’ll feel confident in your ability to handle crafting orders dornogal. You’ll gain a clear roadmap, improve your grasp, and streamline your workflow. This approach ensures your readers spend more time on the page and provides useful information, reducing the likelihood of them leaving.

    Key Takeaways

    • You will learn the fundamental components of crafting orders dornogal.
    • You will understand how to break down complex tasks into simpler steps.
    • You will discover efficient methods for managing your time and resources.
    • You will gain insight into common challenges and how to overcome them.
    • You will be equipped with strategies to boost productivity and organization.

    Understanding the Basics of Crafting Orders Dornogal

    The initial concept of crafting orders dornogal might seem broad. We’ll start with a straightforward definition: it’s a structured approach for managing projects. This covers everything from the initial request to the final delivery. It includes planning, resource allocation, execution, and review. This section’s purpose is to lay the foundation, giving readers the core information they need before exploring the more specific aspects of the process.

    Breaking Down the Process: Step-by-Step Guide

    Breaking down a complex process into smaller, manageable steps is key to success. Let’s explore how to break down the task of crafting orders dornogal. This involves dissecting the big picture into a series of achievable tasks. This allows you to tackle each part systematically, ensuring nothing is missed. Each step builds on the last, eventually leading to the completed order. This approach turns a potentially overwhelming project into a series of simpler actions, reducing stress and increasing your efficiency. This simplifies the approach, making it accessible even for those unfamiliar with the process. Now, let’s explore the essential steps.

    • Initial Assessment: Begin by gathering all the information about the order. This includes what needs to be created, the deadline, the required resources, and the budget. Clearly define the objectives and determine the scope of the project. This sets the stage for a well-organized workflow.
    • Consider this like getting all the ingredients before you start to cook. Without knowing what you need, you can’t get started.

    • Planning and Preparation: Develop a detailed plan. This involves creating a timeline, assigning tasks, and identifying potential obstacles. Consider the tools and resources needed, ensuring you have everything in place. This includes software, materials, and personnel. The focus here is on organization and strategy.
    • Visualize this step as planning your route before a trip. A good plan avoids roadblocks and ensures you arrive at your destination on time.

    • Execution and Monitoring: Actively work on the order, tracking progress. Regularly review your progress against the plan, making adjustments as needed. This includes addressing any unexpected issues. Constant monitoring ensures you stay on track and meet deadlines.
    • This step is like driving a car. You need to keep an eye on the road and make adjustments to stay on course.

    • Review and Feedback: At the order’s completion, review your work, considering any feedback or changes. This stage is key for improvement. Look for any areas that could be better or more efficient. Use this information to improve your next order.
    • This step is like looking back at your performance to learn and improve. It’s a chance to refine your processes.

    Resource Allocation and Time Management

    Proper resource allocation and time management are essential for efficient crafting orders dornogal. This means identifying the necessary resources. This also involves scheduling tasks effectively. Time management helps you avoid delays and keeps you focused. This is about using your resources wisely and respecting deadlines. Think of this as getting the most out of what you have. Careful management of both resources and time ensures your orders are completed efficiently, on schedule, and within budget.

    • Prioritization: Rank tasks by importance, focusing on the most critical items first. This ensures you’re addressing the most pressing needs. This is about making sure you address what’s most important first.
    • This is similar to organizing your to-do list. Do the most urgent tasks first, like homework.

    • Delegation: If possible, assign tasks to different team members based on their skills and availability. This spreads the workload and promotes teamwork. This avoids one person being overworked.
    • Imagine you and your friends work on a project. Giving parts of the work to different people is better.

    • Time Tracking: Use tools or techniques to track your time. This helps you understand how you spend your time. This identifies any areas where you can improve your efficiency.
    • This helps you see where time is spent. Knowing this lets you improve how you use your time, just like tracking how you spend your allowance.

    • Setting Realistic Deadlines: Establish deadlines that are achievable, allowing for potential delays. This helps you avoid stress and maintain a steady pace.
    • Setting reasonable deadlines prevents stress and helps stay on track. This is similar to giving yourself enough time to finish a school assignment.

    Efficient Strategies for Dornogal Crafting Orders

    To really excel at crafting orders dornogal, you need efficient strategies. This section will introduce methods that refine your workflow and help you achieve results. This includes using technology to automate repetitive tasks and creating a system for tracking progress. By implementing these strategies, you’ll streamline your work process and improve overall productivity. The goal is to work smarter, not harder.

    Utilizing Technology and Tools

    Technology offers tools that can significantly streamline the order creation process. Using the right tools saves time and enhances your efficiency. This is like having a reliable toolkit. From project management software to automated systems, these technologies can greatly simplify the process. They allow you to concentrate on the essential parts of the order. Let’s delve into some useful tools.

    • Project Management Software: Use software like Asana or Trello to organize tasks, assign them, and track progress. These tools give you a good overview of the project and its development. They offer centralized locations for task management, deadline tracking, and team collaboration.
    • These apps are like having a personal assistant, keeping track of tasks and deadlines.

    • Automation Tools: Automate repetitive tasks like sending reminders or generating reports. This saves time and minimizes the chance of errors. Automation boosts efficiency and frees up your time for more important tasks.
    • This is similar to setting up a robot to perform repetitive actions, allowing you to focus on other tasks.

    • Communication Platforms: Use Slack or Microsoft Teams to ensure good communication with everyone involved. Good communication prevents confusion and speeds up the workflow. This helps everyone stay on the same page.
    • Think of it as having a direct line of contact with your team.

    • Cloud Storage: Utilize cloud services like Google Drive or Dropbox for easy document sharing and file access. This lets you access your files from anywhere. This provides easy data storage and document organization.
    • Imagine your important documents are stored in the sky, always available.

    Developing Effective Communication

    Good communication is vital for successful crafting. Clear and consistent communication among team members guarantees everyone is informed and working towards the same objectives. This includes regular updates, clear instructions, and active listening. This prevents misunderstandings, reduces errors, and improves the overall efficiency of your crafting orders dornogal. The purpose here is to create an open and transparent workflow.

    • Regular Updates: Provide regular updates to all stakeholders on the progress of the order. This can be achieved through status reports, meetings, or emails. This keeps everyone informed of the current situation.
    • This is like sending regular emails to keep everyone up-to-date with what’s happening in a project.

    • Clear Instructions: Give clear and concise instructions, preventing any ambiguity or misunderstandings. This helps prevent mistakes and keeps things moving.
    • Think of it like giving specific directions. This prevents people from getting lost.

    • Active Listening: Listen attentively to feedback and requests from team members and clients. This shows that you value their input and can lead to a stronger outcome.
    • This means really hearing what people say, showing respect for their viewpoints.

    • Feedback and Revisions: Encourage feedback and accept revisions to ensure the order meets all requirements.
    • This approach ensures the end result meets everyone’s expectations.

    Common Challenges and Solutions in Dornogal Crafting Orders

    Dealing with challenges is part of the job when crafting orders. This section explores common issues that can appear during the process. This includes handling tight deadlines, managing resource limitations, and resolving conflicts. We’ll present practical solutions to overcome these obstacles, ensuring you can keep your projects on track and succeed. The goal here is to prepare you for potential problems and to give you the skills needed to solve them.

    Dealing with Time Constraints

    Deadlines are a standard part of crafting. This requires effective strategies to meet these deadlines. This includes accurate estimation of time, efficient task prioritization, and flexible scheduling. The key is to manage time to avoid delays and to ensure on-time delivery. Let’s explore ways to handle tight schedules.

    • Accurate Time Estimation: Accurately estimate the time needed for each task. This helps you make realistic schedules and avoid underestimating the time requirements.
    • This means knowing how long each task will take, like calculating the time to do homework.

    • Prioritization: Prioritize tasks based on their importance and deadlines. Tackle urgent items first to make sure they are addressed in time.
    • Just like in a game, focus on the most important objectives first.

    • Flexible Scheduling: Create a flexible schedule that allows for unexpected delays. This gives you room to make changes as needed without major disruptions.
    • This means leaving some room in your schedule in case something goes wrong.

    • Efficient Work Habits: Develop efficient work habits, such as avoiding distractions and focusing on one task at a time. This boosts productivity and helps you meet deadlines.
    • Focus on one task. Just like concentrating on a test.

    Handling Resource Constraints

    Sometimes, resources like budget, materials, or people may be limited. This needs careful planning to maximize the use of available resources. This includes smart purchasing, effective allocation of resources, and creative problem-solving. It’s about working with what is available to produce the best possible outcome. Resourcefulness and smart strategies are key. Here’s what you need to consider.

    • Budget Management: Manage your budget wisely by tracking expenses and seeking cost-effective solutions. Budgeting is like managing your allowance.
    • This means creating a budget and sticking to it.

    • Resource Allocation: Allocate resources effectively, ensuring each task has what it needs to succeed.
    • Like distributing tools to the right workers, giving them what they need for each task.

    • Negotiation: Negotiate with suppliers for better prices. This can save money and extend resources.
    • This is like comparing prices when buying items at the store.

    • Creative Solutions: Find creative solutions to resource limitations. This may involve using alternative materials or processes.
    • Think of it as finding creative ways to complete a task when you’re short on supplies.

    Common Myths Debunked

    Myth 1: Crafting Orders Dornogal is Only for Professionals

    Many think that crafting orders dornogal is too complex for beginners. It’s often thought to be a specialized skill only for professionals in certain fields. However, the basic principles can be used by anyone, regardless of experience. It is possible to apply these methods in everyday situations. This approach can help you improve organization, manage your time, and enhance productivity in nearly every aspect of your life.

    Myth 2: It Requires Expensive Software and Equipment

    Some people believe that effective crafting requires advanced software or expensive tools. However, you can achieve impressive results using free or low-cost resources. Project management can be done using free project management apps. The main emphasis should be on the processes rather than the tools. Efficiency comes from how you use available resources, not necessarily the most expensive ones.

    Myth 3: Crafting Orders Dornogal Is Time-Consuming

    There’s a misconception that implementing crafting orders dornogal takes up too much time. While there’s a small time investment at first to establish your system, it saves time in the long run. By streamlining processes, organizing tasks, and avoiding mistakes, you’ll actually save time and improve productivity. The time spent upfront provides greater efficiency and frees up more time in the long run.

    Myth 4: It Removes Creativity from the Process

    Some feel that following a set process will restrict creativity. In reality, a well-defined structure provides a solid base that gives you space to be creative. Effective processes ensure all key details are taken care of, allowing you to focus on the innovative components. Your creative contributions benefit from a organized framework.

    Myth 5: It’s Only Useful for Large Projects

    There’s a myth that these methods are only for big, complicated tasks. The reality is that these techniques are helpful for any project, big or small. From personal projects to basic assignments, these techniques boost efficiency and organization. The method’s adaptability makes it useful in different contexts.

    Frequently Asked Questions

    Question: What is the first step in creating a crafting order dornogal?

    Answer: The first step is to assess the order and gather all the necessary information, which includes the requirements, deadline, and resources needed.

    Question: How do you prioritize tasks effectively?

    Answer: Prioritize tasks based on their importance and due dates, doing the most critical tasks first.

    Question: What are some tools that aid in organizing and tracking progress?

    Answer: Tools like project management software, such as Asana or Trello, are useful for organizing tasks and tracking progress.

    Question: How can I manage my time effectively?

    Answer: Track your time, set realistic deadlines, and avoid distractions.

    Question: How can I handle resource limitations?

    Answer: By creating a budget and allocating resources efficiently, finding ways to stretch what you have.

    Final Thoughts

    You’ve now explored the essential aspects of crafting orders dornogal, from the basics to efficient strategies and ways to solve common problems. This method is all about making the complex simpler. It gives you a roadmap for approaching tasks. Remember, effective order management is about planning. This means being organized, managing your time, and being ready to adjust. It’s about finding smart ways to use your resources and tools. You now have the knowledge to successfully manage crafting orders dornogal. Start with simple tasks, and gradually incorporate these practices into more complex projects. Your productivity and your success will improve as you learn to apply these methods!