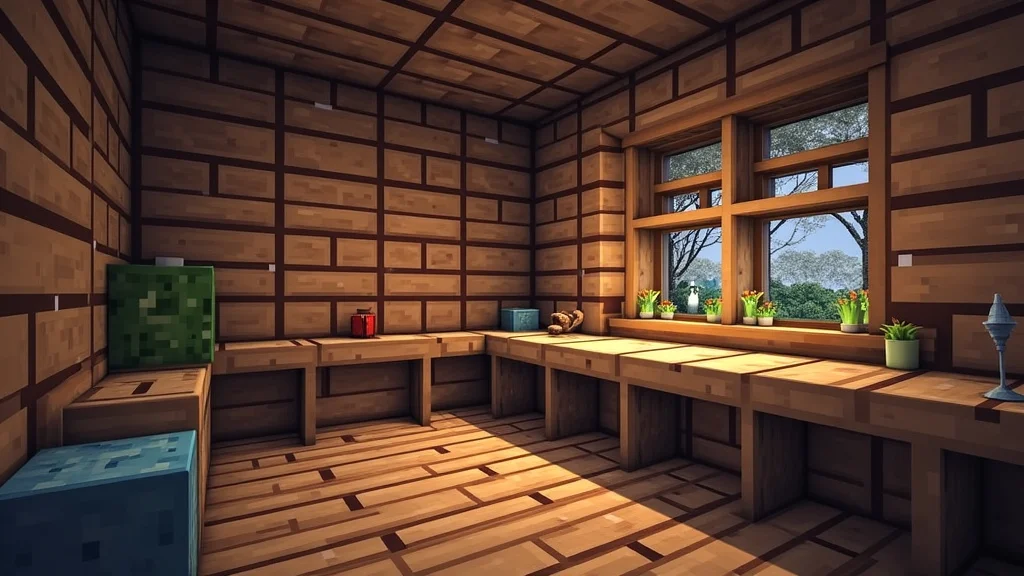
Remember that time you spent hours building a magnificent castle in Minecraft, only to realize your inventory was a chaotic mess? Finding that one specific block or tool felt like searching for a needle in a haystack. We’ve all been there! This guide is for you. Learn how to design and build a fantastic crafting room Minecraft players dream of, transforming your base from messy to magnificent. You’ll gain practical building strategies, innovative design concepts, and organizational tips that boost your efficiency and make building even more fun. Get ready to level up your Minecraft experience!
Key Takeaways
- Learn essential design principles for crafting rooms that prioritize organization and function.
- Discover a variety of room layouts suitable for different playstyles and resource availability.
- Explore useful storage solutions and how to arrange them for easy item access.
- Understand how to implement automated systems to streamline resource management.
- Get creative building and decorating ideas to customize your crafting space.
- Find ways to improve your Minecraft building skills and be a better player.
Planning Your Minecraft Crafting Room
Before you start placing blocks, a little planning can make a big difference. Think of your crafting room as a workshop – you need space, good organization, and easy access to everything you need. This section will guide you through the initial stages of crafting room design, giving you the foundation for a useful and enjoyable space. The design should integrate seamlessly into your overall base, so it looks great while being useful.
Choosing Your Location
The location of your crafting room is key. Consider where you spend most of your time and what resources you access frequently. It should be easily accessible from your main base and near areas where you do a lot of mining or farming. Think about safety, too. Placing your crafting room in a well-lit and easily defensible area will keep you safe from monsters. A central location saves time. You’ll move around less, and everything you need will be right at your fingertips. Take some time to think before you act.
- Near Your Main Base: This allows you to quickly access your crafting room when you need to make changes to your house.
- Proximity to Resource Farms: Having it close to farms saves time when processing materials like wood, wheat, and cobblestone.
- Safe and Well-Lit Area: Ensures you can build without the worry of mobs interrupting you, especially at night.
- Accessibility: Choose a location that’s easy to reach, whether by foot, rail, or other transport methods.
Consider the space available and the amount of resources you regularly use. It might seem like a small detail, but these simple steps have a significant influence on your play style.
Room Size and Layout
The size of your crafting room Minecraft build will influence how organized it can be. Start small and expand as your needs change. A basic setup might include a crafting table, furnace, and a few chests. As your resources grow, you can add more storage, automation, and special workstations. Think of it as a living space that grows with you. Plan your layout to make the best use of the space. Consider placing the most important stations in a central location, making it easier to work. Leave room for expansion.
- Start Small: Begin with a small room to get a feel for the space. You can always expand it.
- Centralized Workstations: Place important stations like crafting tables and furnaces in the center for quick access.
- Consider Future Needs: Leave space for additional storage, automation, or workstations.
- Experiment with Layouts: Try different room shapes and arrangements to find what works best.
Good planning keeps everything within reach. That will improve your speed. It also creates a more enjoyable and user-friendly experience.
Essential Features for Your Minecraft Crafting Room
Now that you’ve got your foundation set, it’s time to equip your crafting room. This is where you bring the room to life with everything you need for efficient resource management. From basic tools to advanced automation, these elements will turn your crafting space into a powerhouse. Think of it as upgrading from a simple shed to a high-tech workshop. Having the right tools makes all the difference.
Storage Solutions
Storage is the heart of any crafting room. Without a good system, your inventory and your base will quickly become a mess. Choose storage solutions that fit your needs, from simple chests to complex sorting systems. Consider accessibility and how often you’ll access different items. You can organize your storage based on material type, tool type, or any system that suits your needs. Labeling your chests is a smart move. That way you know what’s inside at a glance. You’ll save time and stress.
- Chests: The most basic storage, ideal for small quantities of items.
- Double Chests: Offer more storage space for larger quantities of materials.
- Shulker Boxes: Portable storage that keeps your inventory organized while traveling.
- Automated Sorting Systems: Use hoppers and droppers to automatically sort items into chests.
Effective storage will make it easier to find what you need. That will make the whole building experience much better.
Essential Crafting Stations
No crafting room is complete without crafting stations. These are the tools of your trade, and you’ll rely on them constantly. Make sure you have all the necessary stations and place them in locations that make sense. Arrange them in a way that minimizes movement. For example, have your furnace and crafting table near your storage for easy access to resources. Position essential items, like crafting tables and furnaces, in central locations.
- Crafting Table: The cornerstone of your crafting operations, used for making a huge variety of items.
- Furnace: For smelting ores, cooking food, and making glass.
- Blast Furnace: Smelts ores faster than a regular furnace.
- Smoker: Cooks food much faster.
- Anvil: Used for repairing and renaming tools and equipment.
- Brewing Stand: Used for crafting potions.
Having easy access to your crafting stations is key to building efficiently. Organize these stations in a manner that’s intuitive to you.
Automated Systems
Automation is the secret weapon of efficient crafting. Once set up, automated systems will reduce the amount of time you spend manually gathering and processing resources. This lets you focus on the more fun aspects of the game, like building and exploring. From automatic farms to item sorters, these systems will transform your crafting room into a well-oiled machine. This will make your gameplay more rewarding. The payoff is worth the effort. It also reduces the need to manually move materials.
- Item Sorters: Use hoppers and chests to automatically sort items as they enter your storage system.
- Automatic Farms: Construct farms for resources like wheat, carrots, and potatoes, which will feed your other systems.
- Smelting Automation: Use hoppers to feed items into furnaces automatically, saving you time.
- Resource Collection Systems: Design systems for collecting items from mob farms or mines automatically.
Automation will free up your time for more exciting Minecraft activities. It’s a game changer when it comes to resource management.
Design and Decoration of Your Minecraft Crafting Room
With the essentials in place, it’s time to make your crafting room your own. This section covers the design and decoration choices that allow you to express your creativity. Consider what you want from your design. Do you want it to be functional, beautiful, or both? From block choice to lighting, every detail contributes to the character of your space. It’s an opportunity to create a room that reflects your personal style. It can be a simple, functional room, or an elaborate masterpiece.
Choosing Your Block Palette
Your choice of blocks sets the tone of your crafting room. Choose a color palette and materials that create the atmosphere you want. Consider the materials that are easy to obtain. Use wood, stone, and other readily available blocks. This will make building the room quick. Experiment with different textures and colors to make your space interesting. Contrasting colors can add depth and visual appeal. Using a uniform palette can also make the room visually pleasant and create a good vibe.
- Complementary Colors: Combine colors that create visual harmony.
- Textured Blocks: Use blocks like stone bricks or wood planks to add character.
- Contrast: Create contrast by using blocks with different colors and textures.
- Natural Materials: Consider using wood, stone, and other natural materials for a rustic look.
Your choice of blocks will influence the vibe and functionality of your space. Consider them before you start building to ensure your crafting room fits your design. You can modify things as you get new resources.
Lighting and Ambiance
Lighting is important for both function and decoration. Good lighting ensures that you can see what you’re doing and creates a pleasant atmosphere. Use a combination of natural and artificial light sources to illuminate your space. Experiment with different lighting designs to find what works best. Make it look nice and inviting. Incorporate light sources in your design, such as lanterns, torches, or glowstone. This helps make the space feel bright and safe. Good lighting makes it a nice place to be.
- Torches: Simple and effective for basic lighting.
- Lanterns: A more stylish and brighter alternative to torches.
- Glowstone: A bright and clean light source, good for ceilings.
- Creative Lighting Designs: Integrate light into your build using hidden lighting or decorative fixtures.
With smart use of lighting, your crafting room will feel safe, and you’ll be able to see everything. It also adds character to the room.
Customization and Decoration
Customization lets you add personality. Decorate your room with items that reflect your style and interests. Add details like banners, paintings, and item frames. These decorations will make the space more interesting. You can also customize your room with crafting-themed decorations, such as tool displays, resource showcases, and mini-builds. Add personal touches, such as banners, armor stands, and custom art to express your personality. Customization is all about adding your personal touch to it.
- Banners and Paintings: Add artistic touches to walls.
- Item Frames: Display tools, weapons, and other items.
- Tool Displays: Showcase your best tools and equipment.
- Mini-Builds: Create miniature versions of your favorite structures.
Decorate to make the room unique. It can show off your style and make the room more enjoyable to spend time in.
Advanced Crafting Room Ideas
Ready to take your crafting room to the next level? This section will show you how to enhance your space with some advanced builds and features. From complex automation to unique designs, these ideas will make your crafting room a true center of power in your Minecraft world. It’s time to build a space that’s both functional and impressive.
Multi-Level Crafting Rooms
Expand vertically to maximize space. A multi-level crafting room allows you to dedicate each level to a specific function or resource. This organization can make it easier to find what you need. You can use ladders, stairs, or elevators to move between levels. Each level could hold a different function, such as storage, smelting, brewing, or enchanting. This also allows you to make your base more compact. Making a good vertical space will make it easier to manage your base.
- Level Specialization: Assign each level a specific function, such as storage, smelting, or brewing.
- Vertical Transportation: Use ladders, stairs, or elevators to move between levels.
- Aesthetic Integration: Design the levels to complement each other visually.
- Resource Flow: Plan for easy movement of resources between levels.
You can create a compact and extremely effective base by using multi-level crafting rooms.
Integration with Redstone
Redstone is the key to advanced automation and can add extra features to your crafting room. Use redstone to create automated systems that will make your game easier. Integrate redstone into your crafting room to create automated item sorters, smelting systems, and more. Use redstone to create hidden entrances, secret storage, and interactive displays. Redstone can add extra features to your space. You can easily make your space much more fun.
- Automated Item Sorters: Sort items into the appropriate chests.
- Smelting Systems: Automatically feed items into furnaces.
- Hidden Entrances: Use redstone to create secret passages.
- Interactive Displays: Create displays that respond to player actions.
Redstone can also add cool things, like hidden doors. That is where it really comes into play.
Themed Crafting Rooms
Create a crafting room Minecraft players will enjoy by developing themed rooms. Choose a theme that fits your playstyle. Design your crafting room around a specific theme. This will make your base stand out. A pirate-themed room might include treasure chests, wooden planks, and nautical decorations. Choose a theme that reflects your interests. Themes can add a bit of personality. You will always have a favorite space.
- Choose a Theme: Select a theme that inspires you, such as a medieval workshop or a futuristic lab.
- Block Palette: Use blocks that complement your theme.
- Decorative Elements: Incorporate decorations that add to the theme, such as tool displays and banners.
- Functionality: Ensure the room is still functional.
A themed room is an excellent way to express your creativity. It can also make your base unique and memorable.
Common Myths Debunked
Myth 1: Crafting Rooms Need to Be Huge
Many people think that you need a huge space to create an efficient crafting room. The reality is that the size doesn’t matter as much as smart design. Even a small room can be super efficient with good organization, compact storage, and smart layouts. You can begin with a small space and expand it as you collect more resources and your needs change. Prioritize organization over sheer size.
Myth 2: Redstone Automation Is Too Difficult
Some players avoid redstone because they think it’s too complicated. Actually, you can start with basic redstone circuits and learn as you go. There are tons of tutorials online. You can begin with simple item sorters and expand to more complex systems. Learning redstone is a fun way to take your crafting room Minecraft builds to another level. The more you explore, the easier it gets.
Myth 3: The Design Doesn’t Matter
Some people believe that function is all that matters. While functionality is important, design greatly influences the overall experience. A well-designed room can be a joy to spend time in, boosting your enjoyment of the game. A good design also makes it easy to find what you’re looking for. A great design also inspires creativity. Good design makes a huge difference in the long run.
Myth 4: Automation Ruins the Fun
Some players fear that automation takes away from the game. Instead, automation frees you from tedious tasks. It also gives you more time for the parts of the game you enjoy. It allows you to explore, build, and interact with the world. You’re trading repetitive tasks for more time to enjoy your favorite things about Minecraft. Automation also helps you to improve. It makes gameplay more rewarding.
Myth 5: You Need Expensive Materials
Some people believe you need rare or hard-to-find materials. The best crafting rooms use readily available materials. Wood, stone, and other common blocks can look amazing. You can always add accents with more rare blocks. Building with common materials means you can start building right away without needing to spend a long time looking for resources. That also makes it possible for everyone to have a great crafting room.
Frequently Asked Questions
Question: How do I start planning my crafting room?
Answer: Begin by choosing a location that’s accessible and safe. Then, decide on the size and layout you want. That might change. Next, think about what you want to store and arrange your items in a way that’s simple for you.
Question: What are the best storage solutions for my crafting room?
Answer: Chests are a good start. For more storage, use double chests or Shulker boxes. Use automated sorting systems to keep everything neat and accessible.
Question: How can I improve my crafting room design?
Answer: Start with a block palette you like. Use good lighting. Incorporate decorative elements. Experiment with themes to make the room feel special to you.
Question: How can I incorporate redstone into my crafting room?
Answer: You can use redstone for automated item sorting, automatic smelting, and secret passages. You will be able to control many functions.
Question: How do I know when to expand my crafting room?
Answer: When you run out of space or find it hard to store and retrieve items. When you’ve outgrown your existing setup, that means it’s time to expand.
Final Thoughts
You now have a complete guide to crafting a fantastic crafting room Minecraft players always hope for. You’ve explored the design process, storage options, essential features, customization, and advanced strategies. Keep in mind, the best crafting room is one that meets your needs and expresses your creativity. Don’t be afraid to experiment with different layouts, designs, and automated systems. Take inspiration from the ideas you’ve seen and incorporate them into your own unique crafting space. Build a space that you enjoy using. Your crafting room can evolve as your needs grow. Take action and start building. Your ideal crafting room is now within reach. Let your imagination run wild!
Leave a Reply